Afficher des informations sur les fonctionnalités
Remarque
Mise hors service d’Android SDK Azure Maps
Le kit de développement logiciel (SDK) natif Azure Maps pour Android est désormais déconseillé et va être mis hors service le 31 mars 2025. Pour éviter toute interruption de service, nous vous recommandons de migrer vers le kit de développement logiciel (SDK) web Azure Maps avant le 31 mars 2025. Pour plus d’informations, consultez le Guide de migration Android SDK Azure Maps.
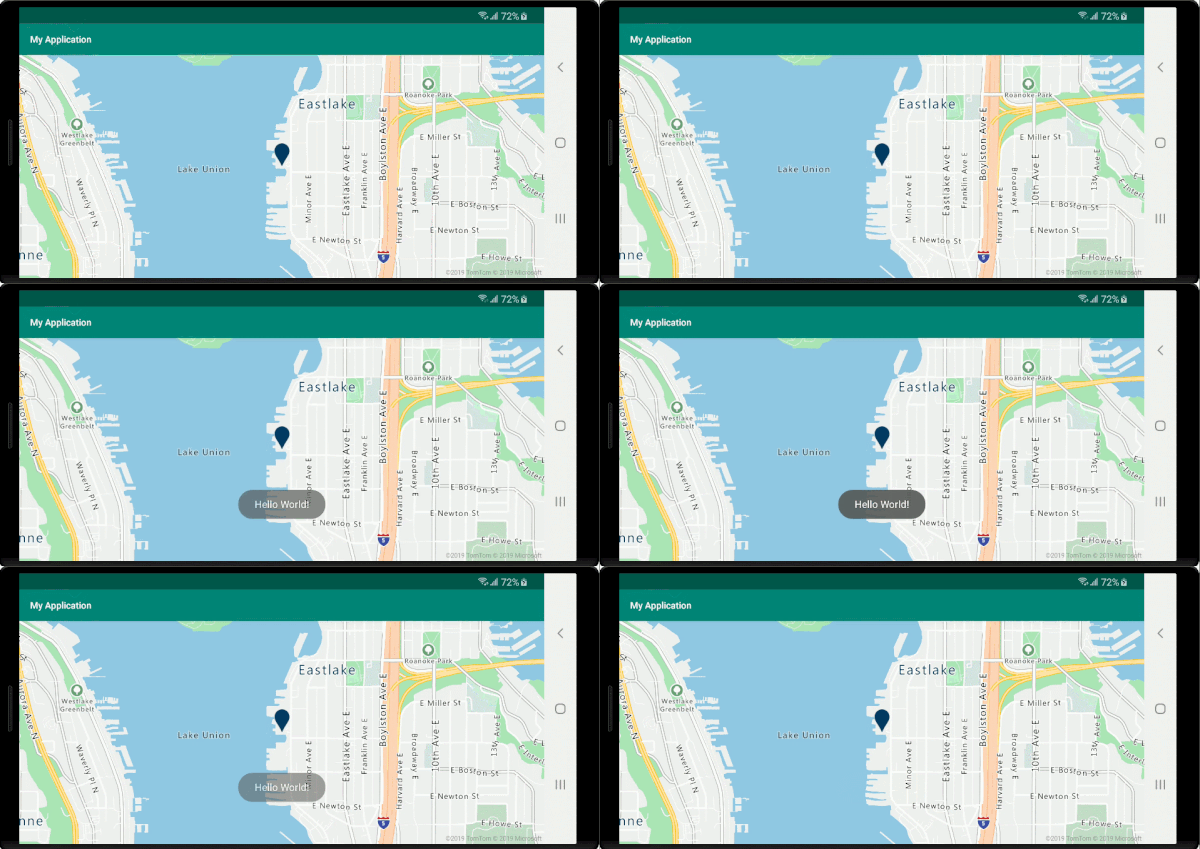
Les données spatiales sont souvent représentées à l’aide de points, de lignes et de polygones. Ces données sont souvent associées à des informations de métadonnées. Par exemple, un point peut représenter l’emplacement d’un restaurant, dont le nom, l’adresse et le type de nourriture proposé constituent les métadonnées. Ces métadonnées peuvent être ajoutées dans les propriétés d’une Feature GeoJSON. Le code suivant crée une caractéristique de point simple avec une propriété title dont la valeur est « Hello World! ».
//Create a data source and add it to the map.
DataSource source = new DataSource();
map.sources.add(source);

//Create a point feature.
Feature feature = Feature.fromGeometry(Point.fromLngLat(-122.33, 47.64));

//Add a property to the feature.
feature.addStringProperty("title", "Hello World!");

//Create a point feature, pass in the metadata properties, and add it to the data source.
source.add(feature);
//Create a data source and add it to the map.
val source = DataSource()
map.sources.add(source)

//Create a point feature.
val feature = Feature.fromGeometry(Point.fromLngLat(-122.33, 47.64))

//Add a property to the feature.
feature.addStringProperty("title", "Hello World!")

//Create a point feature, pass in the metadata properties, and add it to the data source.
source.add(feature)
Pour plus d’informations sur la création et l’ajout de données à la carte, consultez Créer une source de données.
Quand un utilisateur interagit avec une caractéristique sur la carte, des événements peuvent être utilisés pour réagir à ces actions. Un scénario courant consiste à afficher un message constitué des propriétés de métadonnées d’une caractéristique avec laquelle l’utilisateur a interagi. L’événement OnFeatureClick est l’événement principal utilisé pour détecter quand l’utilisateur a appuyé sur une caractéristique sur la carte. Il existe également un événement OnLongFeatureClick. Quand vous ajoutez l’événement OnFeatureClick à la carte, vous pouvez le limiter à un seul calque en transmettant l’ID d’un calque auquel le limiter. Si aucun ID de calque n’est transmis, le fait de cliquer sur n’importe quelle caractéristique de la carte, quelle que soit le calque dans lequel elle se trouve, déclenche cet événement. Le code suivant crée un calque de symboles pour afficher des données de point sur la carte, puis ajoute un événement OnFeatureClick et le limite à ce calque de symboles.
//Create a symbol and add it to the map.
SymbolLayer layer = new SymbolLayer(source);
map.layers.add(layer);

//Add a feature click event to the map.
map.events.add((OnFeatureClick) (features) -> {
    //Retrieve the title property of the feature as a string.
    String msg = features.get(0).getStringProperty("title");

    //Do something with the message.

    //Return a boolean indicating if event should be consumed or continue bubble up.
    return false;
}, layer.getId());    //Limit this event to the symbol layer.
//Create a symbol and add it to the map.
val layer = SymbolLayer(source)
map.layers.add(layer)

//Add a feature click event to the map.
map.events.add(OnFeatureClick { features: List<Feature> ->
    //Retrieve the title property of the feature as a string.
    val msg = features[0].getStringProperty("title")

    //Do something with the message.

    //Return a boolean indicating if event should be consumed or continue bubble up.
    return false
}, layer.getId()) //Limit this event to the symbol layer.
Afficher un message Toast
Les messages Toast sont l’un des moyens les plus simples de présenter des informations à l’utilisateur. Ils sont disponibles dans toutes les versions d’Android. Ils ne prennent en charge aucun type d’entrée utilisateur et sont affichés uniquement pendant un court instant. Si vous souhaitez fournir rapidement une information à l’utilisateur concernant l’objet sur lequel il a appuyé, un message Toast peut être une bonne option. Le code suivant montre comment utiliser un message Toast avec l’événement OnFeatureClick.
//Add a feature click event to the map.
map.events.add((OnFeatureClick) (features) -> {
    //Retrieve the title property of the feature as a string.
    String msg = features.get(0).getStringProperty("title");

    //Display a toast message with the title information.
    Toast.makeText(this, msg, Toast.LENGTH_SHORT).show();

    //Return a boolean indicating if event should be consumed or continue bubble up.
    return false;
}, layer.getId());    //Limit this event to the symbol layer.
//Add a feature click event to the map.
map.events.add(OnFeatureClick { features: List<Feature> ->
    //Retrieve the title property of the feature as a string.
    val msg = features[0].getStringProperty("title")

    //Display a toast message with the title information.
    Toast.makeText(this, msg, Toast.LENGTH_SHORT).show()

    //Return a boolean indicating if event should be consumed or continue bubble up.
    return false
}, layer.getId()) //Limit this event to the symbol layer.

Outre les messages Toast, il existe de nombreuses autres façons de présenter les propriétés de métadonnées d’une caractéristique, par exemple :
- Widget Snackbar : les
Snackbarsdonnent des retours d’informations légers concernant une opération. Ils affichent un bref message en bas de l’écran sur l’appareil mobile et en bas à gauche sur les appareils plus grands. LesSnackbarsapparaissent au-dessus de tous les autres éléments à l’écran. Il ne peut y en avoir qu’un seul affiché à la fois. - Boîtes de dialogue : une boîte de dialogue est une petite fenêtre qui invite l’utilisateur à prendre une décision ou à entrer des informations supplémentaires. Une boîte de dialogue ne remplit pas l’écran et est normalement utilisée pour les événements modaux qui exigent que les utilisateurs effectuent une action avant de pouvoir continuer.
- Ajouter un fragment à l’activité en cours.
- Accéder à une autre activité ou vue.
Afficher une fenêtre contextuelle
L’Android SDK Azure Maps fournit une Popup classe qui facilite la création d’éléments d’annotation d’interface utilisateur qui sont ancrés à une position sur la carte. Pour les fenêtres contextuelles, vous devez transmettre un affichage avec une disposition relative dans l’option content de la fenêtre contextuelle. Voici un exemple de disposition simple qui affiche du texte sombre sur un arrière-plan blanc.
<?xml version="1.0" encoding="utf-8"?>
<RelativeLayout xmlns:android="http://schemas.android.com/apk/res/android"
    android:layout_width="match_parent"
    android:orientation="vertical"
    android:background="#ffffff"
    android:layout_margin="8dp"
    android:padding="10dp"

    android:layout_height="match_parent">

    <TextView
        android:id="@+id/message"
        android:layout_width="wrap_content"
        android:text=""
        android:textSize="18dp"
        android:textColor="#222"
        android:layout_height="wrap_content"
        android:width="200dp"/>

</RelativeLayout>
En supposant que la disposition ci-dessus est stockée dans un fichier appelé popup_text.xml dans le res -> layout dossier d’une application, le code suivant crée une fenêtre contextuelle et l’ajoute à la carte. Quand un utilisateur clique sur une fonctionnalité, la title propriété est affichée à l’aide de la disposition popup_text.xml, avec le centre en bas de la disposition ancré à la position spécifiée sur la carte.
//Create a popup and add it to the map.
Popup popup = new Popup();
map.popups.add(popup);

map.events.add((OnFeatureClick)(feature) -> {
    //Get the first feature and it's properties.
    Feature f = feature.get(0);
    JsonObject props = f.properties();

    //Retrieve the custom layout for the popup.
    View customView = LayoutInflater.from(this).inflate(R.layout.popup_text, null);

    //Access the text view within the custom view and set the text to the title property of the feature.
    TextView tv = customView.findViewById(R.id.message);
    tv.setText(props.get("title").getAsString());

    //Get the position of the clicked feature.
    Position pos = MapMath.getPosition((Point)cluster.geometry());

    //Set the options on the popup.
    popup.setOptions(
        //Set the popups position.
        position(pos),

        //Set the anchor point of the popup content.
        anchor(AnchorType.BOTTOM),

        //Set the content of the popup.
        content(customView)

        //Optionally, hide the close button of the popup.
        //, closeButton(false)

        //Optionally offset the popup by a specified number of pixels.
        //pixelOffset(new Pixel(10, 10))
    );

    //Open the popup.
    popup.open();

    //Return a boolean indicating if event should be consumed or continue bubble up.
    return false;
});
//Create a popup and add it to the map.
val popup = Popup()
map.popups.add(popup)

map.events.add(OnFeatureClick { feature: List<Feature> ->
    //Get the first feature and it's properties.
    val f = feature[0]
    val props = f.properties()

    //Retrieve the custom layout for the popup.
    val customView: View = LayoutInflater.from(this).inflate(R.layout.popup_text, null)

    //Access the text view within the custom view and set the text to the title property of the feature.
    val tv: TextView = customView.findViewById(R.id.message)
    tv.text = props!!["title"].asString

    //Get the position of the clicked feature.
    val pos = MapMath.getPosition(f.geometry() as Point?);

    //Set the options on the popup.
    popup.setOptions(
        //Set the popups position.
        position(pos),

        //Set the anchor point of the popup content.
        anchor(AnchorType.BOTTOM),

        //Set the content of the popup.
        content(customView)

        //Optionally, hide the close button of the popup.
        //, closeButton(false)

        //Optionally offset the popup by a specified number of pixels.
        //pixelOffset(Pixel(10, 10))
    )

    //Open the popup.
    popup.open()

    //Return a boolean indicating if event should be consumed or continue bubble up.
    false
})
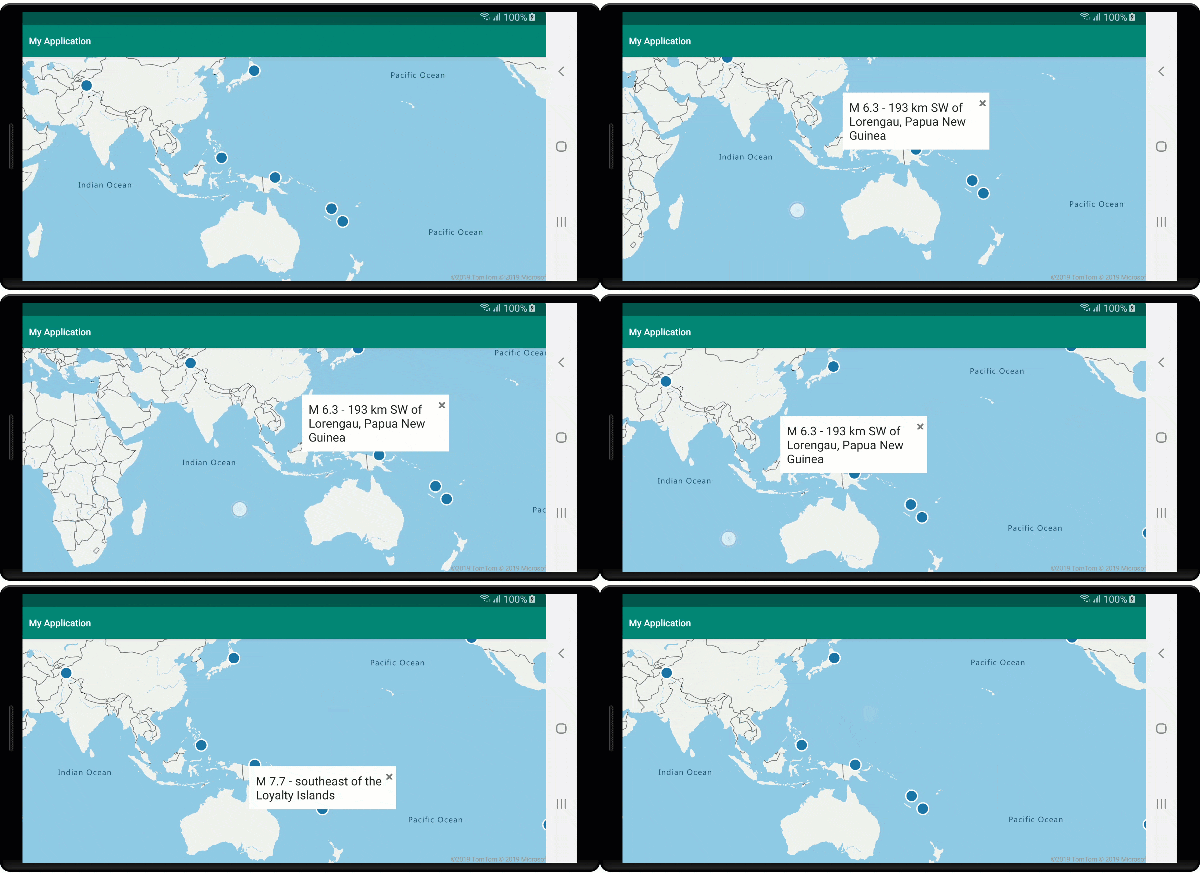
La capture d’écran suivante montre des fenêtres contextuelles qui s’affichent en cas de clic sur les fonctionnalités et restent ancrées à leur emplacement spécifié sur la carte tandis que celle-ci se déplace.

Étapes suivantes
Pour ajouter des données à votre carte :
Commentaires
Prochainement : Tout au long de l'année 2024, nous supprimerons progressivement les GitHub Issues en tant que mécanisme de retour d'information pour le contenu et nous les remplacerons par un nouveau système de retour d'information. Pour plus d’informations, voir: https://aka.ms/ContentUserFeedback.
Soumettre et afficher des commentaires pour