Sign up for a free limited trial of Microsoft Cloud for Healthcare
Microsoft Cloud for Healthcare offers a free limited trial for 30 days. After a quick sign-up, you'll have access to many of the app's key features. The trial allows you to test the app with sample data and even try out your own demo data. To learn more about Microsoft Cloud for Healthcare features, go to What is Microsoft Cloud for Healthcare?
The trial service is made available pursuant to the Microsoft Online Subscription Agreement, trial services agreement and Microsoft privacy statement.
Sign up for the trial
To sign up for the trial,
Sign in to the Solution Center.
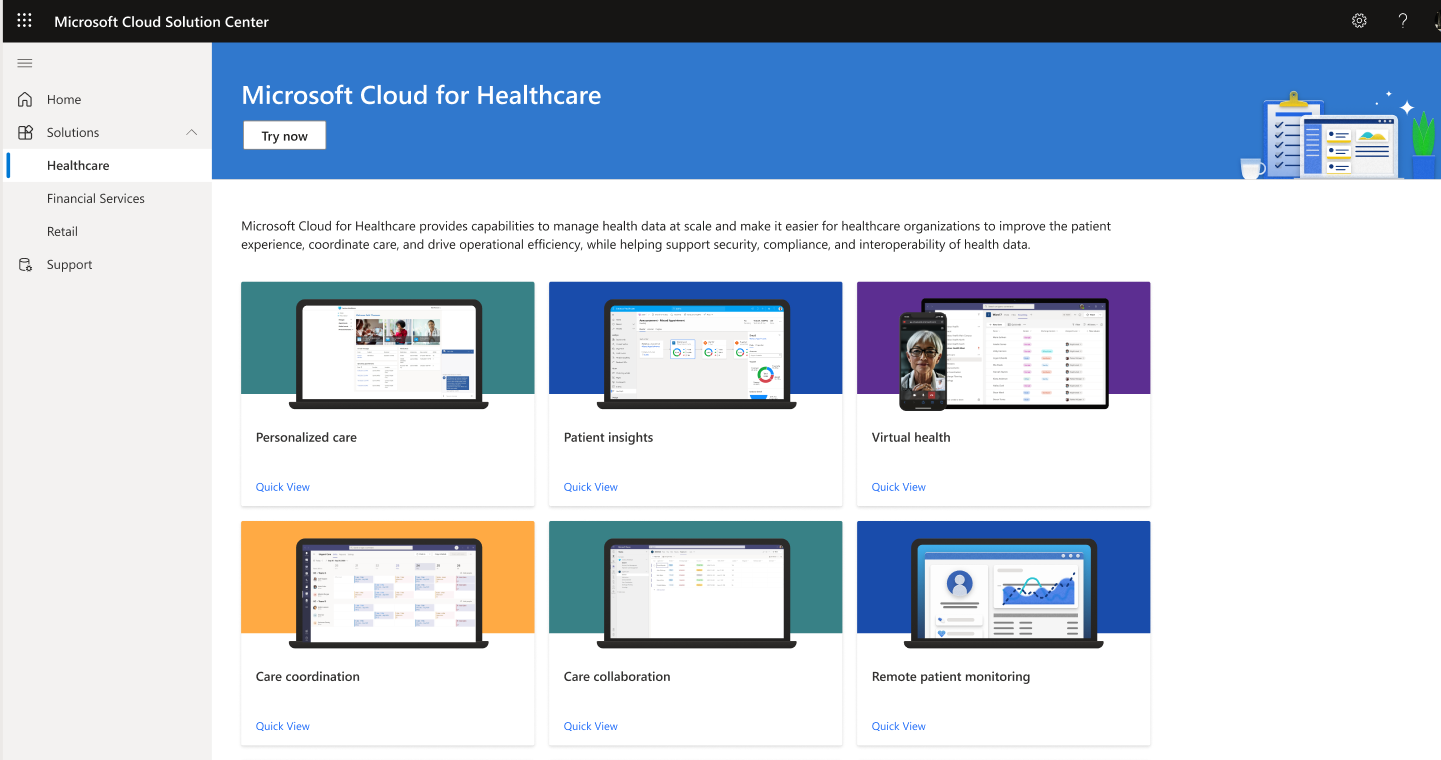
In the left navigation pane, go to Solutions, and then select Healthcare.
Ensure you've selected a language that the trial supports. For a list of supported languages, go to Which regions is the trial available in?
Tip
To verify or change the language in Solution Center, select the Settings icon, and then select Change your language under Language and time zone.
Select Try Now.
Follow the onscreen guidance to enter the email associated with your Microsoft account and your contact information.
The trial takes a few moments to load, then you can start using the app.
Set up patient access portal
As a post-deployment step, set up the portal environment for patient access using the following steps:
Sign in to Power Apps from the same tenant where the trial is provisioned.
In the upper-right corner, on the Environment pane, select the trial environment.
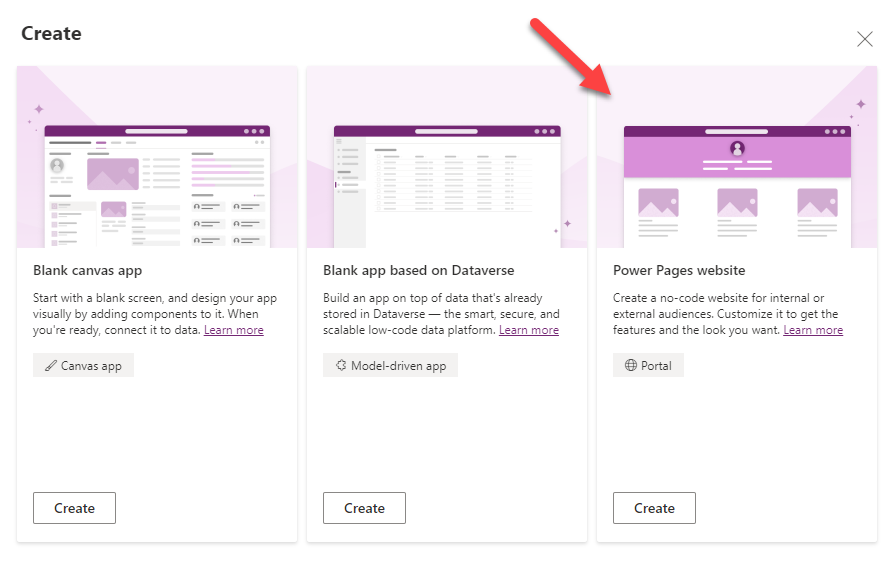
Select +Create. Under Create your app, select Blank app.

Select Create from the Power Pages website option.
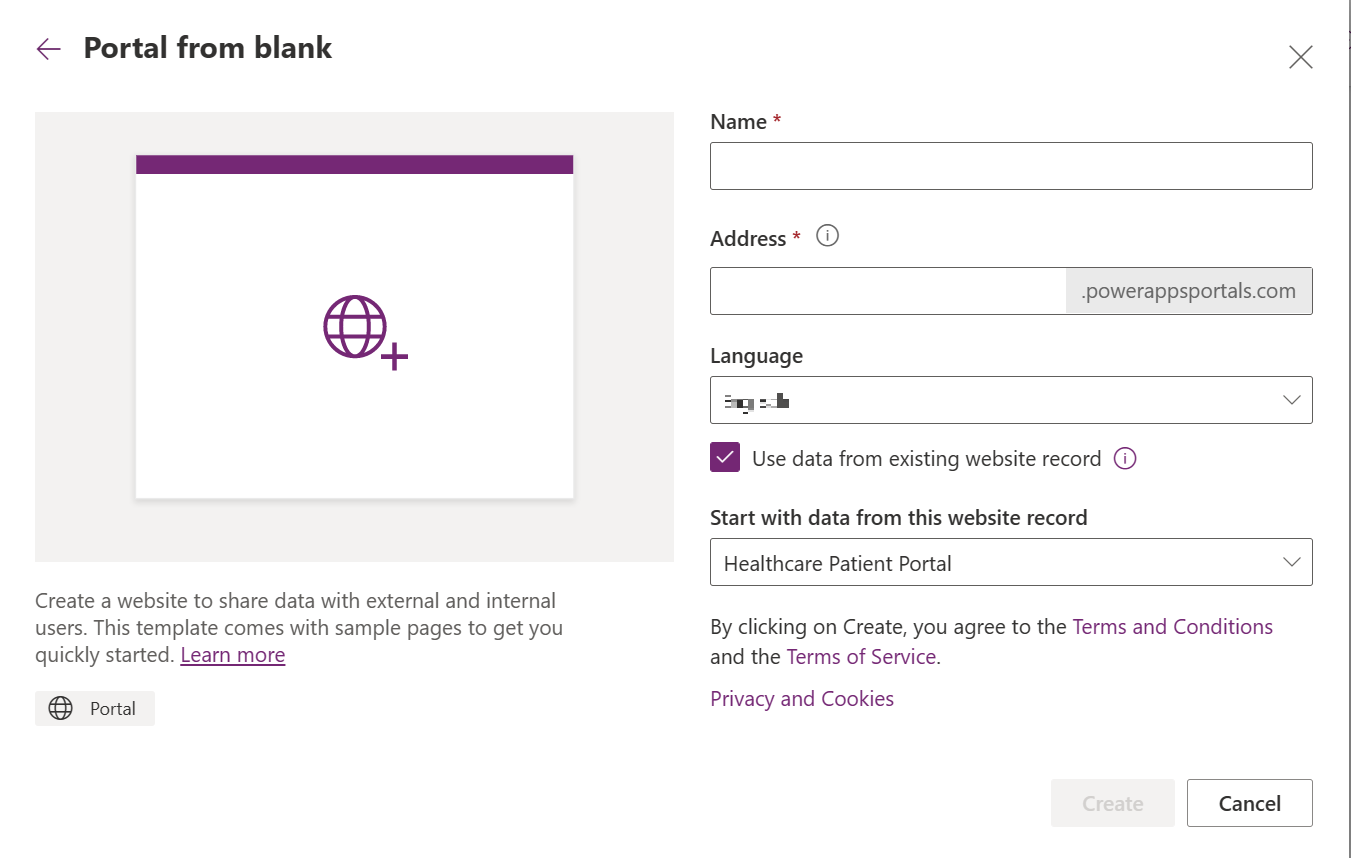
In the following window, enter a unique website address and ensure to check the "Use data from existing website record" checkbox.
Also, select the "Healthcare Patient Portal" website record from the drop-down. When you're done, select Create.
After you select Create, the portal will begin provisioning. You should be able to navigate to the portal after the provisioning is complete.
On the Power Apps platform, under Apps, sign in to the trial environment's Portal Management app and select Websites.
Select the Healthcare Patient Portal record, and verify or update the primary domain name with the portal domain name from step 5.

Configure virtual visits for scheduling instant virtual appointments with patients. For the configuration steps, go to Configure virtual visits.


What to try
Your trial environment includes many of the same features as the paid version. The following links guide you through some of the key features: