Add the Business card reader to your canvas app
Your goal for this exercise is to take a picture or upload an existing photo from the file system and extract contact information that is present in the image. You will then build a canvas app in Power Apps and use the Business card reader component.
For more information, see the What are canvas apps in Power Apps? and the Use the Business card reader component in a canvas app documentation.
Create an application in Power Apps
To create an application in Power Apps, follow these steps:
- Select Create in the Power Apps left menu and then select Blank app > Blank canvas app > Create.
- Enter App name Contoso Business card reader.
- Select Phone.
- Select Create.
Enable automatic retrieval of contact information from business cards
Follow these steps to give users the ability to automatically retrieve contact information from business cards:
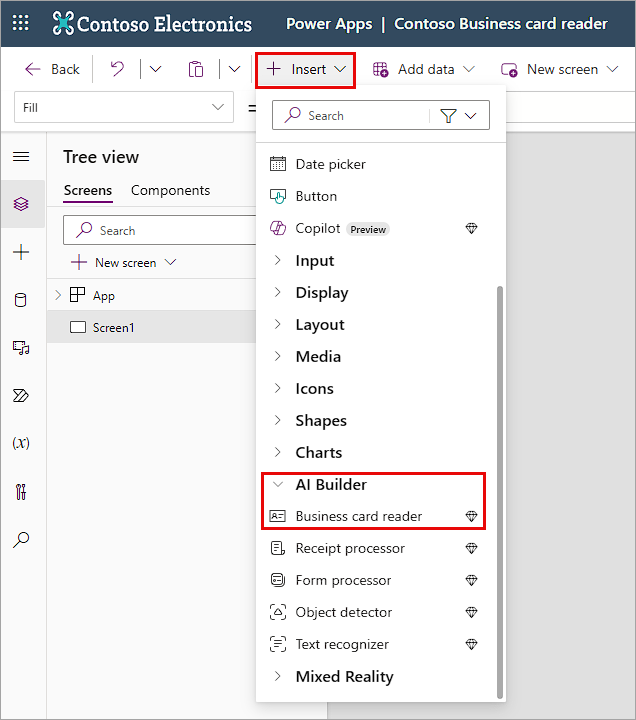
From the Insert menu, expand AI Builder and select Business card reader. This control will allow you to take or upload a picture and automatically recognize contact information from business cards.
Resize the control to fit in the top third of the screen.

Bind the contact information to an existing table from Microsoft Dataverse
To bind the contact information to an existing table from Dataverse, follow these steps:
Select Insert > Edit form.
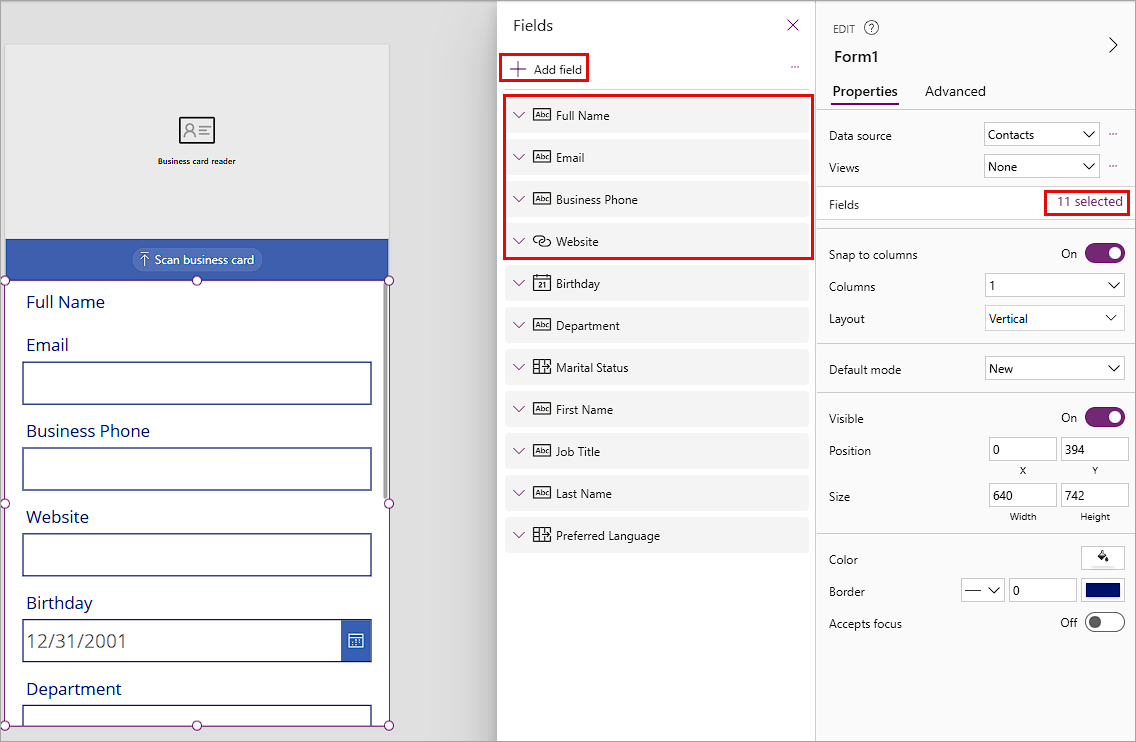
Change the Default mode property to New and the Data source property to the Contacts table.
After the Data Source property has been set, fields are automatically added to the form. Select the Fields property and add other contact fields to the form. Ensure that you have the following fields at the top of your form in the following order (remember you can drag and drop within the panel to adjust the order):
- Full Name
- Business Phone
- Website
Business card reader can extract 18 different fields from business cards.
Bind the extracted contact information to the form
To bind the extracted contact information to the form, follow these steps:
Go to each of the form's data cards and, in the Advanced tab, select Unlock to change properties.

You can now change the default value of each data card to map the Business card reader extracted properties. Set the following Default property values for each unlocked card:
Full Name_DataCard1 - BusinessCardReader1.FullName
Email_DataCard1 - BusinessCardReader1.Email
Business Phone_ DataCard1 - BusinessCardReader1.BusinessPhone
Website_ DataCard1 - BusinessCardReader1.Website

You can always add more fields to be mapped. For this example, you can extract the following list of fields from your business cards.
| Property | Definition |
|---|---|
| AddressCity | The city address |
| AddressCountry | The country address |
| AddressPostalCode | The postal code address |
| AddressStreet | The street address |
| BusinessPhone | The first phone or fax number |
| CleanedImage | The image after processing where the business card appears cropped and enhanced from the original image |
| CompanyName | The company name |
| Department | The organization department found |
| The contact email found in the business card, if any | |
| Fax | The third phone or fax number |
| FirstName | The contact first name |
| FullAddress | The contact full address |
| FullName | The contact full name |
| JobTitle | The contact job title |
| LastName | The contact last name |
| MobilePhone | The second phone or fax number |
| OriginalImage | The original image before processing |
| Website | The website |
Add a button to trigger the creation of a new contact
To add a button to trigger the creation of a new contact, follow these steps:
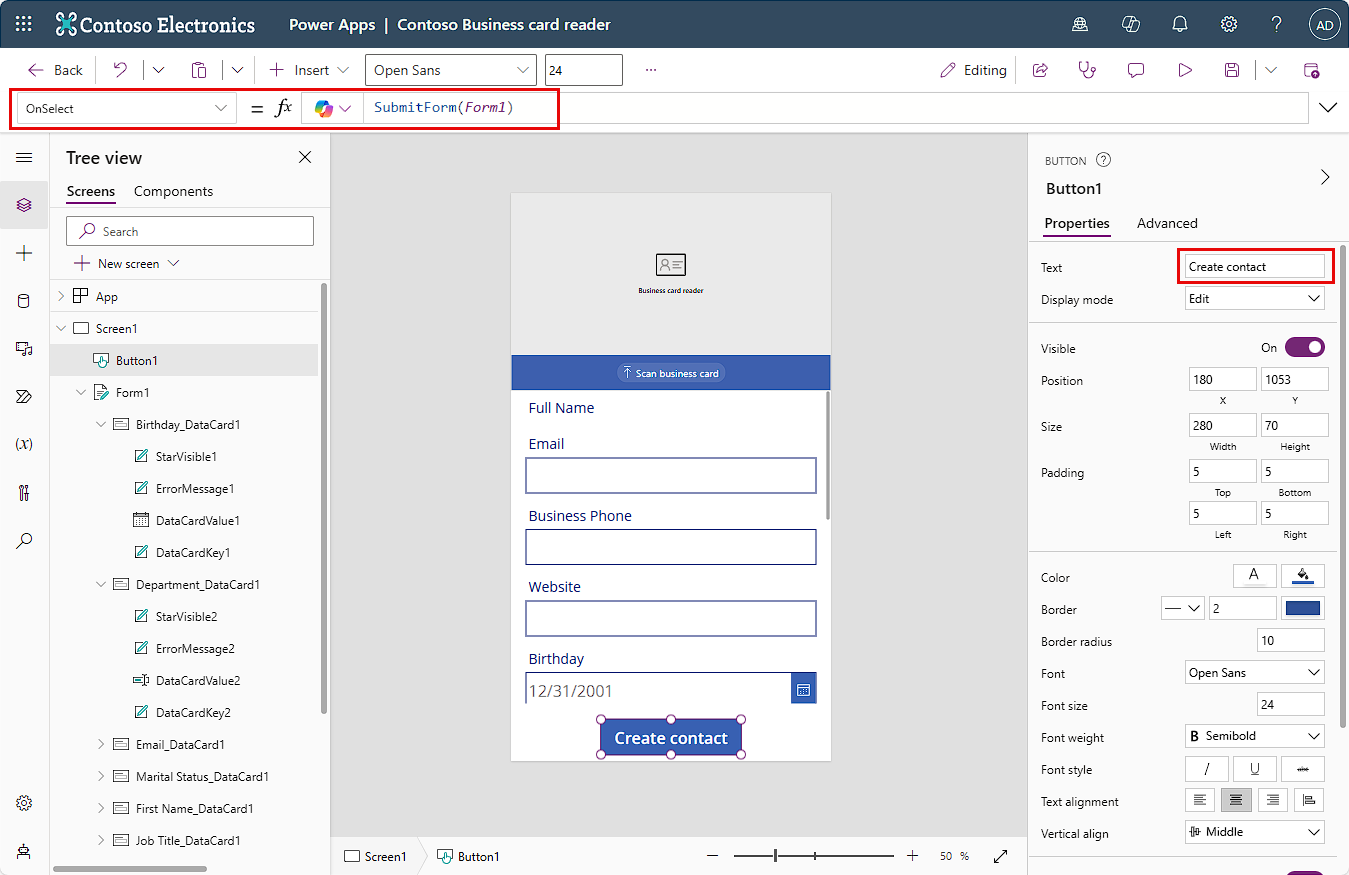
Select Insert > Button and place the button below the form. Resize the form to be able to fit the button under it.
Change the OnSelect property to SubmitForm(Form1) and the Text property to Create contact.
Test that the application is working properly before moving on to the next step.
Select the "Play" button on top right of the command bar to preview your app.
To analyze a business card, select Scan business card and then select an image that you have saved. You can also use your mobile device to take a picture.

AI Builder Business card reader will process the business card and display extracted contact information.
The extracted contact information is now displayed in the form's data cards. You can review it and create a new contact in your Dataverse table by selecting Create contact.

You can modify your form by adding new fields and tying the Default property to the corresponding BusinessCardReader property. AI Builder Business card reader will recognize various contact information from business cards. You can also use the extracted information to create records in other tables from Dataverse and to use it in external data sources.
You have now learned how to build a Power Apps canvas app with the AI Builder Business card reader component, and you have discovered how to use the extracted contact information to create a new record in the Contact table from Dataverse.