Exercise - Create a topic with Copilot
Here, you create a conversational flow for your copilot.
Create a topic using Copilot
Sign into Microsoft Copilot Studio.
On the left-hand side of the screen, select Copilots and then select the copilot that you created in the previous exercise.
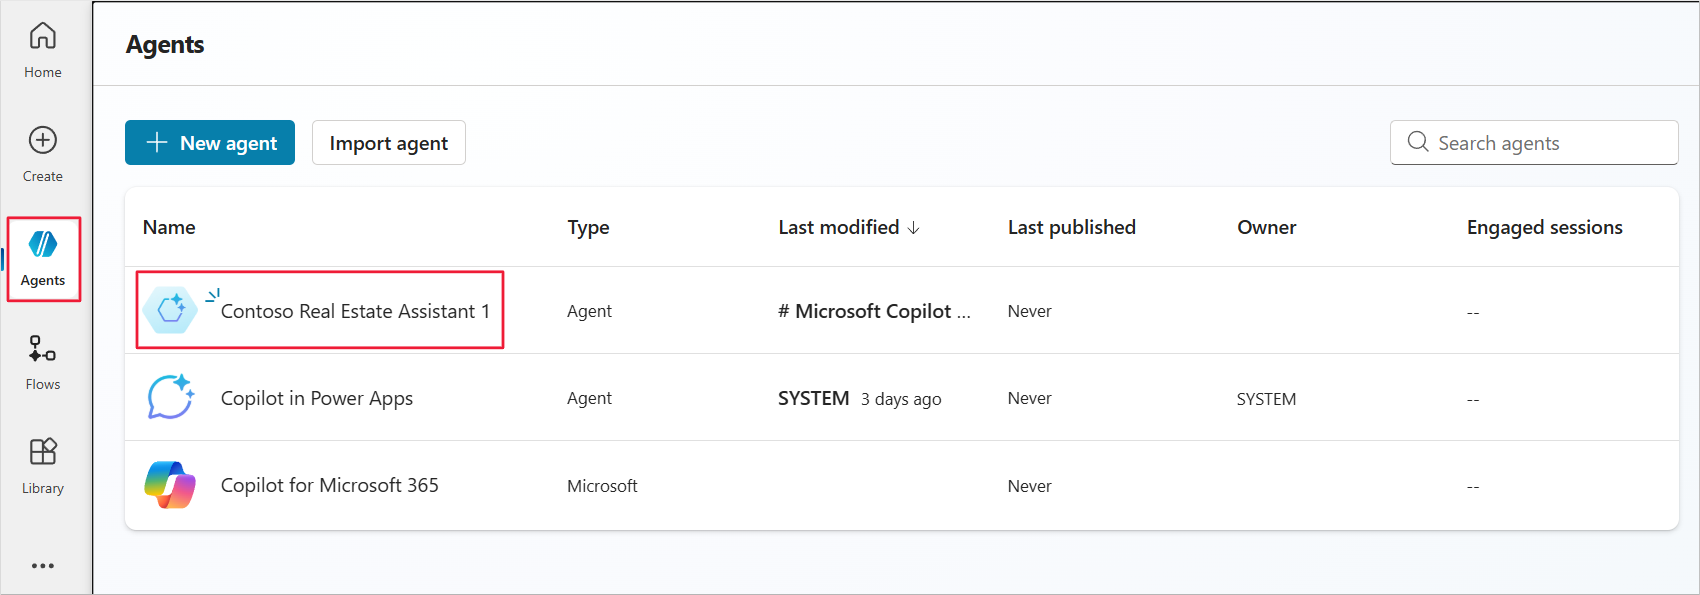
When the copilot opens up, select the Topics tab.
Topics are discrete conversation paths that, when used together, allow for users to have a conversation that feels natural and flows appropriately. They can be created manually or generated using natural language.
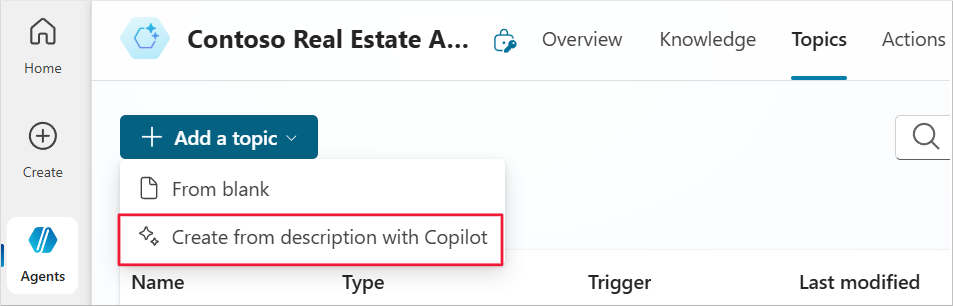
Select + Add a topic > Create from description with Copilot.
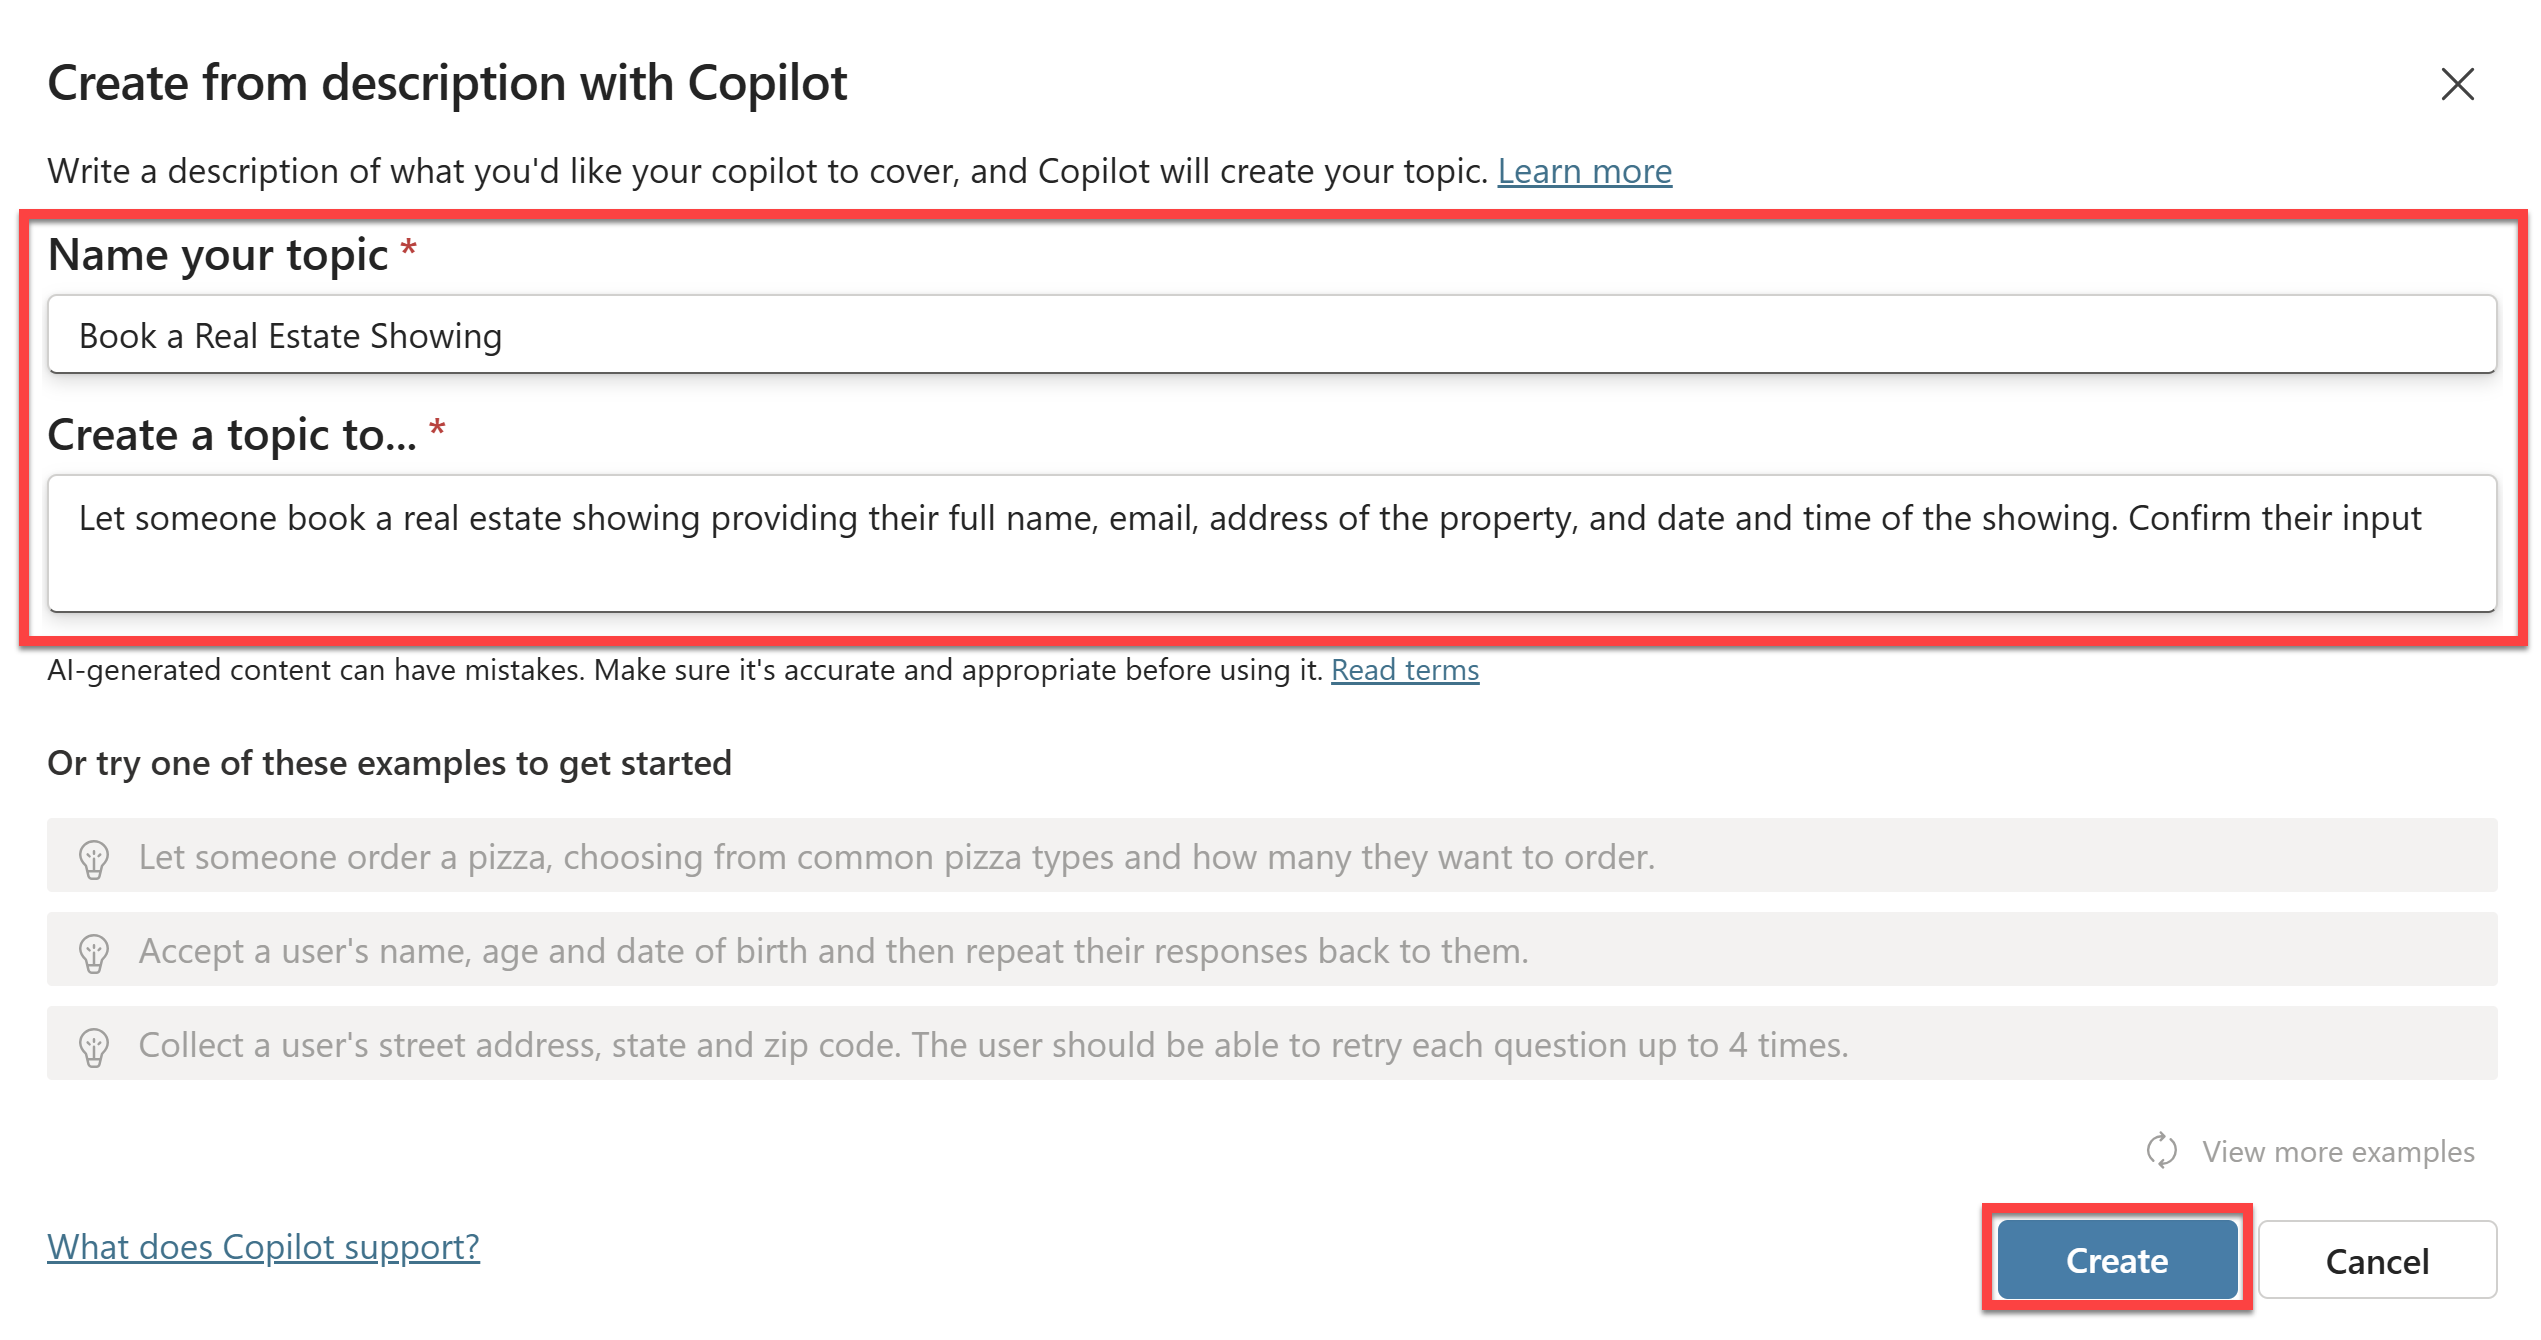
A new window appears asking you to Name your topic and provide a description in the Create a topic to... space.
In the Name your topic field, enter:
Book a Real Estate Showing.In the Create a topic to... field, enter:
Let someone book a real estate showing providing their full name, email, address of the property, and date and time of the showing.Then select Create.
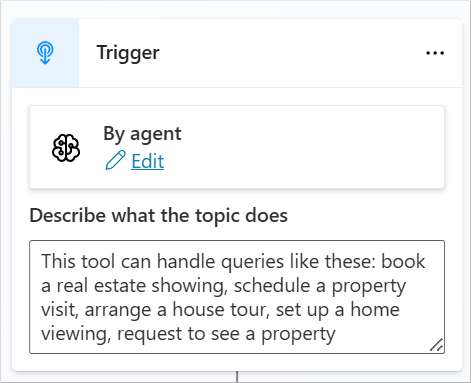
You should see a new topic with the generated trigger phrases:
Along with multiple question nodes, entity selection, and variable naming:
In summary, you should see:
- A trigger node with the trigger phrases
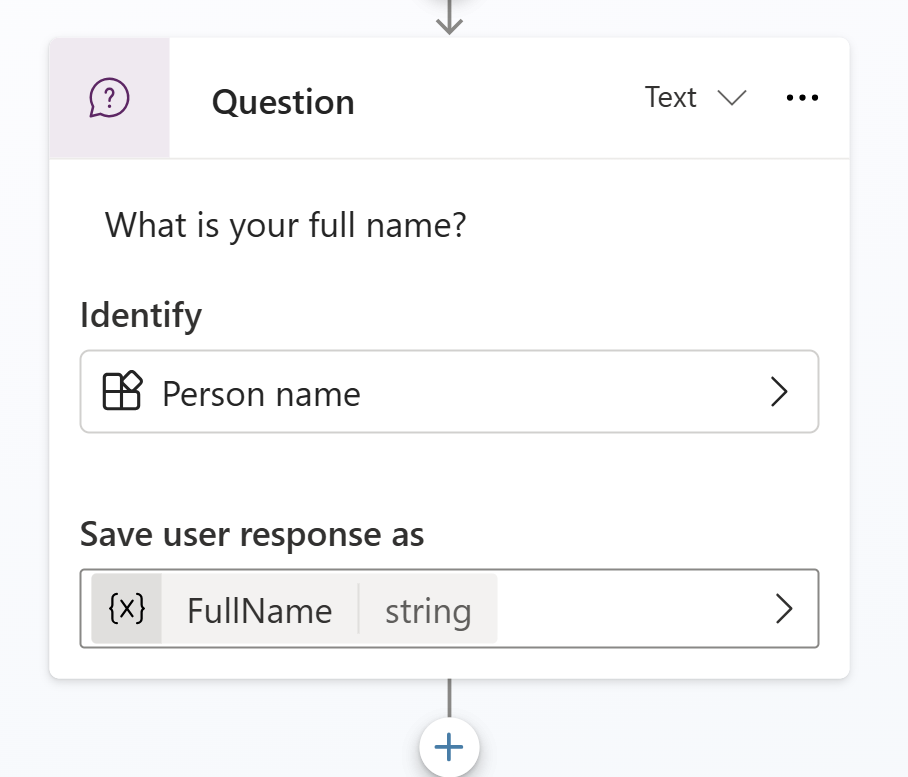
- A question node asking for the user's name
- A question node asking for the user's email address
- A question node asking for the property address
- A question node asking for the date and time of the showing
Delete any nodes that you don't need.
Note
Remember, your generated content may be different than what's shown here.


Edit a topic using Copilot
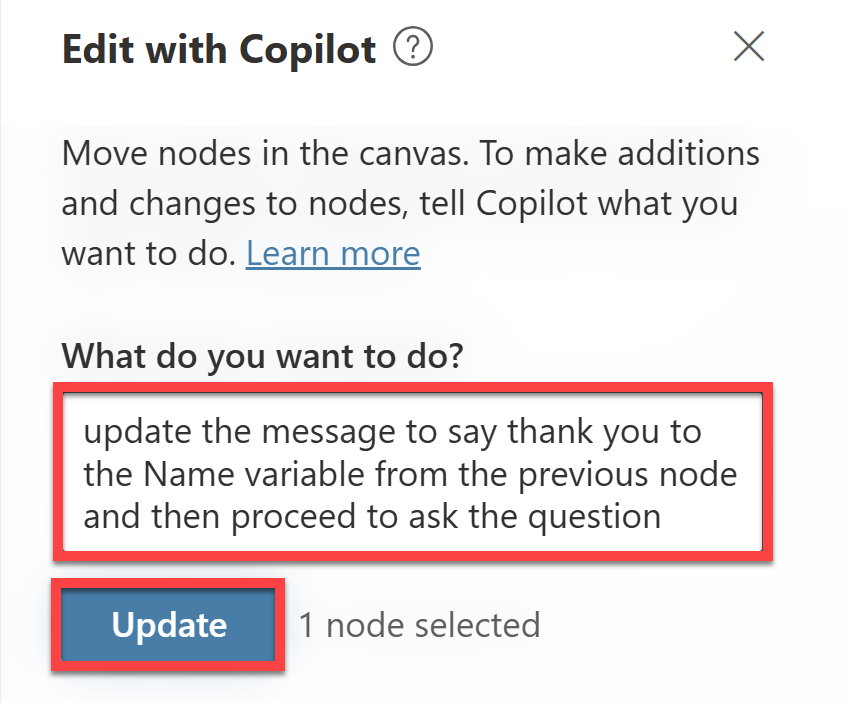
Look for the What is your email address? question node and select it.
Then select the Copilot icon in the upper part of the authoring canvas. This opens the Edit with Copilot panel on the right-hand side of the screen.
Selecting the Copilot icon after selecting a node ensures that any changes you make with Copilot will be applied to that node.
Within the Edit with Copilot panel, in the field What do you want to do?, enter:
Update the Question node to say thank you to the FullName variable from the previous node and then proceed to ask the questionThen select Update.
Copilot updates the What is your email address? question node to the following, which now includes the FullName variable from the message node before it:
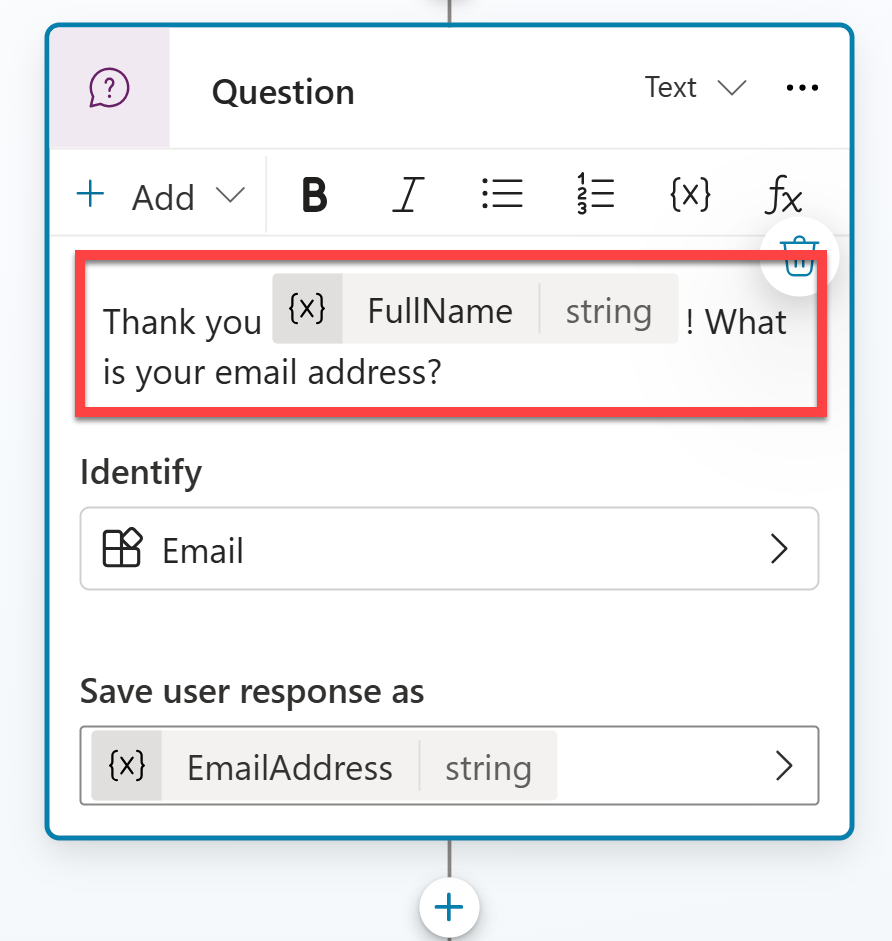
So with Copilot, in addition to adding new nodes, you can also update existing ones.
Make sure no node is selected by clicking in the empty space around the nodes and then within the Edit with Copilot panel, in the field What do you want to do?, enter:
Summarize the information collected in an adaptive cardThen select Update.
You'll then see that a message node with an Adaptive Card has been added to the end of the topic. Select the Adaptive Card.
The Adaptive Card properties should appear on the right of the screen. Select the arrow icon to Expand the Adaptive Card formula.
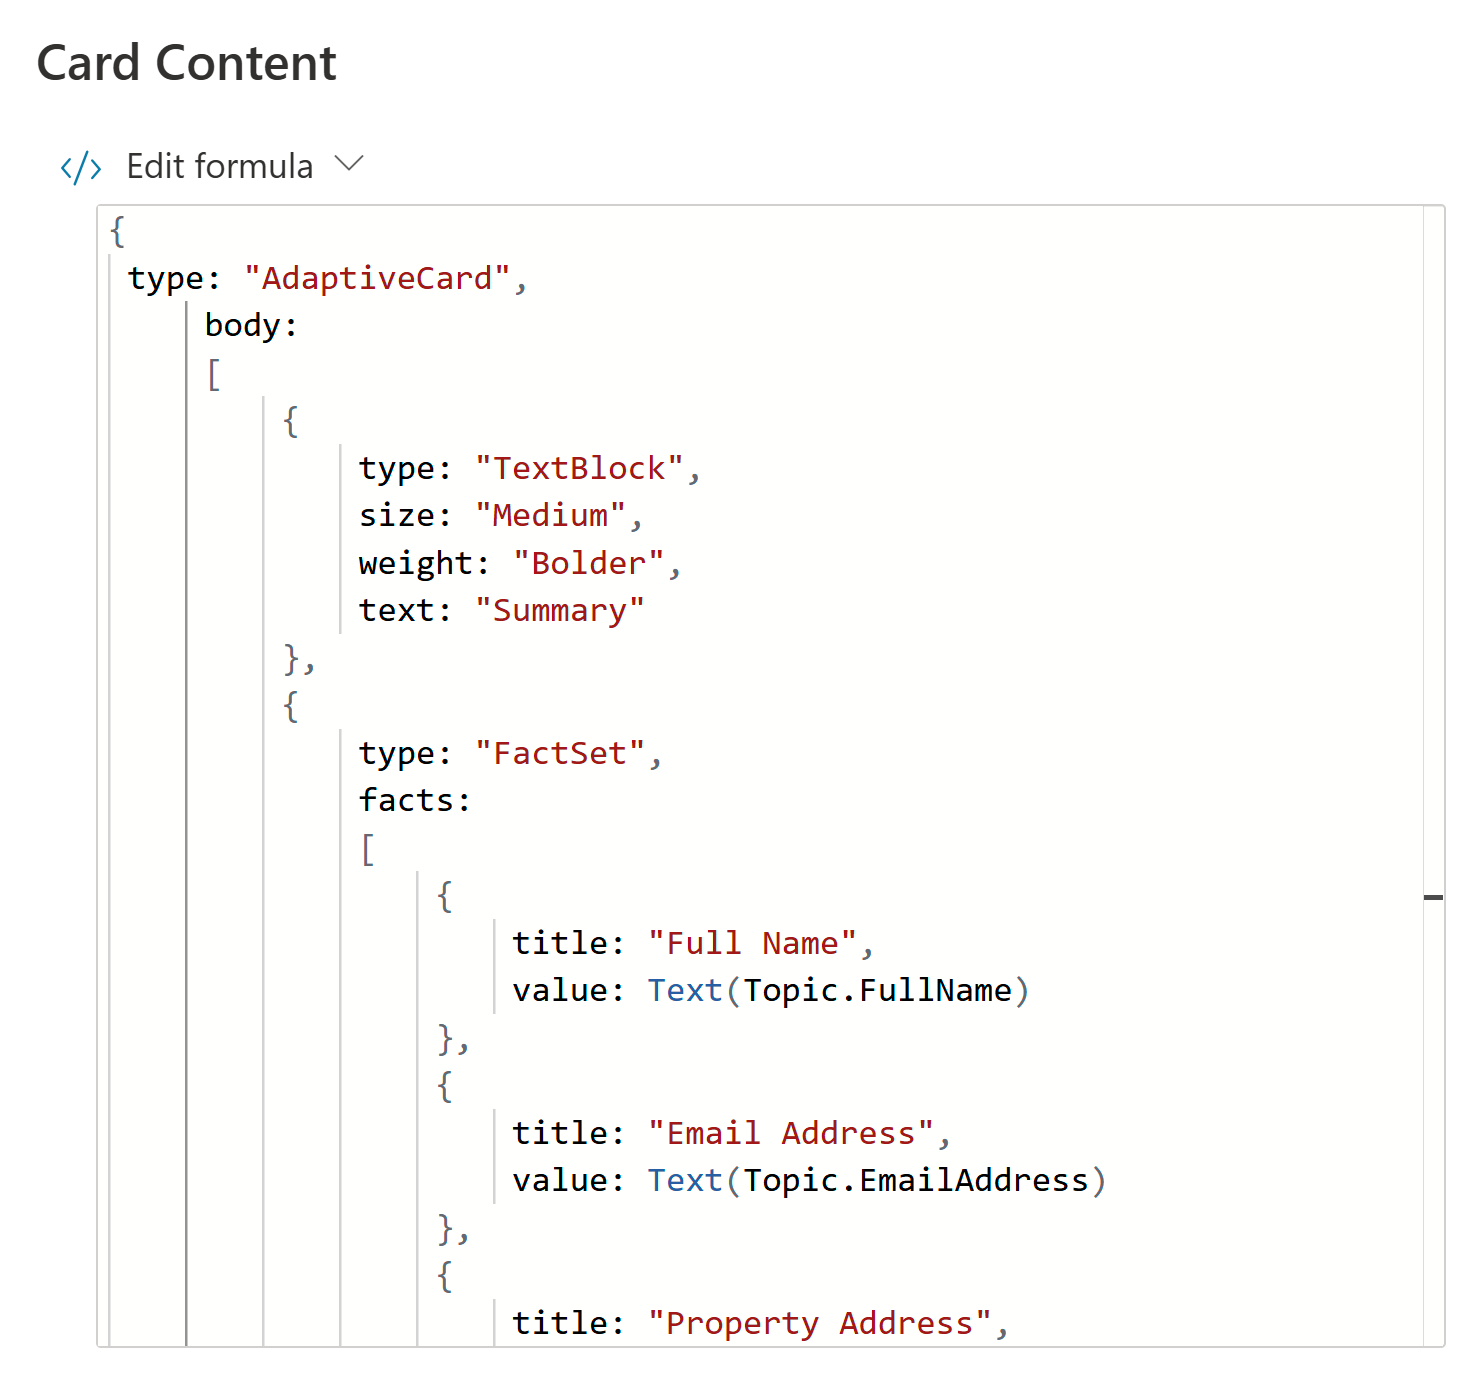
Your Adaptive Card formula should look similar to the one above. If it doesn't, then you can copy and paste the following formula:
{
type: "AdaptiveCard",
    body:
    [
        {
            type: "TextBlock",
            size: "Medium",
            weight: "Bolder",
            text: "Summary"
        },
        {
            type: "FactSet",
            facts:
            [
                {
                    title: "Full Name",
                    value: Text(Topic.FullName)
                },
                {
                    title: "Email Address",
                    value: Text(Topic.EmailAddress)
                },
                {
                    title: "Property Address",
                    value: Text(Topic.PropertyAddress)
                },
                {
                    title: "Date and Time",
                    value: Text(Topic.ShowingDateAndTime)
                }
            ]
        },
        {
            type: "TextBlock",
            text: "Thank you for providing the information."
        }
    ]
}
Opening the Adaptive Card properties closes the Edit with Copilot panel; therefore, you need to select the icon to reopen it.
Make sure that no node is selected by clicking in the empty space around the nodes. In the What do you want to do? field, enter the following text:
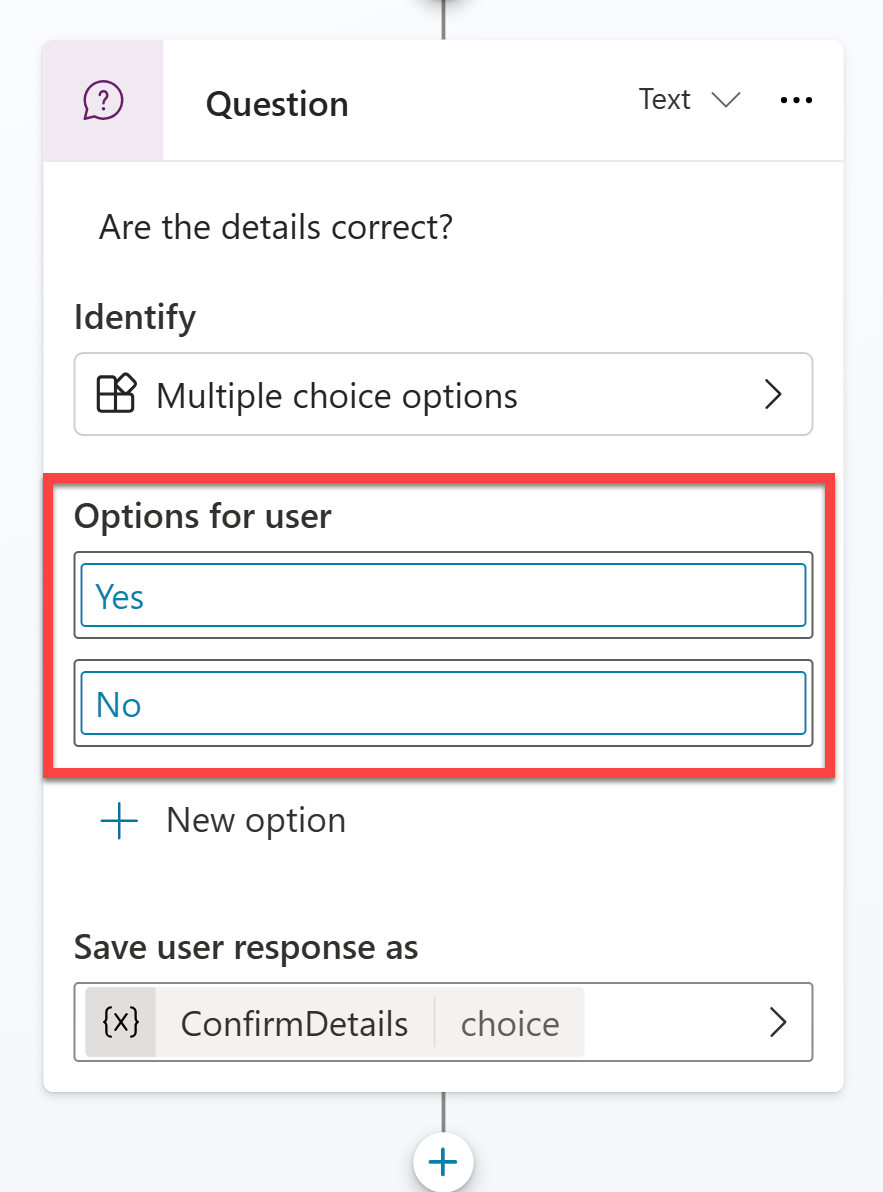
Add a new multiple choice question to prompt the user if the details are correct with two options Yes or NoThen select Update.
A new question node is added to the end of the topic with options for the user to select.
In the top-right of the screen, select Save to save your Topic changes.
Once saved, select Test in the top-right of the screen to open the Test your copilot pane.
The Conversation Start message will appear, and your copilot will start a conversation. In response, enter a trigger phrase for the topic that you've created:
I want to book a real estate showingAnd then you'll see it respond with the "What is your full name" question:
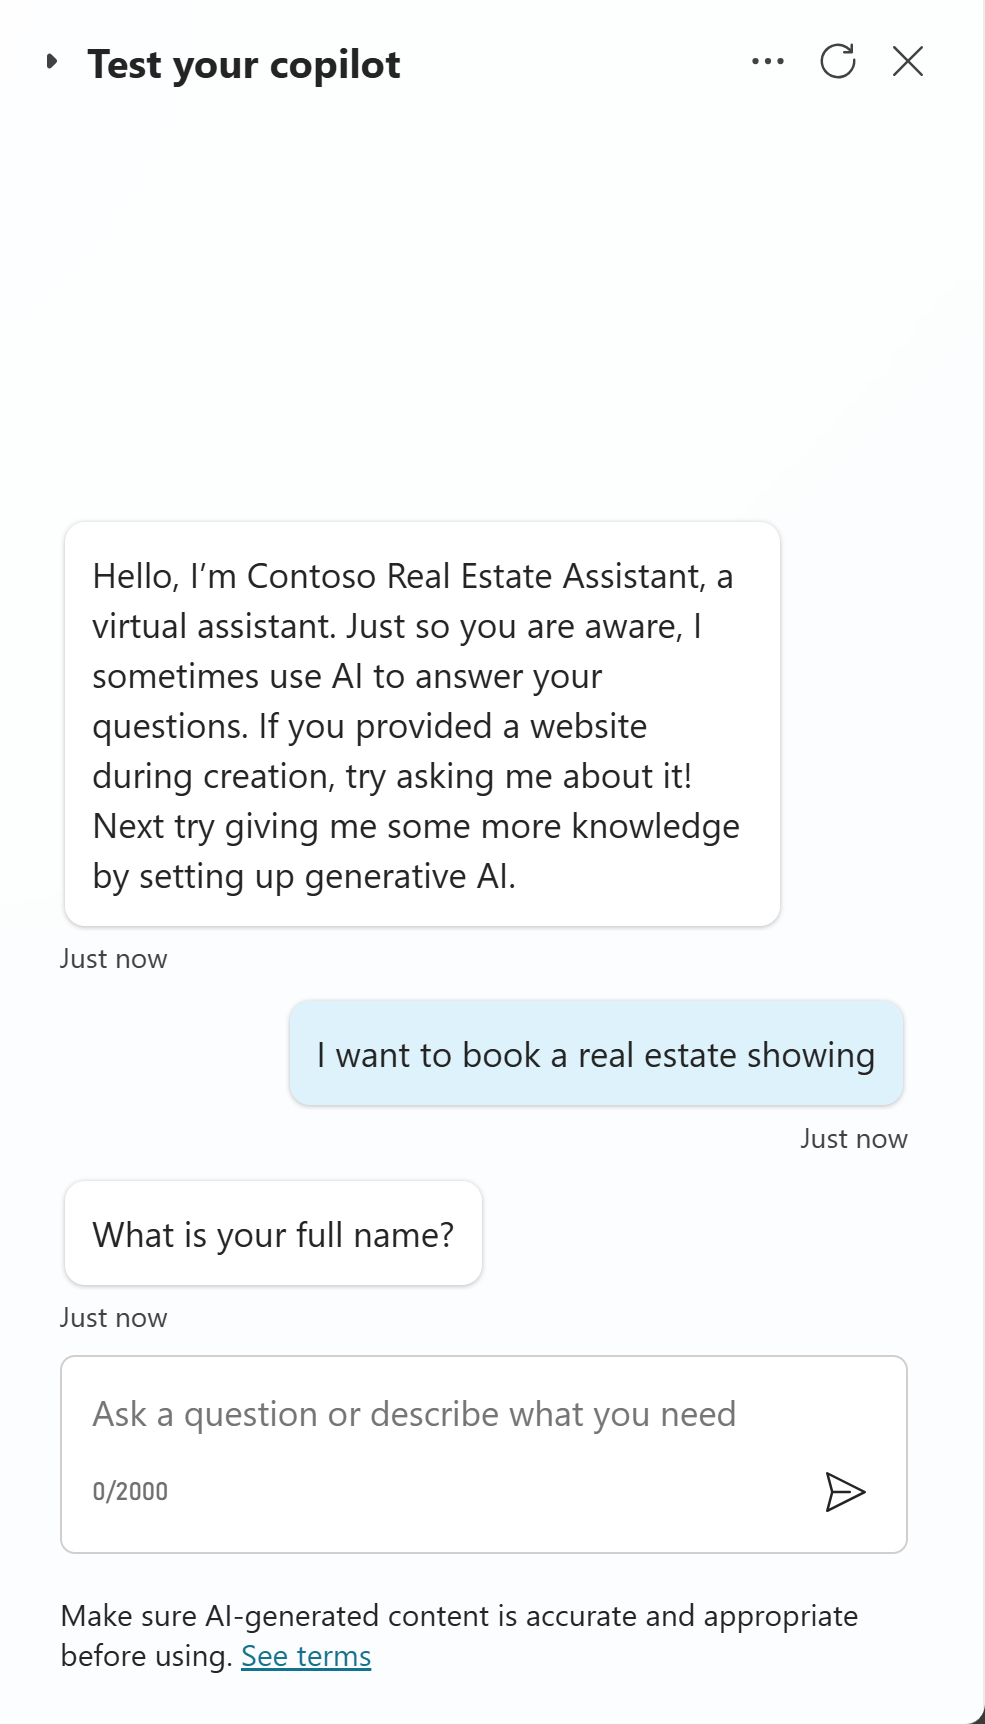
Enter the rest of the information as prompted.
"What is your full name?"
<Your name>"Thank you, <Your name>! What is your email address?"
<Your email address>"What is the address of the property?"
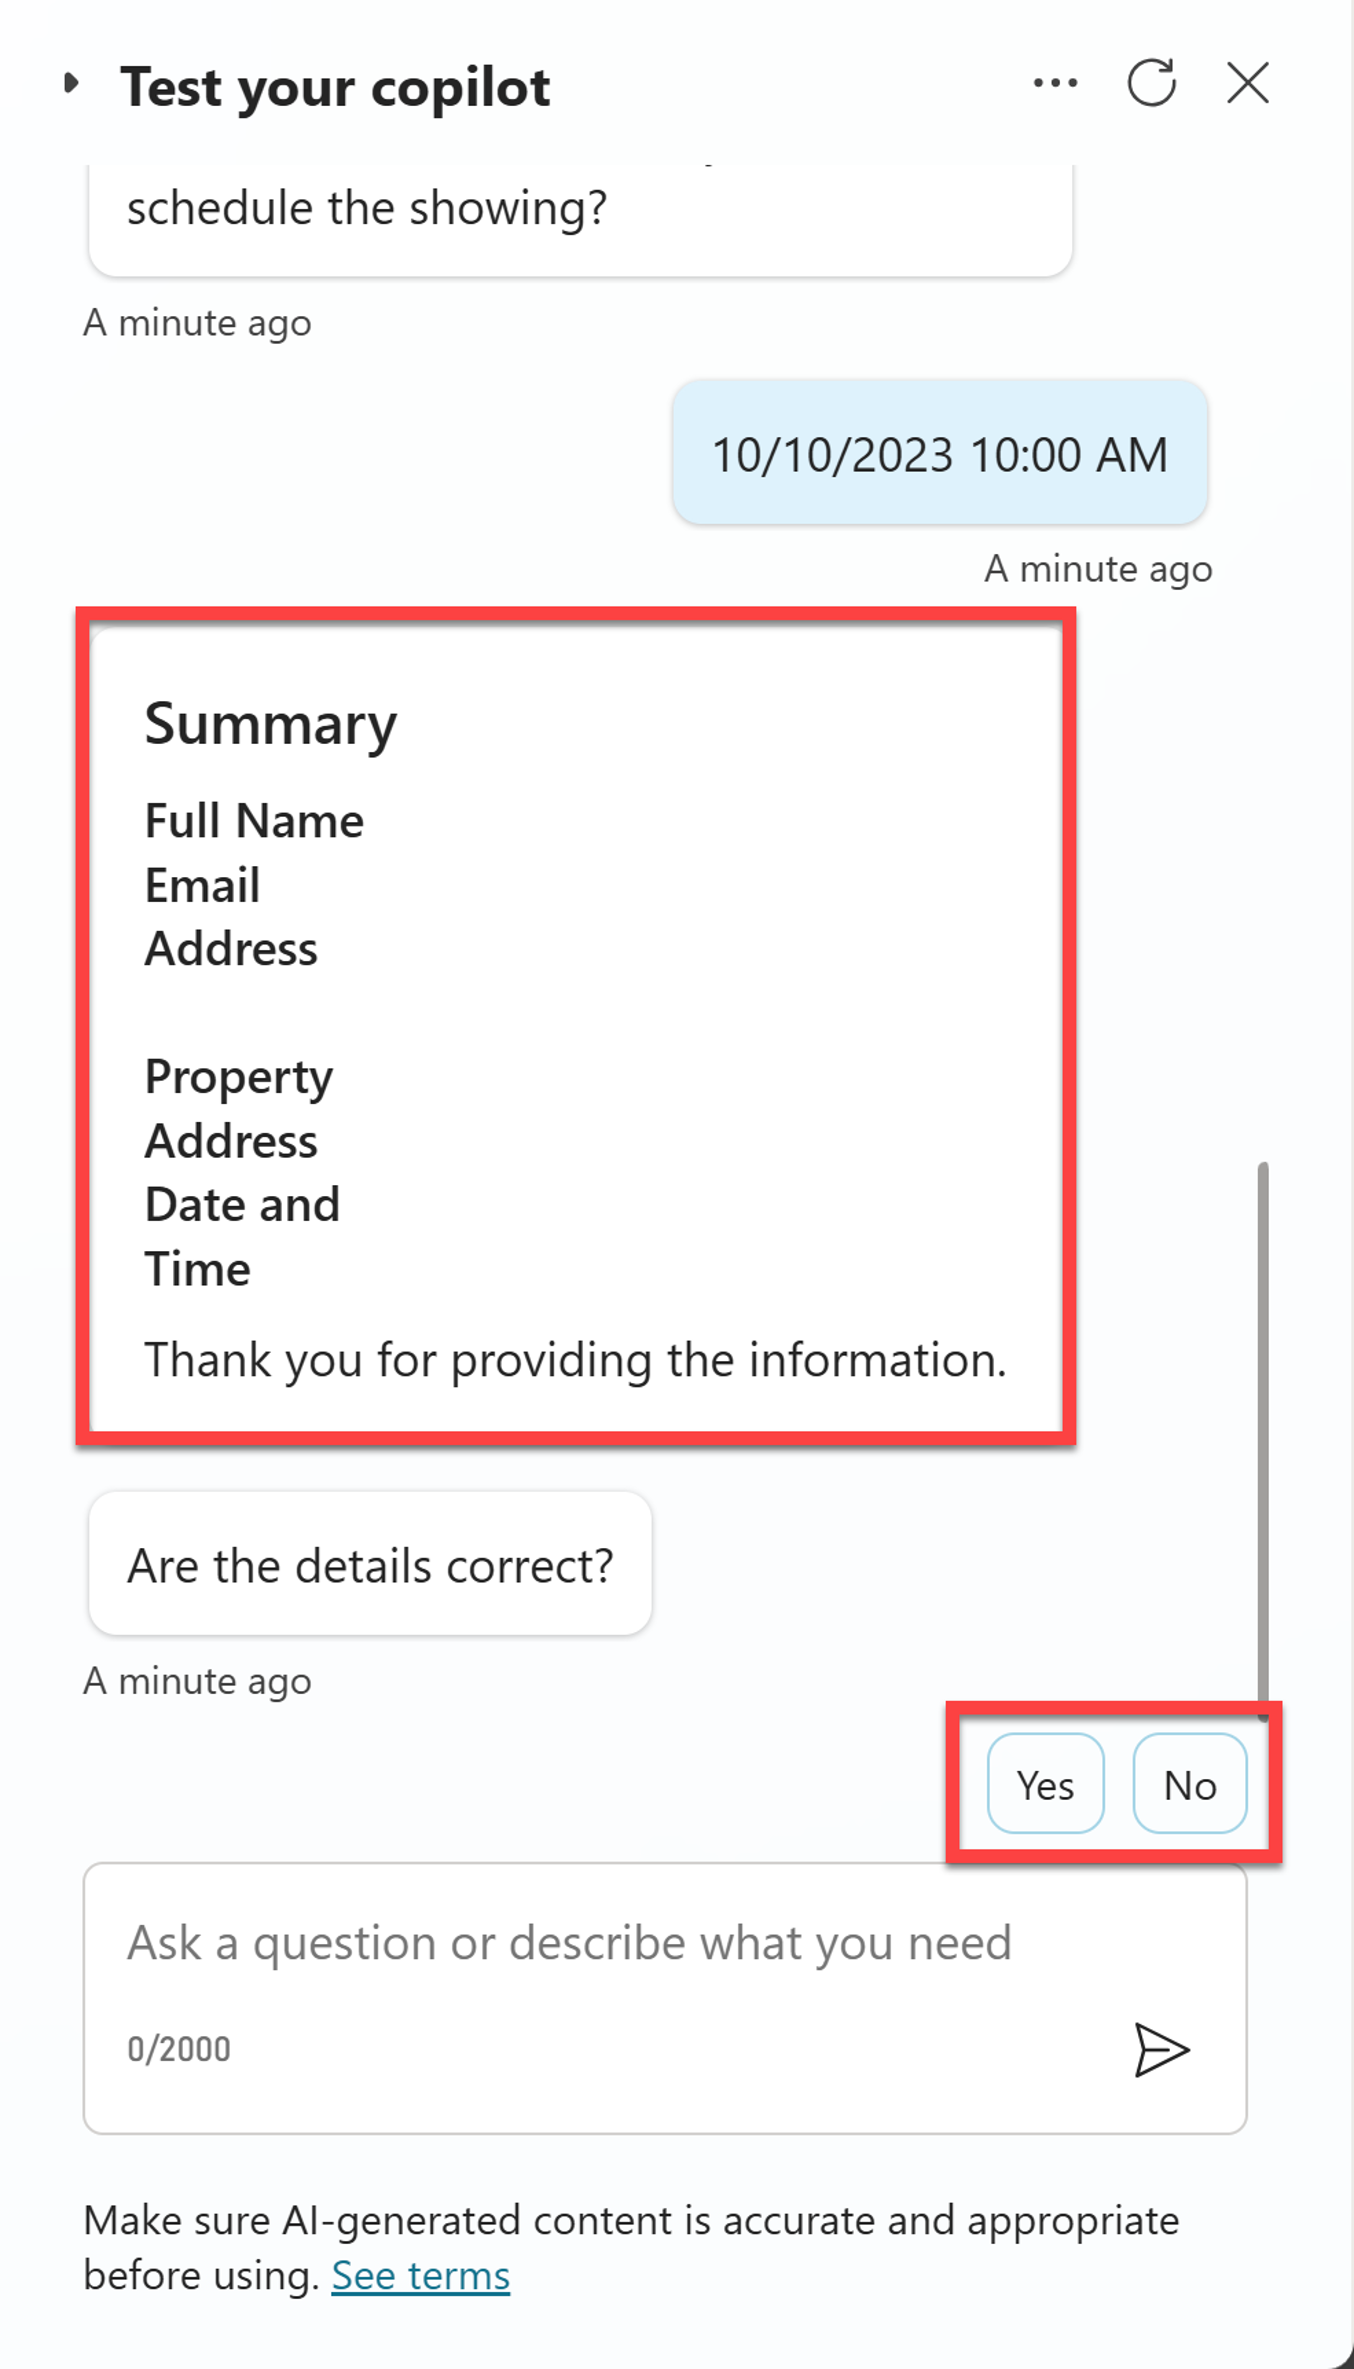
555 Oak Lane, Denver, CO 80203"What date and time would you like to schedule the showing?"
10/10/2023 10:00 AMOnce all the information has been entered, you'll see the Adaptive Card with the information you entered and a question asking if the information is correct with the options to select either "Yes" or "No":
After selecting one of the options, you can further develop the topic to either save the data in Dataverse via a Power Automate flow or send an email to the user with the information they entered. However this is outside the scope of this module.


