Catatan
Akses ke halaman ini memerlukan otorisasi. Anda dapat mencoba masuk atau mengubah direktori.
Akses ke halaman ini memerlukan otorisasi. Anda dapat mencoba mengubah direktori.
Pendahuluan
This tutorial describes how to connect to, set up, and activate your Data Box Gateway device by using the local web UI.
The setup and activation process can take around 10 minutes to complete.
Dalam tutorial ini, Anda mempelajari cara:
- Connect to a virtual device
- Set up and activate the virtual device
Prasyarat
Before you configure and set up your Data Box Gateway, make sure that:
- You've provisioned a virtual device and obtained a connected URL to it as detailed in the Provision a Data Box Gateway in Hyper-V or Provision a Data Box Gateway in VMware.
- You have the activation key from the Data Box Gateway service that you created to manage Data Box Gateway devices. Untuk informasi selengkapnya, buka Mempersiapkan untuk menyebarkan Azure Data Box Gateway.
Sambungkan ke pengaturan antarmuka web lokal
Open a browser window and access the local web UI of the device at:
https://ip-address-of-network-interface
Use the connection URL noted in the previous tutorial. Anda melihat kesalahan atau peringatan yang menunjukkan bahwa ada masalah dengan sertifikat keamanan situs web.
Pilih Lanjutkan ke halaman web ini. Langkah-langkah ini mungkin bervariasi tergantung pada browser yang Anda gunakan.
pesan kesalahan sertifikat keamanan situs web

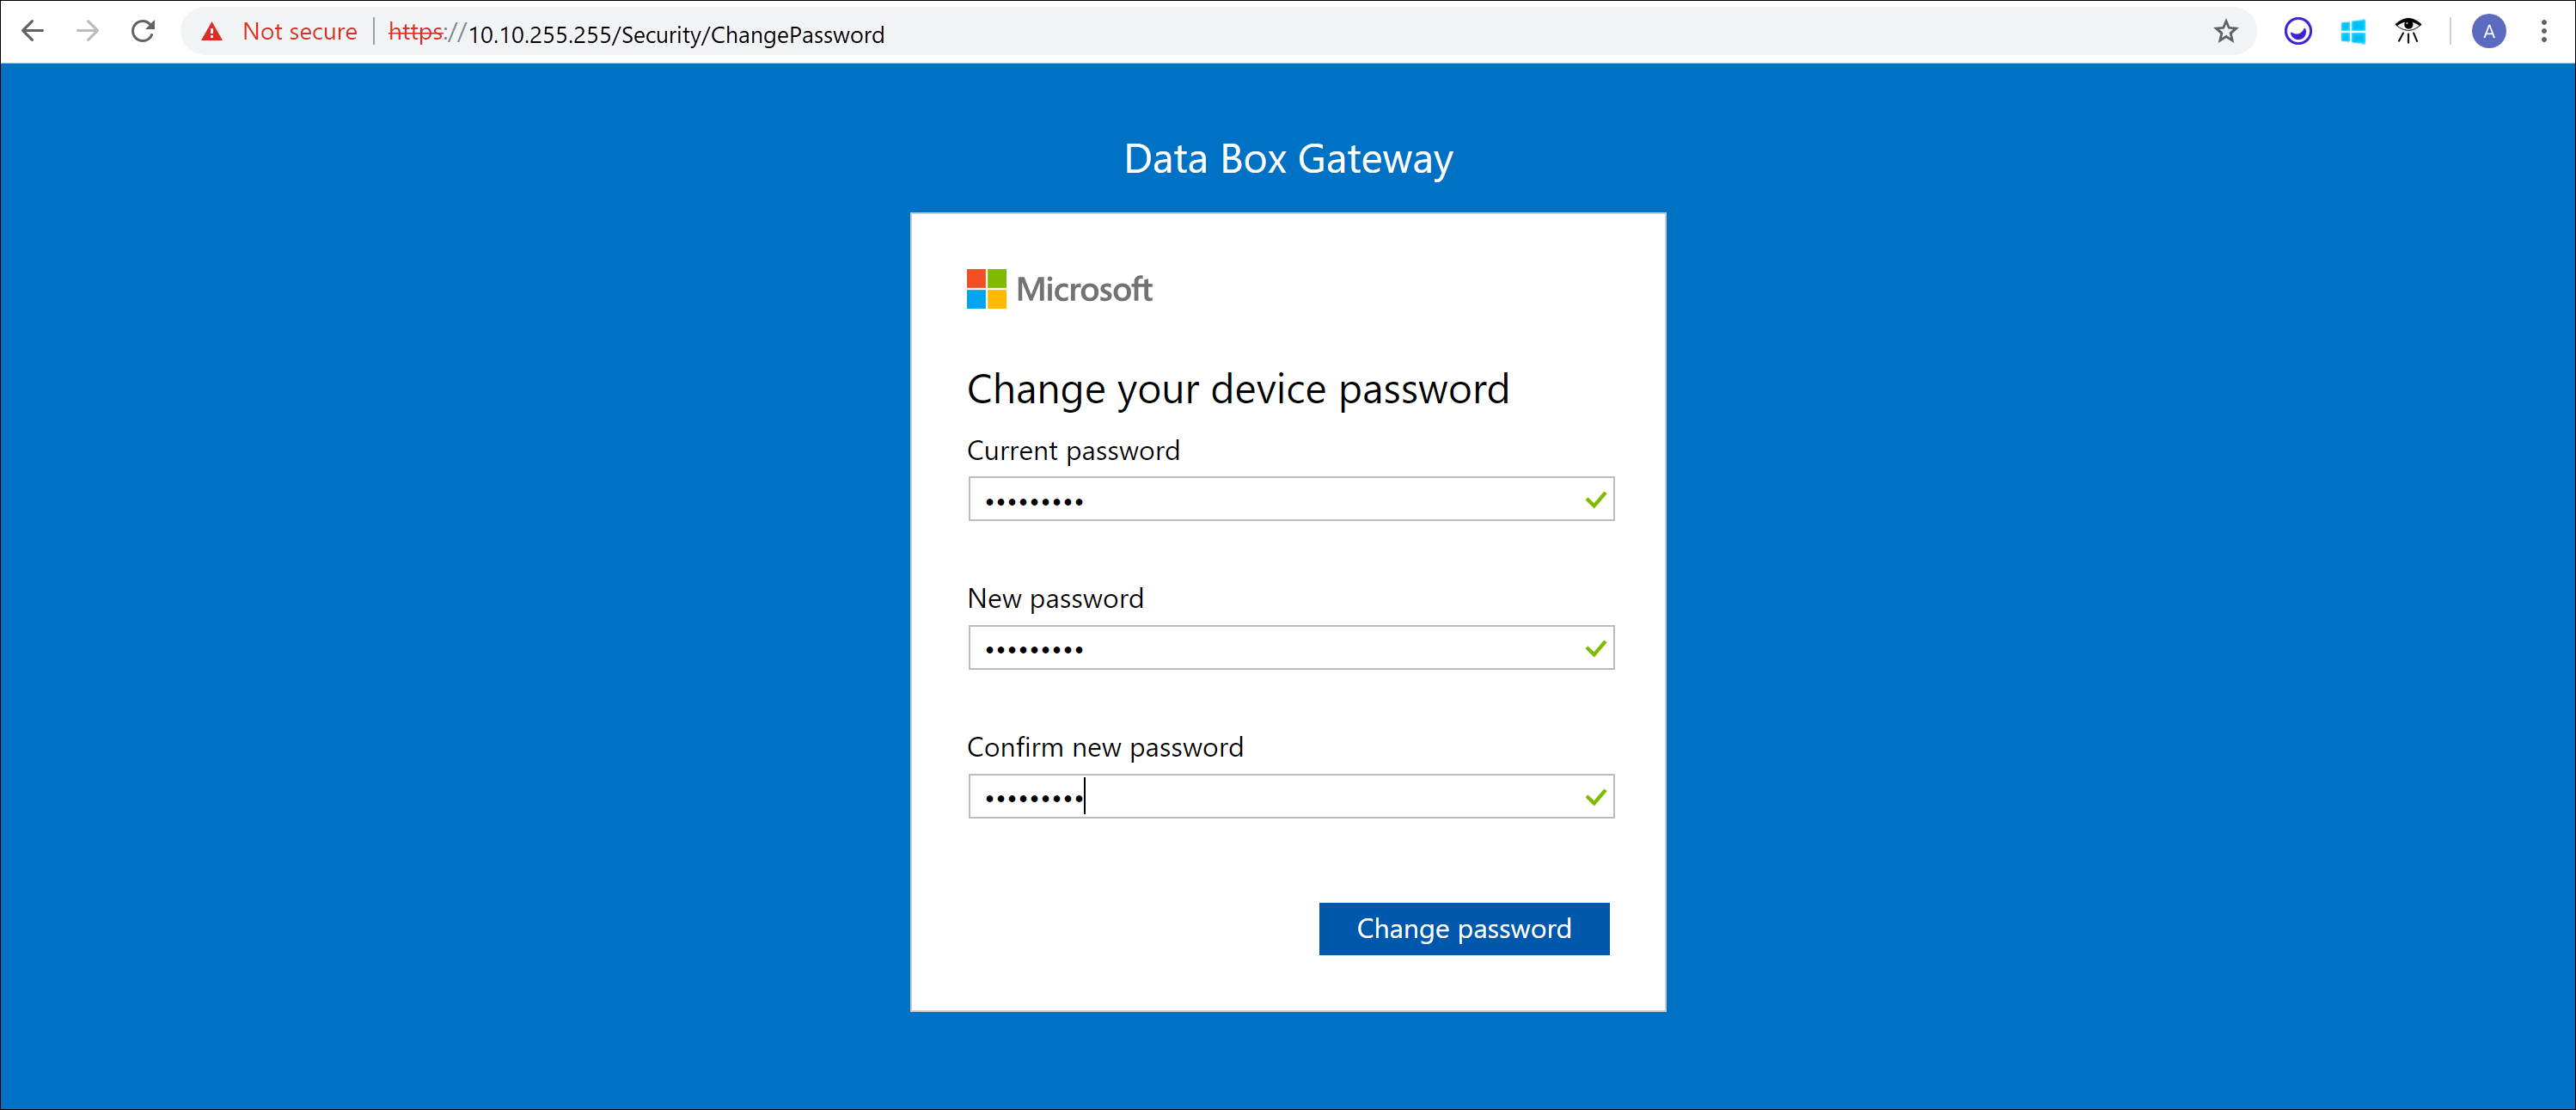
Sign in to the web UI of your virtual device. Kata sandi default adalah Password1.

At the prompt, change the device password. Kata sandi baru harus berisi antara 8 dan 16 karakter. It must contain 3 of the following: uppercase, lowercase, numeric, and special characters.
You're now at the Dashboard of your device.
Set up and activate the virtual device
Your dashboard displays the various settings that are required to configure and register the virtual device with the Data Box Gateway service. Pengaturan Nama perangkat, Pengaturan jaringan, pengaturan proksi Web, dan pengaturan Waktu bersifat opsional. Satu-satunya pengaturan yang diperlukan adalah pengaturan Cloud .

In the left-pane, select Device name, and then enter a friendly name for your device. The friendly name must contain from 1 to 15 characters long and have letter, numbers, and hyphens.

(Optional) In the left-pane, select Network settings and then configure the settings. On your virtual device, you'll see at least one network interface and more depending on how many you configured in the underlying virtual machine. The Network settings page for a virtual device with one network interface enabled is as shown below.

As you configure network settings, keep in mind:
- Jika DHCP diaktifkan di lingkungan Anda, antarmuka jaringan akan dikonfigurasi secara otomatis. Alamat IP, subnet, gateway, dan DNS secara otomatis ditetapkan.
- Jika DHCP tidak diaktifkan, Anda dapat menetapkan IP statis jika diperlukan.
- Anda dapat mengonfigurasi antarmuka jaringan Anda sebagai IPv4.
Nota
Kami menyarankan agar Anda tidak mengalihkan alamat IP lokal antarmuka jaringan dari statis ke DHCP, kecuali Anda memiliki alamat IP lain untuk terhubung ke perangkat. Jika menggunakan satu antarmuka jaringan dan Anda beralih ke DHCP, tidak akan ada cara untuk menentukan alamat DHCP. Jika Anda ingin mengubah ke alamat DHCP, tunggu hingga setelah perangkat mendaftar dengan layanan, lalu ubah. Anda kemudian dapat melihat IP semua adaptor di properti perangkat di portal Microsoft Azure untuk layanan Anda.
(Optional) configure your web proxy server. Although web proxy configuration is optional, if you use a web proxy, you can configure it only on this page.

On the Web proxy page, do the following:
- Di kotak URL proksi Web , masukkan URL dengan format berikut:
http://<host-IP address or FQDN>:Port number. URL HTTPS tidak didukung. - Under Authentication, select None or NTLM.
- If you're using authentication, enter a Username and Password.
- To validate and apply the configured web proxy settings, select Apply.
Nota
File konfigurasi otomatis proxy (PAC) tidak didukung. File PAC menentukan bagaimana browser web dan agen pengguna lainnya dapat secara otomatis memilih server proksi (metode akses) yang sesuai untuk mengambil URL tertentu. Proksi yang mencoba mencegat dan membaca semua lalu lintas (kemudian menandatangani ulang semuanya dengan sertifikasi mereka sendiri) tidak kompatibel karena sertifikasi proksi tidak tepercaya. Typically transparent proxies work well with Azure Data Box Gateway.
- Di kotak URL proksi Web , masukkan URL dengan format berikut:
(Opsional) Di panel kiri, pilih Pengaturan waktu, lalu konfigurasikan zona waktu dan server NTP utama dan sekunder untuk perangkat Anda.
Server NTP diperlukan karena perangkat Anda harus menyinkronkan waktu sehingga dapat mengautentikasi dengan penyedia layanan cloud Anda.

In the Time settings page, do the following:
In the Time zone drop-down list, select the time zone that corresponds to the geographic location in which the device is deployed. Zona waktu default untuk perangkat Anda adalah PST. Perangkat Anda akan menggunakan zona waktu ini untuk semua operasi terjadwal.
Specify a Primary NTP server for your device or accept the default value of
time.windows.com.
Ensure that your network allows NTP traffic to pass from your datacenter to the Internet.Secara opsional, dalam kotak server NTP Sekunder, masukkan server sekunder untuk perangkat Anda.
To validate and apply the configured time settings, select Apply.
In the left pane, select Cloud settings, and then activate your device with the Data Box Gateway service in Azure portal.
In the Activation key box, enter the Activation key that you got in Get the activation key for Data Box Gateway.
Pilih aktifkan.

The device is activated and critical updates, if available, are automatically applied. Anda melihat pemberitahuan tentang hal tersebut. Monitor the update progress via the Azure portal.

The dialog also has a recovery key that you should copy and save in a safe location. Kunci ini digunakan untuk memulihkan data Anda jika perangkat tidak dapat melakukan booting.
You may need to wait several minutes for the update to successfully complete. After the update is complete, sign in to the device. The Cloud settings page updates to indicate that the device is successfully activated.
Halaman "Pengaturan Cloud" antarmuka pengguna web lokal telah diperbarui

Penyiapan perangkat selesai. Sekarang Anda dapat menambahkan berbagi di perangkat Anda.
Langkah berikutnya
Dalam tutorial ini, Anda belajar cara:
- Connect to a virtual device
- Set up and activate the virtual device
To learn how to transfer data with your Data Box Gateway, see: