Nóta
Aðgangur að þessari síðu krefst heimildar. Þú getur prófað aðskrá þig inn eða breyta skráasöfnum.
Aðgangur að þessari síðu krefst heimildar. Þú getur prófað að breyta skráasöfnum.
This article describes how to add a claimable virtual machine (VM) to a lab in DevTest Labs by using the Azure portal.
A claimable VM is added to a lab in a similar manner to how you add a standard VM. The base for the claimable VM can be a custom image, formula, or Marketplace image. After you add the VM, you can claim it and later unclaim it, as needed.
Add a claimable VM to your lab
Use the following steps to add a claimable VM to a lab in DevTest Labs:
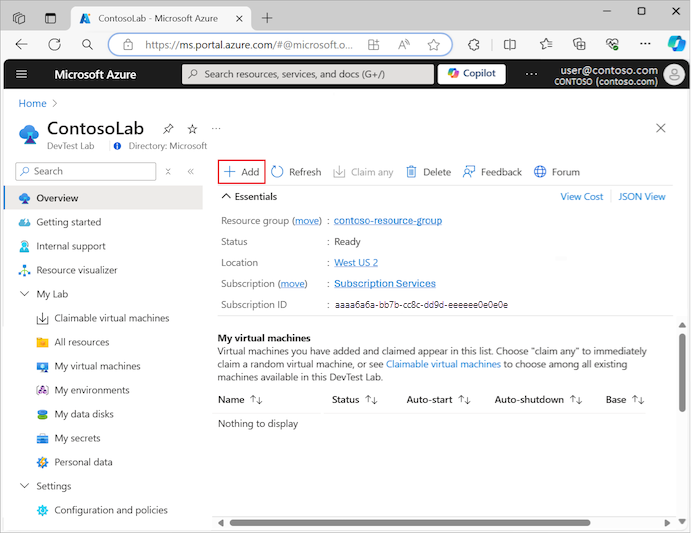
In the Azure portal, go to your DevTest Labs lab resource where you want to create the claimable VM.
On the lab Overview page, select Add to create a new virtual machine:
On the Choose a base page, select a Marketplace image to use when creating the VM. After you select a base image, the Create lab resource - Virtual machine pane opens.
On the Basic Settings tab, configure the following options:
Virtual machine name: Enter a name for the VM. The text box is prefilled with a unique autogenerated name. The value corresponds to the user name within your email address followed by a unique three-digit number. You can override the provided value by entering a name of your choice. The machine name is validated as you type. A message indicates the requirements for a valid name.
User Name: Enter the name for a user with administrator privileges on the virtual machine. For the first VM you create for your lab, the text box is prefilled with a unique autogenerated name. The name corresponds to the user name within your email address. You can override the autogenerated value by entering a name of your choice. When you create subsequent VMs in your lab, this text box is prefilled with the most recent user name that you used.
Password: When you create the first VM in your lab, enter a password for the user with administrator privileges. To save this password as a default password in the Azure key vault associated with your lab, select Save as default password. The default password is saved in your key vault with the name
VmPassword. When you create subsequent VMs in the lab, theVmPasswordvalue is automatically entered as the password. To override the value, clear the Use a saved secret check box, and enter a password.Use a saved secret: You can also save secrets in your Azure key vault first and then use the secrets when you create VMs in your lab. To use a password stored in your key vault, select Use a saved secret, and then specify a key value that corresponds to your stored secret (password). For more information, see Store secrets in Azure Key Vault.
Virtual machine size: A common size is prefilled according to the base image you selected for the VM. The size specifies the processor cores, RAM size, and hard drive size of the VM to create. To use a different size, select Change size and choose from a list of available sizes and support options.
OS disk type: The selected base image for the VM determines your options for the disk type. Depending on the base, you can choose from the following options:
- Premium SSDs offer high-performance, low-latency disk support for I/O-intensive applications and production workloads.
- Standard SSDs are a cost effective storage option optimized for workloads that need consistent performance at lower I/O operations per second (IOPS) levels.
- Standard HDDs are ideal for Dev/Test scenarios and less critical workloads at lowest cost.
Artifacts: Zero or more artifacts are added by default according to the selected base image for the VM. You can also select Add or Remove Artifacts to change the artifacts for the new VM.
Important
If you're new to DevTest Labs or configuring artifacts, review the guidance in Add artifacts to DevTest Labs VMs before you set up the artifacts for the new VM.
On the Advanced Settings tab, configure the following options:
Virtual network: The virtual network for your lab is prefilled in the text field. Use the dropdown list to select from available networks.
Subnet Selector: The subnet for the selected virtual network for your lab is prefilled in the text field. Use the dropdown list to select from available subnets.
IP address: Specify the type of IP address for the VM: Public, Private, or Shared. For more information about shared IP addresses, see Understand shared IP addresses in Azure DevTest Labs.
Expiration date: To automatically delete the VM, specify the expiration date and expiration time.
Make this VM claimable: To make the VM claimable by a lab user, select Yes.
Number of instances: Specify the number of the instances of the VM that you want to make available to your lab users.
On the Basic Settings tab, select Create to add the new VM to your lab.

The lab page displays the status of the VM's creation - first as Creating, then Available, and finally as Running after the VM is started.
Note
If you deploy lab VMs through Azure Resource Manager (ARM) templates, you can create claimable VMs by setting the allowClaim property to True in the VM Properties.
Use a claimable VM
There are two ways a user can claim a VM from the list of Claimable virtual machines, as described in the following sections. After a VM is claimed, the machine is no longer available in the claimable pool for the lab.
Claim a specific VM
The user can claim a specific VM for their lab:
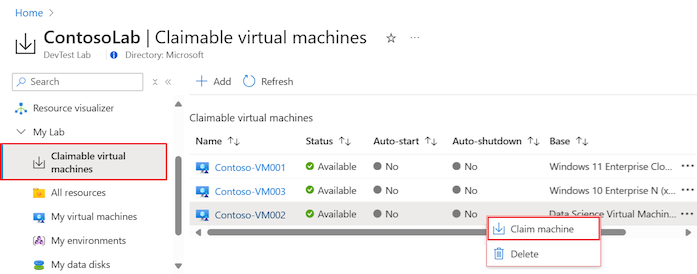
On the lab Overview page, expand the My lab section on the left menu, and select Claimable virtual machines.
Right-click the VM you want to claim, and then select Claim machine:

Claim any available VM
Another approach is to instruct DevTest Labs to select any available claimable machine:
On the lab Overview page, select Claim any:
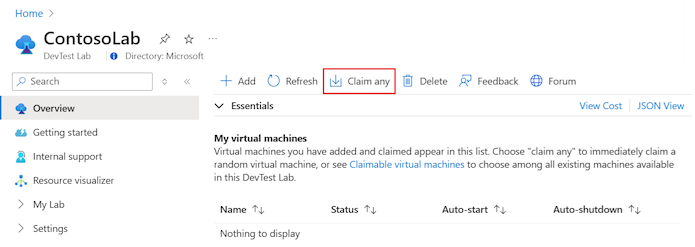
A random virtual machine is assigned from the list of claimable VMs.
After a user claims a VM, DevTest Labs starts the machine and adds it to lab user's list of My virtual machines:
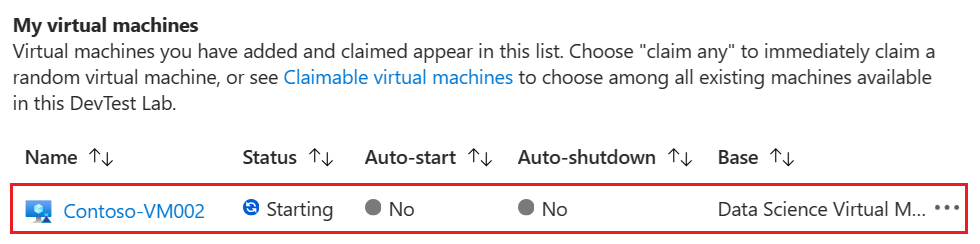
The lab user now has owner privileges on the machine. The time required for this step can vary depending on startup times and any other custom actions being performed during the claim event.

Unclaim a VM
When a user is finished using a claimed VM, they can transition the VM to the unclaimed state and return it to the list of claimable virtual machines for the lab.
After a user unclaims a VM, they no longer have owner permissions for that specific lab VM. The VM is then claimable by all lab users in the state that it was returned to the pool.
The following sections describe two ways to unclaim a VM.
Unclaim a VM from a list of VMs
The user can unclaim a specific VM in the lab:
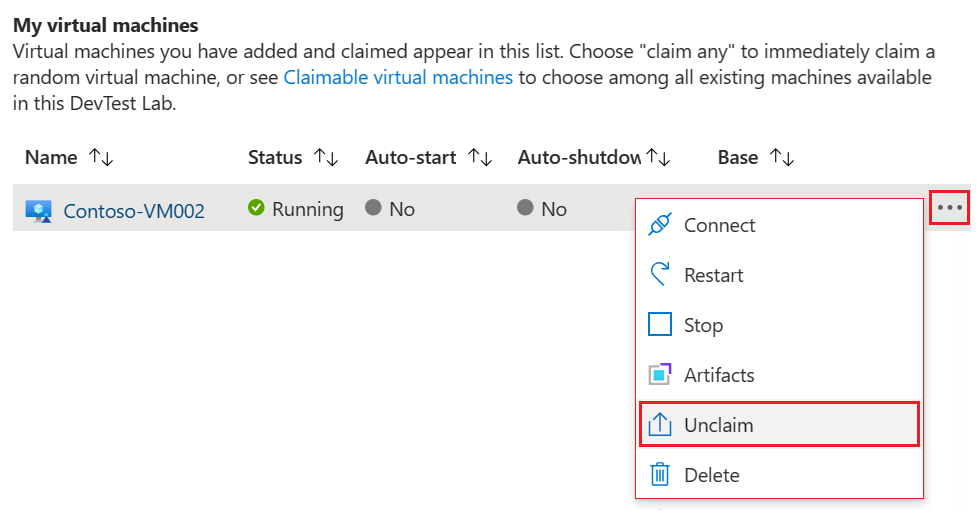
On the lab Overview page, expand the list of My virtual machines.
Locate the row with the VM to unclaim, right-click the row or select More options (...), and then select Unclaim:
Unclaim a VM from the resource view
The user can also unclaim a virtual machine from the Overview page for the resource:
On the lab Overview page, expand the list of My virtual machines.
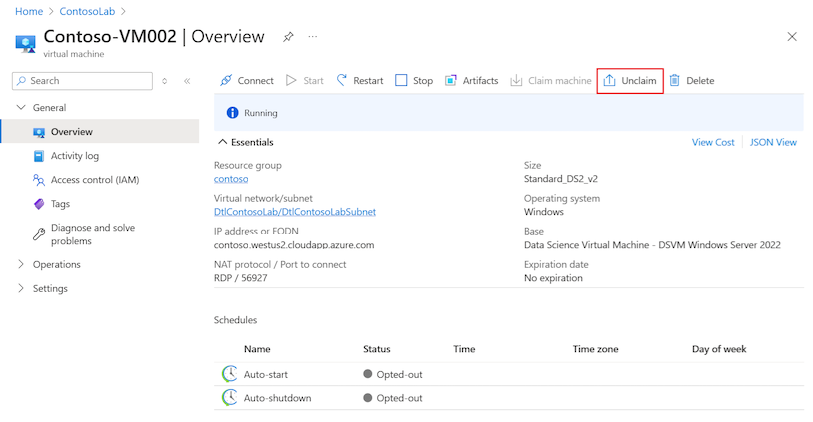
In the list of My virtual machines, locate the VM to unclaim, and then select the VM name to view the resource details.
In the Overview page for the virtual machine, select Unclaim:

Transfer the data disk
If a claimable VM has a data disk attached to it, and a user unclaims the VM, the data disk stays with the VM. In other words, the user also unclaims the data disk along with the VM.
When another user claims the VM, the new user claims the VM and also the attached data disk. The act of claiming the data disk attached to a VM is known as transferring the data disk.
When a VM is claimed by a user, the attached data disk is added to the new user's list of My data disks for the lab.
Related content
- Explore the DevTest Labs ARM template QuickStart gallery