Nota
L'accesso a questa pagina richiede l'autorizzazione. È possibile provare ad accedere o modificare le directory.
L'accesso a questa pagina richiede l'autorizzazione. È possibile provare a modificare le directory.
In questa guida introduttiva si apprenderà come avviare una chiamata da Servizi di comunicazione di Azure utente a Teams. A questo scopo, seguire questa procedura:
- Abilitare la federazione di Servizi di comunicazione di Azure risorsa con il tenant di Teams.
- Trovare l'ID utente di Teams.
- Avviare una chiamata con Servizi di comunicazione di Azure Calling SDK.
Ottenere l'ID oggetto utente di Teams
Tutte le informazioni di Teams sono disponibili in Microsoft Graph Explorer usando la posta elettronica nella ricerca.
https://graph.microsoft.com/v1.0/users/user-email@contoso.com
Nei risultati è possibile trovare il campo "ID"
    "userPrincipalName": "user-email@contoso.com",
    "id": "31a011c2-2672-4dd0-b6f9-9334ef4999db"
In alternativa, è possibile trovare lo stesso ID in portale di Azure nella scheda Utenti: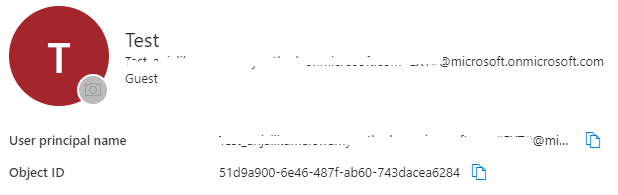
Codice di esempio
Se si vuole passare direttamente alla fine, è possibile scaricare questa guida introduttiva come esempio in GitHub.
Prerequisiti
Aggiungere i controlli dell'interfaccia utente di Teams
Sostituire il codice in index.html con il frammento di codice seguente. La casella di testo viene usata per immettere il contesto della riunione di Teams e il pulsante viene usato per partecipare alla riunione specificata:
<!-- index.html -->
<!DOCTYPE html>
<html>
    <head>
        <title>Azure Communication Services - Calling Web SDK</title>
    </head>
    <body>
        <h4>Azure Communication Services - Calling Web SDK</h4>
        <input id="user-access-token"
            type="text"
            placeholder="User access token"
            style="margin-bottom:1em; width: 500px;"/>
        <button id="initialize-teams-call-agent" type="button">Initialize Call Agent</button>
        <br>
        <br>
        <input id="teams-user-id"
            type="text"
            placeholder="Enter callee's Teams user identity in format: '8:orgid:USER_GUID'"
            style="margin-bottom:1em; width: 500px; display: block;"/>
        <button id="start-call-button" type="button" disabled="true">Start Call</button>
        <button id="hangup-call-button" type="button" disabled="true">Hang up Call</button>
        <button id="accept-call-button" type="button" disabled="true">Accept Call</button>
        <button id="start-video-button" type="button" disabled="true">Start Video</button>
        <button id="stop-video-button" type="button" disabled="true">Stop Video</button>
        <br>
        <br>
        <div id="connectedLabel" style="color: #13bb13;" hidden>Call is connected!</div>
        <br>
        <div id="remoteVideoContainer" style="width: 40%;" hidden>Remote participants' video streams:</div>
        <br>
        <div id="localVideoContainer" style="width: 30%;" hidden>Local video stream:</div>
        <!-- points to the bundle generated from client.js -->
        <script src="./bundle.js"></script>
    </body>
</html>
Abilitare i controlli dell'interfaccia utente di Teams
Sostituire il contenuto di app.js file con il frammento di codice seguente.
// Make sure to install the necessary dependencies
const { CallClient, VideoStreamRenderer, LocalVideoStream } = require('@azure/communication-calling');
const { AzureCommunicationTokenCredential } = require('@azure/communication-common');
const { AzureLogger, setLogLevel } = require("@azure/logger");
// Set the log level and output
setLogLevel('verbose');
AzureLogger.log = (...args) => {
    console.log(...args);
};
// Calling web sdk objects
let callAgent;
let deviceManager;
let call;
let incomingCall;
let localVideoStream;
let localVideoStreamRenderer;
// UI widgets
let userAccessToken = document.getElementById('user-access-token');
let teamsUserId = document.getElementById('teams-user-id');
let initializeCallAgentButton = document.getElementById('initialize-call-agent');
let startCallButton = document.getElementById('start-call-button');
let hangUpCallButton = document.getElementById('hangup-call-button');
let acceptCallButton = document.getElementById('accept-call-button');
let startVideoButton = document.getElementById('start-video-button');
let stopVideoButton = document.getElementById('stop-video-button');
let connectedLabel = document.getElementById('connectedLabel');
let remoteVideoContainer = document.getElementById('remoteVideoContainer');
let localVideoContainer = document.getElementById('localVideoContainer');
/**
 * Create an instance of CallClient. Initialize a CallAgent instance with a AzureCommunicationTokenCredential via created CallClient. CallAgent enables us to make outgoing calls and receive incoming calls.
 * You can then use the CallClient.getDeviceManager() API instance to get the DeviceManager.
 */
initializeCallAgentButton.onclick = async () => {
    try {
        const callClient = new CallClient();
        tokenCredential = new AzureCommunicationTokenCredential(userAccessToken.value.trim());
        callAgent = await callClient.createCallAgent(tokenCredential)
        // Set up a camera device to use.
        deviceManager = await callClient.getDeviceManager();
        await deviceManager.askDevicePermission({ video: true });
        await deviceManager.askDevicePermission({ audio: true });
        // Listen for an incoming call to accept.
        callAgent.on('incomingCall', async (args) => {
            try {
                incomingCall = args.incomingCall;
                acceptCallButton.disabled = false;
                startCallButton.disabled = true;
            } catch (error) {
                console.error(error);
            }
        });
        startCallButton.disabled = false;
        initializeCallAgentButton.disabled = true;
    } catch(error) {
        console.error(error);
    }
}
/**
 * Place a 1:1 outgoing video call to a Teams user
 * Add an event listener to initiate a call when the `startCallButton` is selected.
 * Enumerate local cameras using the deviceManager `getCameraList` API.
 * In this quickstart, we're using the first camera in the collection. Once the desired camera is selected, a
 * LocalVideoStream instance will be constructed and passed within `videoOptions` as an item within the
 * localVideoStream array to the call method. When the call connects, your application will be sending a video stream to the other participant.
 */
startCallButton.onclick = async () => {
    try {
        const localVideoStream = await createLocalVideoStream();
        const videoOptions = localVideoStream ? { localVideoStreams: [localVideoStream] } : undefined;
        call = teamsCallAgent.startCall([{ microsoftTeamsUserId: teamsUserId.value.trim() }], { videoOptions: videoOptions });
        // Subscribe to the call's properties and events.
        subscribeToCall(call);
    } catch (error) {
        console.error(error);
    }
}
/**
 * Accepting an incoming call with a video
 * Add an event listener to accept a call when the `acceptCallButton` is selected.
 * You can accept incoming calls after subscribing to the `CallAgent.on('incomingCall')` event.
 * You can pass the local video stream to accept the call with the following code.
 */
acceptCallButton.onclick = async () => {
    try {
        const localVideoStream = await createLocalVideoStream();
        const videoOptions = localVideoStream ? { localVideoStreams: [localVideoStream] } : undefined;
        call = await incomingCall.accept({ videoOptions });
        // Subscribe to the call's properties and events.
        subscribeToCall(call);
    } catch (error) {
        console.error(error);
    }
}
// Subscribe to a call obj.
// Listen for property changes and collection updates.
subscribeToCall = (call) => {
    try {
        // Inspect the initial call.id value.
        console.log(`Call Id: ${call.id}`);
        //Subscribe to call's 'idChanged' event for value changes.
        call.on('idChanged', () => {
            console.log(`Call ID changed: ${call.id}`);
        });
        // Inspect the initial call.state value.
        console.log(`Call state: ${call.state}`);
        // Subscribe to call's 'stateChanged' event for value changes.
        call.on('stateChanged', async () => {
            console.log(`Call state changed: ${call.state}`);
            if(call.state === 'Connected') {
                connectedLabel.hidden = false;
                acceptCallButton.disabled = true;
                startCallButton.disabled = true;
                hangUpCallButton.disabled = false;
                startVideoButton.disabled = false;
                stopVideoButton.disabled = false;
            } else if (call.state === 'Disconnected') {
                connectedLabel.hidden = true;
                startCallButton.disabled = false;
                hangUpCallButton.disabled = true;
                startVideoButton.disabled = true;
                stopVideoButton.disabled = true;
                console.log(`Call ended, call end reason={code=${call.callEndReason.code}, subCode=${call.callEndReason.subCode}}`);
            }
        });

        call.on('isLocalVideoStartedChanged', () => {
            console.log(`isLocalVideoStarted changed: ${call.isLocalVideoStarted}`);
        });
        console.log(`isLocalVideoStarted: ${call.isLocalVideoStarted}`);
        call.localVideoStreams.forEach(async (lvs) => {
            localVideoStream = lvs;
            await displayLocalVideoStream();
        });
        call.on('localVideoStreamsUpdated', e => {
            e.added.forEach(async (lvs) => {
                localVideoStream = lvs;
                await displayLocalVideoStream();
            });
            e.removed.forEach(lvs => {
               removeLocalVideoStream();
            });
        });

        // Inspect the call's current remote participants and subscribe to them.
        call.remoteParticipants.forEach(remoteParticipant => {
            subscribeToRemoteParticipant(remoteParticipant);
        });
        // Subscribe to the call's 'remoteParticipantsUpdated' event to be
        // notified when new participants are added to the call or removed from the call.
        call.on('remoteParticipantsUpdated', e => {
            // Subscribe to new remote participants that are added to the call.
            e.added.forEach(remoteParticipant => {
                subscribeToRemoteParticipant(remoteParticipant)
            });
            // Unsubscribe from participants that are removed from the call
            e.removed.forEach(remoteParticipant => {
                console.log('Remote participant removed from the call.');
            });
        });
    } catch (error) {
        console.error(error);
    }
}
// Subscribe to a remote participant obj.
// Listen for property changes and collection updates.
subscribeToRemoteParticipant = (remoteParticipant) => {
    try {
        // Inspect the initial remoteParticipant.state value.
        console.log(`Remote participant state: ${remoteParticipant.state}`);
        // Subscribe to remoteParticipant's 'stateChanged' event for value changes.
        remoteParticipant.on('stateChanged', () => {
            console.log(`Remote participant state changed: ${remoteParticipant.state}`);
        });
        // Inspect the remoteParticipants's current videoStreams and subscribe to them.
        remoteParticipant.videoStreams.forEach(remoteVideoStream => {
            subscribeToRemoteVideoStream(remoteVideoStream)
        });
        // Subscribe to the remoteParticipant's 'videoStreamsUpdated' event to be
        // notified when the remoteParticipant adds new videoStreams and removes video streams.
        remoteParticipant.on('videoStreamsUpdated', e => {
            // Subscribe to newly added remote participant's video streams.
            e.added.forEach(remoteVideoStream => {
                subscribeToRemoteVideoStream(remoteVideoStream)
            });
            // Unsubscribe from newly removed remote participants' video streams.
            e.removed.forEach(remoteVideoStream => {
                console.log('Remote participant video stream was removed.');
            })
        });
    } catch (error) {
        console.error(error);
    }
}
/**
 * Subscribe to a remote participant's remote video stream obj.
 * You have to subscribe to the 'isAvailableChanged' event to render the remoteVideoStream. If the 'isAvailable' property
 * changes to 'true' a remote participant is sending a stream. Whenever the availability of a remote stream changes
 * you can choose to destroy the whole 'Renderer' a specific 'RendererView' or keep them. Displaying RendererView without a video stream will result in a blank video frame.
 */
subscribeToRemoteVideoStream = async (remoteVideoStream) => {
    // Create a video stream renderer for the remote video stream.
    let videoStreamRenderer = new VideoStreamRenderer(remoteVideoStream);
    let view;
    const renderVideo = async () => {
        try {
            // Create a renderer view for the remote video stream.
            view = await videoStreamRenderer.createView();
            // Attach the renderer view to the UI.
            remoteVideoContainer.hidden = false;
            remoteVideoContainer.appendChild(view.target);
        } catch (e) {
            console.warn(`Failed to createView, reason=${e.message}, code=${e.code}`);
        }
    }

    remoteVideoStream.on('isAvailableChanged', async () => {
        // Participant has switched video on.
        if (remoteVideoStream.isAvailable) {
            await renderVideo();
        // Participant has switched video off.
        } else {
            if (view) {
                view.dispose();
                view = undefined;
            }
        }
    });
    // Participant has video on initially.
    if (remoteVideoStream.isAvailable) {
        await renderVideo();
    }
}
// Start your local video stream.
// This will send your local video stream to remote participants so they can view it.
startVideoButton.onclick = async () => {
    try {
        const localVideoStream = await createLocalVideoStream();
        await call.startVideo(localVideoStream);
    } catch (error) {
        console.error(error);
    }
}
// Stop your local video stream.
// This will stop your local video stream from being sent to remote participants.
stopVideoButton.onclick = async () => {
    try {
        await call.stopVideo(localVideoStream);
    } catch (error) {
        console.error(error);
    }
}
/**
 * To render a LocalVideoStream, you need to create a new instance of VideoStreamRenderer, and then
 * create a new VideoStreamRendererView instance using the asynchronous createView() method.
 * You may then attach view.target to any UI element.
 */
// Create a local video stream for your camera device
createLocalVideoStream = async () => {
    const camera = (await deviceManager.getCameras())[0];
    if (camera) {
        return new LocalVideoStream(camera);
    } else {
        console.error(`No camera device found on the system`);
    }
}
// Display your local video stream preview in your UI
displayLocalVideoStream = async () => {
    try {
        localVideoStreamRenderer = new VideoStreamRenderer(localVideoStream);
        const view = await localVideoStreamRenderer.createView();
        localVideoContainer.hidden = false;
        localVideoContainer.appendChild(view.target);
    } catch (error) {
        console.error(error);
    }
}
// Remove your local video stream preview from your UI
removeLocalVideoStream = async() => {
    try {
        localVideoStreamRenderer.dispose();
        localVideoContainer.hidden = true;
    } catch (error) {
        console.error(error);
    }
}
// End the current call
hangUpCallButton.addEventListener("click", async () => {
    // end the current call
    await call.hangUp();
});
Eseguire il codice
Eseguire il comando seguente per aggregare l'host dell'applicazione in un server Web locale:
npx webpack serve --config webpack.config.js
Passaggi manuali per configurare la chiamata:
- Aprire il browser e passare a http://localhost:8080/.
- Immettere un token di accesso utente valido. Se non è disponibile un token, vedere la documentazione dei token di accesso utente.
- Fare clic sui pulsanti "Inizializza agente di chiamata".
- Immettere l'ID oggetto utente di Teams e selezionare il pulsante "Avvia chiamata". L'applicazione avvierà la chiamata in uscita con un ID oggetto specificato.
Prerequisiti
- Un'app di Servizi di comunicazione funzionante che chiama Windows.
- Una distribuzione di Teams.
Aggiungere i controlli dell'interfaccia utente di Teams e Abilitare i controlli dell'interfaccia utente di Teams
Sostituire il codice in MainPage.xaml con il frammento di codice seguente. La casella di testo verrà usata per accedere al contesto della riunione di Teams e il pulsante per partecipare alla riunione specificata:
Configurare il framework dell'app
È necessario configurare un layout di base per collegare la logica. Per effettuare una chiamata in uscita, è necessario un TextBox per fornire l'ID utente del chiamato. È anche necessario un pulsante Start/Join Call e un pulsante Hang up.
È anche necessario visualizzare in anteprima il video locale ed eseguire il rendering del video remoto dell'altro partecipante. Sono quindi necessari due elementi per visualizzare i flussi video.
Aprire il MainPage.xaml del progetto e sostituire il contenuto con l'implementazione seguente.
<Page
    x:Class="CallingQuickstart.MainPage"
    xmlns="http://schemas.microsoft.com/winfx/2006/xaml/presentation"
    xmlns:x="http://schemas.microsoft.com/winfx/2006/xaml"
    xmlns:local="using:CallingQuickstart"
    xmlns:d="http://schemas.microsoft.com/expression/blend/2008"
    xmlns:mc="http://schemas.openxmlformats.org/markup-compatibility/2006"
    mc:Ignorable="d"
    Background="{ThemeResource ApplicationPageBackgroundThemeBrush}" Width="800" Height="600">

    <Grid>
        <Grid.RowDefinitions>
            <RowDefinition Height="16*"/>
            <RowDefinition Height="30*"/>
            <RowDefinition Height="200*"/>
            <RowDefinition Height="60*"/>
            <RowDefinition Height="16*"/>
        </Grid.RowDefinitions>
        <TextBox Grid.Row="1" x:Name="CalleeTextBox" PlaceholderText="Who would you like to call?" TextWrapping="Wrap" VerticalAlignment="Center" Height="30" Margin="10,10,10,10" />

        <Grid x:Name="AppTitleBar" Background="LightSeaGreen">
            <!-- Width of the padding columns is set in LayoutMetricsChanged handler. -->
            <!-- Using padding columns instead of Margin ensures that the background paints the area under the caption control buttons (for transparent buttons). -->
            <TextBlock x:Name="QuickstartTitle" Text="Calling Quickstart sample title bar" Style="{StaticResource CaptionTextBlockStyle}" Padding="7,7,0,0"/>
        </Grid>

        <Grid Grid.Row="2">
            <Grid.RowDefinitions>
                <RowDefinition/>
            </Grid.RowDefinitions>
            <Grid.ColumnDefinitions>
                <ColumnDefinition Width="*"/>
                <ColumnDefinition Width="*"/>
            </Grid.ColumnDefinitions>
            <MediaPlayerElement x:Name="LocalVideo" HorizontalAlignment="Center" Stretch="UniformToFill" Grid.Column="0" VerticalAlignment="Center" AutoPlay="True" />
            <MediaPlayerElement x:Name="RemoteVideo" HorizontalAlignment="Center" Stretch="UniformToFill" Grid.Column="1" VerticalAlignment="Center" AutoPlay="True" />
        </Grid>
        <StackPanel Grid.Row="3" Orientation="Vertical" Grid.RowSpan="2">
            <StackPanel Orientation="Horizontal">
                <Button x:Name="CallButton" Content="Start/Join call" Click="CallButton_Click" VerticalAlignment="Center" Margin="10,0,0,0" Height="40" Width="123"/>
                <Button x:Name="HangupButton" Content="Hang up" Click="HangupButton_Click" VerticalAlignment="Center" Margin="10,0,0,0" Height="40" Width="123"/>
            </StackPanel>
        </StackPanel>
        <TextBox Grid.Row="5" x:Name="Stats" Text="" TextWrapping="Wrap" VerticalAlignment="Center" Height="30" Margin="0,2,0,0" BorderThickness="2" IsReadOnly="True" Foreground="LightSlateGray" />
    </Grid>
</Page>
Aprire il MainPage.xaml.cs (fare clic con il pulsante destro del mouse e scegliere Visualizza codice) e sostituire il contenuto con l'implementazione seguente:
using Azure.Communication.Calling.WindowsClient;
using System;
using System.Collections.Generic;
using System.ComponentModel;
using System.Linq;
using System.Threading.Tasks;
using Windows.ApplicationModel;
using Windows.ApplicationModel.Core;
using Windows.Media.Core;
using Windows.Networking.PushNotifications;
using Windows.UI;
using Windows.UI.ViewManagement;
using Windows.UI.Xaml;
using Windows.UI.Xaml.Controls;
using Windows.UI.Xaml.Media;
using Windows.UI.Xaml.Navigation;

namespace CallingQuickstart
{
    public sealed partial class MainPage : Page
    {
        private const string authToken = "<AUTHENTICATION_TOKEN>";

        private CallClient callClient;
        private CallTokenRefreshOptions callTokenRefreshOptions = new CallTokenRefreshOptions(false);
        private CallAgent callAgent;
        private CommunicationCall call;

        private LocalOutgoingVideoStream cameraStream;

        #region Page initialization
        public MainPage()
        {
            this.InitializeComponent();
            // Additional UI customization code goes here
        }

        protected override async void OnNavigatedTo(NavigationEventArgs e)
        {
            base.OnNavigatedTo(e);
        }
        #endregion

        #region UI event handlers
        private async void CallButton_Click(object sender, RoutedEventArgs e)
        {
            // Start a call
        }

        private async void HangupButton_Click(object sender, RoutedEventArgs e)
        {
            // Hang up a call
        }
        #endregion

        #region API event handlers
        private async void OnIncomingCallAsync(object sender, IncomingCallReceivedEventArgs args)
        {
            // Handle incoming call event
        }

        private async void OnStateChangedAsync(object sender, PropertyChangedEventArgs args)
        {
            // Handle connected and disconnected state change of a call
        }

        private async void OnRemoteParticipantsUpdatedAsync(object sender, ParticipantsUpdatedEventArgs args)
        {
            // Handle remote participant arrival or departure events and subscribe to individual participant's VideoStreamStateChanged event
        }

        private void OnVideoStreamStateChanged(object sender, VideoStreamStateChangedEventArgs e)
        {
            // Handle incoming or outgoing video stream change events
        }

        private async void OnIncomingVideoStreamStateChangedAsync(IncomingVideoStream incomingVideoStream)
        {
            // Handle incoming IncomingVideoStreamStateChanged event and process individual VideoStreamState
        }
        #endregion
    }
}
Avviare l'app e partecipare alla riunione di Teams
È possibile compilare ed eseguire l'app in Visual Studio selezionando Debug>Avvia debug oppure usando il tasto di scelta rapida (F5).
Inserire il contesto di Teams nella casella di testo e premere il pulsante Partecipa alla riunione di Teams per partecipare alla riunione di Teams dall'interno dell'applicazione di Servizi di comunicazione.
Codice di esempio
Trovare il codice finalizzato per questa guida introduttiva in GitHub.
Prerequisiti
- Un'app Android che chiama Servizi di comunicazione funzionante.
- Una distribuzione di Teams.
Aggiungere i controlli dell'interfaccia utente di Teams
Sostituire il codice in activity_main.xml con il frammento di codice seguente. La casella di testo verrà usata per accedere al contesto della riunione di Teams e il pulsante per partecipare alla riunione specificata:
<?xml version="1.0" encoding="utf-8"?>
<androidx.constraintlayout.widget.ConstraintLayout xmlns:android="http://schemas.android.com/apk/res/android"
    xmlns:app="http://schemas.android.com/apk/res-auto"
    xmlns:tools="http://schemas.android.com/tools"
    android:layout_width="match_parent"
    android:layout_height="match_parent"
    tools:context=".MainActivity">

    <EditText
        android:id="@+id/callee_id"
        android:layout_width="match_parent"
        android:layout_height="wrap_content"
        android:ems="10"
        android:hint="Callee Id"
        android:inputType="textPersonName"
        android:layout_marginTop="100dp"
        android:layout_marginHorizontal="20dp"
        app:layout_constraintEnd_toEndOf="parent"
        app:layout_constraintStart_toStartOf="parent"
        app:layout_constraintTop_toTopOf="parent" />

    <LinearLayout
        android:layout_width="match_parent"
        android:layout_height="wrap_content"
        android:layout_marginBottom="46dp"
        android:gravity="center"
        app:layout_constraintBottom_toBottomOf="parent"
        app:layout_constraintEnd_toEndOf="parent"
        app:layout_constraintStart_toStartOf="parent">

        <Button
            android:id="@+id/call_button"
            android:layout_width="wrap_content"
            android:layout_height="wrap_content"
            android:text="Call" />

        <Button
            android:id="@+id/hangup_button"
            android:layout_width="wrap_content"
            android:layout_height="wrap_content"
            android:text="Hangup" />

    </LinearLayout>

    <TextView
        android:id="@+id/status_bar"
        android:layout_width="wrap_content"
        android:layout_height="wrap_content"
        android:layout_marginBottom="16dp"
        app:layout_constraintBottom_toBottomOf="parent"
        app:layout_constraintEnd_toEndOf="parent"
        app:layout_constraintStart_toStartOf="parent" />
</androidx.constraintlayout.widget.ConstraintLayout>
Abilitare i controlli dell'interfaccia utente di Teams
Sostituire il contenuto di MainActivity.java con il frammento di codice seguente:
package com.contoso.acsquickstart;

import androidx.annotation.NonNull;
import androidx.appcompat.app.AppCompatActivity;
import androidx.core.app.ActivityCompat;

import android.Manifest;
import android.content.pm.PackageManager;
import android.media.AudioManager;
import android.os.Bundle;
import android.widget.Button;
import android.widget.EditText;
import android.widget.TextView;
import android.widget.Toast;

import java.util.ArrayList;
import java.util.concurrent.ExecutionException;

import com.azure.android.communication.common.CommunicationIdentifier;
import com.azure.android.communication.common.CommunicationUserIdentifier;
import com.azure.android.communication.calling.Call;
import com.azure.android.communication.calling.CallAgent;
import com.azure.android.communication.calling.CallClient;
import com.azure.android.communication.calling.HangUpOptions;
import com.azure.android.communication.common.CommunicationTokenCredential;
import com.azure.android.communication.calling.StartCallOptions;

public class MainActivity extends AppCompatActivity {
    private static final String[] allPermissions = new String[] { Manifest.permission.RECORD_AUDIO, Manifest.permission.CAMERA, Manifest.permission.WRITE_EXTERNAL_STORAGE, Manifest.permission.READ_PHONE_STATE };
    private static final String UserToken = "<User_Access_Token>";

    TextView statusBar;

    private CallAgent agent;
    private Call call;

    @Override
    protected void onCreate(Bundle savedInstanceState) {
        super.onCreate(savedInstanceState);
        setContentView(R.layout.activity_main);

        getAllPermissions();
        createAgent();

        Button callButton = findViewById(R.id.call_button);
        callButton.setOnClickListener(l -> startCall());

        Button hangupButton = findViewById(R.id.hangup_button);
        hangupButton.setOnClickListener(l -> endCall());

        statusBar = findViewById(R.id.status_bar);

        setVolumeControlStream(AudioManager.STREAM_VOICE_CALL);
    }

    /**
     * Start a call
     */
    private void startCall() {
        if (UserToken.startsWith("<")) {
            Toast.makeText(this, "Please enter token in source code", Toast.LENGTH_SHORT).show();
            return;
        }

        EditText calleeIdView = findViewById(R.id.callee_id);
        String calleeId = calleeIdView.getText().toString();
        if (calleeId.isEmpty()) {
            Toast.makeText(this, "Please enter callee", Toast.LENGTH_SHORT).show();
            return;
        }
        ArrayList<CommunicationIdentifier> participants = new ArrayList<>();
        participants.add(new CommunicationUserIdentifier(calleeId));
        StartCallOptions options = new StartCallOptions();
        call = agent.startCall(
                getApplicationContext(),
                participants,
                options);
        call.addOnStateChangedListener(p -> setStatus(call.getState().toString()));
    }

    /**
     * Ends the call previously started
     */
    private void endCall() {
        try {
            call.hangUp(new HangUpOptions()).get();
        } catch (ExecutionException | InterruptedException e) {
            Toast.makeText(this, "Unable to hang up call", Toast.LENGTH_SHORT).show();
        }
    }

    /**
     * Create the call agent
     */
    private void createAgent() {
        try {
            CommunicationTokenCredential credential = new CommunicationTokenCredential(UserToken);
            agent = new CallClient().createCallAgent(getApplicationContext(), credential).get();
        } catch (Exception ex) {
            Toast.makeText(getApplicationContext(), "Failed to create call agent.", Toast.LENGTH_SHORT).show();
        }
    }

    /**
     * Request each required permission if the app doesn't already have it.
     */
    private void getAllPermissions() {
        ArrayList<String> permissionsToAskFor = new ArrayList<>();
        for (String permission : allPermissions) {
            if (ActivityCompat.checkSelfPermission(this, permission) != PackageManager.PERMISSION_GRANTED) {
                permissionsToAskFor.add(permission);
            }
        }
        if (!permissionsToAskFor.isEmpty()) {
            ActivityCompat.requestPermissions(this, permissionsToAskFor.toArray(new String[0]), 1);
        }
    }

    /**
     * Ensure all permissions were granted, otherwise inform the user permissions are missing.
     */
    @Override
    public void onRequestPermissionsResult(int requestCode, @NonNull String[] permissions, int[] grantResults) {
        boolean allPermissionsGranted = true;
        for (int result : grantResults) {
            allPermissionsGranted &= (result == PackageManager.PERMISSION_GRANTED);
        }
        if (!allPermissionsGranted) {
            Toast.makeText(this, "All permissions are needed to make the call.", Toast.LENGTH_LONG).show();
            finish();
        }
    }

    /**
     * Shows message in the status bar
     */
    private void setStatus(String status) {
        runOnUiThread(() -> statusBar.setText(status));
    }
}
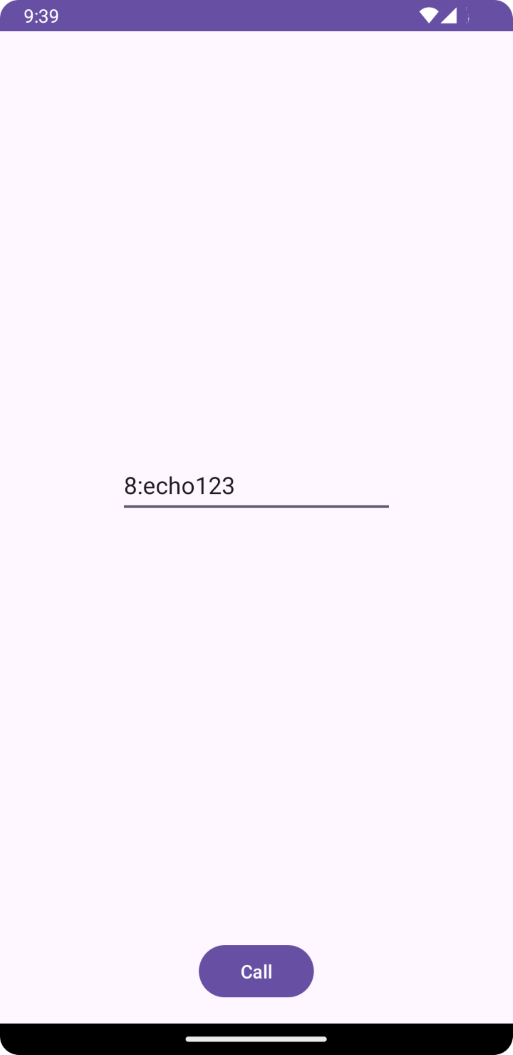
Avviare l'app e partecipare alla riunione di Teams
È ora possibile avviare l'app usando il pulsante "Run App" (Esegui app) sulla barra degli strumenti (MAIUSC+F10). Verificare che sia possibile effettuare chiamate chiamando 8:echo123. Verrà riprodotto un messaggio preregistrato che ripete il messaggio inviato.
Prerequisiti
- Un'app di Servizi di comunicazione funzionante che chiama l'app iOS.
- Una distribuzione di Teams.
Per questa guida introduttiva si userà la versione beta.12 di AzureCommunicationCalling SDK, quindi è necessario aggiornare il podfile e installare di nuovo i pod.
Sostituire il podfile con il codice seguente nel podfile e salvare (assicurarsi che "target" corrisponda al nome del progetto):
platform :ios, '13.0'
use_frameworks!

target 'AzureCommunicationCallingSample' do
  pod 'AzureCommunicationCalling', '1.0.0-beta.12'
end
Eliminare la cartella Pods, Podfile.lock e il .xcworkspace. file.
Eseguire pod install e aprire .xcworkspace con Xcode.
Richiedere l'accesso al microfono e alla fotocamera
Per accedere al microfono e alla fotocamera del dispositivo, è necessario aggiornare l'elenco delle proprietà delle informazioni dell'app con un NSMicrophoneUsageDescription e NSCameraUsageDescription. Impostare il valore associato su una stringa inclusa nella finestra di dialogo usata dal sistema per richiedere l'accesso all'utente.
Fare clic con il pulsante destro del mouse sulla voce Info.plist dell'albero del progetto e selezionare Apri come > Codice sorgente. Aggiungere le righe seguenti nella sezione <dict> di primo livello e quindi salvare il file.
<key>NSMicrophoneUsageDescription</key>
<string>Need microphone access for VOIP calling.</string>
<key>NSCameraUsageDescription</key>
<string>Need camera access for video calling</string>
Configurare il framework dell'app
Aprire il file ContentView.swift del progetto e aggiungere una dichiarazione di importazione all'inizio del file per importare la libreria AzureCommunicationCalling e AVFoundation. AVFoundation viene usato per acquisire l'autorizzazione audio dal codice.
import AzureCommunicationCalling
import AVFoundation
Modello a oggetti
Le classi e le interfacce seguenti gestiscono alcune delle principali funzionalità del SDK Chiamate di Servizi di comunicazione di Azure per iOS.
| Nome | Descrizione |
|---|---|
CallClient |
CallClient è il punto di ingresso principale di Calling SDK. |
CallAgent |
CallAgent viene usato per avviare e gestire le chiamate. |
CommunicationTokenCredential |
CommunicationTokenCredential viene usato come credenziale del token per creare un'istanza di CallAgent. |
CommunicationIdentifier |
CommunicationIdentifier viene usato per rappresentare l'identità dell'utente, che può essere una delle opzioni seguenti: CommunicationUserIdentifier, PhoneNumberIdentifier o CallingApplication. |
Creare l'agente di chiamata
Sostituire l'implementazione del ContentView struct con alcuni semplici controlli dell'interfaccia utente che consentano a un utente di avviare e terminare una chiamata. In questa guida di avvio rapido viene aggiunta logica di business a questi controlli.
struct ContentView: View {
    @State var callee: String = ""
    @State var callClient: CallClient?
    @State var callAgent: CallAgent?
    @State var call: Call?
    @State var deviceManager: DeviceManager?
    @State var localVideoStream:[LocalVideoStream]?
    @State var incomingCall: IncomingCall?
    @State var sendingVideo:Bool = false
    @State var errorMessage:String = "Unknown"

    @State var remoteVideoStreamData:[Int32:RemoteVideoStreamData] = [:]
    @State var previewRenderer:VideoStreamRenderer? = nil
    @State var previewView:RendererView? = nil
    @State var remoteRenderer:VideoStreamRenderer? = nil
    @State var remoteViews:[RendererView] = []
    @State var remoteParticipant: RemoteParticipant?
    @State var remoteVideoSize:String = "Unknown"
    @State var isIncomingCall:Bool = false

    @State var callObserver:CallObserver?
    @State var remoteParticipantObserver:RemoteParticipantObserver?

    var body: some View {
        NavigationView {
            ZStack{
                Form {
                    Section {
                        TextField("Who would you like to call?", text: $callee)
                        Button(action: startCall) {
                            Text("Start Call")
                        }.disabled(callAgent == nil)
                        Button(action: endCall) {
                            Text("End Call")
                        }.disabled(call == nil)
                        Button(action: toggleLocalVideo) {
                            HStack {
                                Text(sendingVideo ? "Turn Off Video" : "Turn On Video")
                            }
                        }
                    }
                }
                // Show incoming call banner
                if (isIncomingCall) {
                    HStack() {
                        VStack {
                            Text("Incoming call")
                                .padding(10)
                                .frame(maxWidth: .infinity, alignment: .topLeading)
                        }
                        Button(action: answerIncomingCall) {
                            HStack {
                                Text("Answer")
                            }
                            .frame(width:80)
                            .padding(.vertical, 10)
                            .background(Color(.green))
                        }
                        Button(action: declineIncomingCall) {
                            HStack {
                                Text("Decline")
                            }
                            .frame(width:80)
                            .padding(.vertical, 10)
                            .background(Color(.red))
                        }
                    }
                    .frame(maxWidth: .infinity, alignment: .topLeading)
                    .padding(10)
                    .background(Color.gray)
                }
                ZStack{
                    VStack{
                        ForEach(remoteViews, id:\.self) { renderer in
                            ZStack{
                                VStack{
                                    RemoteVideoView(view: renderer)
                                        .frame(width: .infinity, height: .infinity)
                                        .background(Color(.lightGray))
                                }
                            }
                            Button(action: endCall) {
                                Text("End Call")
                            }.disabled(call == nil)
                            Button(action: toggleLocalVideo) {
                                HStack {
                                    Text(sendingVideo ? "Turn Off Video" : "Turn On Video")
                                }
                            }
                        }

                    }.frame(maxWidth: .infinity, maxHeight: .infinity, alignment: .topLeading)
                    VStack{
                        if(sendingVideo)
                        {
                            VStack{
                                PreviewVideoStream(view: previewView!)
                                    .frame(width: 135, height: 240)
                                    .background(Color(.lightGray))
                            }
                        }
                    }.frame(maxWidth:.infinity, maxHeight:.infinity,alignment: .bottomTrailing)
                }
            }
     .navigationBarTitle("Video Calling Quickstart")
        }.onAppear{
            // Authenticate the client

            // Initialize the CallAgent and access Device Manager

            // Ask for permissions
        }
    }
}

//Functions and Observers

struct PreviewVideoStream: UIViewRepresentable {
    let view:RendererView
    func makeUIView(context: Context) -> UIView {
        return view
    }
    func updateUIView(_ uiView: UIView, context: Context) {}
}

struct RemoteVideoView: UIViewRepresentable {
    let view:RendererView
    func makeUIView(context: Context) -> UIView {
        return view
    }
    func updateUIView(_ uiView: UIView, context: Context) {}
}

struct ContentView_Previews: PreviewProvider {
    static var previews: some View {
        ContentView()
    }
}
Eseguire il codice
È possibile creare ed eseguire un'app nel simulatore iOS selezionando Prodotto >Esegui, o premendo i tasti di scelta rapida (⌘-R).
Pulire le risorse
Se si vuole pulire e rimuovere una sottoscrizione a Servizi di comunicazione, è possibile eliminare la risorsa o il gruppo di risorse. L'eliminazione del gruppo di risorse comporta anche l'eliminazione di tutte le altre risorse associate. Altre informazioni sulla pulizia delle risorse.
Passaggi successivi
Per altre informazioni, vedere gli articoli seguenti:
- Consultare l'esempio hero per le chiamate
- Introduzione alla libreria dell'interfaccia utente
- Informazioni sulle funzionalità di Calling SDK
- Leggere altre informazioni sul funzionamento delle chiamate