チュートリアル:Azure CLI を使用して URL パスベースのリダイレクトのあるアプリケーション ゲートウェイを作成する
アプリケーション ゲートウェイを作成するときに、Azure CLI を使用して URL パス ベースのルーティング規則を構成できます。 このチュートリアルでは、仮想マシン スケール セットを使用してバックエンド プールを作成します。 次に、Web トラフィックが適切なバックエンド プールにリダイレクトされるようにする URL ルーティング規則を作成します。
このチュートリアルでは、以下の内容を学習します。
- ネットワークのセットアップ
- アプリケーション ゲートウェイの作成
- リスナーとルーティング規則の追加
- バックエンド プールの仮想マシン スケール セットの作成
次の例は、ポート 8080 と 8081 の両方から送信されてきており、同じバックエンド プールに転送されているサイト トラフィックを示します。

必要に応じて、Azure PowerShell を使ってこのチュートリアルの手順を完了できます。
Azure サブスクリプションをお持ちでない場合は、開始する前に Azure 無料アカウントを作成してください。
前提条件
Azure Cloud Shell で Bash 環境を使用します。 詳細については、「Azure Cloud Shell の Bash のクイックスタート」を参照してください。

CLI リファレンス コマンドをローカルで実行する場合、Azure CLI をインストールします。 Windows または macOS で実行している場合は、Docker コンテナーで Azure CLI を実行することを検討してください。 詳細については、「Docker コンテナーで Azure CLI を実行する方法」を参照してください。
ローカル インストールを使用する場合は、az login コマンドを使用して Azure CLI にサインインします。 認証プロセスを完了するには、ターミナルに表示される手順に従います。 その他のサインイン オプションについては、Azure CLI でのサインインに関するページを参照してください。
初回使用時にインストールを求められたら、Azure CLI 拡張機能をインストールします。 拡張機能の詳細については、Azure CLI で拡張機能を使用する方法に関するページを参照してください。
az version を実行し、インストールされているバージョンおよび依存ライブラリを検索します。 最新バージョンにアップグレードするには、az upgrade を実行します。
- このチュートリアルには、Azure CLI のバージョン 2.0.4 以降が必要です。 Azure Cloud Shell を使用している場合は、最新バージョンが既にインストールされています。
リソース グループを作成する
リソース グループとは、Azure リソースのデプロイと管理に使用する論理コンテナーです。 az group create を使用してリソース グループを作成します。
次の例では、myResourceGroupAG という名前のリソース グループを eastus に作成します。
az group create --name myResourceGroupAG --location eastus
ネットワーク リソースを作成する
az network vnet create を使用して、myVNet という名前の仮想ネットワークと myAGSubnet という名前のサブネットを作成します。 次に、az network vnet subnet create を使用して、バックエンド サーバーに必要な myBackendSubnet という名前のサブネットを追加できます。 az network public-ip create を使用して myAGPublicIPAddress という名前のパブリック IP アドレスを作成します。
az network vnet create \
  --name myVNet \
  --resource-group myResourceGroupAG \
  --location eastus \
  --address-prefix 10.0.0.0/16 \
  --subnet-name myAGSubnet \
  --subnet-prefix 10.0.1.0/24

az network vnet subnet create \
  --name myBackendSubnet \
  --resource-group myResourceGroupAG \
  --vnet-name myVNet \
  --address-prefix 10.0.2.0/24

az network public-ip create \
  --resource-group myResourceGroupAG \
  --name myAGPublicIPAddress \
  --allocation-method Static \
  --sku Standard
アプリケーション ゲートウェイを作成する
az network application-gateway create を使用して、myAppGateway という名前のアプリケーション ゲートウェイを作成します。 Azure CLI を使用してアプリケーション ゲートウェイを作成するときは、容量、SKU、HTTP 設定などの構成情報を指定します。 このアプリケーション ゲートウェイを、先ほど作成した myAGSubnet と myPublicIPAddress に割り当てます。
az network application-gateway create \
  --name myAppGateway \
  --location eastus \
  --resource-group myResourceGroupAG \
  --vnet-name myVNet \
  --subnet myAGsubnet \
  --capacity 2 \
  --sku Standard_v2 \
  --http-settings-cookie-based-affinity Disabled \
  --frontend-port 80 \
  --http-settings-port 80 \
  --http-settings-protocol Http \
  --public-ip-address myAGPublicIPAddress \
  --priority 100
アプリケーション ゲートウェイの作成には数分かかる場合があります。 アプリケーション ゲートウェイを作成すると、新たに次の機能が確認できます。
- appGatewayBackendPool - アプリケーション ゲートウェイには、少なくとも 1 つのバックエンド アドレス プールが必要です。
- appGatewayBackendHttpSettings - 通信に使用するポート 80 と HTTP プロトコルを指定します。
- appGatewayHttpListener - appGatewayBackendPool に関連付けられている既定のリスナー。
- appGatewayFrontendIP -myAGPublicIPAddress を appGatewayHttpListener に割り当てます。
- rule1 - appGatewayHttpListener に関連付けられている既定のルーティング規則。
バックエンド プールとポートの追加
imagesBackendPool および videoBackendPool という名前のバックエンド アドレス プールをアプリケーション ゲートウェイに追加するには、az network application-gateway address-pool create を使用します。 プールのフロントエンド ポートは、az network application-gateway frontend-port create を使用して追加します。
az network application-gateway address-pool create \
  --gateway-name myAppGateway \
  --resource-group myResourceGroupAG \
  --name imagesBackendPool

az network application-gateway address-pool create \
  --gateway-name myAppGateway \
  --resource-group myResourceGroupAG \
  --name videoBackendPool

az network application-gateway frontend-port create \
  --port 8080 \
  --gateway-name myAppGateway \
  --resource-group myResourceGroupAG \
  --name bport

az network application-gateway frontend-port create \
  --port 8081 \
  --gateway-name myAppGateway \
  --resource-group myResourceGroupAG \
  --name rport
リスナーと規則の追加
リスナーの追加
az network application-gateway http-listener create を使用して、トラフィックのルーティングに必要な backendListener と redirectedListener という名前のバックエンド リスナーを追加します。
az network application-gateway http-listener create \
  --name backendListener \
  --frontend-ip appGatewayFrontendIP \
  --frontend-port bport \
  --resource-group myResourceGroupAG \
  --gateway-name myAppGateway

az network application-gateway http-listener create \
  --name redirectedListener \
  --frontend-ip appGatewayFrontendIP \
  --frontend-port rport \
  --resource-group myResourceGroupAG \
  --gateway-name myAppGateway
既定の URL パス マップを追加する
URL パス マップにより、特定の URL が特定のバックエンド プールに確実にルーティングされます。 az network application-gateway url-path-map create と az network application-gateway url-path-map rule create を使用して、imagePathRule および videoPathRule という名前の URI パス マップを作成します。
az network application-gateway url-path-map create \
  --gateway-name myAppGateway \
  --name urlpathmap \
  --paths /images/* \
  --resource-group myResourceGroupAG \
  --address-pool imagesBackendPool \
  --default-address-pool appGatewayBackendPool \
  --default-http-settings appGatewayBackendHttpSettings \
  --http-settings appGatewayBackendHttpSettings \
  --rule-name imagePathRule

az network application-gateway url-path-map rule create \
  --gateway-name myAppGateway \
  --name videoPathRule \
  --resource-group myResourceGroupAG \
  --path-map-name urlpathmap \
  --paths /video/* \
  --address-pool videoBackendPool
リダイレクト構成を追加する
az network application-gateway redirect-config create を使用して、リスナーのリダイレクトを構成できます。
az network application-gateway redirect-config create \
  --gateway-name myAppGateway \
  --name redirectConfig \
  --resource-group myResourceGroupAG \
  --type Found \
  --include-path true \
  --include-query-string true \
  --target-listener backendListener
リダイレクト URL パス マップを追加する
az network application-gateway url-path-map create \
  --gateway-name myAppGateway \
  --name redirectpathmap \
  --paths /images/* \
  --resource-group myResourceGroupAG \
  --redirect-config redirectConfig \
  --rule-name redirectPathRule
ルーティング規則の追加
ルーティング規則によって、URL パス マップが作成したリスナーに関連付けられます。 az network application-gateway rule create を使用して、defaultRule と redirectedRule という名前の規則を追加することができます。
az network application-gateway rule create \
  --gateway-name myAppGateway \
  --name defaultRule \
  --resource-group myResourceGroupAG \
  --http-listener backendListener \
  --rule-type PathBasedRouting \
  --url-path-map urlpathmap \
  --address-pool appGatewayBackendPool \
  --priority 100

az network application-gateway rule create \
  --gateway-name myAppGateway \
  --name redirectedRule \
  --resource-group myResourceGroupAG \
  --http-listener redirectedListener \
  --rule-type PathBasedRouting \
  --url-path-map redirectpathmap \
  --address-pool appGatewayBackendPool \
  --priority 100
仮想マシン スケール セットの作成
この例では、作成した 3 つのバックエンド プールをサポートする 3 つの仮想マシン スケール セットを作成します。 作成するスケール セットの名前は、myvmss1、myvmss2、および myvmss3 です。 各スケール セットには、NGINX をインストールする 2 つの仮想マシン インスタンスが含まれています。
<azure-user> と <password> は、選択したユーザー名とパスワードに置き換えます。
for i in `seq 1 3`; do
  if [ $i -eq 1 ]
  then
    poolName="appGatewayBackendPool"
  fi
  if [ $i -eq 2 ]
  then
    poolName="imagesBackendPool"
  fi
  if [ $i -eq 3 ]
  then
    poolName="videoBackendPool"
  fi

  az vmss create \
    --name myvmss$i \
    --resource-group myResourceGroupAG \
    --image Ubuntu2204 \
    --admin-username <azure-user> \
    --admin-password <password> \
    --instance-count 2 \
    --vnet-name myVNet \
    --subnet myBackendSubnet \
    --vm-sku Standard_DS2 \
    --upgrade-policy-mode Automatic \
    --app-gateway myAppGateway \
    --backend-pool-name $poolName
done
NGINX のインストール
for i in `seq 1 3`; do
  az vmss extension set \
    --publisher Microsoft.Azure.Extensions \
    --version 2.0 \
    --name CustomScript \
    --resource-group myResourceGroupAG \
    --vmss-name myvmss$i \
    --settings '{ "fileUris": ["https://raw.githubusercontent.com/Azure/azure-docs-powershell-samples/master/application-gateway/iis/install_nginx.sh"], "commandToExecute": "./install_nginx.sh" }'

done
アプリケーション ゲートウェイのテスト
アプリケーション ゲートウェイのパブリック IP アドレスを取得するには、az network public-ip show を使用します。 そのパブリック IP アドレスをコピーし、ブラウザーのアドレス バーに貼り付けます。 たとえば、http://40.121.222.19、http://40.121.222.19:8080/images/test.htm、http://40.121.222.19:8080/video/test.htm、http://40.121.222.19:8081/images/test.htm などです。
az network public-ip show \
  --resource-group myResourceGroupAG \
  --name myAGPublicIPAddress \
  --query [ipAddress] \
  --output tsv
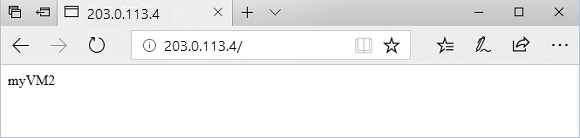
URL を http://<IP アドレス>:8080/images/test.html に変更し、<IP アドレス> を使用している IP アドレスに置き換えると、次の例のように表示されるはずです。
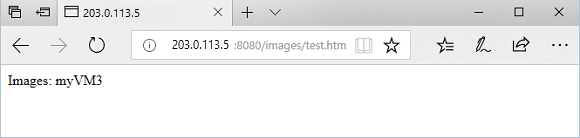
URL を http://<ip-address>:8080/video/test.html に変更します。<ip-address> は使用している IP アドレスに置き換えてください。次の例のように表示されます。
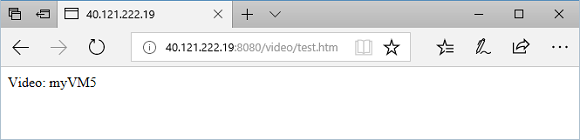
URL を http://<ip-address>:8081/images/test.htm に変更します。<ip-address> は使用している IP アドレスに置き換えてください。トラフィックが http://<ip-address>:8080/images の images バックエンド プールにリダイレクトされるのがわかります。
リソースをクリーンアップする
必要がなくなったら、リソース グループ、アプリケーション ゲートウェイ、およびすべての関連リソースを削除します。
az group delete --name myResourceGroupAG
次のステップ
フィードバック
以下は間もなく提供いたします。2024 年を通じて、コンテンツのフィードバック メカニズムとして GitHub の issue を段階的に廃止し、新しいフィードバック システムに置き換えます。 詳細については、「https://aka.ms/ContentUserFeedback」を参照してください。
フィードバックの送信と表示