Databricks Apps テンプレートを使用して、最初の AI エージェントをビルドしてデプロイします。 このチュートリアルでは、次のことを行います。
- Databricks Apps UI からエージェントをビルドしてデプロイします。
- 事前に構築されたチャット インターフェイスを使用してエージェントとチャットします。
[前提条件]
ワークスペースで Databricks Apps を有効にします。 Databricks Apps ワークスペースと開発環境を設定するを参照してください。
エージェント テンプレートをデプロイする
Databricks アプリ テンプレート リポジトリから事前構築済みのエージェント テンプレートを使用して作業を開始します。
このチュートリアルでは、次の agent-openai-agents-sdk テンプレートを使用します。
- OpenAI Agent SDK を使用して作成されたエージェント
- 会話型 REST API と対話型チャット UI を使用したエージェント アプリケーションのスターター コード
- MLflow を使用してエージェントを評価するコード
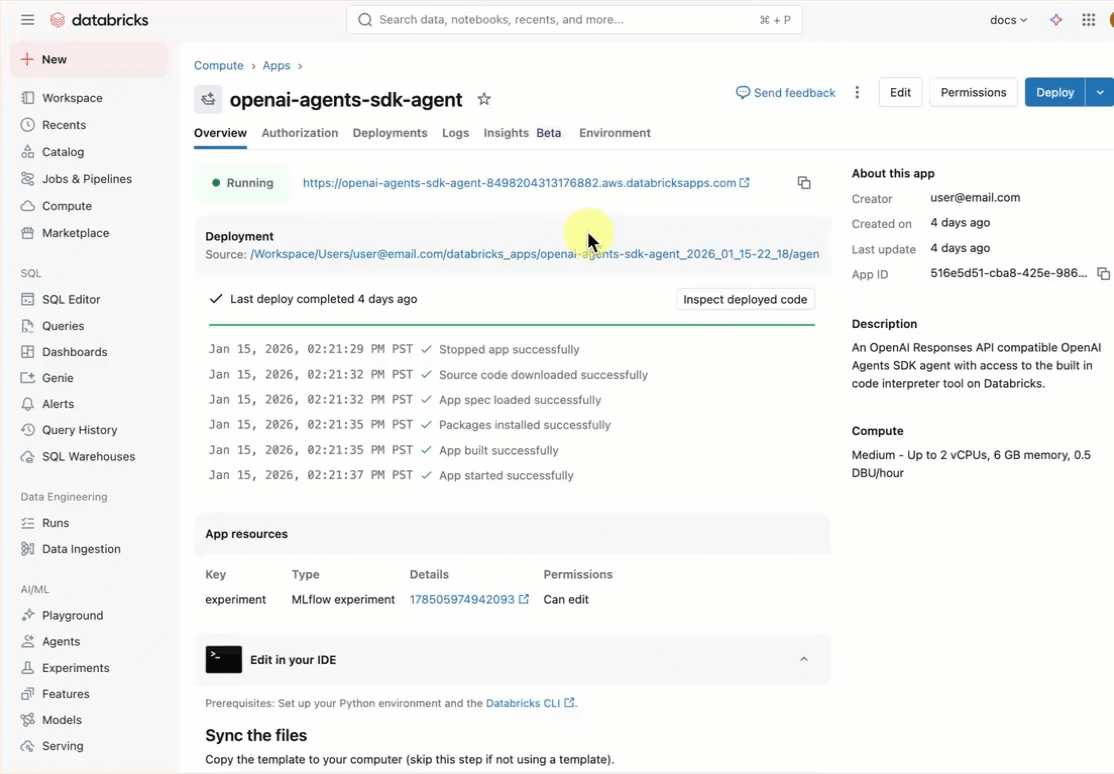
ワークスペース UI を使用してアプリ テンプレートをインストールします。 これにより、アプリがインストールされ、ワークスペース内のコンピューティング リソースにデプロイされます。
Databricks ワークスペースで、[ + 新規>App] をクリックします。
[ エージェント>Agent - OpenAI Agents SDK] をクリックします。
openai-agents-templateという名前の新しい MLflow 実験を作成し、残りの設定を完了してテンプレートをインストールします。アプリを作成したら、アプリの URL をクリックしてチャット UI を開きます。
エージェント アプリケーションを理解する
エージェント テンプレートは、次の主要コンポーネントを備えた運用対応アーキテクチャを示しています。
MLflow AgentServer: 組み込みのトレースと可観測性でエージェント要求を処理する非同期 FastAPI サーバー。 AgentServer は、エージェントに対してクエリを実行するための /invocations エンドポイントを提供し、要求ルーティング、ログ記録、およびエラー処理を自動的に管理します。
OpenAI Agents SDK: テンプレートは、会話管理とツール オーケストレーションのエージェント フレームワークとして OpenAI Agents SDK を使用します。 任意のフレームワークを使用してエージェントを作成できます。 キーは、MLflow ResponsesAgent インターフェイスでエージェントをラップすることです。
ResponsesAgent インターフェイス: このインターフェイスにより、エージェントがさまざまなフレームワーク間で動作し、Databricks ツールと統合されます。 OpenAI SDK、LangGraph、LangChain、または純粋な Python を使用してエージェントを構築し、それを ResponsesAgent でラップして、AI Playground、Agent Evaluation、Databricks Apps のデプロイとの自動互換性を得ます。
MCP (モデル コンテキスト プロトコル) サーバー: テンプレートは Databricks MCP サーバーに接続して、エージェントにツールとデータ ソースにアクセスします。 Databricks のモデル コンテキスト プロトコル (MCP) を参照してください。

次のステップ
カスタム エージェントを作成する方法について:AI エージェントを作成して Databricks Apps にデプロイする