Wear の基本
初めての Android Wear アプリを作成し、Wear エミュレーターまたはデバイス上で実行しましょう。 このチュートリアルでは、ボタン クリックを処理し、Wear デバイスにクリック カウンターを表示する小さな Android Wear プロジェクトを作成するステップ バイ ステップの手順について説明します。 Bluetooth 経由で Android フォンに接続された Wear エミュレーターまたは Wear デバイスを使ってアプリをデバッグする方法について説明します。 また、Android Wear のデバッグに関するヒントも紹介します。
初めての Wear アプリ
初めて Xamarin.Android Wear アプリを作成するには、以下の手順を実行します。
1.新しい Android プロジェクトを作成する
新しい Android Wear アプリケーションを作成します。
![[新しいプロジェクト] ダイアログで新しい Android Wear アプリケーションを作成する](hello-wear-images/vs/new-solution.w157.png#lightbox)
![[新しいソリューション] ダイアログで新しい Android Wear アプリケーションを作成する](hello-wear-images/xs/new-solution.png#lightbox)
このテンプレートには、Xamarin Android Wearable Library NuGet (と依存関係) が自動的に含まれるため、Wear 固有のウィジェットにアクセスできます。 Wear テンプレートが表示されない場合は、「インストールとセットアップ」ガイドを参照して、サポートされている Android SDK がインストールされていることを再確認します。
2.適切なターゲット フレームワークを選ぶ
[ターゲットとなる最小 Android] が Android 5.0 (Lollipop) 以降に設定されていることを確認します。


ターゲット フレームワークの設定の詳細については、「Android API レベルの理解」を参照してください。
3.Main.axml レイアウトを編集する
サンプル用に TextView と Button を含むようにレイアウトを構成します。
<?xml version="1.0" encoding="utf-8"?>
<FrameLayout xmlns:android="http://schemas.android.com/apk/res/android"
android:layout_width="match_parent"
android:layout_height="match_parent">
  <ScrollView
    android:id="@+id/scroll"
    android:layout_width="wrap_content"
    android:layout_height="wrap_content"
    android:background="#000000"
    android:fillViewport="true">
    <LinearLayout
      android:layout_width="match_parent"
      android:layout_height="wrap_content"
      android:orientation="vertical">
      <TextView
        android:layout_width="wrap_content"
        android:layout_height="wrap_content"
        android:layout_marginBottom="2dp"
        android:text="Main Activity"
        android:textSize="36sp"
        android:textColor="#006600" />
      <TextView
        android:layout_width="wrap_content"
        android:layout_height="wrap_content"
        android:layout_marginBottom="2dp"
        android:textColor="#cccccc"
        android:id="@+id/result" />
      <Button
        android:layout_width="match_parent"
        android:layout_height="wrap_content"
        android:onClick="showNotification"
        android:text="Click Me!"
        android:id="@+id/click_button" />
    </LinearLayout>
  </ScrollView>
</FrameLayout>
4.MainActivity.cs ソースを編集する
ボタンがクリックされるたびにカウンターをインクリメントし、表示するコードを追加します。
[Activity (Label = "WearTest", MainLauncher = true, Icon = "@drawable/icon")]
public class MainActivity : Activity
{
  int count = 1;

  protected override void OnCreate (Bundle bundle)
  {
    base.OnCreate (bundle);

    SetContentView (Resource.Layout.Main);

    Button button = FindViewById<Button> (Resource.Id.click_button);
    TextView text = FindViewById<TextView> (Resource.Id.result);

    button.Click += delegate {
      text.Text = string.Format ("{0} clicks!", count++);
    };
  }
}
5.エミュレーターまたはデバイスを設定する
次の手順は、アプリを展開して実行するためのエミュレーターまたはデバイスの設定です。 一般的な Xamarin.Android アプリの展開と実行のプロセスにまだ慣れていない場合は、「Hello, Android: クイックスタート」を参照してください。
Android Wear Smartwatch などの Android Wear デバイスを持っていない場合は、エミュレーター上でアプリを実行できます。 エミュレーター上での Wear アプリのデバッグについては、「エミュレーター上で Android Wear をデバッグする」を参照してください。
Android Wear Smartwatch などの Android Wear デバイスを持っている場合は、エミュレーターを使わずに、このデバイス上でアプリを実行することもできます。 Wear デバイス上でのデバッグの詳細については、「Wear デバイスでのデバッグ」を参照してください。
6.Android Wear アプリを実行する
Android Wear デバイスがデバイスのプルダウン メニューに表示されます。 デバッグを開始する前に、必ず正しい Android Wear デバイスまたは AVD を選んでください。 デバイスを選んだら、[再生] ボタンをクリックして、アプリをエミュレーターまたはデバイスに展開します。


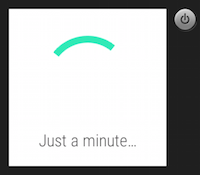
最初に "しばらくお待ちください" メッセージ (または他の中断画面) が表示されることがあります。
ウォッチ エミュレーターを使っている場合は、アプリの起動に時間がかかることがあります。 Bluetooth を使っている場合は、USB 経由よりもアプリの展開に時間がかかります (たとえば、Nexus 5 フォンに Bluetooth で接続されている LG G Watch にこのアプリを展開するには、約 5 分かかります)。
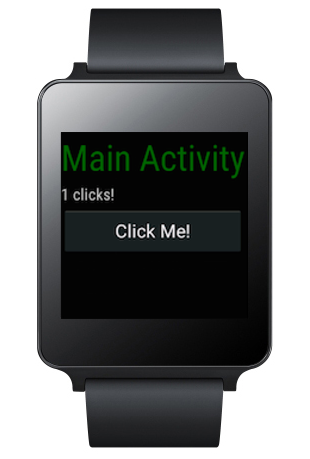
アプリが正常に展開されると、Wear デバイスの画面に次のような画面が表示されます。

Wear デバイスの表面にある [CLICK ME!] ボタンをタップすると、タップするたびにカウントがインクリメントされます。

次のステップ
アプリを配布する準備ができたら、パッケージ化の作業に関する記事を参照してください。