Visual Studio 2019 バージョン 16.8 で、Git エクスペリエンスの最初のバージョンを発表しました。 このエクスペリエンスにより、一般的な Git タスクを含むシンプルな [Git 変更] ウィンドウでコンテキストの切り替えを減らすことができます。 また、これには、ブランチの管理やリポジトリの参照など、より高度な Git 操作のための全画面の [Git リポジトリ] ウィンドウも含まれています。
チーム エクスプローラーを使用している場合は、Git エクスペリエンスを使用する方法について、次の手順を追ったガイドを参照してください。
Note
次のセクションでは、テーブルの列に合わせてサイズ変更されたスクリーンショットを示します。 各スクリーンショットをクリックすると、より大きなバージョンが表示されます (タッチスクリーン デバイスを使用している場合は、各スクリーンショットをタップして、より大きなバージョンを表示してください)。
はじめに
|
チーム エクスプローラー |
Git エクスペリエンス |
| リポジトリを複製する |
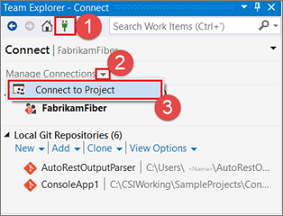 1.[接続] ページを開きます。
2.[接続の管理] を展開します。
3.[プロジェクトに接続] を選択します。 |
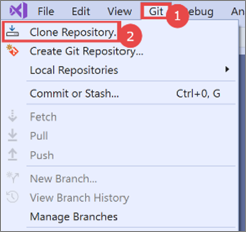 1.[Git] メニューを開きます。
2.[リポジトリの複製] を選択します。
|
| レポジトリの切り替え |
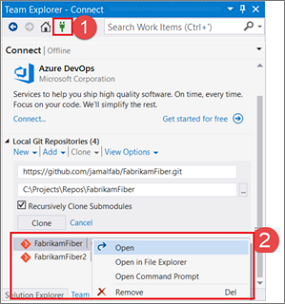 1.[接続] ページを開きます。
2.[ローカル リポジトリ] リストからリポジトリを選択します。 |
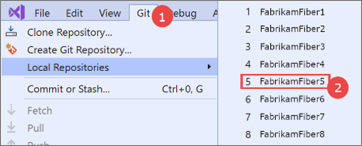 1.[Git] メニューを開きます。
2.[ローカル リポジトリ] リストからリポジトリを選択します。 |
| ソリューションを開く |
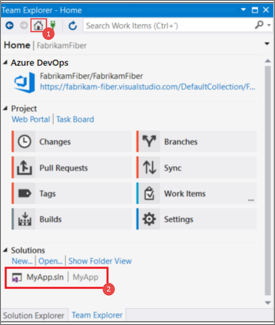 1.チーム エクスプローラーで [ホーム] ページを開きます。
2.ソリューションのリストからソリューションを選択します。 |
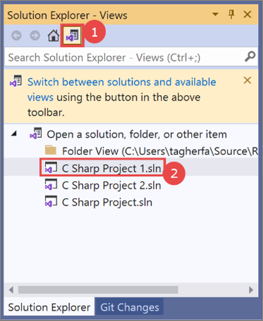 1.ソリューション エクスプローラーで [ビューの切り替え] ページを開きます。
2.ソリューションのリストからソリューションを選択します。 |
| ソース コントロールにソリューションを追加し、新しいリポジトリを作成する |
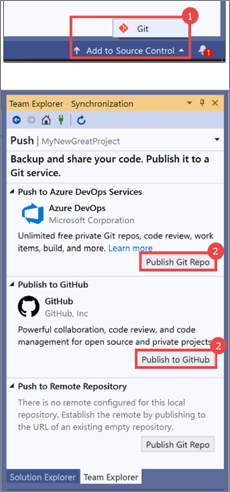 1.[ソース コントロールに追加] ステータス バー メニューで [Git] を選択します。
2.[発行] を選びます。 |
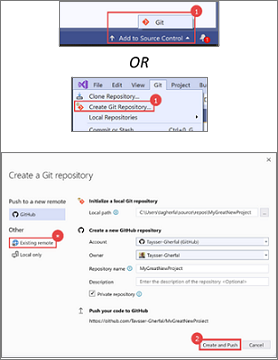 1.[ソース コントロールに追加] ステータス バー メニューで [Git] を選択するか、最上位の Visual Studio メニュー バーで [Git]>[Create Git Repository]\(Git リポジトリの作成\) を選択します。
2.[Create and Push]\(作成してプッシュ\) を選択します。 注: Azure DevOps にコードを追加する場合は、既存のリモート オプションを使用します。 この場合、最初に Azure DevOps リポジトリを作成する必要があります。 |
ヒント
Git エクスペリエンスは、開いたリポジトリまたはソリューションに基づいて、適切な Azure DevOps リポジトリに自動的に接続されます。 ただし、リポジトリに手動で接続する必要がある場合でも、チーム エクスプローラーを使用してこれを行うことができます。 Visual Studio のメニュー バーで、[表示]>[チーム エクスプローラー]>[接続の管理]>[接続] を選択します。
Git 変更
|
チーム エクスプローラー |
Git エクスペリエンス |
| [Commit and stage]\(コミットとステージ\) |
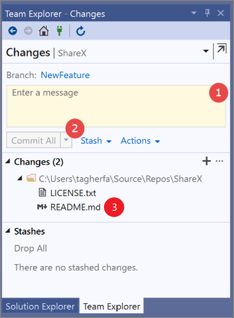 1.コミット メッセージを入力します。
2.[すべてをコミット] を選択します。
3.特定のファイルをステージングするには、そのファイルを右クリックし、[ステージ] を選択します。 |
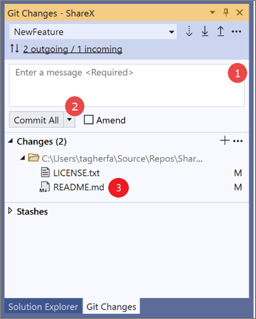 1.コミット メッセージを入力します。
2.[すべてをコミット] を選択します。
3.特定のファイルをステージングするには、そのファイルにカーソルを合わせ、「+」アイコンをクリックします。 |
| コミットの修正 |
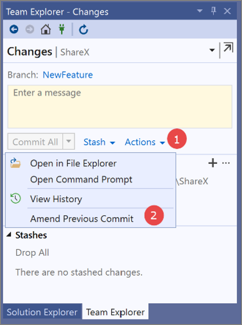 1.[アクション] ドロップダウンをクリックします。
2.[以前のコミットを修正] を選択します。 |
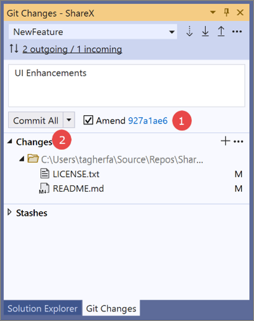 1.[修正] チェックボックスをクリックします。
2.[すべてコミット] をクリックして、更新をコミットします。 |
| 変更の一時退避 |
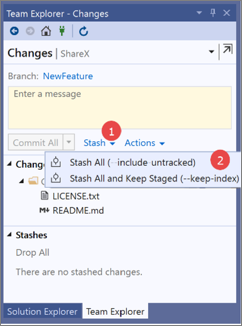 1.[一時退避] ドロップダウンをクリックします。
2.関連する [一時退避] オプションを選択します。 |
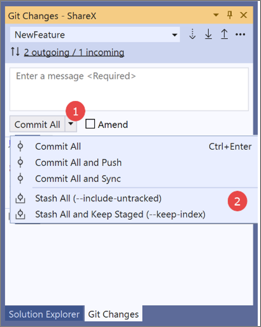 1.[すべてコミット] ドロップダウンをクリックします。
2.関連する [一時退避] オプションを選択します。 |
同期
|
チーム エクスプローラー |
Git エクスペリエンス |
| 変更のフェッチ、プル、プッシュ |
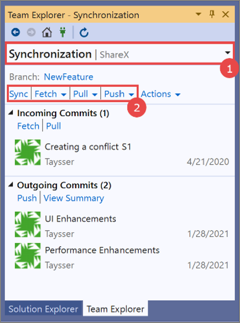 1.[同期] ページに移動します。
2.選択したネットワーク操作をクリックします。 |
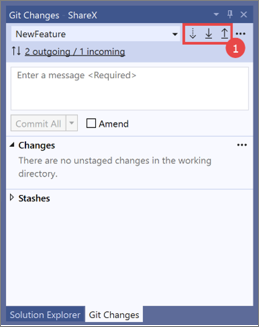 1.[Git 変更] ウィンドウで、フェッチ、プル、プッシュの各ボタンを探します。
2.選択したネットワーク操作をクリックします。 |
| 着信および発信コミットの表示 |
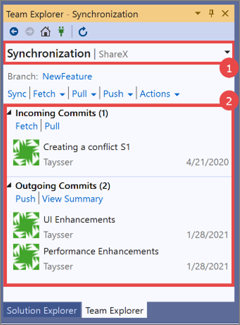 1.[同期] ページに移動します。
2.着信および発信リストを表示します。 |
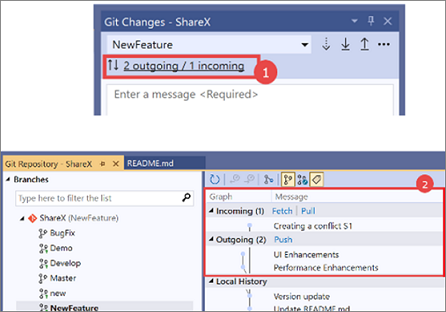 1.[Git 変更] ウィンドウで、発信または着信リンクをクリックします。
2.[Git リポジトリ] ウィンドウの上部にあるグラフ テーブルのアイコンを使用して、着信および発信コミットを表示します。 |
ブランチ
|
チーム エクスプローラー |
Git エクスペリエンス |
| 分岐を作成する |
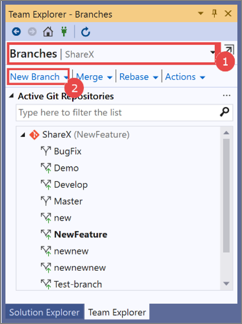 1.[ブランチ] ウィンドウに移動します。
2.[新しいブランチ] をクリックします。 |
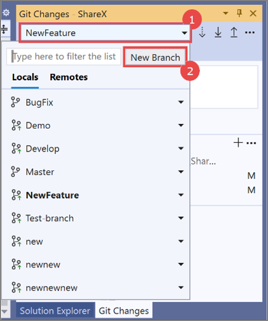 1.[Git 変更] ウィンドウで、ブランチ ドロップダウン リストをクリックします。
2.[新しいブランチ] をクリックします。 |
| リモート ブランチからの最近の変更の取得 |
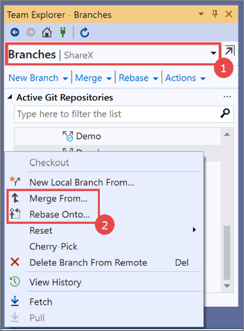 1.[ブランチ] ページに移動します。
2.リモート ブランチを右クリックし、[マージ元] または [Rebase Onto]\(リベース先\) を選択します。 |
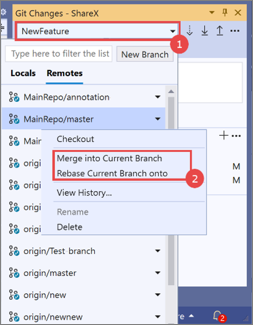 1.ブランチ ドロップダウン リストをクリックします。
2.[リモート] タブでリモート ブランチをクリックし、[Merge into Current Branch]\(現在のブランチにマージ\) または [Rebase Current Branch onto]\(現在のブランチのリベース先\) を選択します。 |
| ブランチを管理する |
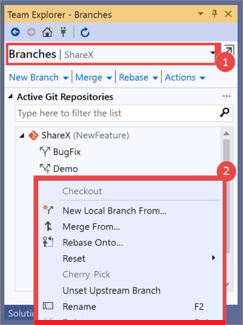 1.[ブランチ] ウィンドウに移動します。
2.管理するブランチを右クリックします。
3.ブランチの履歴を表示して、コミットを管理します。 |
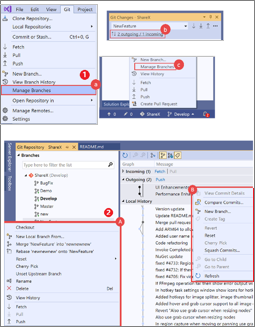 1.次のいずれかのエントリ ポイントを使用して、[Git リポジトリ] ウィンドウに移動します。
a. 最上位の Visual Studio メニューで、[Git]>[ブランチの管理] を選択します。
b. [Git 変更]>[着信/発信] を選択します。
c. 右下にあるステータス バー メニューで、[ブランチの管理] を選択します。
2.最上位の [Git]>[ブランチの管理] メニューで、次のいずれかの操作を実行します。
A。 ブランチを右クリックします。
B. 管理するコミットを複数選択します。 |
競合の解決
|
チーム エクスプローラー |
Git エクスペリエンス |
| 競合のあるファイルのリストへのアクセス |
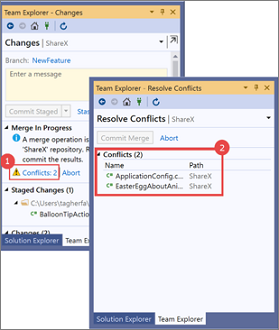 1.[競合] リンクをクリックして、[競合の解決] ウィンドウに移動します。
2.[競合] リストを使用して、マージの競合を解決します。 |
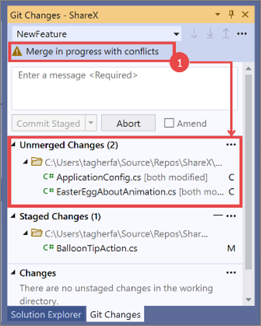 1.[Merge in progress with conflicts]\(競合のあるマージが進行中\) が表示されることを確認します。
2.[Git 変更] ウィンドウの [Unmerged Changes]\(マージされていない変更\) セクションに、マージの競合があるファイルのリストが表示されます。
競合を解決します。 |
関連するコンテンツ


