Azure Communication Services 그룹 통화 주인공 샘플은 Communication Services 통화 웹 SDK를 사용하여 그룹 통화 환경을 만드는 방법을 보여줍니다.
이 샘플 빠른 시작에서는 로컬 컴퓨터에서 샘플을 실행한 다음, 사용자 고유의 Azure Communication Services 리소스를 사용하여 Azure에 샘플을 배포하기 전에 샘플의 작동 방식을 알아봅니다.
코드 다운로드
GitHub에서 이 샘플에 대한 프로젝트를 찾습니다. Teams 상호 운용성 및 통화 녹음/녹화와 같이 현재 공개 미리 보기의 기능이 포함된 샘플 버전은 별도의 분기에서 찾을 수 있습니다.
개요
이 샘플에는 클라이언트 쪽 애플리케이션과 서버 쪽 애플리케이션이 모두 들어 있습니다. 클라이언트 쪽 애플리케이션은 Microsoft의 Fluent UI 프레임워크를 사용하는 React/Redux 웹 애플리케이션입니다. 이 애플리케이션은 클라이언트 쪽 애플리케이션에서 Azure에 연결하는 데 도움이 되는 ASP.NET Core 서버 쪽 애플리케이션으로 요청을 보냅니다.
샘플은 다음과 같습니다.
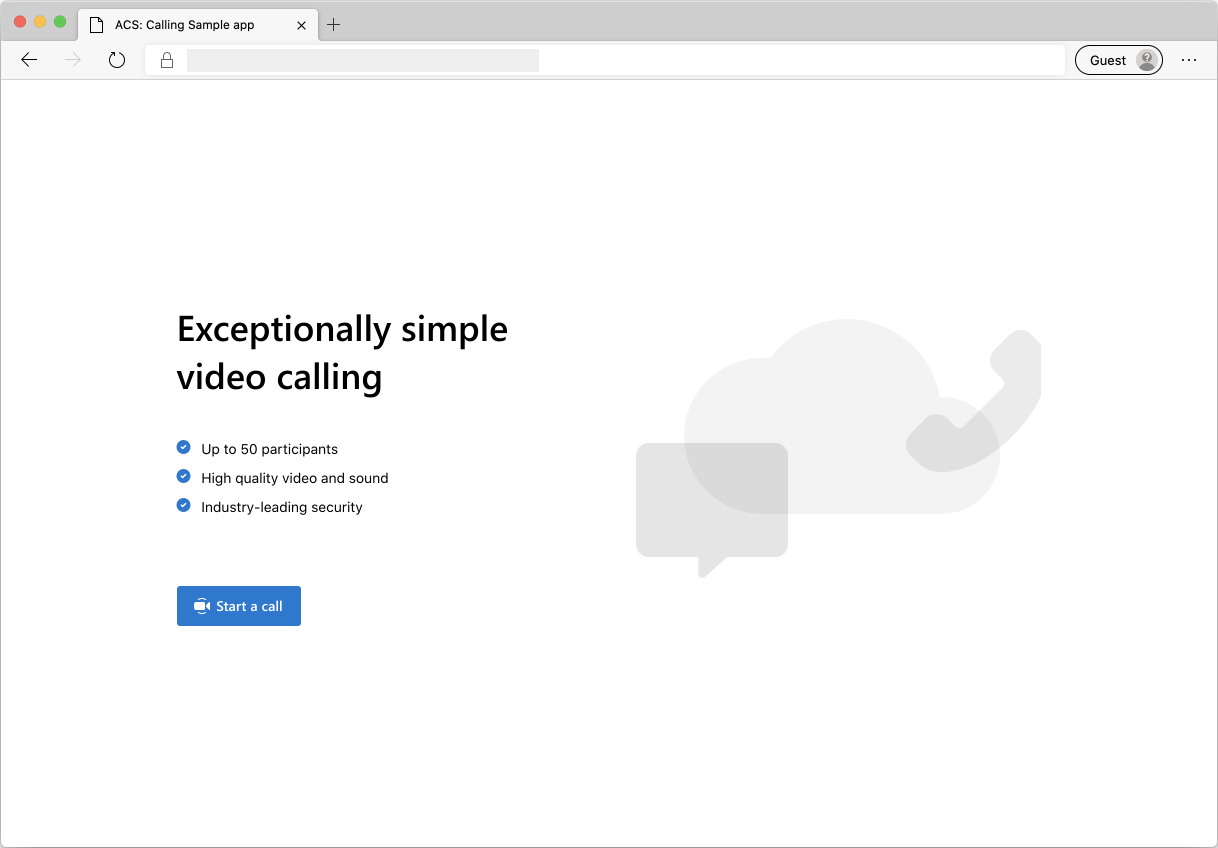
"통화 시작" 단추를 누르면 웹 애플리케이션이 서버 쪽 애플리케이션에서 사용자 액세스 토큰을 가져옵니다. 가져온 토큰은 클라이언트 앱을 Azure Communication Services에 연결하는 데 사용됩니다. 토큰을 가져오면 사용할 카메라와 마이크를 지정하라는 메시지가 표시됩니다. 토글 컨트롤을 사용하여 디바이스를 사용하지 않거나 사용하도록 설정할 수 있습니다.
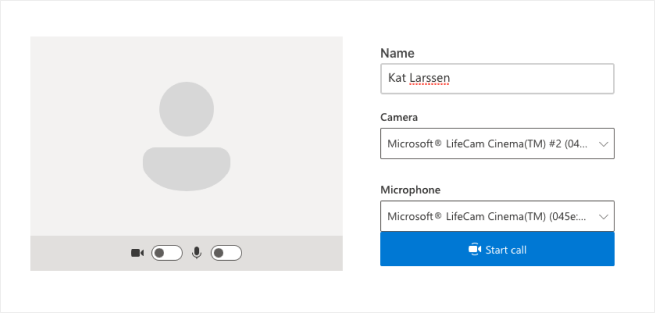
표시 이름 및 디바이스 구성이 끝나면 통화 세션에 참가할 수 있습니다. 핵심 통화 환경이 있는 기본 통화 캔버스가 표시됩니다.
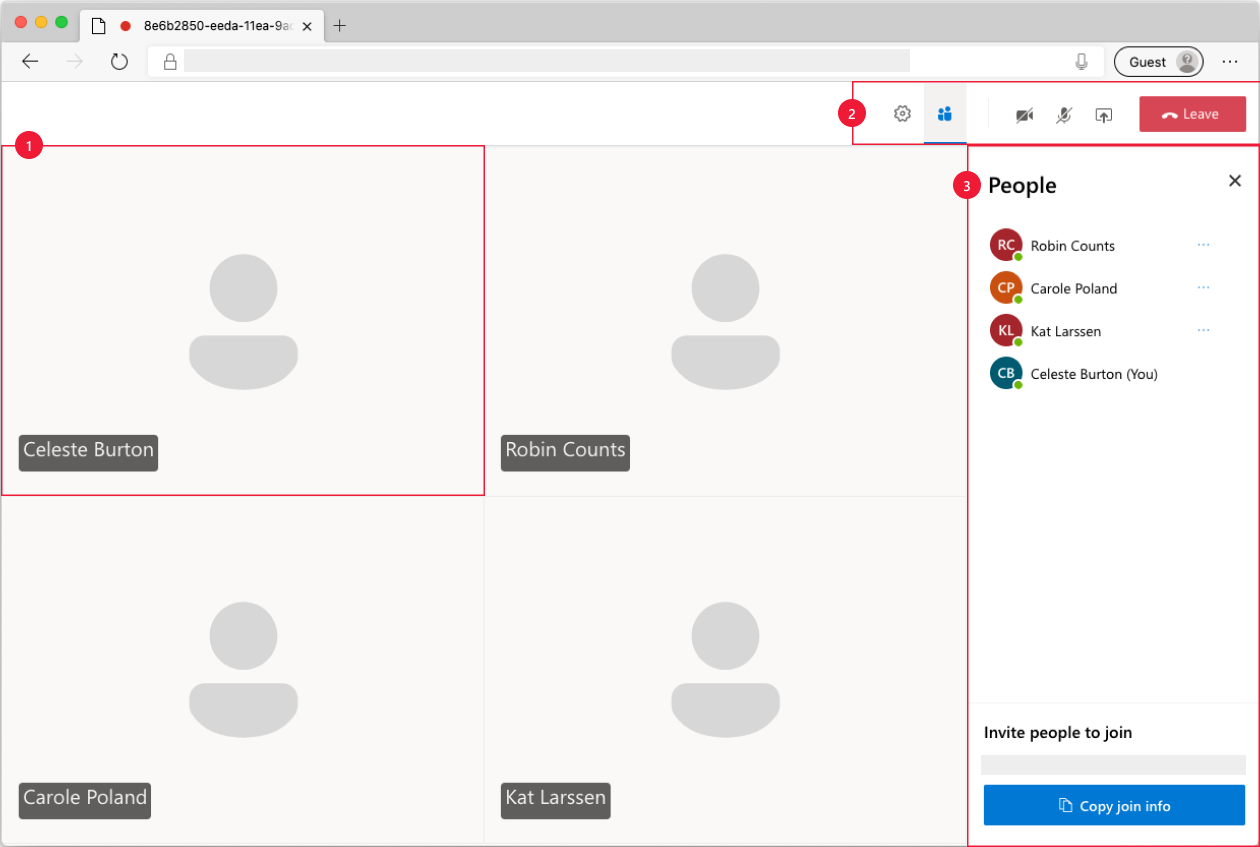
기본 통화 화면의 구성 요소:
- 미디어 갤러리: 참가자가 표시되는 기본 스테이지입니다. 참가자가 카메라를 사용하도록 설정한 경우 비디오 피드가 여기에 표시됩니다. 각 참가자별로 표시 이름 및 비디오 스트림을 보여 주는 개별 타일이 있습니다(있는 경우).
- 헤더: 여기에는 설정 및 참가자 사이드바를 토글하고, 비디오 및 믹스를 설정/해제하고, 화면을 공유하고, 통화를 종료하는 기본 통화 컨트롤이 있습니다.
- 사이드바: 헤더의 컨트롤을 사용하여 사이드바를 전환하면 참가자 및 설정 정보가 사이드바에 표시됩니다. 오른쪽 위 모서리에서 'X'를 사용하여 구성 요소를 해제할 수 있습니다. 참가자 사이드바에는 참가자 목록과 추가 사용자를 채팅에 초대하는 링크가 표시됩니다. 설정 사이드바에서는 마이크 및 카메라 설정을 구성할 수 있습니다.
아래에서 샘플을 설정하기 위한 필수 구성 요소 및 설정 단계에 대한 자세한 정보를 찾을 수 있습니다.
필수 조건
- 활성 구독이 있는 Azure 계정. 자세한 내용은 체험 계정 만들기를 참조하세요.
- Node.js(12.18.4 이상)
- Visual Studio Code(안정적인 빌드)
- Azure Communication Services 리소스. 자세한 내용은 Azure Communication Services 리소스 만들기를 참조하세요. 이 빠른 시작에 대한 연결 문자열 리소스를 기록해야 합니다.
처음으로 샘플을 실행하기 전에
PowerShell, Windows 터미널, 명령 프롬프트 또는 그에 상응하는 인스턴스를 열고 샘플을 복제할 디렉터리로 이동합니다.
git clone https://github.com/Azure-Samples/communication-services-web-calling-hero.gitAzure Portal에서 또는 Azure CLI를 사용하여
Connection String을 가져옵니다.az communication list-key --name "<acsResourceName>" --resource-group "<resourceGroup>"연결 문자열에 대한 자세한 내용은 Azure Communication 리소스 만들기를 참조하세요.
Connection String을 가져오면 연결 문자열을 samples/Server/appsetting.json 파일에 추가합니다.ResourceConnectionString변수에 연결 문자열을 입력합니다.Azure Portal에서 또는 Azure CLI를 사용하여
Endpoint string을 가져옵니다.az communication list-key --name "<acsResourceName>" --resource-group "<resourceGroup>"엔드포인트 문자열에 대한 자세한 내용은 Azure 통신 리소스 만들기를 참조하세요.
Endpoint String을 가져오면 엔드포인트 문자열을 samples/Server/appsetting.json 파일에 추가합니다. 변수EndpointUrl에 엔드포인트 문자열을 입력합니다.
로컬 실행
종속성 설치
npm run setup통화 앱 시작
npm run start이렇게 하면 웹 사이트 파일을 제공하는 포트 3000에서 클라이언트 서버가 열리고 포트 8080에서 호출 참가자를 위한 토큰 생성과 같은 기능을 수행하는 API 서버가 열립니다.
문제 해결
앱에 "지원되지 않는 브라우저" 화면이 표시되지만 지원되는 브라우저를 사용하고 있습니다.
앱이 localhost가 아닌 호스트 이름을 통해 제공되는 경우 http가 아닌 https를 통해 트래픽을 제공해야 합니다.
Azure에 게시
npm run setupnpm run buildnpm run package- Azure 확장을 사용하고 Calling/dist 디렉터리를 앱 서비스에 배포합니다.
리소스 정리
Communication Services 구독을 정리하고 제거하려면 리소스 또는 리소스 그룹을 삭제하면 됩니다. 리소스 그룹을 삭제하면 해당 리소스 그룹에 연결된 다른 모든 리소스가 함께 삭제됩니다. 리소스 정리에 대해 자세히 알아보세요.
다음 단계
자세한 내용은 다음 문서를 참조하세요.
- 통화 SDK 사용법 숙지
- 통화 작동 방식에 대한 자세한 정보
추가 자료
- 샘플 - 샘플 개요 페이지에서 추가 샘플과 예제를 찾아보세요.
- Redux - 클라이언트 쪽 상태 관리
- FluentUI - Microsoft 기반 UI 라이브러리
- React - 사용자 인터페이스 빌드용 라이브러리
- ASP.NET Core - 웹 애플리케이션 빌드용 프레임워크
Azure Communication Services iOS용 그룹 통화 주인공 샘플은 Communication Services 통화 iOS SDK를 사용하여 음성 및 비디오가 포함된 그룹 통화 환경을 구축하는 방법을 보여 줍니다. 이 샘플 빠른 시작에서는 샘플을 설정하고 실행하는 방법에 대해 알아봅니다. 상황에 맞는 샘플 개요가 제공됩니다.
코드 다운로드
GitHub에서 이 샘플에 대한 프로젝트를 찾습니다.
개요
이 샘플은 Azure Communication Services iOS SDK를 사용하여 음성 및 영상 통화를 모두 제공하는 통화 환경을 구축하는 네이티브 iOS 애플리케이션입니다. 애플리케이션에서 서버 쪽 구성 요소를 사용하여 Azure Communication Services SDK를 초기화하는 데 사용되는 액세스 토큰을 프로비저닝합니다. 이 서버 쪽 구성 요소를 구성하려면 언제든지 Azure Functions를 사용하여 신뢰할 수 있는 서비스 빌드 자습서를 따르세요.
샘플은 다음과 같습니다.
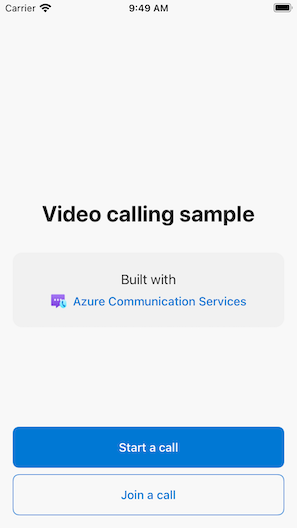
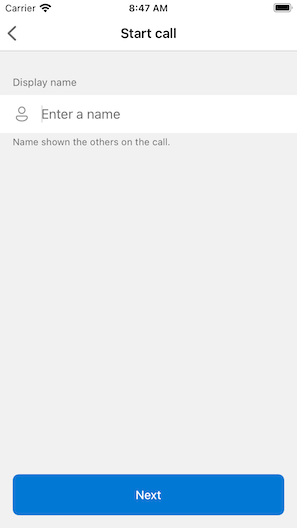
"새 통화 시작" 단추를 누르면 iOS 애플리케이션에서 통화에 사용할 표시 이름을 입력하라는 메시지가 표시됩니다.
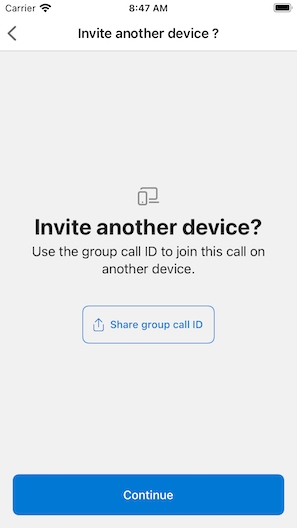
"통화 시작" 화면에서 "다음"을 탭하면 iOS 공유 시트를 통해 통화의 그룹 ID를 공유할 수 있습니다.
또한 이 애플리케이션을 사용하면 기존 통화의 ID 또는 팀 ID 링크를 지정하여 기존 Azure Communication Services 통화에 참가할 수 있습니다.

통화에 참여한 후 아직 권한 부여되지 않은 경우 카메라와 마이크에 액세스할 수 있는 애플리케이션 권한을 부여하라는 메시지가 표시됩니다. 모든 AVFoundation 기반 앱과 마찬가지로 진정한 오디오 및 동영상 기능은 실제 하드웨어에서만 사용할 수 있습니다.
표시 이름을 구성하고 통화에 참여하면 코어 통화 환경이 있는 기본 통화 캔버스가 표시됩니다.
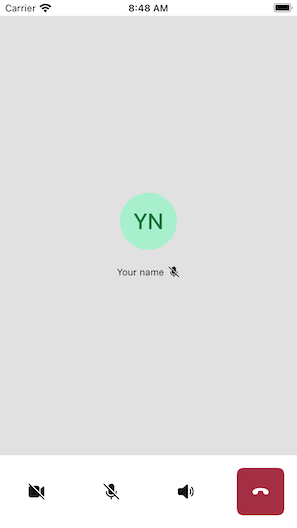
기본 통화 화면의 구성 요소:
- 미디어 갤러리: 참가자가 표시되는 기본 스테이지입니다. 참가자가 카메라를 사용하도록 설정한 경우 비디오 피드가 여기에 표시됩니다. 각 참가자에게는 표시 이름 및 비디오 스트림(있는 경우)을 보여주는 개별 타일이 있습니다. 갤러리는 여러 참가자를 지원하며, 참가자가 통화에 추가되거나 제거될 때 업데이트됩니다.
- 작업 모음: 기본 통화 컨트롤이 있는 위치입니다. 이러한 컨트롤을 사용하면 비디오와 마이크를 설정/해제하고, 화면을 공유하고, 통화를 종료할 수 있습니다.
아래에는 샘플을 설정하기 위한 필수 구성 요소 및 설정 단계가 자세히 설명되어 있습니다.
필수 조건
- 활성 구독이 있는 Azure 계정. 자세한 내용은 체험 계정 만들기를 참조하세요.
- 키 집합에 설치된 유효한 개발자 인증서와 함께 Xcode를 실행하는 Mac
- Azure Communication Services 리소스. 자세한 내용은 Azure Communication Services 리소스 만들기를 참조하세요.
- 액세스 토큰을 가져오기 위해 인증 엔드포인트를 실행하는 Azure Function
로컬로 샘플 실행
그룹 통화 샘플은 XCode를 사용하여 로컬로 실행할 수 있습니다. 개발자는 물리적 디바이스 또는 에뮬레이터를 사용하여 애플리케이션을 테스트할 수 있습니다.
처음으로 샘플을 실행하기 전에
-
pod install을 실행하여 종속성을 설치합니다. - XCode에서
AzureCalling.xcworkspace를 엽니다. - 루트에
AppSettings.xcconfig라는 텍스트 파일을 만들고 값을 설정합니다.communicationTokenFetchUrl = <your authentication endpoint, without the https:// component>
샘플 실행
선택한 시뮬레이터 또는 디바이스에서 AzureCalling 대상을 사용하여 XCode에서 샘플을 빌드하고 실행합니다.
(선택 사항) 인증 엔드포인트 보안
데모를 위해 이 샘플은 기본적으로 공개적으로 액세스할 수 있는 엔드포인트를 사용하여 Azure Communication Services 액세스 토큰을 가져옵니다. 프로덕션 시나리오의 경우 사용자 고유의 보안 엔드포인트를 사용하여 사용자 고유의 토큰을 프로비저닝하는 것이 좋습니다.
추가 구성을 사용하는 경우 이 샘플은 Microsoft Entra ID(Microsoft Entra ID) 보호 엔드포인트에 대한 연결을 지원하므로 앱에서 Azure Communication Services 액세스 토큰을 가져오려면 사용자 로그인이 필요합니다. 아래 단계를 참조하세요.
- 앱에서 Microsoft Entra 인증을 사용하도록 설정합니다.
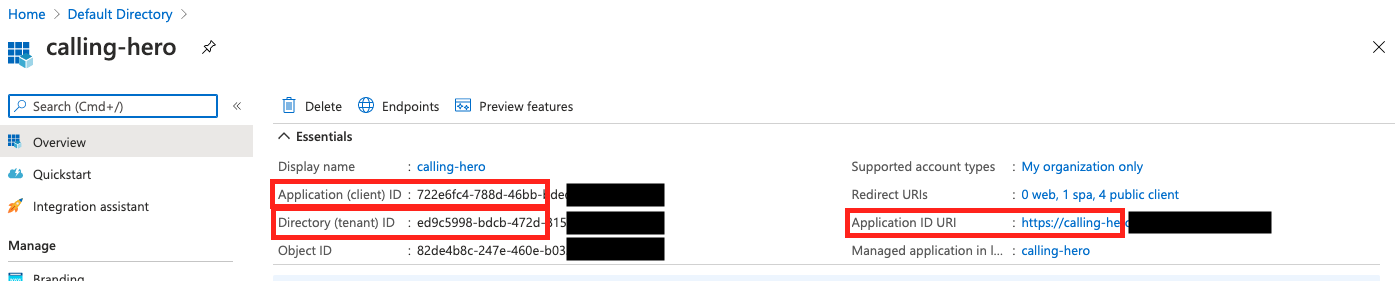
- Microsoft Entra 앱 등록에서 등록된 앱 개요 페이지로 이동합니다.
Application (client) ID,Directory (tenant) ID,Application ID URI를 적어 두세요.
- 아직 없는 경우 루트에
AppSettings.xcconfig파일을 만들고 값을 추가합니다.communicationTokenFetchUrl = <Application ID URI, without the https:// component> aadClientId = <Application (client) ID> aadTenantId = <Directory (tenant) ID>
리소스 정리
Communication Services 구독을 정리하고 제거하려면 리소스 또는 리소스 그룹을 삭제하면 됩니다. 리소스 그룹을 삭제하면 해당 리소스 그룹에 연결된 다른 모든 리소스가 함께 삭제됩니다. 리소스 정리에 대해 자세히 알아보세요.
다음 단계
자세한 내용은 다음 문서를 참조하세요.
- 통화 SDK 사용법 숙지
- 통화 작동 방식에 대한 자세한 정보
추가 자료
- Azure Communication GitHub - 공식 GitHub 페이지에서 더 많은 예제 및 정보 찾기
- 샘플 - 샘플 개요 페이지에서 추가 샘플과 예제를 찾아보세요.
- Azure Communication 기능 호출 - iOS sdk 호출에 대한 자세한 내용은 Azure Communication iOS 호출 SDK를 참조하세요.
Azure Communication Services Android용 그룹 통화 주인공 샘플은 Communication Services 통화 Android SDK를 사용하여 음성 및 비디오가 포함된 그룹 통화 환경을 구축하는 방법을 보여줍니다. 이 샘플 빠른 시작에서는 샘플을 설정하고 실행하는 방법에 대해 알아봅니다. 상황에 맞는 샘플 개요가 제공됩니다.
코드 다운로드
GitHub에서 이 샘플에 대한 프로젝트를 찾습니다.
개요
이 샘플은 Azure Communication Services Android UI 클라이언트 라이브러리를 사용하여 음성 및 영상 통화를 모두 제공하는 통화 환경을 빌드하는 네이티브 Android 애플리케이션입니다. 애플리케이션에서 서버 쪽 구성 요소를 사용하여 Azure Communication Services SDK를 초기화하는 데 사용되는 액세스 토큰을 프로비저닝합니다. 이 서버 쪽 구성 요소를 구성하려면 언제든지 Azure Functions를 사용하여 신뢰할 수 있는 서비스 빌드 자습서를 따르세요.
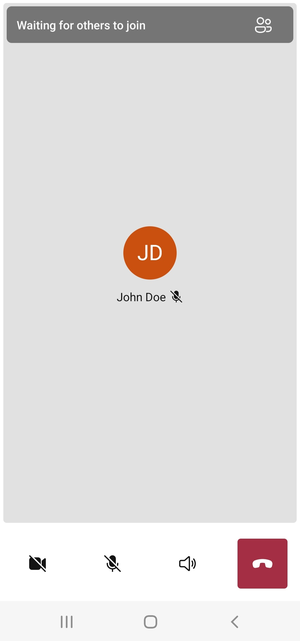
샘플은 다음과 같습니다.
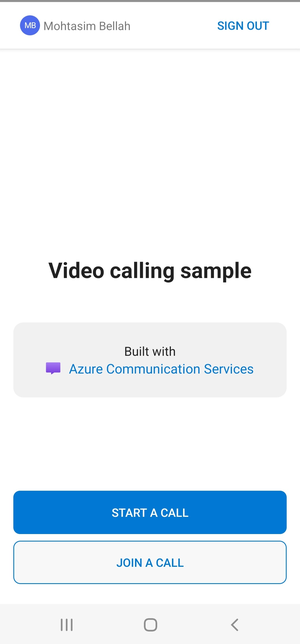
"새 통화 시작" 단추를 누르면 Android 애플리케이션에서 통화에 사용할 표시 이름을 입력하라는 메시지를 표시합니다.
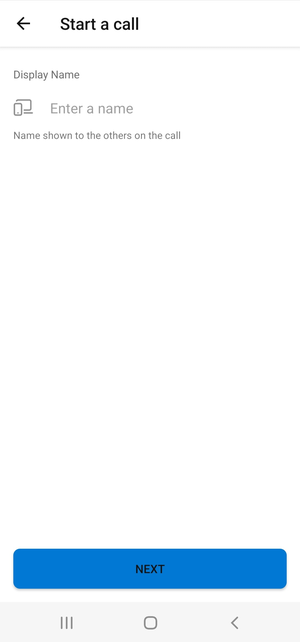
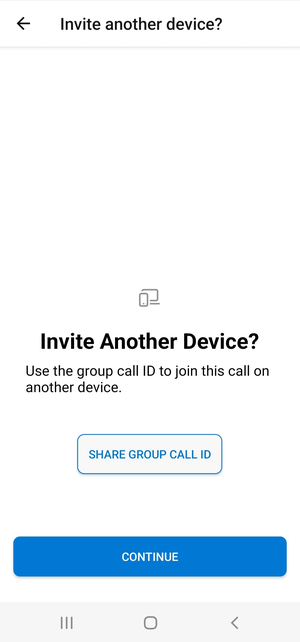
"통화 시작" 페이지에서 "다음"을 누르면 "그룹 통화 ID"를 공유할 수 있습니다.
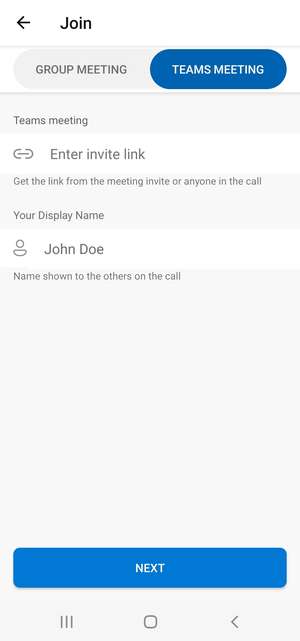
이 애플리케이션을 사용하면 기존 통화의 ID 또는 팀 모임 ID 링크 및 표시 이름을 지정하여 기존 Azure Communication Services 통화에 참가할 수 있습니다.
통화에 참여한 후 아직 권한 부여되지 않은 경우 카메라와 마이크에 액세스할 수 있는 애플리케이션 권한을 부여하라는 메시지가 표시됩니다. 핵심 통화 환경이 있는 기본 통화 캔버스가 표시됩니다.
기본 통화 화면의 구성 요소:
- 미디어 갤러리: 참가자가 표시되는 기본 스테이지입니다. 참가자가 카메라를 사용하도록 설정한 경우 비디오 피드가 여기에 표시됩니다. 각 참가자에게는 표시 이름 및 비디오 스트림(있는 경우)을 보여주는 개별 타일이 있습니다. 갤러리는 여러 참가자를 지원하며, 참가자가 통화에 추가되거나 제거될 때 업데이트됩니다.
- 작업 모음: 기본 통화 컨트롤이 있는 위치입니다. 이러한 컨트롤을 사용하면 비디오와 마이크를 설정/해제하고, 화면을 공유하고, 통화를 종료할 수 있습니다.
아래에는 샘플을 설정하기 위한 필수 구성 요소 및 설정 단계가 자세히 설명되어 있습니다.
필수 조건
- 활성 구독이 있는 Azure 계정. 자세한 내용은 체험 계정 만들기를 참조하세요.
- 컴퓨터에서 실행 중인 Android Studio
- Azure Communication Services 리소스. 자세한 내용은 Azure Communication Services 리소스 만들기를 참조하세요.
- 액세스 토큰을 가져오기 위해 인증 엔드포인트를 실행하는 Azure Function
로컬로 샘플 실행
그룹 통화 샘플은 Android Studio를 사용하여 로컬로 실행할 수 있습니다. 개발자는 물리적 디바이스 또는 에뮬레이터를 사용하여 애플리케이션을 테스트할 수 있습니다.
처음으로 샘플을 실행하기 전에
- Android Studio를 열고
Open an Existing Project를 선택합니다. - 샘플을 받기 위해 다운로드한 릴리스 내에서
AzureCalling폴더를 엽니다. -
appSettings.properties를 업데이트할 앱/자산을 확장합니다.communicationTokenFetchUrl키의 값을 필수 구성 요소로 설정한 인증 엔드포인트의 URL로 설정합니다.
샘플 실행
Android Studio에서 샘플을 빌드하고 실행합니다.
(선택 사항) 인증 엔드포인트 보안
데모를 위해 이 샘플은 기본적으로 공개적으로 액세스할 수 있는 엔드포인트를 사용하여 Azure Communication Services 토큰을 가져옵니다. 프로덕션 시나리오의 경우 사용자 고유의 보안 엔드포인트를 사용하여 사용자 고유의 토큰을 프로비저닝하는 것이 좋습니다.
추가 구성을 사용하는 경우 이 샘플은 Microsoft Entra ID(Microsoft Entra ID) 보호 엔드포인트에 대한 연결을 지원하므로 앱에서 Azure Communication Services 토큰을 가져오려면 사용자 로그인이 필요합니다. 아래 단계를 참조하세요.
앱에서 Microsoft Entra 인증을 사용하도록 설정합니다.
Microsoft Entra 앱 등록에서 등록된 앱 개요 페이지로 이동합니다.
Package name,Signature hash,MSAL Configuration을(를) 적어 두세요.
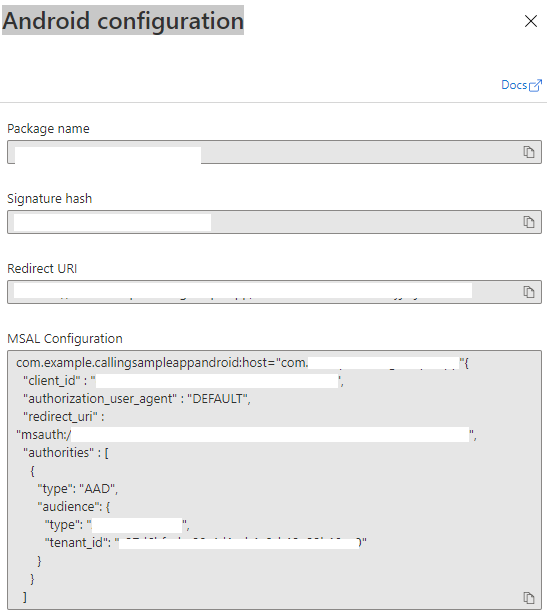
AzureCalling/app/src/main/res/raw/auth_config_single_account.json을(를) 편집하고isAADAuthEnabled을(를) 설정하여 Microsoft Entra ID를 활성화하세요.AndroidManifest.xml을 편집하고android:path를 키 저장소 서명 해시로 설정합니다. (선택 사항. 현재 값은 debug.keystore 번들의 해시를 사용합니다. 다른 키 저장소를 사용하는 경우 이 부분을 업데이트해야 합니다.)<activity android:name="com.microsoft.identity.client.BrowserTabActivity"> <intent-filter> <action android:name="android.intent.action.VIEW" /> <category android:name="android.intent.category.DEFAULT" /> <category android:name="android.intent.category.BROWSABLE" /> <data android:host="com.azure.samples.communication.calling" android:path="/Signature hash" <!-- do not remove /. The current hash in AndroidManifest.xml is for debug.keystore. --> android:scheme="msauth" /> </intent-filter> </activity>Azure Portal에서 MSAL Android 구성을 복사하여
AzureCalling/app/src/main/res/raw/auth_config_single_account.json에 붙여넣습니다. "account_mode": "SINGLE" 포함{ "client_id": "", "authorization_user_agent": "DEFAULT", "redirect_uri": "", "account_mode" : "SINGLE", "authorities": [ { "type": "AAD", "audience": { "type": "AzureADMyOrg", "tenant_id": "" } } ] }AzureCalling/app/src/main/res/raw/auth_config_single_account.json을 편집하고communicationTokenFetchUrl키의 값을 보안 인증 엔드포인트의 URL로 설정합니다.AzureCalling/app/src/main/res/raw/auth_config_single_account.json을 편집하고aadScopes키의 값을Azure Active DirectoryExpose an API범위에서 설정합니다.graphURL에서AzureCalling/app/assets/appSettings.properties에 대한 값을 사용자 정보를 페치 위한 Graph API 엔드포인트로 설정합니다.AzureCalling/app/src/main/assets/appSettings.properties를 편집하고 키tenant의 값을 설정하여 애플리케이션을 다시 시작하는 동안 사용자가 반복해서 인증할 필요가 없도록 자동 로그인을 사용하도록 설정합니다.
리소스 정리
Communication Services 구독을 정리하고 제거하려면 리소스 또는 리소스 그룹을 삭제하면 됩니다. 리소스 그룹을 삭제하면 해당 리소스 그룹에 연결된 다른 모든 리소스가 함께 삭제됩니다. 리소스 정리에 대해 자세히 알아보세요.
다음 단계
자세한 내용은 다음 문서를 참조하세요.
- 통화 SDK 사용법 숙지
- 통화 작동 방식에 대한 자세한 정보
추가 자료
- Azure Communication GitHub - 공식 GitHub 페이지에서 더 많은 예제 및 정보 찾기
- 샘플 - 샘플 개요 페이지에서 추가 샘플과 예제를 찾아보세요.
- Azure Communication 기능 호출 - Android sdk 호출에 대한 자세한 내용은 Azure Communication Android 호출 SDK를 참조하세요.
Azure Communication Services Windows용 그룹 통화 주인공 샘플은 Communication Services 통화 Windows SDK를 사용하여 음성 및 비디오가 포함된 그룹 통화 환경을 구축하는 방법을 보여 줍니다. 이 샘플에서는 샘플을 설정하고 실행하는 방법에 대해 알아봅니다. 상황에 맞는 샘플 개요가 제공됩니다.
이 빠른 시작에서는 Windows용 Azure Communication Services Calling SDK를 사용하여 1:1 화상 통화를 시작하는 방법에 대해 알아봅니다.
UWP 샘플 코드
필수 조건
이 자습서를 완료하려면 다음 필수 구성 요소가 필요합니다.
활성 구독이 있는 Azure 계정. 체험 계정을 만듭니다.
유니버설 Windows 플랫폼 개발 워크로드가 있는 Visual Studio 2022를 설치합니다.
배포된 Communication Services 리소스. Communication Services 리소스 만들기 이 빠른 시작에 대한 연결 문자열을 기록해야 합니다.
사용자 액세스 토큰(Azure Communication Service용) 또한 Azure CLI를 사용하고 연결 문자열과 함께 명령을 실행하여 사용자 및 액세스 토큰을 만들 수 있습니다.
az communication identity token issue --scope voip --connection-string "yourConnectionString"자세한 내용은 Azure CLI를 사용하여 액세스 토큰 만들기 및 관리를 참조하세요.
설정
프로젝트 만들기
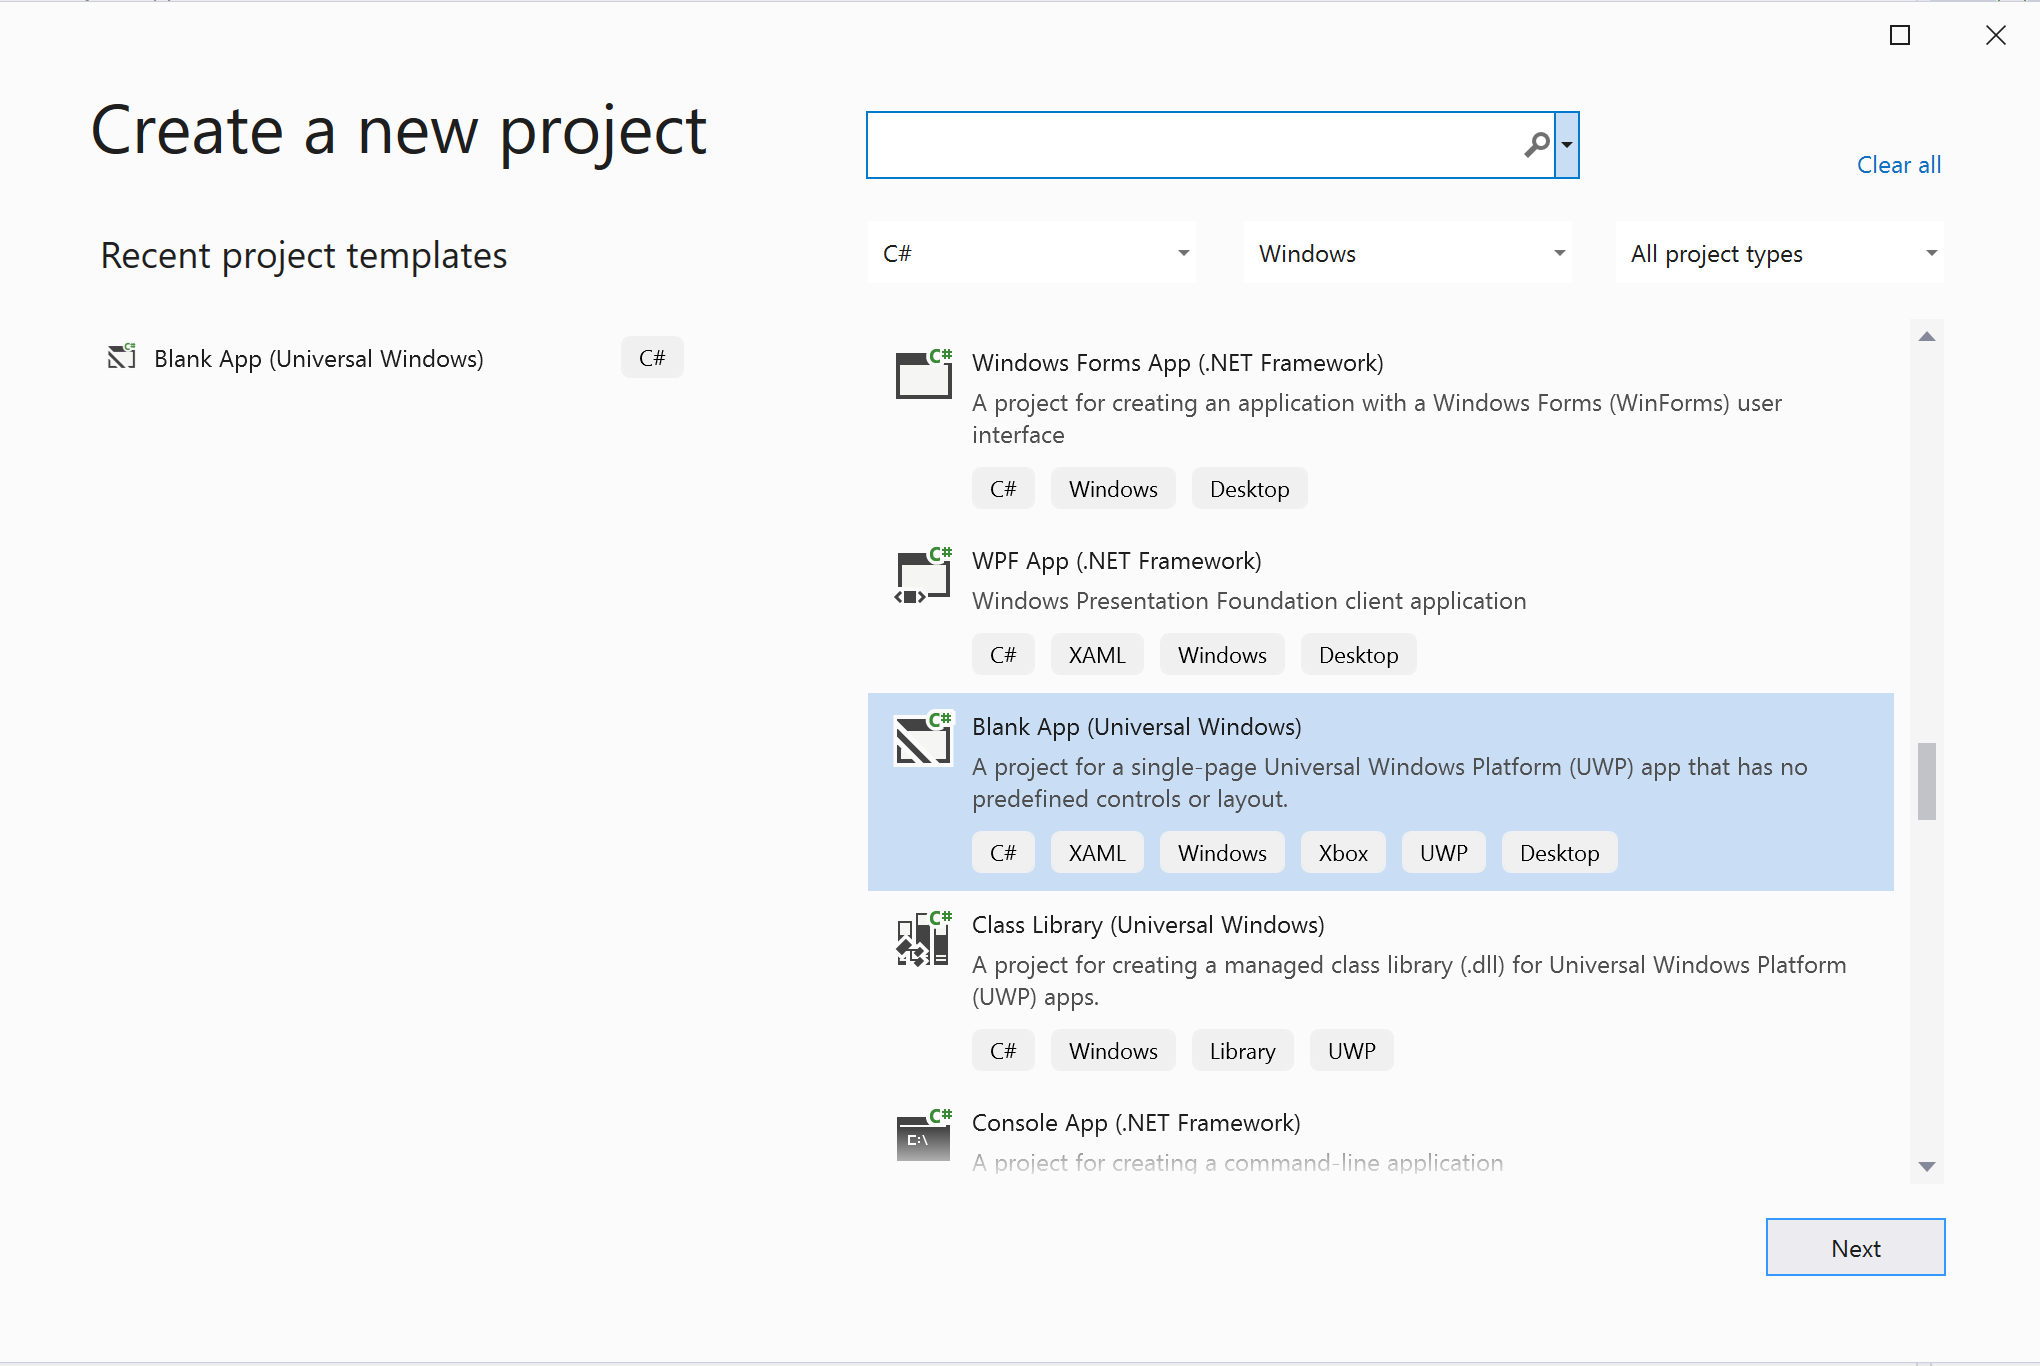
Visual Studio에서 비어 있는 앱(유니버설 Windows) 템플릿을 사용하여 단일 페이지 UWP(유니버설 Windows 플랫폼) 앱을 설정하는 새 프로젝트를 만듭니다.
패키지 설치
프로젝트를 마우스 오른쪽 단추로 클릭하고 Manage Nuget Packages로 이동하여 Azure.Communication.Calling.WindowsClient1.2.0-beta.1 이상을 설치합니다. 시험판 포함이 선택되어 있는지 확인합니다.
액세스 요청
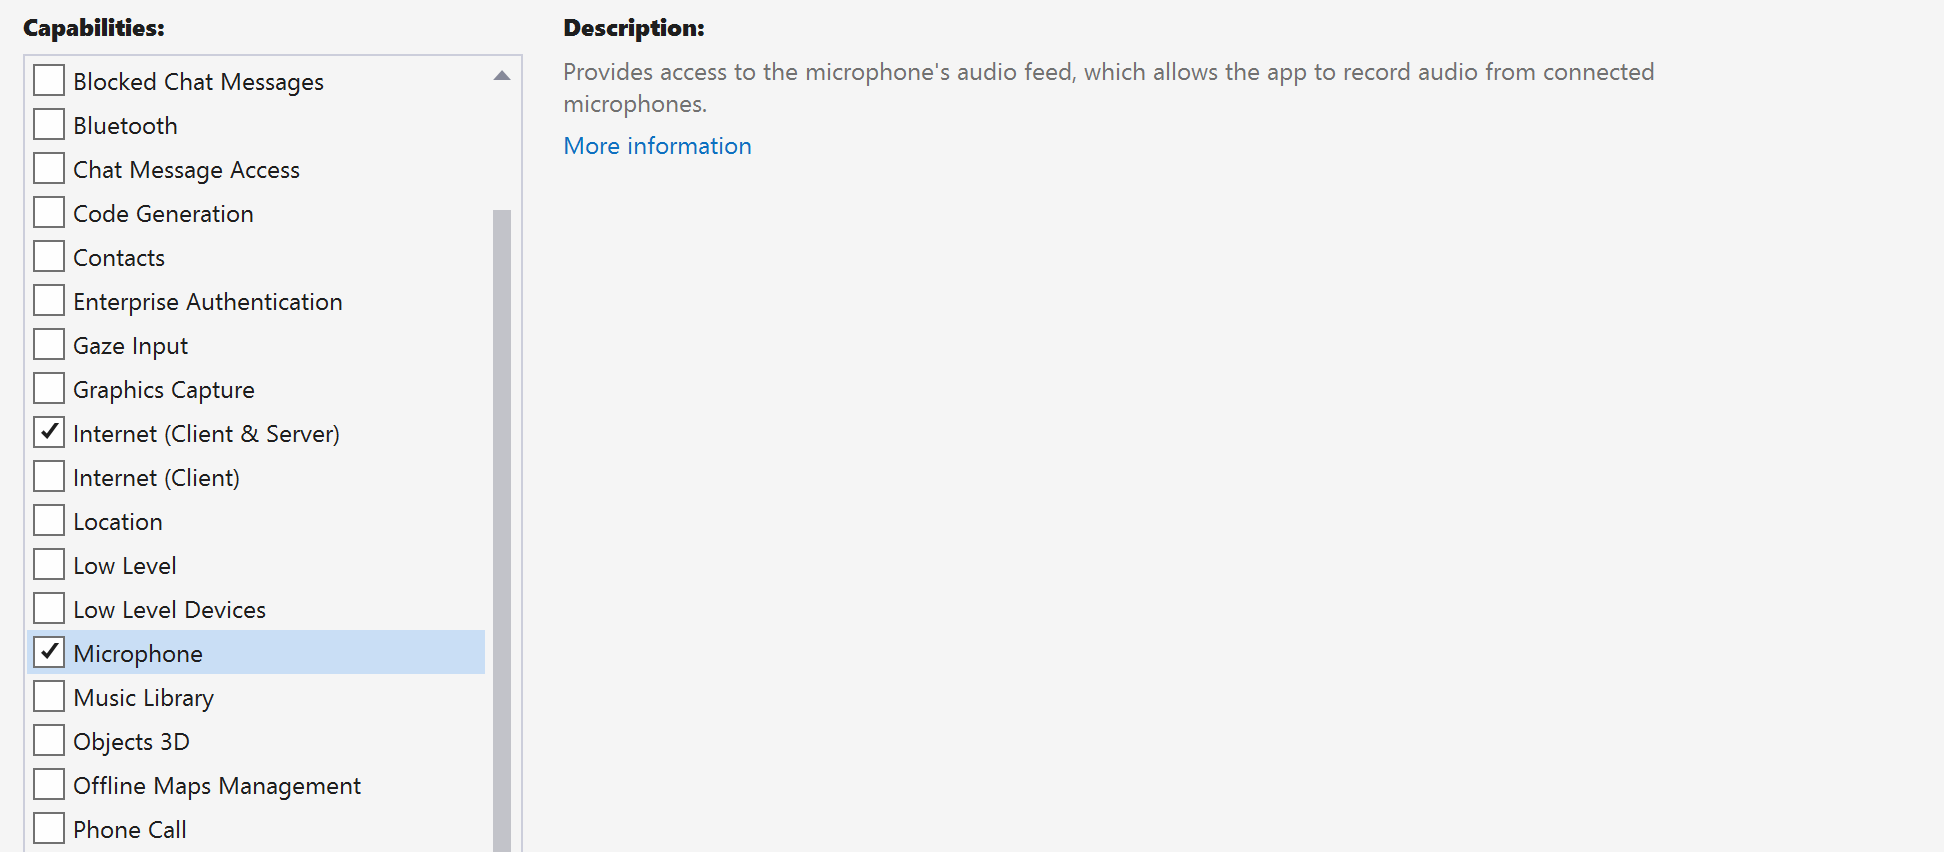
Package.appxmanifest로 이동하여 Capabilities를 클릭합니다.
인터넷에 대한 인바운드 및 아웃바운드 액세스 권한을 얻으려면 Internet (Client & Server)을 선택합니다.
마이크의 오디오 피드에 액세스하려면 Microphone을 선택합니다.
디바이스의 카메라에 액세스하려면 WebCam을 선택합니다.
마우스 오른쪽 단추를 클릭하고 코드 보기를 선택하여 Package.appxmanifest에 다음 코드를 추가합니다.
<Extensions>
<Extension Category="windows.activatableClass.inProcessServer">
<InProcessServer>
<Path>RtmMvrUap.dll</Path>
<ActivatableClass ActivatableClassId="VideoN.VideoSchemeHandler" ThreadingModel="both" />
</InProcessServer>
</Extension>
</Extensions>
앱 프레임워크 설정
논리를 연결하려면 기본 레이아웃을 구성해야 합니다. 아웃바운드 통화를 수행하려면 호출 수신자의 사용자 ID를 입력할 TextBox가 필요합니다. 또한 Start Call 단추와 Hang Up 단추도 필요합니다.
로컬 비디오를 미리 보고 다른 참가자의 원격 비디오도 렌더링해야 합니다. 따라서 비디오 스트림을 표시하려면 두 개의 요소가 필요합니다.
프로젝트의 MainPage.xaml을 열고 콘텐츠를 다음 구현으로 바꿉니다.
<Page
    x:Class="CallingQuickstart.MainPage"
    xmlns="http://schemas.microsoft.com/winfx/2006/xaml/presentation"
    xmlns:x="http://schemas.microsoft.com/winfx/2006/xaml"
    xmlns:local="using:CallingQuickstart"
    xmlns:d="http://schemas.microsoft.com/expression/blend/2008"
    xmlns:mc="http://schemas.openxmlformats.org/markup-compatibility/2006"
    mc:Ignorable="d"
    Background="{ThemeResource ApplicationPageBackgroundThemeBrush}">

    <Grid x:Name="MainGrid" HorizontalAlignment="Stretch">
        <Grid.RowDefinitions>
            <RowDefinition Height="*"/>
            <RowDefinition Height="Auto"/>
            <RowDefinition Height="200*"/>
            <RowDefinition Height="60*"/>
            <RowDefinition Height="Auto"/>
        </Grid.RowDefinitions>

        <Grid Grid.Row="0" x:Name="AppTitleBar" Background="LightSeaGreen">
            <!-- Width of the padding columns is set in LayoutMetricsChanged handler. -->
            <!-- Using padding columns instead of Margin ensures that the background paints the area under the caption control buttons (for transparent buttons). -->
            <TextBlock x:Name="QuickstartTitle" Text="Calling Quickstart sample title bar" Style="{StaticResource CaptionTextBlockStyle}" Padding="4,4,0,0"/>
        </Grid>

        <TextBox Grid.Row="1" x:Name="CalleeTextBox" PlaceholderText="Who would you like to call?" TextWrapping="Wrap" VerticalAlignment="Center" />

        <Grid Grid.Row="2" Background="LightGray">
            <Grid.RowDefinitions>
                <RowDefinition/>
            </Grid.RowDefinitions>
            <Grid.ColumnDefinitions>
                <ColumnDefinition Width="*"/>
                <ColumnDefinition Width="*"/>
            </Grid.ColumnDefinitions>
            <MediaPlayerElement x:Name="LocalVideo" HorizontalAlignment="Center" Stretch="UniformToFill" Grid.Column="0" VerticalAlignment="Center" AutoPlay="True" />
            <MediaPlayerElement x:Name="RemoteVideo" HorizontalAlignment="Center" Stretch="UniformToFill" Grid.Column="1" VerticalAlignment="Center" AutoPlay="True" />
        </Grid>
        <StackPanel Grid.Row="3" Orientation="Vertical" Grid.RowSpan="2">
            <StackPanel Orientation="Horizontal" Margin="10">
                <TextBlock VerticalAlignment="Center">Cameras:</TextBlock>
                <ComboBox x:Name="CameraList" HorizontalAlignment="Left" Grid.Column="0" DisplayMemberPath="Name" SelectionChanged="CameraList_SelectionChanged" Margin="10"/>
            </StackPanel>
            <StackPanel Orientation="Horizontal">
                <Button x:Name="CallButton" Content="Start/Join call" Click="CallButton_Click" VerticalAlignment="Center" Margin="10,0,0,0" Height="40" Width="123"/>
                <Button x:Name="HangupButton" Content="Hang up" Click="HangupButton_Click" VerticalAlignment="Center" Margin="10,0,0,0" Height="40" Width="123"/>
                <CheckBox x:Name="MuteLocal" Content="Mute" Margin="10,0,0,0" Click="MuteLocal_Click" Width="74"/>
                <CheckBox x:Name="BackgroundBlur" Content="Background blur" Width="142" Margin="10,0,0,0" Click="BackgroundBlur_Click"/>
            </StackPanel>
        </StackPanel>
        <TextBox Grid.Row="4" x:Name="Stats" Text="" TextWrapping="Wrap" VerticalAlignment="Center" Height="30" Margin="0,2,0,0" BorderThickness="2" IsReadOnly="True" Foreground="LightSlateGray" />
    </Grid>
</Page>
App.xaml.cs를 열고(마우스 오른쪽 단추를 클릭하고 코드 보기 선택) 이 줄을 맨 위에 추가합니다.
using CallingQuickstart;
MainPage.xaml.cs를 열고(마우스 오른쪽 단추로 클릭하고 코드 보기 선택) 콘텐츠를 다음 구현으로 바꿉니다.
using Azure.Communication.Calling.WindowsClient;
using System;
using System.Collections.Generic;
using System.Linq;
using System.Threading.Tasks;
using Windows.ApplicationModel;
using Windows.ApplicationModel.Core;
using Windows.Media.Core;
using Windows.Networking.PushNotifications;
using Windows.UI;
using Windows.UI.ViewManagement;
using Windows.UI.Xaml;
using Windows.UI.Xaml.Controls;
using Windows.UI.Xaml.Media;
using Windows.UI.Xaml.Navigation;

namespace CallingQuickstart
{
    public sealed partial class MainPage : Page
    {
        private const string authToken = "<Azure Communication Services auth token>";

        private CallClient callClient;
        private CallTokenRefreshOptions callTokenRefreshOptions;
        private CallAgent callAgent;
        private CommunicationCall call = null;

        private LocalOutgoingAudioStream micStream;
        private LocalOutgoingVideoStream cameraStream;

        #region Page initialization
        public MainPage()
        {
            this.InitializeComponent();

            // Hide default title bar.
            var coreTitleBar = CoreApplication.GetCurrentView().TitleBar;
            coreTitleBar.ExtendViewIntoTitleBar = true;

            QuickstartTitle.Text = $"{Package.Current.DisplayName} - Ready";
            Window.Current.SetTitleBar(AppTitleBar);

            CallButton.IsEnabled = true;
            HangupButton.IsEnabled = !CallButton.IsEnabled;
            MuteLocal.IsChecked = MuteLocal.IsEnabled = !CallButton.IsEnabled;

            ApplicationView.PreferredLaunchViewSize = new Windows.Foundation.Size(800, 600);
            ApplicationView.PreferredLaunchWindowingMode = ApplicationViewWindowingMode.PreferredLaunchViewSize;
        }

        protected override async void OnNavigatedTo(NavigationEventArgs e)
        {
            await InitCallAgentAndDeviceManagerAsync();

            base.OnNavigatedTo(e);
        }
#endregion

        private async Task InitCallAgentAndDeviceManagerAsync()
        {
            // Initialize call agent and Device Manager
        }

        private async void Agent_OnIncomingCallAsync(object sender, IncomingCall incomingCall)
        {
            // Accept an incoming call
        }

        private async void CallButton_Click(object sender, RoutedEventArgs e)
        {
            // Start a call with video
        }

        private async void HangupButton_Click(object sender, RoutedEventArgs e)
        {
            // End the current call
        }

        private async void Call_OnStateChangedAsync(object sender, PropertyChangedEventArgs args)
        {
            var call = sender as CommunicationCall;

            if (call != null)
            {
                var state = call.State;

                await Dispatcher.RunAsync(Windows.UI.Core.CoreDispatcherPriority.Normal, () =>
                {
                    QuickstartTitle.Text = $"{Package.Current.DisplayName} - {state.ToString()}";
                    Window.Current.SetTitleBar(AppTitleBar);

                    HangupButton.IsEnabled = state == CallState.Connected || state == CallState.Ringing;
                    CallButton.IsEnabled = !HangupButton.IsEnabled;
                    MuteLocal.IsEnabled = !CallButton.IsEnabled;
                });

                switch (state)
                {
                    case CallState.Connected:
                        {
                            break;
                        }
                    case CallState.Disconnected:
                        {
                            break;
                        }
                    default: break;
                }
            }
        }

        private async void CameraList_SelectionChanged(object sender, SelectionChangedEventArgs e)
        {
            // Handle camera selection
        }
    }
}
개체 모델
Azure Communication Services 통화 SDK의 주요 기능 중 일부를 처리하는 클래스와 인터페이스는 다음과 같습니다.
| 이름 | 설명 |
|---|---|
CallClient |
CallClient는 통화 클라이언트 라이브러리의 기본 진입점입니다. |
CallAgent |
CallAgent는 통화를 시작하고 참여하는 데 사용됩니다. |
CommunicationCall |
CommunicationCall은 발신 또는 참여한 통화를 관리하는 데 사용됩니다. |
CallTokenCredential |
CallTokenCredential은 CallAgent를 인스턴스화하기 위한 토큰 자격 증명으로 사용됩니다. |
CommunicationUserIdentifier |
CommunicationUserIdentifier는 사용자의 ID를 나타내는 데 사용되며 다음 옵션(CommunicationUserIdentifier, PhoneNumberIdentifier 또는 CallingApplication) 중 하나일 수 있습니다. |
클라이언트 인증
CallAgent를 초기화하려면 사용자 액세스 토큰이 필요합니다. 일반적으로 이 토큰은 애플리케이션과 관련된 인증을 사용하는 서비스에서 생성됩니다. 사용자 액세스 토큰에 대한 자세한 내용은 사용자 액세스 토큰 가이드를 확인하세요.
빠른 시작에서는 <AUTHENTICATION_TOKEN>을 Azure Communication Services 리소스에 대해 생성된 사용자 액세스 토큰으로 바꿉니다.
토큰이 있으면 이 토큰으로 CallAgent 인스턴스를 초기화하여 전화를 걸고 받을 수 있습니다. 디바이스의 카메라에 액세스하려면 디바이스 관리자 인스턴스도 가져와야 합니다.
InitCallAgentAndDeviceManagerAsync 함수에 다음 코드를 추가합니다.
this.callClient = new CallClient(new CallClientOptions() {
    Diagnostics = new CallDiagnosticsOptions() {
        AppName = "CallingQuickstart",
        AppVersion="1.0",
        Tags = new[] { "Calling", "ACS", "Windows" }
        }
    });

// Set up local video stream using the first camera enumerated
var deviceManager = await this.callClient.GetDeviceManagerAsync();
var camera = deviceManager?.Cameras?.FirstOrDefault();
var mic = deviceManager?.Microphones?.FirstOrDefault();
micStream = new LocalOutgoingAudioStream();

CameraList.ItemsSource = deviceManager.Cameras.ToList();

if (camera != null)
{
    CameraList.SelectedIndex = 0;
}

callTokenRefreshOptions = new CallTokenRefreshOptions(false);
callTokenRefreshOptions.TokenRefreshRequested += OnTokenRefreshRequestedAsync;

var tokenCredential = new CallTokenCredential(authToken, callTokenRefreshOptions);

var callAgentOptions = new CallAgentOptions()
{
    DisplayName = "Contoso",
    //https://github.com/lukes/ISO-3166-Countries-with-Regional-Codes/blob/master/all/all.csv
    EmergencyCallOptions = new EmergencyCallOptions() { CountryCode = "840" }
};


try
{
    this.callAgent = await this.callClient.CreateCallAgentAsync(tokenCredential, callAgentOptions);
    //await this.callAgent.RegisterForPushNotificationAsync(await this.RegisterWNS());
    this.callAgent.CallsUpdated += OnCallsUpdatedAsync;
    this.callAgent.IncomingCallReceived += OnIncomingCallAsync;

}
catch(Exception ex)
{
    if (ex.HResult == -2147024809)
    {
        // E_INVALIDARG
        // Handle possible invalid token
    }
}
비디오로 통화 시작
영상 통화를 시작하려면 CallButton_Click에 구현을 추가합니다. 디바이스 관리자 인스턴스를 사용하여 카메라를 열거하고 LocalOutgoingVideoStream을 생성해야 합니다.
VideoOptions을 사용하여 LocalVideoStream를 설정하고 startCallOptions를 전달하여 호출의 초기 옵션을 설정해야 합니다.
LocalOutgoingVideoStream을 MediaElement에 연결하면 로컬 비디오의 미리 보기를 볼 수 있습니다.
var callString = CalleeTextBox.Text.Trim();

if (!string.IsNullOrEmpty(callString))
{
    if (callString.StartsWith("8:")) // 1:1 Azure Communication Services call
    {
        call = await StartAcsCallAsync(callString);
    }
    else if (callString.StartsWith("+")) // 1:1 phone call
    {
        call = await StartPhoneCallAsync(callString, "+12133947338");
    }
    else if (Guid.TryParse(callString, out Guid groupId))// Join group call by group guid
    {
        call = await JoinGroupCallByIdAsync(groupId);
    }
    else if (Uri.TryCreate(callString, UriKind.Absolute, out Uri teamsMeetinglink)) //Teams meeting link
    {
        call = await JoinTeamsMeetingByLinkAsync(teamsMeetinglink);
    }
}

if (call != null)
{
    call.RemoteParticipantsUpdated += OnRemoteParticipantsUpdatedAsync;
    call.StateChanged += OnStateChangedAsync;
}
다양한 유형의 통화(1:1 Azure Communication Services 통화, 1:1 전화 통화, Azure Communication Services 그룹 통화, Teams 모임 참가 등)를 시작하거나 참가하는 방법을 추가합니다.
private async Task<CommunicationCall> StartAcsCallAsync(string acsCallee)
{
    var options = await GetStartCallOptionsAsync();
    var call = await this.callAgent.StartCallAsync( new [] { new UserCallIdentifier(acsCallee) }, options);
    return call;
}

private async Task<CommunicationCall> StartPhoneCallAsync(string acsCallee, string alternateCallerId)
{
    var options = await GetStartCallOptionsAsync();
    options.AlternateCallerId = new PhoneNumberCallIdentifier(alternateCallerId);

    var call = await this.callAgent.StartCallAsync( new [] { new PhoneNumberCallIdentifier(acsCallee) }, options);
    return call;
}

private async Task<CommunicationCall> JoinGroupCallByIdAsync(Guid groupId)
{
    var joinCallOptions = await GetJoinCallOptionsAsync();

    var groupCallLocator = new GroupCallLocator(groupId);
    var call = await this.callAgent.JoinAsync(groupCallLocator, joinCallOptions);
    return call;
}

private async Task<CommunicationCall> JoinTeamsMeetingByLinkAsync(Uri teamsCallLink)
{
    var joinCallOptions = await GetJoinCallOptionsAsync();

    var teamsMeetingLinkLocator = new TeamsMeetingLinkLocator(teamsCallLink.AbsoluteUri);
    var call = await callAgent.JoinAsync(teamsMeetingLinkLocator, joinCallOptions);
    return call;
}

private async Task<StartCallOptions> GetStartCallOptionsAsync()
{
    return new StartCallOptions() {
        OutgoingAudioOptions = new OutgoingAudioOptions() { IsOutgoingAudioMuted = true, OutgoingAudioStream = micStream  },
        OutgoingVideoOptions = new OutgoingVideoOptions() { OutgoingVideoStreams = new OutgoingVideoStream[] { cameraStream } }
    };
}

private async Task<JoinCallOptions> GetJoinCallOptionsAsync()
{
    return new JoinCallOptions() {
        OutgoingAudioOptions = new OutgoingAudioOptions() { IsOutgoingAudioMuted = true },
        OutgoingVideoOptions = new OutgoingVideoOptions() { OutgoingVideoStreams = new OutgoingVideoStream[] { cameraStream } }
    };
}
CameraList_SelectionChanged 메서드에서 선택한 카메라에 따라 LocalVideoStream을 생성하는 코드를 추가합니다.
var selectedCamera = CameraList.SelectedItem as VideoDeviceDetails;
cameraStream = new LocalOutgoingVideoStream(selectedCamera);

 var localUri = await cameraStream.StartPreviewAsync();
await Dispatcher.RunAsync(Windows.UI.Core.CoreDispatcherPriority.Normal, () =>
{
    LocalVideo.Source = MediaSource.CreateFromUri(localUri);
});

if (call != null)
{
    await call?.StartVideoAsync(cameraStream);
}
수신 전화 받기
구현을 OnIncomingCallAsync에 추가하여 비디오로 들어오는 호출에 응답하고 LocalVideoStream을 acceptCallOptions에 전달합니다.
var incomingCall = args.IncomingCall;

var acceptCallOptions = new AcceptCallOptions() {
    IncomingVideoOptions = new IncomingVideoOptions()
    {
        IncomingVideoStreamKind = VideoStreamKind.RemoteIncoming
    }
};

_ = await incomingCall.AcceptAsync(acceptCallOptions);
원격 참가자 및 원격 비디오 스트림
모든 원격 참가자는 통화 인스턴스의 RemoteParticipants 컬렉션을 통해 사용할 수 있습니다. 통화가 연결되면(CallState.Connected) 통화의 원격 참가자에게 액세스하고 원격 비디오 스트림을 처리할 수 있습니다.
참고 항목
사용자가 통화에 참가하면 RemoteParticipants 컬렉션을 통해 현재 원격 참가자에 액세스할 수 있습니다.
RemoteParticipantsUpdated 이벤트는 이러한 기존 참가자에 대해 트리거되지 않습니다. 이 이벤트는 사용자가 이미 통화 중일 때 원격 참가자가 통화에 참가하거나 나가는 경우에만 트리거됩니다.
private async void Call_OnVideoStreamsUpdatedAsync(object sender, RemoteVideoStreamsEventArgs args)
{
    foreach (var remoteVideoStream in args.AddedRemoteVideoStreams)
    {
        await Dispatcher.RunAsync(Windows.UI.Core.CoreDispatcherPriority.Normal, async () =>
        {
            RemoteVideo.Source = await remoteVideoStream.Start();
        });
    }

    foreach (var remoteVideoStream in args.RemovedRemoteVideoStreams)
    {
        remoteVideoStream.Stop();
    }
}

private async void Agent_OnCallsUpdatedAsync(object sender, CallsUpdatedEventArgs args)
{
    var removedParticipants = new List<RemoteParticipant>();
    var addedParticipants = new List<RemoteParticipant>();

    foreach(var call in args.RemovedCalls)
    {
        removedParticipants.AddRange(call.RemoteParticipants.ToList<RemoteParticipant>());
    }

    foreach (var call in args.AddedCalls)
    {
        addedParticipants.AddRange(call.RemoteParticipants.ToList<RemoteParticipant>());
    }

    await OnParticipantChangedAsync(removedParticipants, addedParticipants);
}

private async Task OnParticipantChangedAsync(IEnumerable<RemoteParticipant> removedParticipants, IEnumerable<RemoteParticipant> addedParticipants)
{
    foreach (var participant in removedParticipants)
    {
        foreach(var incomingVideoStream in  participant.IncomingVideoStreams)
        {
            var remoteVideoStream = incomingVideoStream as RemoteIncomingVideoStream;
            if (remoteVideoStream != null)
            {
                await remoteVideoStream.StopPreviewAsync();
            }
        }
        participant.VideoStreamStateChanged -= OnVideoStreamStateChanged;
    }

    foreach (var participant in addedParticipants)
    {
        participant.VideoStreamStateChanged += OnVideoStreamStateChanged;
    }
}

private void OnVideoStreamStateChanged(object sender, VideoStreamStateChangedEventArgs e)
{
    CallVideoStream callVideoStream = e.CallVideoStream;

    switch (callVideoStream.StreamDirection)
    {
        case StreamDirection.Outgoing:
            OnOutgoingVideoStreamStateChanged(callVideoStream as OutgoingVideoStream);
            break;
        case StreamDirection.Incoming:
            OnIncomingVideoStreamStateChanged(callVideoStream as IncomingVideoStream);
            break;
    }
}

private async void OnIncomingVideoStreamStateChanged(IncomingVideoStream incomingVideoStream)
{
    switch (incomingVideoStream.State)
    {
        case VideoStreamState.Available:
        {
            switch (incomingVideoStream.Kind)
            {
                case VideoStreamKind.RemoteIncoming:
                    var remoteVideoStream = incomingVideoStream as RemoteIncomingVideoStream;
                    var uri = await remoteVideoStream.StartPreviewAsync();

                    await Dispatcher.RunAsync(Windows.UI.Core.CoreDispatcherPriority.Normal, () =>
                    {
                        RemoteVideo.Source = MediaSource.CreateFromUri(uri);
                    });
                    break;

                case VideoStreamKind.RawIncoming:
                    break;
            }
            break;
        }
        case VideoStreamState.Started:
            break;
        case VideoStreamState.Stopping:
            break;
        case VideoStreamState.Stopped:
            if (incomingVideoStream.Kind == VideoStreamKind.RemoteIncoming)
            {
                var remoteVideoStream = incomingVideoStream as RemoteIncomingVideoStream;
                await remoteVideoStream.StopPreviewAsync();
            }
            break;
        case VideoStreamState.NotAvailable:
            break;
    }

}
원격 비디오 렌더링
각 원격 비디오 스트림의 경우 MediaElement에 연결합니다.
private async Task AddVideoStreamsAsync(IReadOnlyList<RemoteVideoStream> remoteVideoStreams)
{
    foreach (var remoteVideoStream in remoteVideoStreams)
    {
        var remoteUri = await remoteVideoStream.Start();

        await Dispatcher.RunAsync(Windows.UI.Core.CoreDispatcherPriority.Normal, () =>
        {
            RemoteVideo.Source = remoteUri;
            RemoteVideo.Play();
        });
    }
}
통화 상태 업데이트
통화 연결이 끊긴 후 비디오 렌더러를 정리하고 원격 참가자가 처음 통화에 참가할 때 사례를 처리해야 합니다.
private async void Call_OnStateChanged(object sender, PropertyChangedEventArgs args)
{
    switch (((Call)sender).State)
    {
        case CallState.Disconnected:
            await Dispatcher.RunAsync(Windows.UI.Core.CoreDispatcherPriority.Normal, () =>
            {
                LocalVideo.Source = null;
                RemoteVideo.Source = null;
            });
            break;

        case CallState.Connected:
            foreach (var remoteParticipant in call.RemoteParticipants)
            {
                String remoteParticipantMRI = remoteParticipant.Identifier.ToString();
                remoteParticipantDictionary.TryAdd(remoteParticipantMRI, remoteParticipant);
                await AddVideoStreams(remoteParticipant.VideoStreams);
                remoteParticipant.OnVideoStreamsUpdated += Call_OnVideoStreamsUpdated;
            }
            break;

        default:
            break;
    }
}
통화 종료
Hang Up 단추를 클릭하면 현재 통화가 종료됩니다. HangupButton_Click에 구현을 추가하여 작성한 callAgent를 사용하여 통화를 종료하고 참가자 업데이트 및 통화 상태 이벤트 처리기를 해제합니다.
var call = this.callAgent?.Calls?.FirstOrDefault();
if (call != null)
{
    try
    {
        await call.HangUpAsync(new HangUpOptions() { ForEveryone = true });
    }
    catch(Exception ex)
    {
    }
}
코드 실행
Visual Studio에서 코드를 빌드하고 실행할 수 있습니다. 지원되는 솔루션 플랫폼은 ARM64, x64 및 x86입니다.
텍스트 필드에 사용자 ID를 지정하고 Start Call 단추를 클릭하여 아웃바운드 비디오 호출을 수행할 수 있습니다.
참고: 에코 봇은 동영상 스트리밍을 지원하지 않으므로 8:echo123을 호출하면 동영상 스트리밍이 중지됩니다.
사용자 ID에 대한 자세한 내용은 사용자 액세스 토큰 가이드를 확인하세요.
WinUI 3 샘플 코드
필수 조건
이 자습서를 완료하려면 다음 필수 구성 요소가 필요합니다.
활성 구독이 있는 Azure 계정. 체험 계정을 만듭니다.
WinUI 3 앱을 만드는 방법에 대한 기본적인 이해. 첫 번째 WinUI 3(Windows App SDK) 프로젝트 만들기는 시작하기에 좋은 리소스입니다.
배포된 Communication Services 리소스. Communication Services 리소스 만들기 이 빠른 시작에 대한 연결 문자열을 기록해야 합니다.
사용자 액세스 토큰(Azure Communication Service용) 또한 Azure CLI를 사용하고 연결 문자열과 함께 명령을 실행하여 사용자 및 액세스 토큰을 만들 수 있습니다.
az communication identity token issue --scope voip --connection-string "yourConnectionString"자세한 내용은 Azure CLI를 사용하여 액세스 토큰 만들기 및 관리를 참조하세요.
설정
프로젝트 만들기
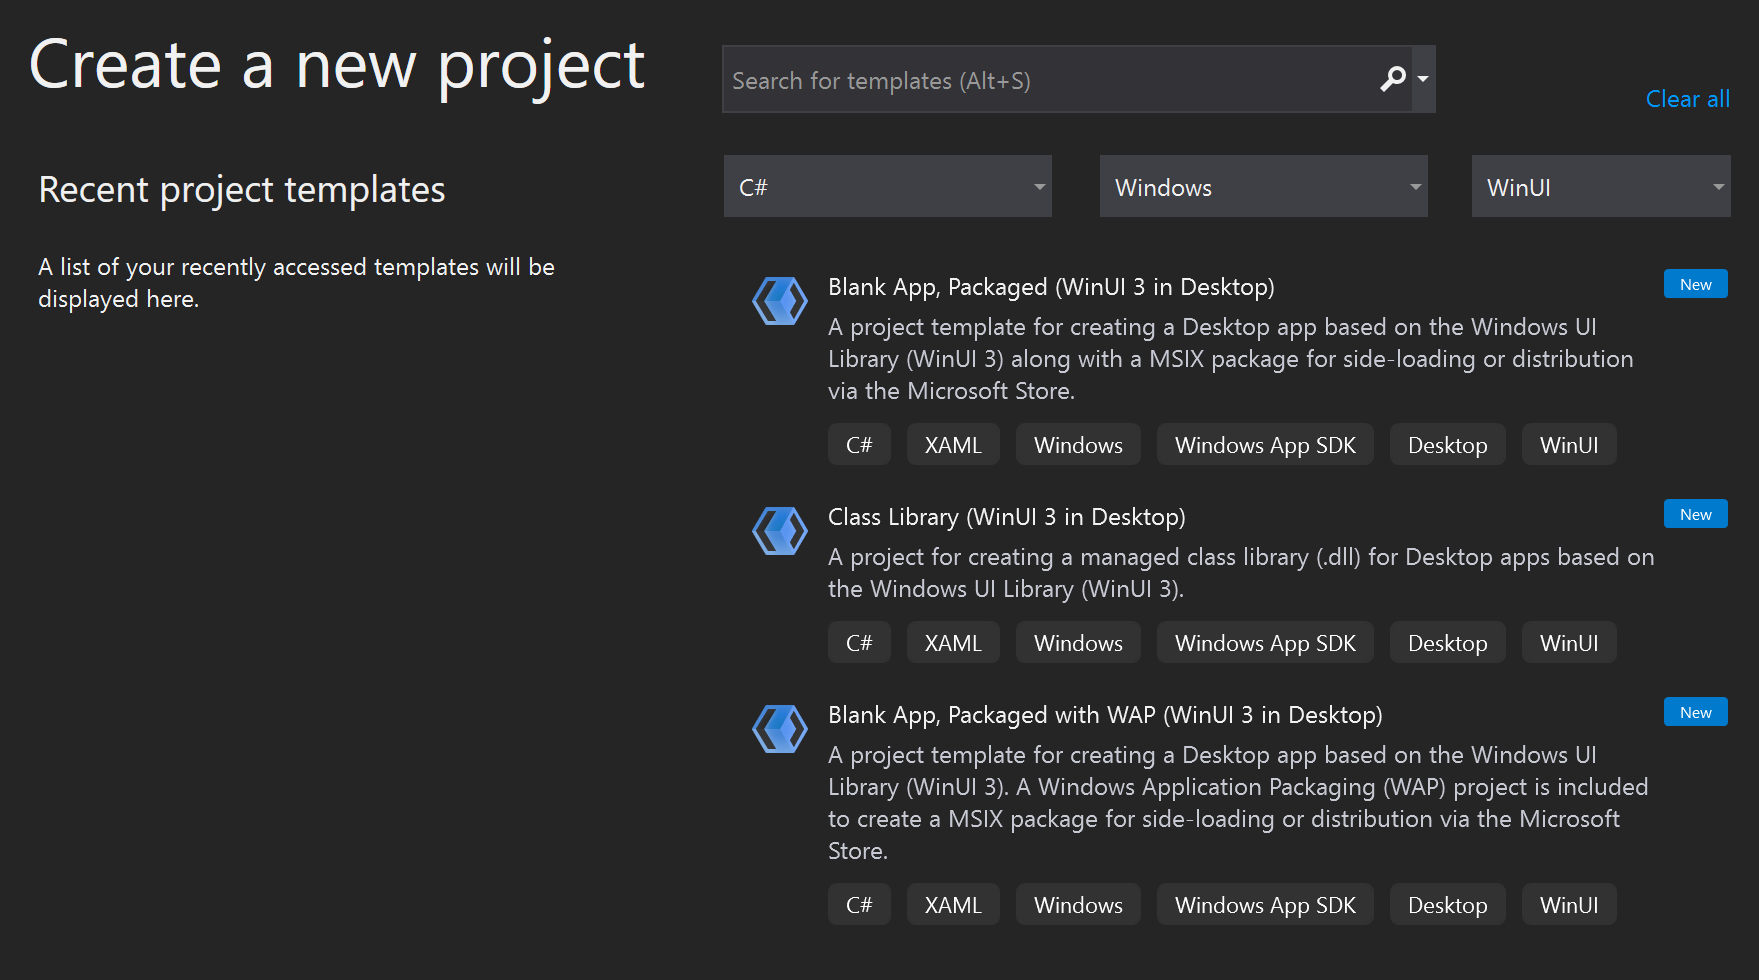
Visual Studio에서 빈 앱, 패키지됨(데스크톱의 WinUI 3) 템플릿으로 새 프로젝트를 만들어 단일 페이지 WinUI 3 앱을 설정합니다.
패키지 설치
프로젝트를 마우스 오른쪽 단추로 클릭하고 Manage Nuget Packages로 이동하여 Azure.Communication.Calling.WindowsClient1.0.0 이상을 설치합니다. 시험판 포함이 선택되어 있는지 확인합니다.
액세스 요청
app.manifest에 다음 코드를 추가합니다.
<file name="RtmMvrMf.dll">
    <activatableClass name="VideoN.VideoSchemeHandler" threadingModel="both" xmlns="urn:schemas-microsoft-com:winrt.v1" />
</file>
앱 프레임워크 설정
논리를 연결하려면 기본 레이아웃을 구성해야 합니다. 아웃바운드 통화를 수행하려면 호출 수신자의 사용자 ID를 입력할 TextBox가 필요합니다. 또한 Start Call 단추와 Hang Up 단추도 필요합니다.
로컬 비디오를 미리 보고 다른 참가자의 원격 비디오도 렌더링해야 합니다. 따라서 비디오 스트림을 표시하려면 두 개의 요소가 필요합니다.
프로젝트의 MainWindow.xaml을 열고 콘텐츠를 다음 구현으로 바꿉니다.
<Page
    x:Class="CallingQuickstart.MainPage"
    xmlns="http://schemas.microsoft.com/winfx/2006/xaml/presentation"
    xmlns:x="http://schemas.microsoft.com/winfx/2006/xaml"
    xmlns:local="using:CallingQuickstart"
    xmlns:d="http://schemas.microsoft.com/expression/blend/2008"
    xmlns:mc="http://schemas.openxmlformats.org/markup-compatibility/2006"
    mc:Ignorable="d">

    <Grid x:Name="MainGrid">
        <Grid.RowDefinitions>
            <RowDefinition Height="32"/>
            <RowDefinition Height="Auto"/>
            <RowDefinition Height="200*"/>
            <RowDefinition Height="60*"/>
            <RowDefinition Height="Auto"/>
        </Grid.RowDefinitions>

        <Grid Grid.Row="0" x:Name="AppTitleBar" Background="LightSeaGreen">
            <!-- Width of the padding columns is set in LayoutMetricsChanged handler. -->
            <!-- Using padding columns instead of Margin ensures that the background paints the area under the caption control buttons (for transparent buttons). -->
            <TextBlock x:Name="QuickstartTitle" Text="Calling Quickstart sample title bar" Style="{StaticResource CaptionTextBlockStyle}" Padding="4,4,0,0"/>
        </Grid>

        <TextBox Grid.Row="1" x:Name="CalleeTextBox" PlaceholderText="Who would you like to call?" TextWrapping="Wrap" VerticalAlignment="Center" />

        <Grid Grid.Row="2" Background="LightGray">
            <Grid.RowDefinitions>
                <RowDefinition/>
            </Grid.RowDefinitions>
            <Grid.ColumnDefinitions>
                <ColumnDefinition Width="*"/>
                <ColumnDefinition Width="*"/>
            </Grid.ColumnDefinitions>
            <MediaPlayerElement x:Name="LocalVideo" HorizontalAlignment="Center" Stretch="UniformToFill" Grid.Column="0" VerticalAlignment="Center" AutoPlay="True" />
            <MediaPlayerElement x:Name="RemoteVideo" HorizontalAlignment="Center" Stretch="UniformToFill" Grid.Column="1" VerticalAlignment="Center" AutoPlay="True" />
        </Grid>
        <StackPanel Grid.Row="3" Orientation="Vertical" Grid.RowSpan="2">
            <StackPanel Orientation="Horizontal" Margin="10">
                <TextBlock VerticalAlignment="Center">Cameras:</TextBlock>
                <ComboBox x:Name="CameraList" HorizontalAlignment="Left" Grid.Column="0" DisplayMemberPath="Name" SelectionChanged="CameraList_SelectionChanged" Margin="10"/>
            </StackPanel>
            <StackPanel Orientation="Horizontal">
                <Button x:Name="CallButton" Content="Start/Join call" Click="CallButton_Click" VerticalAlignment="Center" Margin="10,0,0,0" Height="40" Width="123"/>
                <Button x:Name="HangupButton" Content="Hang up" Click="HangupButton_Click" VerticalAlignment="Center" Margin="10,0,0,0" Height="40" Width="123"/>
                <CheckBox x:Name="MuteLocal" Content="Mute" Margin="10,0,0,0" Click="MuteLocal_Click" Width="74"/>
                <CheckBox x:Name="BackgroundBlur" Content="Background blur" Width="142" Margin="10,0,0,0" Click="BackgroundBlur_Click"/>
            </StackPanel>
        </StackPanel>
        <TextBox Grid.Row="4" x:Name="Stats" Text="" TextWrapping="Wrap" VerticalAlignment="Center" Height="30" Margin="0,2,0,0" BorderThickness="2" IsReadOnly="True" Foreground="LightSlateGray" />
    </Grid>
</Page>
App.xaml.cs를 열고(마우스 오른쪽 단추를 클릭하고 코드 보기 선택) 이 줄을 맨 위에 추가합니다.
using CallingQuickstart;
MainWindow.xaml.cs를 열고(마우스 오른쪽 단추로 클릭하고 코드 보기 선택) 콘텐츠를 다음 구현으로 바꿉니다.
using Azure.Communication.Calling.WindowsClient;
using Azure.WinRT.Communication;
using Microsoft.UI.Xaml;
using System;
using System.Collections.Generic;
using System.Linq;
using System.Threading.Tasks;
using Windows.Media.Core;

namespace CallingQuickstart
{
    public sealed partial class MainWindow : Window
    {
        CallAgent callAgent;
        Call call;
        DeviceManager deviceManager;
        Dictionary<string, RemoteParticipant> remoteParticipantDictionary = new Dictionary<string, RemoteParticipant>();

        public MainWindow()
        {
            this.InitializeComponent();
            Task.Run(() => this.InitCallAgentAndDeviceManagerAsync()).Wait();
        }

        private async Task InitCallAgentAndDeviceManagerAsync()
        {
            // Initialize call agent and Device Manager
        }

        private async void Agent_OnIncomingCallAsync(object sender, IncomingCall incomingCall)
        {
            // Accept an incoming call
        }

        private async void CallButton_Click(object sender, RoutedEventArgs e)
        {
            // Start a call with video
        }

        private async void HangupButton_Click(object sender, RoutedEventArgs e)
        {
            // End the current call
        }

        private async void Call_OnStateChangedAsync(object sender, PropertyChangedEventArgs args)
        {
            var state = (sender as Call)?.State;
            this.DispatcherQueue.TryEnqueue(() => {
                State.Text = state.ToString();
            });
        }
    }
}
개체 모델
Azure Communication Services 통화 SDK의 주요 기능 중 일부를 처리하는 클래스와 인터페이스는 다음과 같습니다.
| 이름 | 설명 |
|---|---|
CallClient |
CallClient는 통화 클라이언트 라이브러리의 기본 진입점입니다. |
CallAgent |
CallAgent는 통화를 시작하고 참여하는 데 사용됩니다. |
CommunicationCall |
CommunicationCall은 발신 또는 참여한 통화를 관리하는 데 사용됩니다. |
CallTokenCredential |
CallTokenCredential은 CallAgent를 인스턴스화하기 위한 토큰 자격 증명으로 사용됩니다. |
CommunicationUserIdentifier |
CommunicationUserIdentifier는 사용자의 ID를 나타내는 데 사용되며 다음 옵션(CommunicationUserIdentifier, PhoneNumberIdentifier 또는 CallingApplication) 중 하나일 수 있습니다. |
클라이언트 인증
CallAgent를 초기화하려면 사용자 액세스 토큰이 필요합니다. 일반적으로 이 토큰은 애플리케이션과 관련된 인증을 사용하는 서비스에서 생성됩니다. 사용자 액세스 토큰에 대한 자세한 내용은 사용자 액세스 토큰 가이드를 확인하세요.
빠른 시작에서는 <AUTHENTICATION_TOKEN>을 Azure Communication Services 리소스에 대해 생성된 사용자 액세스 토큰으로 바꿉니다.
토큰이 있으면 이 토큰으로 CallAgent 인스턴스를 초기화하여 전화를 걸고 받을 수 있습니다. 디바이스의 카메라에 액세스하려면 디바이스 관리자 인스턴스도 가져와야 합니다.
InitCallAgentAndDeviceManagerAsync 함수에 다음 코드를 추가합니다.
var callClient = new CallClient();
this.deviceManager = await callClient.GetDeviceManagerAsync();

var tokenCredential = new CallTokenCredential("<AUTHENTICATION_TOKEN>");
var callAgentOptions = new CallAgentOptions()
{
    DisplayName = "<DISPLAY_NAME>"
};

this.callAgent = await callClient.CreateCallAgentAsync(tokenCredential, callAgentOptions);
this.callAgent.OnCallsUpdated += Agent_OnCallsUpdatedAsync;
this.callAgent.OnIncomingCall += Agent_OnIncomingCallAsync;
비디오로 통화 시작
영상 통화를 시작하려면 CallButton_Click에 구현을 추가합니다. 디바이스 관리자 인스턴스를 사용하여 카메라를 열거하고 LocalVideoStream을 생성해야 합니다.
VideoOptions을 사용하여 LocalVideoStream를 설정하고 startCallOptions를 전달하여 호출의 초기 옵션을 설정해야 합니다.
LocalVideoStream을 MediaPlayerElement에 연결하면 로컬 비디오의 미리 보기를 볼 수 있습니다.
var startCallOptions = new StartCallOptions();

if (this.deviceManager.Cameras?.Count > 0)
{
    var videoDeviceInfo = this.deviceManager.Cameras?.FirstOrDefault();
    if (videoDeviceInfo != null)
    {
        var selectedCamera = CameraList.SelectedItem as VideoDeviceDetails;
        cameraStream = new LocalOutgoingVideoStream(selectedCamera);

        var localUri = await cameraStream.StartPreviewAsync();
        await Dispatcher.RunAsync(Windows.UI.Core.CoreDispatcherPriority.Normal, () =>
        {
            LocalVideo.Source = MediaSource.CreateFromUri(localUri);
        });

        startCallOptions.VideoOptions = new OutgoingVideoOptions(new[] { cameraStream });
    }
}

var callees = new ICommunicationIdentifier[1]
{
    new CommunicationUserIdentifier(CalleeTextBox.Text.Trim())
};

this.call = await this.callAgent.StartCallAsync(callees, startCallOptions);
this.call.OnRemoteParticipantsUpdated += Call_OnRemoteParticipantsUpdatedAsync;
this.call.OnStateChanged += Call_OnStateChangedAsync;
수신 전화 받기
구현을 Agent_OnIncomingCallAsync에 추가하여 비디오로 들어오는 호출에 응답하고 LocalVideoStream을 acceptCallOptions에 전달합니다.
var acceptCallOptions = new AcceptCallOptions();

if (this.deviceManager.Cameras?.Count > 0)
{
    var videoDeviceInfo = this.deviceManager.Cameras?.FirstOrDefault();
    if (videoDeviceInfo != null)
    {
        var selectedCamera = CameraList.SelectedItem as VideoDeviceDetails;
        cameraStream = new LocalOutgoingVideoStream(selectedCamera);

        var localUri = await cameraStream.StartPreviewAsync();
        await Dispatcher.RunAsync(Windows.UI.Core.CoreDispatcherPriority.Normal, () =>
        {
            LocalVideo.Source = MediaSource.CreateFromUri(localUri);
        });

        acceptCallOptions.VideoOptions = new OutgoingVideoOptions(new[] { localVideoStream });
    }
}

call = await incomingCall.AcceptAsync(acceptCallOptions);
원격 참가자 및 원격 비디오 스트림
모든 원격 참가자는 통화 인스턴스의 RemoteParticipants 컬렉션을 통해 사용할 수 있습니다. 전화가 연결되면 전화의 원격 참가자에게 액세스하고 원격 비디오 스트림을 처리할 수 있습니다.
참고 항목
사용자가 통화에 참가하면 RemoteParticipants 컬렉션을 통해 현재 원격 참가자에 액세스할 수 있습니다.
OnRemoteParticipantsUpdated 이벤트는 이러한 기존 참가자에 대해 트리거되지 않습니다. 이 이벤트는 사용자가 이미 통화 중일 때 원격 참가자가 통화에 참가하거나 나가는 경우에만 트리거됩니다.
private async void Call_OnVideoStreamsUpdatedAsync(object sender, RemoteVideoStreamsEventArgs args)
{
    foreach (var remoteVideoStream in args.AddedRemoteVideoStreams)
    {
        this.DispatcherQueue.TryEnqueue(async () => {
            RemoteVideo.Source = MediaSource.CreateFromUri(await remoteVideoStream.Start());
            RemoteVideo.MediaPlayer.Play();
        });
    }

    foreach (var remoteVideoStream in args.RemovedRemoteVideoStreams)
    {
        remoteVideoStream.Stop();
    }
}

private async void Agent_OnCallsUpdatedAsync(object sender, CallsUpdatedEventArgs args)
{
    foreach (var call in args.AddedCalls)
    {
        foreach (var remoteParticipant in call.RemoteParticipants)
        {
            var remoteParticipantMRI = remoteParticipant.Identifier.ToString();
            this.remoteParticipantDictionary.TryAdd(remoteParticipantMRI, remoteParticipant);
            await AddVideoStreamsAsync(remoteParticipant.VideoStreams);
            remoteParticipant.OnVideoStreamsUpdated += Call_OnVideoStreamsUpdatedAsync;
        }
    }
}

private async void Call_OnRemoteParticipantsUpdatedAsync(object sender, ParticipantsUpdatedEventArgs args)
{
    foreach (var remoteParticipant in args.AddedParticipants)
    {
        String remoteParticipantMRI = remoteParticipant.Identifier.ToString();
        this.remoteParticipantDictionary.TryAdd(remoteParticipantMRI, remoteParticipant);
        await AddVideoStreamsAsync(remoteParticipant.VideoStreams);
        remoteParticipant.OnVideoStreamsUpdated += Call_OnVideoStreamsUpdatedAsync;
    }

    foreach (var remoteParticipant in args.RemovedParticipants)
    {
        String remoteParticipantMRI = remoteParticipant.Identifier.ToString();
        this.remoteParticipantDictionary.Remove(remoteParticipantMRI);
    }
}
원격 비디오 렌더링
각 원격 비디오 스트림의 경우 MediaPlayerElement에 연결합니다.
private async Task AddVideoStreamsAsync(IReadOnlyList<RemoteVideoStream> remoteVideoStreams)
{
    foreach (var remoteVideoStream in remoteVideoStreams)
    {
        var remoteUri = await remoteVideoStream.Start();

        this.DispatcherQueue.TryEnqueue(() => {
            RemoteVideo.Source = MediaSource.CreateFromUri(remoteUri);
            RemoteVideo.MediaPlayer.Play();
        });
    }
}
통화 상태 업데이트
통화 연결이 끊긴 후 비디오 렌더러를 정리하고 원격 참가자가 처음 통화에 참가할 때 사례를 처리해야 합니다.
private async void Call_OnStateChanged(object sender, PropertyChangedEventArgs args)
{
    switch (((Call)sender).State)
    {
        case CallState.Disconnected:
            this.DispatcherQueue.TryEnqueue(() => { =>
            {
                LocalVideo.Source = null;
                RemoteVideo.Source = null;
            });
            break;

        case CallState.Connected:
            foreach (var remoteParticipant in call.RemoteParticipants)
            {
                String remoteParticipantMRI = remoteParticipant.Identifier.ToString();
                remoteParticipantDictionary.TryAdd(remoteParticipantMRI, remoteParticipant);
                await AddVideoStreams(remoteParticipant.VideoStreams);
                remoteParticipant.OnVideoStreamsUpdated += Call_OnVideoStreamsUpdated;
            }
            break;

        default:
            break;
    }
}
통화 종료
Hang Up 단추를 클릭하면 현재 통화가 종료됩니다. HangupButton_Click에 구현을 추가하여 작성한 callAgent를 사용하여 통화를 종료하고 참가자 업데이트 및 통화 상태 이벤트 처리기를 해제합니다.
this.call.OnRemoteParticipantsUpdated -= Call_OnRemoteParticipantsUpdatedAsync;
this.call.OnStateChanged -= Call_OnStateChangedAsync;
await this.call.HangUpAsync(new HangUpOptions());
코드 실행
Visual Studio에서 코드를 빌드하고 실행할 수 있습니다. 지원되는 솔루션 플랫폼은 ARM64, x64 및 x86입니다.
텍스트 필드에 사용자 ID를 지정하고 Start Call 단추를 클릭하여 아웃바운드 비디오 호출을 수행할 수 있습니다.
참고: 에코 봇은 동영상 스트리밍을 지원하지 않으므로 8:echo123을 호출하면 동영상 스트리밍이 중지됩니다.
사용자 ID에 대한 자세한 내용은 사용자 액세스 토큰 가이드를 확인하세요.