WPF에서 Shape 및 기본 그리기 개요
이 항목에서는 Shape 개체를 사용하여 그리는 방법에 대한 개요를 제공합니다. Shape는 화면에 도형을 그릴 수 있는 UIElement의 형식에 속합니다. Shape 개체는 UI 요소이기 때문에 Panel 요소 및 대부분의 컨트롤 내에서 사용할 수 있습니다.
WPF(Windows Presentation Foundation)는 그래픽 및 렌더링 서비스에 대한 여러 계층의 액세스를 제공합니다. 최상위 계층에서 Shape 개체는 사용이 간편하며 레이아웃 및 WPF(Windows Presentation Foundation) 참여 등 여러 가지 유용한 기능을 제공합니다.
Shape 개체
WPF에서는 바로 사용할 수 있는 여러 Shape 개체를 제공합니다. 모든 도형 개체는 Shape 클래스에서 상속됩니다. 사용 가능한 도형 개체에는 Ellipse, Line, Path, Polygon, Polyline 및 Rectangle이 있습니다. Shape 개체는 다음과 같은 공용 속성들을 공유합니다.
Stroke: 도형의 윤곽선을 그리는 방법을 설명합니다.
StrokeThickness: 도형의 윤곽선 두께를 설명합니다.
Fill: 도형의 내부를 채색하는 방법을 설명합니다.
디바이스 독립적 픽셀 단위로 측정된 좌표 및 꼭지점을 지정하는 데이터 속성입니다.
Shape 개체는 UIElement에서 파생되므로 패널 및 대부분의 컨트롤 내에서 사용할 수 있습니다. Canvas 패널은 자식 개체의 절대 위치 지정을 지원하기 때문에 복잡한 그리기를 만드는 데 특히 적합합니다.
Line 클래스를 사용하면 두 점 사이에 선을 그릴 수 있습니다. 다음 예제에서는 선 좌표 및 스트로크 속성을 지정하는 여러 방법을 보여 줍니다.
<Canvas Height="300" Width="300">

  <!-- Draws a diagonal line from (10,10) to (50,50). -->
  <Line
    X1="10" Y1="10"
    X2="50" Y2="50"
    Stroke="Black"
    StrokeThickness="4" />

  <!-- Draws a diagonal line from (10,10) to (50,50)
       and moves it 100 pixels to the right. -->
  <Line
    X1="10" Y1="10"
    X2="50" Y2="50"
    StrokeThickness="4"
    Canvas.Left="100">
    <Line.Stroke>
      <RadialGradientBrush GradientOrigin="0.5,0.5" Center="0.5,0.5" RadiusX="0.5" RadiusY="0.5">
        <RadialGradientBrush.GradientStops>
          <GradientStop Color="Red" Offset="0" />
          <GradientStop Color="Blue" Offset="0.25" />
        </RadialGradientBrush.GradientStops>
      </RadialGradientBrush>
    </Line.Stroke>
  </Line>

  <!-- Draws a horizontal line from (10,60) to (150,60). -->
  <Line
     X1="10" Y1="60"
     X2="150" Y2="60"
     Stroke="Black"
     StrokeThickness="4"/>

</Canvas>
// Add a Line Element
myLine = gcnew Line();
myLine->Stroke = Brushes::LightSteelBlue;
myLine->X1 = 1;
myLine->X2 = 50;
myLine->Y1 = 1;
myLine->Y2 = 50;
myLine->HorizontalAlignment = HorizontalAlignment::Left;
myLine->VerticalAlignment = VerticalAlignment::Center;
myLine->StrokeThickness = 2;
myGrid->Children->Add(myLine);
// Add a Line Element
myLine = new Line();
myLine.Stroke = System.Windows.Media.Brushes.LightSteelBlue;
myLine.X1 = 1;
myLine.X2 = 50;
myLine.Y1 = 1;
myLine.Y2 = 50;
myLine.HorizontalAlignment = HorizontalAlignment.Left;
myLine.VerticalAlignment = VerticalAlignment.Center;
myLine.StrokeThickness = 2;
myGrid.Children.Add(myLine);
' Add a Line Element
Dim myLine As New Line()
myLine.Stroke = Brushes.LightSteelBlue
myLine.X1 = 1
myLine.X2 = 50
myLine.Y1 = 1
myLine.Y2 = 50
myLine.HorizontalAlignment = HorizontalAlignment.Left
myLine.VerticalAlignment = VerticalAlignment.Center
myLine.StrokeThickness = 2
myGrid.Children.Add(myLine)
다음 이미지는 렌더링된 Line을 보여줍니다.
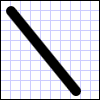
Line 클래스는 Fill 속성을 제공하지만 Line에는 영역이 없기 때문에 이 속성을 설정해도 아무런 효과가 없습니다.
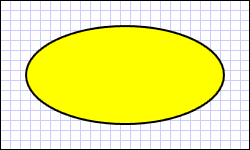
또 다른 일반적인 도형은 Ellipse입니다. 셰이프의 Width 및 Height 속성을 정의하여 Ellipse을 만듭니다. 원을 그리려면 Width 및 Height 값이 일치하는 Ellipse을 지정하세요.
<Ellipse
Fill="Yellow"
Height="100"
Width="200"
StrokeThickness="2"
Stroke="Black"/>
using System;
using System.Windows;
using System.Windows.Controls;
using System.Windows.Media;
using System.Windows.Shapes;

namespace SDKSample
{
    public partial class SetBackgroundColorOfShapeExample : Page
    {
        public SetBackgroundColorOfShapeExample()
        {
            // Create a StackPanel to contain the shape.
            StackPanel myStackPanel = new StackPanel();

            // Create a red Ellipse.
            Ellipse myEllipse = new Ellipse();

            // Create a SolidColorBrush with a red color to fill the
            // Ellipse with.
            SolidColorBrush mySolidColorBrush = new SolidColorBrush();

            // Describes the brush's color using RGB values.
            // Each value has a range of 0-255.
            mySolidColorBrush.Color = Color.FromArgb(255, 255, 255, 0);
            myEllipse.Fill = mySolidColorBrush;
            myEllipse.StrokeThickness = 2;
            myEllipse.Stroke = Brushes.Black;

            // Set the width and height of the Ellipse.
            myEllipse.Width = 200;
            myEllipse.Height = 100;

            // Add the Ellipse to the StackPanel.
            myStackPanel.Children.Add(myEllipse);

            this.Content = myStackPanel;
        }
    }
}
Imports System.Windows
Imports System.Windows.Controls
Imports System.Windows.Media
Imports System.Windows.Shapes

Namespace SDKSample
    Partial Public Class SetBackgroundColorOfShapeExample
        Inherits Page
        Public Sub New()
            ' Create a StackPanel to contain the shape.
            Dim myStackPanel As New StackPanel()

            ' Create a red Ellipse.
            Dim myEllipse As New Ellipse()

            ' Create a SolidColorBrush with a red color to fill the
            ' Ellipse with.
            Dim mySolidColorBrush As New SolidColorBrush()

            ' Describes the brush's color using RGB values.
            ' Each value has a range of 0-255.
            mySolidColorBrush.Color = Color.FromArgb(255, 255, 255, 0)
            myEllipse.Fill = mySolidColorBrush
            myEllipse.StrokeThickness = 2
            myEllipse.Stroke = Brushes.Black

            ' Set the width and height of the Ellipse.
            myEllipse.Width = 200
            myEllipse.Height = 100

            ' Add the Ellipse to the StackPanel.
            myStackPanel.Children.Add(myEllipse)

            Me.Content = myStackPanel
        End Sub

    End Class
End Namespace
다음 이미지는 렌더링된 Ellipse의 예를 보여줍니다.
경로 및 기하 도형 사용
Path 클래스를 사용하면 곡선과 복잡한 도형을 그릴 수 있습니다. 이러한 곡선과 도형들은 Geometry 개체를 사용하여 설명됩니다. Path를 사용하려면 Geometry을 만들어 Path 개체의 Data 속성을 설정하는 데 사용합니다.
선택할 수 있는 다양한 Geometry개체가 있습니다. LineGeometry, RectangleGeometry 및 EllipseGeometry 클래스는 비교적 간단한 셰이프를 설명합니다. 좀 더 복잡한 도형이나 곡선을 만들려면 PathGeometry를 사용하세요.
PathGeometry 및 PathSegments
PathGeometry 개체는 하나 이상의 PathFigure 개체로 구성되며 각 PathFigure는 다른 "그림" 또는 도형을 나타냅니다. 각 PathFigure는 그 자체가 하나 이상의 PathSegment 개체로 구성되며, 각 개체는 그림 또는 도형의 연결된 부분을 나타냅니다. 세그먼트 형식에는 LineSegment, BezierSegment 및 ArcSegment가 포함됩니다.
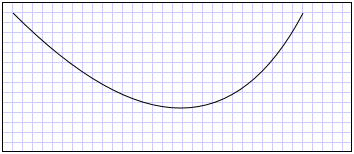
다음 예제에서는 정방형 베지어 곡선을 그리는 데 Path가 사용됩니다.
<Path Stroke="Black" StrokeThickness="1">
  <Path.Data>
    <PathGeometry>
      <PathGeometry.Figures>
        <PathFigureCollection>
          <PathFigure StartPoint="10,100">
            <PathFigure.Segments>
              <PathSegmentCollection>
                <QuadraticBezierSegment Point1="200,200" Point2="300,100" />
              </PathSegmentCollection>
            </PathFigure.Segments>
          </PathFigure>
        </PathFigureCollection>
      </PathGeometry.Figures>
    </PathGeometry>
  </Path.Data>
</Path>
다음 그림에서는 렌더링된 도형을 보여 줍니다.
PathGeometry 및 그 외 Geometry 클래스에 관한 자세한 내용은 기하 도형 개요를 참조하십시오.
XAML 약식 구문
XAML(Extensible Application Markup Language)에서는 특수 약어 구문을 사용하여 Path를 설명합니다. 다음 예제에서는 약식 구문이 복잡한 도형을 그리는 데 사용됩니다.
      <Path Stroke="DarkGoldenRod" StrokeThickness="3"
Data="M 100,200 C 100,25 400,350 400,175 H 280" />
다음 이미지는 렌더링된 Path를 보여줍니다.
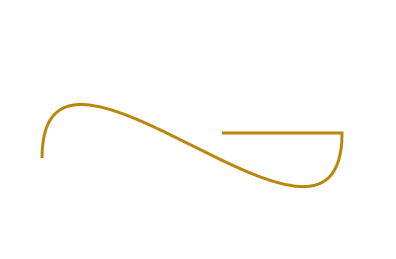
Data 특성 문자열은 M으로 지정되는 "moveto" 명령으로 시작됩니다. 이 명령은 Canvas의 좌표계에 경로의 시작점을 설정합니다. Path 데이터 매개 변수는 대/소문자를 구분합니다. 대문자 M은 새로운 현재 점의 절대 위치를 나타냅니다. 소문자 m은 상대 좌표를 나타냅니다. 첫 번째 세그먼트는 2개의 제어점 (100,25) 및 (400,350)을 사용하여 그린, (100,200)에서 시작하고 (400,175)에서 끝나는 입방형 3차원 곡선입니다. 이 세그먼트는 Data 특성 문자열에서 C 명령으로 표시됩니다. 마찬가지로 대문자 C는 절대 경로를 나타내고 소문자 c는 상대 경로를 나타냅니다.
두 번째 세그먼트는 절대 가로 "lineto" 명령 H로 시작합니다. 이 명령은 이전 하위 경로의 엔드포인트(400,175)에서 새 엔드포인트(280,175)까지 그리는 선을 지정합니다. 이 명령은 가로 "lineto" 명령이기 때문에 지정된 값은 x 좌표입니다.
전체 경로 구문에 대한 자세한 내용은 Data 참조 및 PathGeometry를 사용하여 도형 만들기를 참조하세요.
도형 그리기
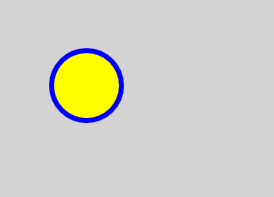
Brush 개체는 도형의 Stroke 및 Fill를 그리는 데 사용됩니다. 다음 예제에서는 Ellipse의 스트로크 및 채우기가 지정됩니다. 브러시 속성에 대한 유효한 입력은 키워드 또는 16진수 색 값일 수 있습니다. 사용 가능한 색상 키워드에 관한 자세한 내용은 System.Windows.Media 네임스페이스에서 Colors 클래스의 속성을 참조하세요.
<Canvas Background="LightGray">
   <Ellipse
      Canvas.Top="50"
      Canvas.Left="50"
      Fill="#FFFFFF00"
      Height="75"
      Width="75"
      StrokeThickness="5"
      Stroke="#FF0000FF"/>
</Canvas>
다음 이미지는 렌더링된 Ellipse을 보여줍니다.
또는 속성 요소 구문을 사용하여 단색으로 도형을 그리기 위한 SolidColorBrush 개체를 명시적으로 만들 수 있습니다.
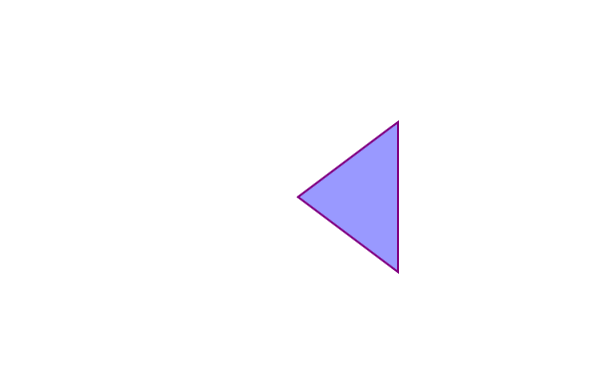
<!-- This polygon shape uses pre-defined color values for its Stroke and
     Fill properties.
     The SolidColorBrush's Opacity property affects the fill color in
     this case by making it slightly transparent (opacity of 0.4) so
     that it blends with any underlying color. -->

<Polygon
    Points="300,200 400,125 400,275 300,200"
    Stroke="Purple"
    StrokeThickness="2">
    <Polygon.Fill>
       <SolidColorBrush Color="Blue" Opacity="0.4"/>
    </Polygon.Fill>
</Polygon>
다음 그림은 렌더링된 도형을 보여 줍니다.
그라데이션, 이미지, 패턴 등으로 도형의 스트로크나 채우기를 그릴 수도 있습니다. 자세한 내용은 단색 및 그라데이션을 사용한 그리기 개요를 참조하세요.
확장 가능한 도형
Line, Path, Polygon, Polyline 및 Rectangle 클래스에는 모두 Stretch 속성이 있습니다. 이 속성은 Shape 개체의 레이아웃 공간을 채우기 위해 Shape 개체의 콘텐츠(그릴 도형)가 확장되는 방식을 결정합니다. Shape 개체의 레이아웃 공간은 명시적인 Width 및 Height 설정 또는 해당 HorizontalAlignment 및 VerticalAlignment 설정으로 인해 레이아웃 시스템에서 Shape에 할당한 공간의 크기를 나타냅니다. WPF(Windows Presentation Foundation)의 레이아웃에 관한 자세한 내용은 레이아웃 개요를 참조하세요.
Stretch 속성은 다음 값 중 하나를 사용합니다.
Fill: Shape 개체의 콘텐츠가 레이아웃 공간을 채우도록 확장됩니다. 가로 세로 비율은 유지되지 않습니다.
Uniform: Shape 개체의 콘텐츠는 원래의 가로 세로 비율을 유지하면서 레이아웃 공간을 채울 수 있을 만큼 확장됩니다.
UniformToFill: Shape 개체의 콘텐츠는 원래의 가로 세로 비율을 유지하면서 레이아웃 공간을 완전히 채우도록 확장됩니다.
Shape 개체의 콘텐츠가 확장되면 Shape 개체의 윤곽선은 그러한 확장 후에 그려집니다.
다음 예제에서는 (0,0)에서 (0,1), 다시 (1,1)로 아주 작은 삼각형을 그리는 데 Polygon이 사용됩니다. Polygon 개체의 Width와 Height는 100으로 설정되며 해당 stretch 속성은 Fill로 설정됩니다. 결과적으로 Polygon 개체의 콘텐츠(삼각형)는 더 큰 공간을 채우도록 확장됩니다.
<Polygon
  Points="0,0 0,1 1,1"
  Fill="Blue"
  Width="100"
  Height="100"
  Stretch="Fill"
  Stroke="Black"
  StrokeThickness="2" />
PointCollection myPointCollection = new PointCollection();
myPointCollection.Add(new Point(0,0));
myPointCollection.Add(new Point(0,1));
myPointCollection.Add(new Point(1,1));

Polygon myPolygon = new Polygon();
myPolygon.Points = myPointCollection;
myPolygon.Fill = Brushes.Blue;
myPolygon.Width = 100;
myPolygon.Height = 100;
myPolygon.Stretch = Stretch.Fill;
myPolygon.Stroke = Brushes.Black;
myPolygon.StrokeThickness = 2;
도형 변환
Transform 클래스는 2차원 평면에서 도형을 변환하는 방법을 제공합니다. 다양한 유형의 변환에는 회전(RotateTransform), 배율(ScaleTransform), 기울이기(SkewTransform) 및 변환(TranslateTransform)이 포함됩니다.
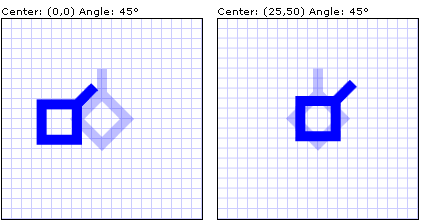
도형에 적용하는 일반적인 변환은 회전입니다. 도형을 회전하려면 RotateTransform을 만들고 그 Angle를 지정합니다. Angle 값이 45이면 요소가 시계 방향으로 45도 회전하고, 90이면 요소가 시계 방향으로 90도 회전합니다. 요소가 회전할 때 그 중심점을 제어하려면 CenterX 및 CenterY 속성을 설정하세요. 이러한 속성 값은 변환할 요소의 좌표 공간으로 표현됩니다. CenterX와 CenterY는 기본값이 0입니다. 마지막으로 RotateTransform을 요소에 적용합니다. 변환이 레이아웃에 영향을 주지 않도록 하려면 도형의 RenderTransform 속성을 설정하세요.
다음 예제에서는 도형의 왼쪽 위 구석 (0,0)을 중심으로 도형을 45도 회전하는 데 RotateTransform이 사용됩니다.
<!-- Rotates the Polyline 45 degrees about the point (0,0). -->
<Polyline Points="25,25 0,50 25,75 50,50 25,25 25,0"
  Stroke="Blue" StrokeThickness="10"
  Canvas.Left="75" Canvas.Top="50">
  <Polyline.RenderTransform>
    <RotateTransform CenterX="0" CenterY="0" Angle="45" />
  </Polyline.RenderTransform>
</Polyline>
다음 예제에서는 다른 모양이 45도 회전되지만 이번에는 점 (25,50)을 기준으로 회전됩니다.
<!-- Rotates the Polyline 45 degrees about its center. -->
<Polyline
  Points="25,25 0,50 25,75 50,50 25,25 25,0"
  Stroke="Blue" StrokeThickness="10"
  Canvas.Left="75" Canvas.Top="50"
  RenderTransformOrigin="0.5,0.5">
  <Polyline.RenderTransform>
    <RotateTransform Angle="45" />
  </Polyline.RenderTransform>
</Polyline>
다음 그림에서는 두 변환을 적용한 결과를 보여 줍니다.
이전 예제에서는 각 도형 개체에 단일 변환이 적용되었습니다. 도형(또는 다른 UI 요소)에 여러 변환을 적용하려면 TransformGroup을 사용합니다.
참고 항목
.NET Desktop feedback
피드백
출시 예정: 2024년 내내 콘텐츠에 대한 피드백 메커니즘으로 GitHub 문제를 단계적으로 폐지하고 이를 새로운 피드백 시스템으로 바꿀 예정입니다. 자세한 내용은 다음을 참조하세요. https://aka.ms/ContentUserFeedback
다음에 대한 사용자 의견 제출 및 보기
