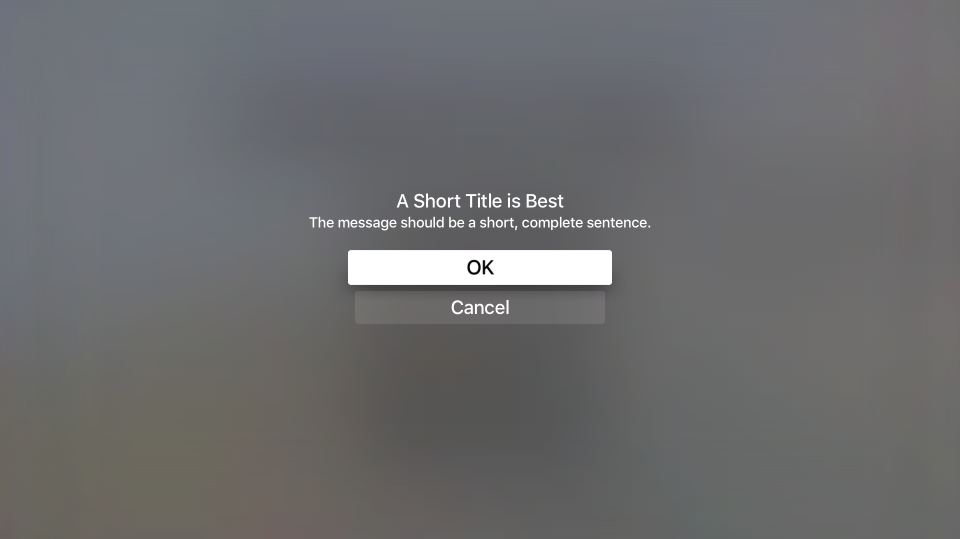
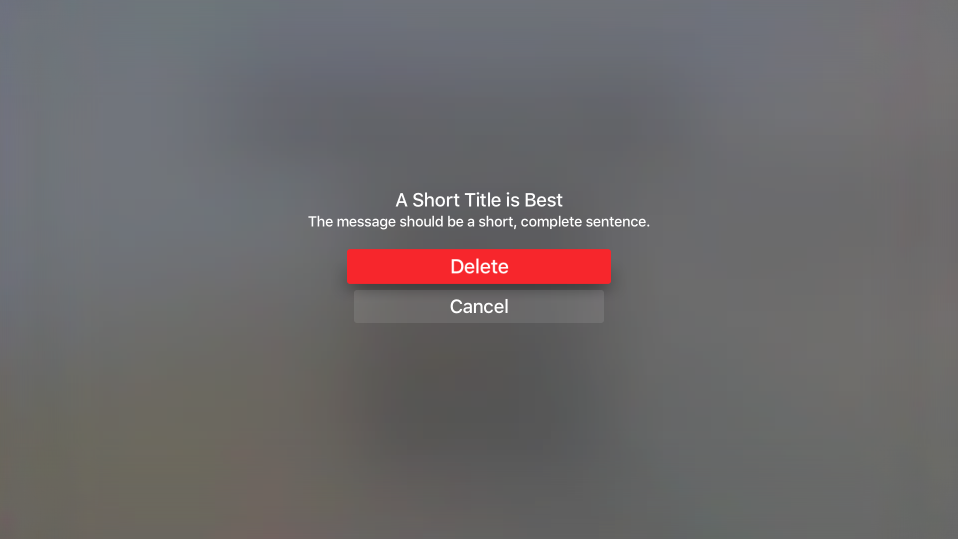
이 문서에서는 UIAlertController를 사용하여 Xamarin.tvOS에서 사용자에게 경고 메시지를 표시하는 방법을 설명합니다.
tvOS 사용자의 주의를 끌거나 파괴적인 작업(예: 파일 삭제)을 수행할 수 있는 권한을 요청해야 하는 경우 다음을 사용하여 UIAlertViewController경고 메시지를 표시할 수 있습니다.
메시지 표시 외에도 사용자가 작업에 응답하고 피드백을 제공할 수 있도록 경고에 단추 및 텍스트 필드를 추가할 수 있습니다.
경고 정보
위에서 설명한 것처럼 경고는 사용자의 주의를 끌고 앱의 상태를 알리거나 피드백을 요청하는 데 사용됩니다. 경고는 제목을 표시해야 하며, 필요에 따라 메시지와 하나 이상의 단추 또는 텍스트 필드를 가질 수 있습니다.
Apple에는 경고 작업에 대한 다음과 같은 제안이 있습니다.
- 경고 사용: 경고는 앱으로 사용자의 흐름을 방해하고 사용자 환경을 중단하므로 오류 알림, 앱 내 구매 및 파괴적인 작업과 같은 중요한 상황에서만 사용해야 합니다.
- 유용한 선택 사항 제공 - 경고가 사용자에게 옵션을 제공하는 경우 각 옵션이 중요한 정보를 제공하고 사용자가 수행할 수 있는 유용한 작업을 제공해야 합니다.
경고 제목 및 메시지
Apple에는 경고의 제목 및 선택적 메시지를 표시하기 위한 다음과 같은 제안이 있습니다.
- 다중 단어 제목 사용 - 경고의 제목은 간단하게 다시 기본 동안 상황을 명확하게 파악해야 합니다. 한 단어 제목은 거의 충분한 정보를 제공하지 않습니다.
- 메시지가 필요하지 않은 설명 제목 사용 - 가능하면 경고의 제목을 설명하여 선택적 메시지 텍스트가 필요하지 않도록 하는 것이 좋습니다.
- 메시지를 짧고 완전한 문장 으로 만들기 - 경고 지점을 가져오는 데 선택적 메시지가 필요한 경우 가능한 한 간단하게 유지하고 적절한 대문자 및 문장 부호가 있는 완전한 문장으로 만듭니다.
경고 단추
Apple에는 경고에 단추를 추가하기 위한 다음과 같은 제안이 있습니다.
- 두 개의 단추로 제한 - 가능한 경우 경고를 최대 두 개의 단추로 제한합니다. 단일 단추 경고는 정보를 제공하지만 작업은 제공하지 않습니다. 두 개의 단추 경고는 간단한 예/아니요 작업을 제공합니다.
- 간결한 논리 단추 제목 사용 - 단추의 동작을 명확하게 설명하는 간단한 1~2개의 단어 단추 제목이 가장 적합합니다. 자세한 내용은 단추 작업 설명서를 참조하세요.
- 파괴적인 단추 표시 - 파일 삭제와 같이 파괴적인 동작을 수행하는 단추의 경우 스타일이
UIAlertActionStyle.Destructive명확하게 표시됩니다.
경고 표시
경고를 표시하려면 작업(단추)을 추가하고 경고 스타일을 선택하여 해당 인스턴스 UIAlertViewController 를 만들고 구성합니다. 예를 들어 다음 코드는 확인/취소 경고를 표시합니다.
const string title = "A Short Title is Best";
const string message = "A message should be a short, complete sentence.";
const string acceptButtonTitle = "OK";
const string cancelButtonTitle = "Cancel";
const string deleteButtonTitle = "Delete";
...

var alertController = UIAlertController.Create (title, message, UIAlertControllerStyle.Alert);

// Create the action.
var acceptAction = UIAlertAction.Create (acceptButtonTitle, UIAlertActionStyle.Default, _ =>
    Console.WriteLine ("The \"OK/Cancel\" alert's other action occurred.")
);

var cancelAction = UIAlertAction.Create (cancelButtonTitle, UIAlertActionStyle.Cancel, _ =>
    Console.WriteLine ("The \"OK/Cancel\" alert's other action occurred.")
);

// Add the actions.
alertController.AddAction (acceptAction);
alertController.AddAction (cancelAction);
PresentViewController (alertController, true, null);
이 코드를 자세히 살펴보겠습니다. 먼저 지정된 제목과 메시지를 사용하여 새 경고를 만듭니다.
UIAlertController.Create (title, message, UIAlertControllerStyle.Alert)
다음으로, 경고에 표시하려는 각 단추에 대해 단추의 제목, 단추 스타일 및 단추를 누를 때 수행할 작업을 정의하는 작업을 만듭니다.
UIAlertAction.Create ("Button Title", UIAlertActionStyle.Default, _ =>
    // Do something when the button is pressed
    ...
);
UIAlertActionStyle 열거형을 사용하면 단추의 스타일을 다음 중 하나로 설정할 수 있습니다.
- 기본값 - 경고가 표시될 때 단추가 선택된 기본 단추가 됩니다.
- 취소 - 단추는 경고의 취소 단추입니다.
- 파괴 - 단추를 파일 삭제와 같은 파괴적인 동작으로 강조 표시합니다. 현재 tvOS는 빨간색 배경으로 파괴 단추를 렌더링합니다.
메서드는 AddAction 지정된 작업을 UIAlertViewController 추가하고 마지막으로 PresentViewController (alertController, true, null) 지정된 경고를 사용자에게 표시합니다.
텍스트 필드 추가
경고에 작업(단추)을 추가하는 것 외에도 경고에 텍스트 필드를 추가하여 사용자가 사용자 ID 및 암호와 같은 정보를 입력할 수 있도록 할 수 있습니다.
사용자가 텍스트 필드를 선택하면 표준 tvOS 키보드가 표시되어 필드 값을 입력할 수 있습니다.
다음 코드는 값을 입력하기 위한 단일 텍스트 필드가 있는 확인/취소 경고를 표시합니다.
UIAlertController alert = UIAlertController.Create(title, description, UIAlertControllerStyle.Alert);
UITextField field = null;

// Add and configure text field
alert.AddTextField ((textField) => {
    // Save the field
    field = textField;

    // Initialize field
    field.Placeholder = placeholder;
    field.Text = text;
    field.AutocorrectionType = UITextAutocorrectionType.No;
    field.KeyboardType = UIKeyboardType.Default;
    field.ReturnKeyType = UIReturnKeyType.Done;
    field.ClearButtonMode = UITextFieldViewMode.WhileEditing;

});

// Add cancel button
alert.AddAction(UIAlertAction.Create("Cancel",UIAlertActionStyle.Cancel,(actionCancel) => {
    // User canceled, do something
    ...
}));

// Add ok button
alert.AddAction(UIAlertAction.Create("OK",UIAlertActionStyle.Default,(actionOK) => {
    // User selected ok, do something
    ...
}));

// Display the alert
controller.PresentViewController(alert,true,null);
이 메서드는 AddTextField 자리 표시자 텍스트(필드가 비어 있을 때 나타나는 텍스트), 기본 텍스트 값 및 키보드 유형과 같은 속성을 설정하여 구성할 수 있는 경고에 새 텍스트 필드를 추가합니다. 예시:
// Initialize field
field.Placeholder = placeholder;
field.Text = text;
field.AutocorrectionType = UITextAutocorrectionType.No;
field.KeyboardType = UIKeyboardType.Default;
field.ReturnKeyType = UIReturnKeyType.Done;
field.ClearButtonMode = UITextFieldViewMode.WhileEditing;
나중에 텍스트 필드의 값에 따라 작업할 수 있도록 다음 코드를 사용하는 복사본도 저장합니다.
UITextField field = null;
...

// Add and configure text field
alert.AddTextField ((textField) => {
    // Save the field
    field = textField;
    ...
});
사용자가 텍스트 필드에 값을 입력한 후 변수를 사용하여 해당 값에 field 액세스할 수 있습니다.
경고 보기 컨트롤러 도우미 클래스
간단하고 일반적인 유형의 경고를 사용하면 UIAlertViewController 상당히 중복된 코드가 발생할 수 있으므로 도우미 클래스를 사용하여 반복 코드의 양을 줄일 수 있습니다. 예시:
using System;
using Foundation;
using UIKit;
using System.CodeDom.Compiler;

namespace UIKit
{
    /// <summary>
    /// Alert view controller is a reusable helper class that makes working with <c>UIAlertViewController</c> alerts
    /// easier in a tvOS app.
    /// </summary>
    public class AlertViewController
    {
        #region Static Methods
        public static UIAlertController PresentOKAlert(string title, string description, UIViewController controller) {
            // No, inform the user that they must create a home first
            UIAlertController alert = UIAlertController.Create(title, description, UIAlertControllerStyle.Alert);

            // Configure the alert
            alert.AddAction(UIAlertAction.Create("OK",UIAlertActionStyle.Default,(action) => {}));

            // Display the alert
            controller.PresentViewController(alert,true,null);

            // Return created controller
            return alert;
        }

        public static UIAlertController PresentOKCancelAlert(string title, string description, UIViewController controller, AlertOKCancelDelegate action) {
            // No, inform the user that they must create a home first
            UIAlertController alert = UIAlertController.Create(title, description, UIAlertControllerStyle.Alert);

            // Add cancel button
            alert.AddAction(UIAlertAction.Create("Cancel",UIAlertActionStyle.Cancel,(actionCancel) => {
                // Any action?
                if (action!=null) {
                    action(false);
                }
            }));

            // Add ok button
            alert.AddAction(UIAlertAction.Create("OK",UIAlertActionStyle.Default,(actionOK) => {
                // Any action?
                if (action!=null) {
                    action(true);
                }
            }));

            // Display the alert
            controller.PresentViewController(alert,true,null);

            // Return created controller
            return alert;
        }

        public static UIAlertController PresentDestructiveAlert(string title, string description, string destructiveAction, UIViewController controller, AlertOKCancelDelegate action) {
            // No, inform the user that they must create a home first
            UIAlertController alert = UIAlertController.Create(title, description, UIAlertControllerStyle.Alert);

            // Add cancel button
            alert.AddAction(UIAlertAction.Create("Cancel",UIAlertActionStyle.Cancel,(actionCancel) => {
                // Any action?
                if (action!=null) {
                    action(false);
                }
            }));

            // Add ok button
            alert.AddAction(UIAlertAction.Create(destructiveAction,UIAlertActionStyle.Destructive,(actionOK) => {
                // Any action?
                if (action!=null) {
                    action(true);
                }
            }));

            // Display the alert
            controller.PresentViewController(alert,true,null);

            // Return created controller
            return alert;
        }

        public static UIAlertController PresentTextInputAlert(string title, string description, string placeholder, string text, UIViewController controller, AlertTextInputDelegate action) {
            // No, inform the user that they must create a home first
            UIAlertController alert = UIAlertController.Create(title, description, UIAlertControllerStyle.Alert);
            UITextField field = null;

            // Add and configure text field
            alert.AddTextField ((textField) => {
                // Save the field
                field = textField;

                // Initialize field
                field.Placeholder = placeholder;
                field.Text = text;
                field.AutocorrectionType = UITextAutocorrectionType.No;
                field.KeyboardType = UIKeyboardType.Default;
                field.ReturnKeyType = UIReturnKeyType.Done;
                field.ClearButtonMode = UITextFieldViewMode.WhileEditing;

            });

            // Add cancel button
            alert.AddAction(UIAlertAction.Create("Cancel",UIAlertActionStyle.Cancel,(actionCancel) => {
                // Any action?
                if (action!=null) {
                    action(false,"");
                }
            }));

            // Add ok button
            alert.AddAction(UIAlertAction.Create("OK",UIAlertActionStyle.Default,(actionOK) => {
                // Any action?
                if (action!=null && field !=null) {
                    action(true, field.Text);
                }
            }));

            // Display the alert
            controller.PresentViewController(alert,true,null);

            // Return created controller
            return alert;
        }
        #endregion

        #region Delegates
        public delegate void AlertOKCancelDelegate(bool OK);
        public delegate void AlertTextInputDelegate(bool OK, string text);
        #endregion
    }
}
이 클래스를 사용하면 다음과 같이 간단한 경고를 표시하고 응답할 수 있습니다.
#region Custom Actions
partial void DisplayDestructiveAlert (Foundation.NSObject sender) {
    // User helper class to present alert
    AlertViewController.PresentDestructiveAlert("A Short Title is Best","The message should be a short, complete sentence.","Delete",this, (ok) => {
        Console.WriteLine("Destructive Alert: The user selected {0}",ok);
    });
}

partial void DisplayOkCancelAlert (Foundation.NSObject sender) {
    // User helper class to present alert
    AlertViewController.PresentOKCancelAlert("A Short Title is Best","The message should be a short, complete sentence.",this, (ok) => {
        Console.WriteLine("OK/Cancel Alert: The user selected {0}",ok);
    });
}

partial void DisplaySimpleAlert (Foundation.NSObject sender) {
    // User helper class to present alert
    AlertViewController.PresentOKAlert("A Short Title is Best","The message should be a short, complete sentence.",this);
}

partial void DisplayTextInputAlert (Foundation.NSObject sender) {
    // User helper class to present alert
    AlertViewController.PresentTextInputAlert("A Short Title is Best","The message should be a short, complete sentence.","placeholder", "", this, (ok, text) => {
        Console.WriteLine("Text Input Alert: The user selected {0} and entered `{1}`",ok,text);
    });
}
#endregion
요약
이 문서에서는 Xamarin.tvOS에서 사용자에게 경고 메시지를 표시하는 작업에 UIAlertController 대해 설명했습니다. 먼저 간단한 경고를 표시하고 단추를 추가하는 방법을 보여 줍니다. 다음으로 경고에 텍스트 필드를 추가하는 방법을 보여 줬습니다. 마지막으로 도우미 클래스를 사용하여 경고를 표시하는 데 필요한 반복 코드의 양을 줄이는 방법을 보여 주었습니다.


