이 항목에서는 플랫폼 호출 서비스(PInvoke)를 사용하여 WinUI 3 및 Win32 interop 기능으로 기본 C# .NET 애플리케이션을 빌드하는 방법을 단계별로 설명합니다.
필수 구성 요소
- Windows 앱 개발 시작
기본 관리형 C#/.NET 앱
이 예제에서는 앱 창의 위치와 크기를 지정하고, 적절한 DPI에 맞게 변환 및 크기를 조정하고, 창 최소화 및 최대화 단추를 사용하지 않도록 설정하고, 마지막으로 현재 프로세스를 쿼리하여 현재 프로세스에 로드된 모듈 목록을 표시합니다.
초기 템플릿 애플리케이션에서 예제 앱을 빌드합니다(필수 구성 요소참조). Visual Studio WinUI 3 템플릿도 참조하세요.
MainWindow.xaml 파일
WinUI 3을 사용하면 XAML 태그에서 Window 클래스의 인스턴스를 만들 수 있습니다.
XAML Window 클래스는 데스크톱 창을 지원하도록 확장되어 UWP 및 데스크톱 앱 모델에서 사용하는 각 하위 수준 창 구현의 추상화로 전환됩니다. 특히 UWP용 CoreWindow 및 Win32의 창 핸들(또는 HWND)입니다.
다음 코드는 Window 클래스를 앱의 루트 요소로 사용하는 초기 템플릿 앱의 MainWindow.xaml 파일을 보여줍니다.
<Window
    x:Class="WinUI_3_basic_win32_interop.MainWindow"
    xmlns="http://schemas.microsoft.com/winfx/2006/xaml/presentation"
    xmlns:x="http://schemas.microsoft.com/winfx/2006/xaml"
    xmlns:local="using:WinUI_3_basic_win32_interop"
    xmlns:d="http://schemas.microsoft.com/expression/blend/2008"
    xmlns:mc="http://schemas.openxmlformats.org/markup-compatibility/2006"
    mc:Ignorable="d">

    <StackPanel Orientation="Horizontal" HorizontalAlignment="Center" VerticalAlignment="Center">
        <Button x:Name="myButton" Click="myButton_Click">Click Me</Button>
    </StackPanel>
</Window>
구성
User32.dll내보낸 Win32 API를 호출하려면 Visual Studio 프로젝트에서 C#/Win32 P/Invoke 원본 생성기 사용할 수 있습니다. 도구>NuGet 패키지 관리자>솔루션용 NuGet 패키지 관리...클릭하고 (찾아보기 탭에서) Microsoft.Windows.CsWin32을 검색합니다. 자세한 내용은 관리 코드 네이티브 함수 호출참조하세요.필요에 따라 Microsoft.Windows.CsWin32 솔루션 탐색기의 종속성>패키지 노드 아래에 나열되어 있는지 확인하여 설치가 성공했는지 확인할 수 있습니다.
필요에 따라 애플리케이션 프로젝트 파일을 두 번 클릭하거나 프로젝트 파일편집을 마우스 오른쪽 단추로 클릭하여 선택하여 텍스트 편집기에서 파일을 열고 프로젝트 파일에 "Microsoft.Windows.CsWin32"에 대한 NuGet
PackageReference포함되어 있는지 확인할 수도 있습니다.<Project Sdk="Microsoft.NET.Sdk"> <PropertyGroup> <OutputType>WinExe</OutputType> <TargetFramework>net8.0-windows10.0.19041.0</TargetFramework> <TargetPlatformMinVersion>10.0.17763.0</TargetPlatformMinVersion> <RootNamespace>WinUI_3_basic_win32_interop</RootNamespace> <ApplicationManifest>app.manifest</ApplicationManifest> <Platforms>x86;x64;ARM64</Platforms> <RuntimeIdentifiers>win-x86;win-x64;win-arm64</RuntimeIdentifiers> <PublishProfile>win-$(Platform).pubxml</PublishProfile> <UseWinUI>true</UseWinUI> <EnableMsixTooling>true</EnableMsixTooling> <Nullable>enable</Nullable> </PropertyGroup> <ItemGroup> <Content Include="Assets\SplashScreen.scale-200.png" /> <Content Include="Assets\LockScreenLogo.scale-200.png" /> <Content Include="Assets\Square150x150Logo.scale-200.png" /> <Content Include="Assets\Square44x44Logo.scale-200.png" /> <Content Include="Assets\Square44x44Logo.targetsize-24_altform-unplated.png" /> <Content Include="Assets\StoreLogo.png" /> <Content Include="Assets\Wide310x150Logo.scale-200.png" /> </ItemGroup> <ItemGroup> <Manifest Include="$(ApplicationManifest)" /> </ItemGroup> <!-- Defining the "Msix" ProjectCapability here allows the Single-project MSIX Packaging Tools extension to be activated for this project even if the Windows App SDK Nuget package has not yet been restored. --> <ItemGroup Condition="'$(DisableMsixProjectCapabilityAddedByProject)'!='true' and '$(EnableMsixTooling)'=='true'"> <ProjectCapability Include="Msix" /> </ItemGroup> <ItemGroup> <PackageReference Include="Microsoft.Windows.CsWin32" Version="0.3.183"> <PrivateAssets>all</PrivateAssets> <IncludeAssets>runtime; build; native; contentfiles; analyzers; buildtransitive</IncludeAssets> </PackageReference> <PackageReference Include="Microsoft.Windows.SDK.BuildTools" Version="10.0.26100.1742" /> <PackageReference Include="Microsoft.WindowsAppSDK" Version="1.6.250205002" /> </ItemGroup> <!-- Defining the "HasPackageAndPublishMenuAddedByProject" property here allows the Solution Explorer "Package and Publish" context menu entry to be enabled for this project even if the Windows App SDK Nuget package has not yet been restored. --> <PropertyGroup Condition="'$(DisableHasPackageAndPublishMenuAddedByProject)'!='true' and '$(EnableMsixTooling)'=='true'"> <HasPackageAndPublishMenu>true</HasPackageAndPublishMenu> </PropertyGroup> <!-- Publish Properties --> <PropertyGroup> <PublishReadyToRun Condition="'$(Configuration)' == 'Debug'">False</PublishReadyToRun> <PublishReadyToRun Condition="'$(Configuration)' != 'Debug'">True</PublishReadyToRun> <PublishTrimmed Condition="'$(Configuration)' == 'Debug'">False</PublishTrimmed> <PublishTrimmed Condition="'$(Configuration)' != 'Debug'">True</PublishTrimmed> </PropertyGroup> </Project>프로젝트에 텍스트 파일을 추가하고 그 이름을
NativeMethods.txt으로 설정하세요. 이 파일의 내용은 C#/Win32 P/Invoke 소스 생성기에 P/Invoke 소스 코드를 생성할 함수 및 형식을 알려줍니다. 즉, C# 코드에서 호출하고 사용할 함수 및 형식입니다.GetDpiForWindow GetWindowLong SetWindowPos SetWindowLong HWND_TOP WINDOW_STYLE
코드
App.xaml.cs코드 숨김 파일에서 WindowNative.GetWindowHandle WinRT COM interop 메서드를 사용하여 Window 대한 핸들을 가져옵니다(HWND(창 핸들 검색)참조).이 메서드는 다음과 같이 앱의 OnLaunched 처리기에서 호출됩니다.
/// <summary>
/// Invoked when the application is launched.
/// </summary>
/// <param name="args">Details about the launch request and process.</param>
protected override void OnLaunched(Microsoft.UI.Xaml.LaunchActivatedEventArgs args)
{
    m_window = new MainWindow();

    var hwnd = WinRT.Interop.WindowNative.GetWindowHandle(m_window);

    SetWindowDetails(hwnd, 800, 600);

    m_window.Activate();
}
그런 다음
SetWindowDetails메서드를 호출하여 창 핸들 및 기본 차원을 전달합니다.이 메서드에서는 다음을 수행합니다.
- GetDpiForWindow 호출하여 창의 dpi(인치당 점 수) 값을 가져옵니다(Win32는 실제 픽셀을 사용하고 WinUI 3은 유효 픽셀을 사용). 이 dpi 값은 배율 인수를 계산하고 창에 지정된 너비 및 높이에 적용하는 데 사용됩니다.
- 그런 다음 SetWindowPos 호출하여 원하는 창 위치를 지정합니다.
- 마지막으로 SetWindowLong 호출하여 최소화 및 최대화 단추를 사용하지 않도록 설정합니다.
private static void SetWindowDetails(IntPtr hwnd, int width, int height)
{
    var dpi = Windows.Win32.PInvoke.GetDpiForWindow((Windows.Win32.Foundation.HWND)hwnd);
    float scalingFactor = (float)dpi / 96;
    width = (int)(width * scalingFactor);
    height = (int)(height * scalingFactor);

    _ = Windows.Win32.PInvoke.SetWindowPos((Windows.Win32.Foundation.HWND)hwnd,
                                Windows.Win32.Foundation.HWND.HWND_TOP,
                                0, 0, width, height,
                                Windows.Win32.UI.WindowsAndMessaging.SET_WINDOW_POS_FLAGS.SWP_NOMOVE);

    var nIndex = Windows.Win32.PInvoke.GetWindowLong((Windows.Win32.Foundation.HWND)hwnd,
              Windows.Win32.UI.WindowsAndMessaging.WINDOW_LONG_PTR_INDEX.GWL_STYLE) &
              ~(int)Windows.Win32.UI.WindowsAndMessaging.WINDOW_STYLE.WS_MINIMIZEBOX &
              ~(int)Windows.Win32.UI.WindowsAndMessaging.WINDOW_STYLE.WS_MAXIMIZEBOX;

    _ = Windows.Win32.PInvoke.SetWindowLong((Windows.Win32.Foundation.HWND)hwnd,
           Windows.Win32.UI.WindowsAndMessaging.WINDOW_LONG_PTR_INDEX.GWL_STYLE,
           nIndex);
}
MainWindow.xaml 파일에서는 ScrollViewerContentDialog 사용하여 현재 프로세스에 대해 로드된 모든 모듈 목록을 표시합니다.
<StackPanel Orientation="Horizontal" HorizontalAlignment="Center" VerticalAlignment="Center">
    <Button x:Name="myButton" Click="myButton_Click">Display loaded modules</Button>

    <ContentDialog x:Name="contentDialog" CloseButtonText="Close">
        <ScrollViewer>
            <TextBlock x:Name="cdTextBlock" TextWrapping="Wrap" />
        </ScrollViewer>
    </ContentDialog>

</StackPanel>
그런 다음
MyButton_Click이벤트 처리기를 다음 코드로 바꿉 있습니다.여기서는 GetCurrentProcess호출하여 현재 프로세스에 대한 참조를 가져옵니다. 그런 다음 모듈 컬렉션을 반복하고 각 ProcessModule 파일 이름을 표시 문자열에 추가합니다.
private async void myButton_Click(object sender, RoutedEventArgs e)
{
    myButton.Content = "Clicked";

    var description = new System.Text.StringBuilder();
    var process = System.Diagnostics.Process.GetCurrentProcess();
    foreach (System.Diagnostics.ProcessModule module in process.Modules)
    {
        description.AppendLine(module.FileName);
    }

    cdTextBlock.Text = description.ToString();
    await contentDialog.ShowAsync();
}
앱을 컴파일하고 실행합니다.
창이 나타나면 "로드된 모듈 표시" 단추를 선택합니다.
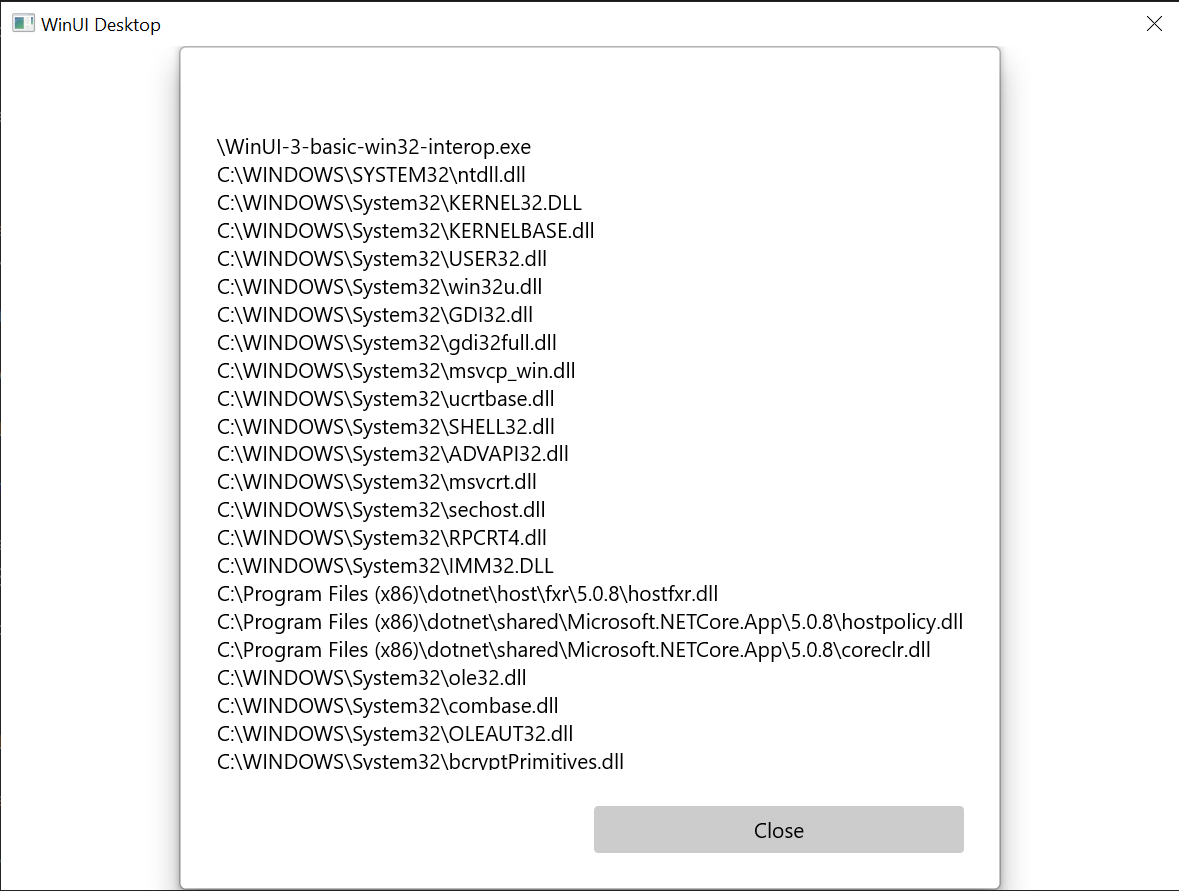
이 항목에 설명된 기본 Win32 interop 애플리케이션입니다.
요약
이 항목에서는 기본 창 구현(이 경우 Win32 및 HWND)에 액세스하고 WinRT API와 함께 Win32 API를 사용하는 방법을 설명했습니다. 새 WinUI 3 데스크톱 앱을 만들 때 기존 데스크톱 애플리케이션 코드를 사용하는 방법을 보여 줍니다.
보다 광범위한 샘플은 Windows 앱 SDK 샘플 GitHub 리포지토리의 AppWindow 갤러리 샘플 참조하세요.
창 제목 표시줄을 사용자 지정하는 예제
이 두 번째 예제에서는 창의 제목 표시줄 및 해당 콘텐츠를 사용자 지정하는 방법을 보여 드립니다. 이 항목을 따라하기 전에 다음 항목을 검토합니다.
새 프로젝트 만들기
- Visual Studio에서 빈 앱, 패키지된(데스크톱의 WinUI 3) 프로젝트 템플릿을 사용하여 새 C# 또는 C++/WinRT 프로젝트를 만듭니다.
구성
마찬가지로 첫 번째 예제에서와 마찬가지로 Microsoft.Windows.CsWin32 NuGet 패키지를 참조합니다.
프로젝트에
NativeMethods.txt텍스트 파일을 추가합니다.LoadImage SendMessage SetWindowText WM_SETICON
MainWindow.xaml
메모
이 연습에 사용할 아이콘 파일이 필요한 경우 computer.ico 샘플 앱에서 파일 다운로드할 수 있습니다. 해당 파일을 Assets 폴더에 배치하고 프로젝트에 콘텐츠를 추가합니다. 그런 다음 url Assets/computer.ico사용하여 파일을 참조할 수 있습니다.
그렇지 않으면 이미 있는 아이콘 파일을 자유롭게 사용하고 아래 코드 목록에서 두 참조를 변경할 수 있습니다.
- 아래 코드 목록에서는
MainWindow.xaml에서 두 개의 버튼을 추가했고, 각각에 대해 Click 처리기를 지정한 것을 볼 수 있습니다. 첫 번째 버튼(basicButton_Click)의 클릭 이벤트 처리기에서 제목 표시줄 아이콘과 텍스트를 설정합니다. 두 번째(customButton_Click)에서는 제목 표시줄을 customTitleBarPanel명명된 StackPanel 내용으로 바꿔 보다 중요한 사용자 지정을 보여 줍니다.
<?xml version="1.0" encoding="utf-8"?>
<Window
    x:Class="window_titlebar.MainWindow"
    xmlns="http://schemas.microsoft.com/winfx/2006/xaml/presentation"
    xmlns:x="http://schemas.microsoft.com/winfx/2006/xaml"
    xmlns:local="using:window_titlebar"
    xmlns:d="http://schemas.microsoft.com/expression/blend/2008"
    xmlns:mc="http://schemas.openxmlformats.org/markup-compatibility/2006"
    mc:Ignorable="d"
    Title="Basic WinUI 3 Window title bar sample">

    <Grid x:Name="rootElement" RowDefinitions="100, *, 100, *">

        <StackPanel x:Name="customTitleBarPanel" Grid.Row="0" Orientation="Horizontal" HorizontalAlignment="Stretch" VerticalAlignment="Top" Visibility="Collapsed">
            <Image Source="Images/windowIcon.gif" />
            <TextBlock VerticalAlignment="Center" Text="Full customization of title bar"/>
        </StackPanel>

        <StackPanel x:Name="buttonPanel"  Grid.Row="2" Orientation="Horizontal" HorizontalAlignment="Center">
            <Button x:Name="basicButton" Click="basicButton_Click" Margin="25">Set the Window title and icon</Button>
            <Button x:Name="customButton" Click="customButton_Click" Margin="25">Customize the window title bar</Button>
        </StackPanel>

    </Grid>
</Window>
MainWindow.xaml.cs/cpp
- 사용자 지정 제목 표시줄을 숨기기 위해 basicButton_Click 처리기에 대한 아래 코드 목록에서 customTitleBarPanelStackPanel축소하고 ExtendsContentIntoTitleBar 속성을
false설정합니다. - 그런 다음 IWindowNative::get_WindowHandle(C#의 경우 interop 도우미 메서드 GetWindowHandle사용)을 호출하여 주 창의 창 핸들(HWND)을 검색합니다.
- 다음으로, PInvoke.User32 NuGet 패키지를 사용하여 C#에서 애플리케이션 아이콘을 설정하기 위해 LoadImage 및 SendMessage 함수를 호출합니다.
- 마지막으로 SetWindowText 호출하여 제목 표시줄 문자열을 업데이트합니다.
private void basicButton_Click(object sender, RoutedEventArgs e)
{
    // Ensure the custom title bar content is not displayed.
    customTitleBarPanel.Visibility = Visibility.Collapsed;

    // Disable custom title bar content.
    ExtendsContentIntoTitleBar = false;

    //Get the Window's HWND
    var hwnd = WinRT.Interop.WindowNative.GetWindowHandle(this);

    var hIcon = Windows.Win32.PInvoke.LoadImage(
        null,
        "Images/windowIcon.ico",
        Windows.Win32.UI.WindowsAndMessaging.GDI_IMAGE_TYPE.IMAGE_ICON,
        20, 20,
        Windows.Win32.UI.WindowsAndMessaging.IMAGE_FLAGS.LR_LOADFROMFILE);

    Windows.Win32.PInvoke.SendMessage(
        (Windows.Win32.Foundation.HWND)hwnd,
        Windows.Win32.PInvoke.WM_SETICON,
        (Windows.Win32.Foundation.WPARAM)0,
        (Windows.Win32.Foundation.LPARAM)hIcon.DangerousGetHandle());

    Windows.Win32.PInvoke.SetWindowText((Windows.Win32.Foundation.HWND)hwnd, "Basic customization of title bar");
}
// pch.h
...
#include <microsoft.ui.xaml.window.h>
...

// MainWindow.xaml.h
...
void basicButton_Click(Windows::Foundation::IInspectable const& sender, Microsoft::UI::Xaml::RoutedEventArgs const& args);
...

// MainWindow.xaml.cpp
void MainWindow::basicButton_Click(IInspectable const&, RoutedEventArgs const&)
{
    // Ensure the that custom title bar content is not displayed.
    customTitleBarPanel().Visibility(Visibility::Collapsed);

    // Disable custom title bar content.
    ExtendsContentIntoTitleBar(false);

    // Get the window's HWND
    auto windowNative{ this->m_inner.as<::IWindowNative>() };
    HWND hWnd{ 0 };
    windowNative->get_WindowHandle(&hWnd);

    HICON icon{ reinterpret_cast<HICON>(::LoadImage(nullptr, L"Assets/computer.ico", IMAGE_ICON, 0, 0, LR_DEFAULTSIZE | LR_LOADFROMFILE)) };
    ::SendMessage(hWnd, WM_SETICON, 0, (LPARAM)icon);

    this->Title(L"Basic customization of title bar");
}
- customButton_Click 처리기에서 customTitleBarPanelStackPanel의 표시 유형을 Visible으로 설정합니다.
- 그런 다음 ExtendsContentIntoTitleBar 속성을
true설정하고 SetTitleBar 호출하여 customTitleBarPanelStackPanel 사용자 지정 제목 표시줄로 표시합니다.
private void customButton_Click(object sender, RoutedEventArgs e)
{
    customTitleBarPanel.Visibility = Visibility.Visible;

    // Enable custom title bar content.
    ExtendsContentIntoTitleBar = true;
    // Set the content of the custom title bar.
    SetTitleBar(customTitleBarPanel);
}
// MainWindow.xaml.h
...
void customButton_Click(Windows::Foundation::IInspectable const& sender, Microsoft::UI::Xaml::RoutedEventArgs const& args);
...

// MainWindow.xaml.cpp
void MainWindow::customButton_Click(IInspectable const&, RoutedEventArgs const&)
{
    customTitleBarPanel().Visibility(Visibility::Visible);

    // Enable custom title bar content.
    ExtendsContentIntoTitleBar(true);

    // Set the content of the custom title bar.
    SetTitleBar(customTitleBarPanel());
}
App.xaml
-
App.xaml파일에서<!-- Other app resources here -->주석 바로 뒤 아래와 같이 제목 표시줄에 대한 사용자 지정 색 브러시를 추가했습니다.
<?xml version="1.0" encoding="utf-8"?>
<Application
    x:Class="window_titlebar.App"
    xmlns="http://schemas.microsoft.com/winfx/2006/xaml/presentation"
    xmlns:x="http://schemas.microsoft.com/winfx/2006/xaml"
    xmlns:local="using:window_titlebar">
    <Application.Resources>
        <ResourceDictionary>
            <ResourceDictionary.MergedDictionaries>
                <XamlControlsResources xmlns="using:Microsoft.UI.Xaml.Controls" />
                <!-- Other merged dictionaries here -->
            </ResourceDictionary.MergedDictionaries>
            <!-- Other app resources here -->
            <SolidColorBrush x:Key="WindowCaptionBackground">Green</SolidColorBrush>
            <SolidColorBrush x:Key="WindowCaptionBackgroundDisabled">LightGreen</SolidColorBrush>
            <SolidColorBrush x:Key="WindowCaptionForeground">Red</SolidColorBrush>
            <SolidColorBrush x:Key="WindowCaptionForegroundDisabled">Pink</SolidColorBrush>
        </ResourceDictionary>
    </Application.Resources>
</Application>
사용자 고유의 앱에서 이러한 단계를 수행한 경우 지금 프로젝트를 빌드하고 앱을 실행할 수 있습니다. 다음과 유사한 애플리케이션 창이 표시됩니다(사용자 지정 앱 아이콘 사용).
템플릿 앱
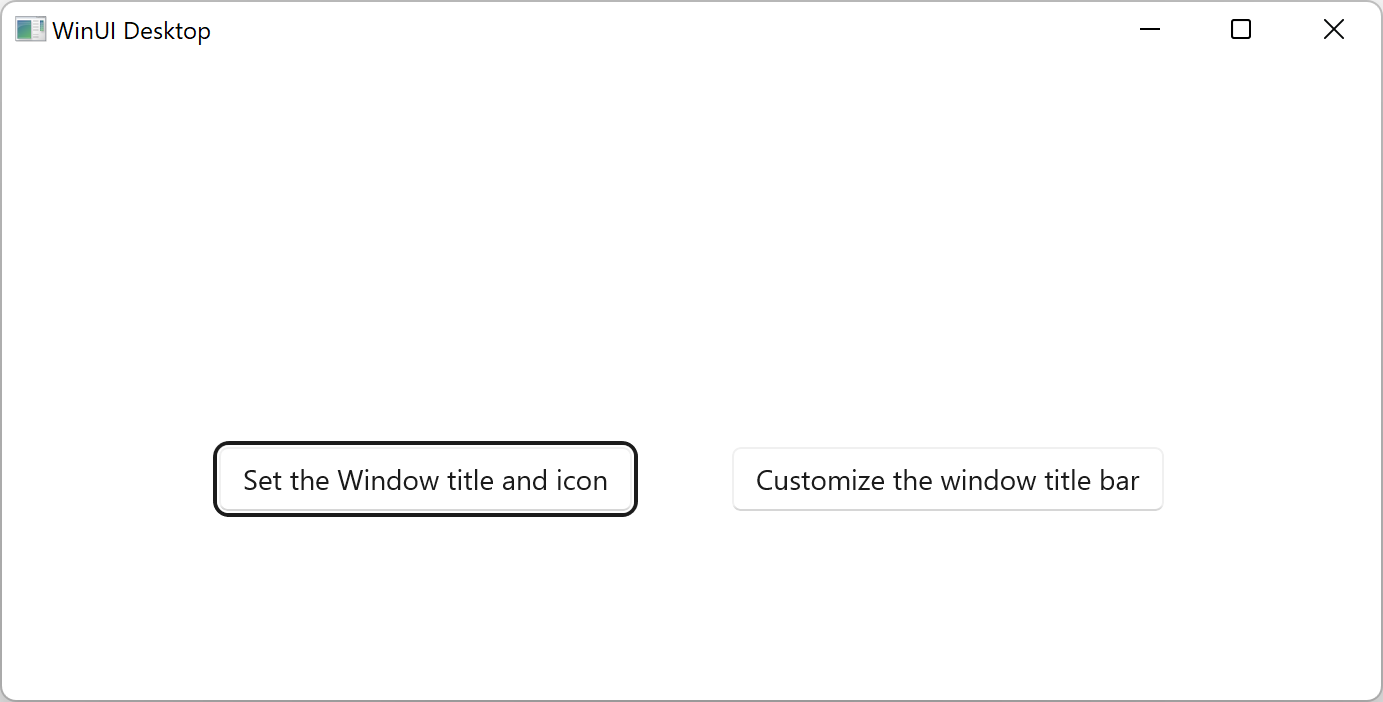
템플릿 앱 .
기본 사용자 지정 제목 표시줄은 다음과 같습니다.
사용자 지정 애플리케이션 아이콘이 있는 템플릿 앱
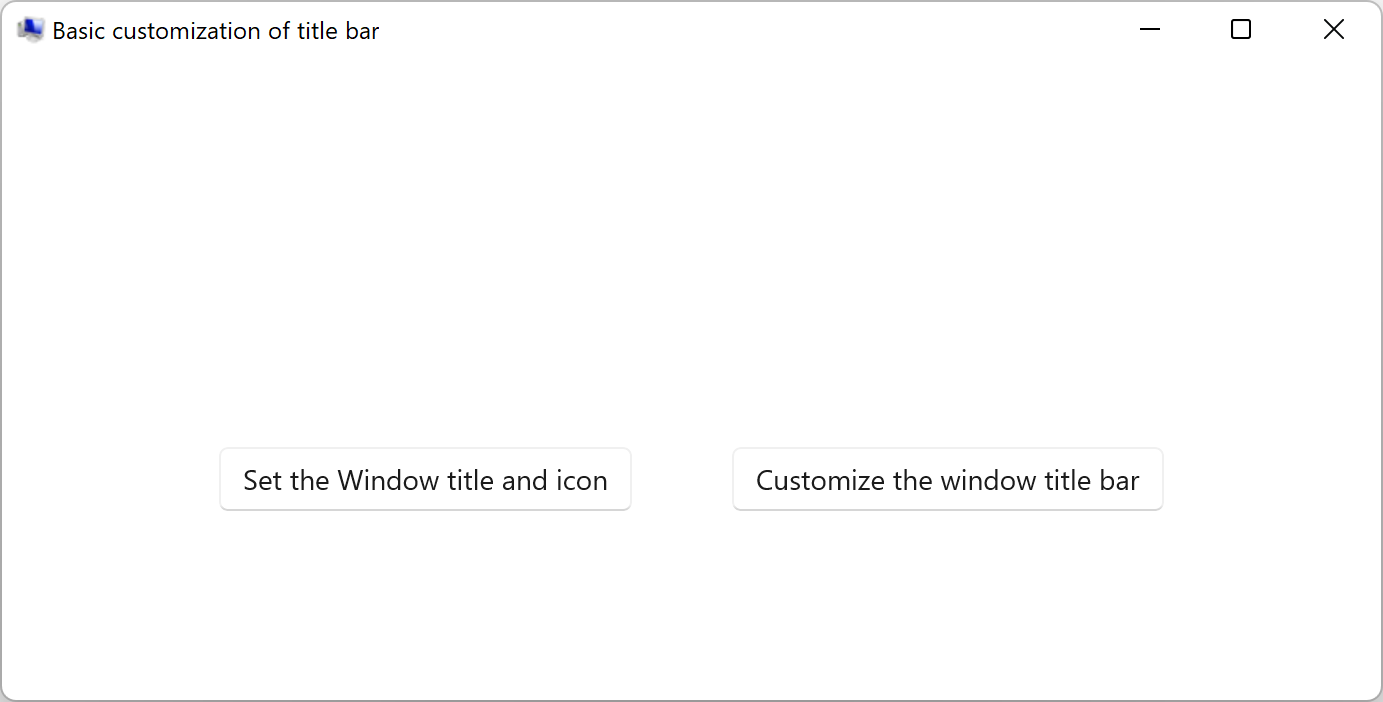
사용자 지정 애플리케이션 아이콘이 있는 템플릿 앱 .전체 사용자 지정 제목 표시줄은 다음과 같습니다.
사용자 지정 제목 표시줄이 있는
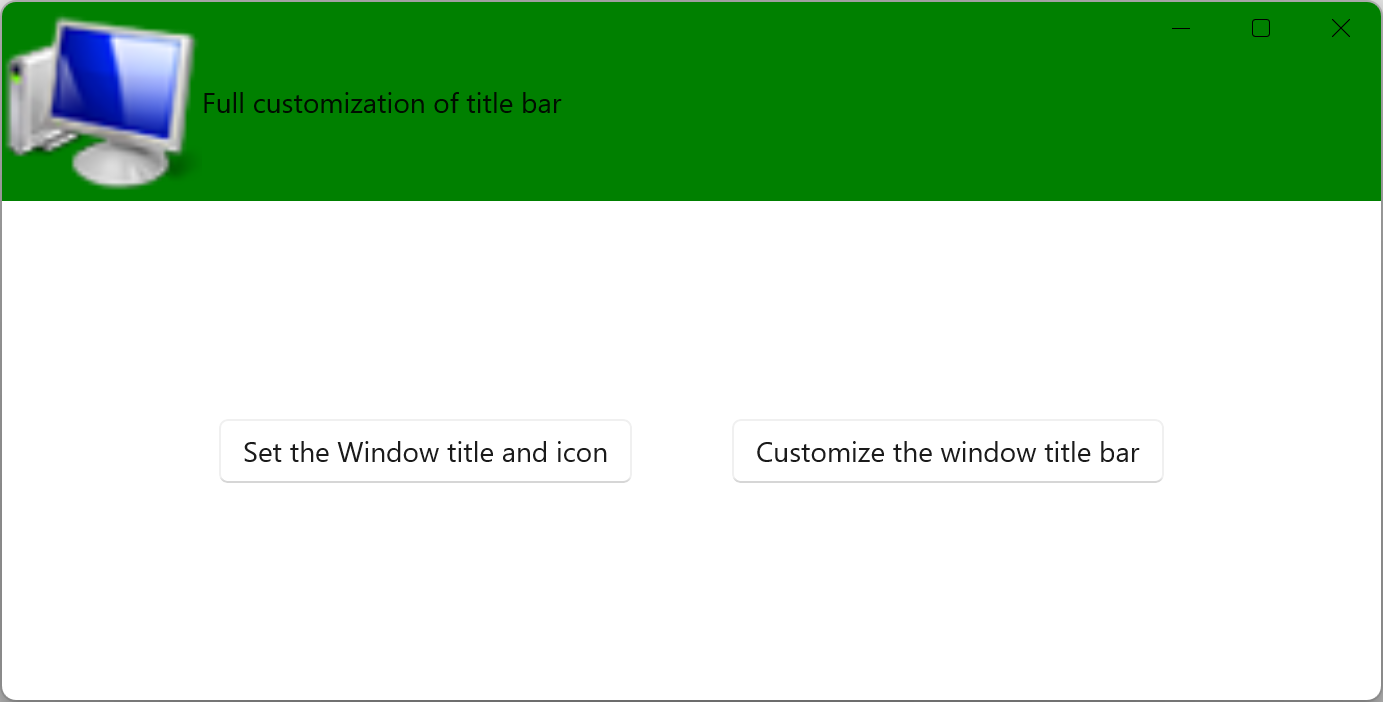
사용자 지정 제목 표시줄이 있는 템플릿 앱 .
참고 문서
- Windows 앱 SDK
- 윈도우 앱 SDK의 안정적인 릴리스 채널
- 앱 창 관리
- Windows 앱 SDK 샘플
GitHub에서 Microsoft와 공동 작업
이 콘텐츠의 원본은 GitHub에서 찾을 수 있으며, 여기서 문제와 끌어오기 요청을 만들고 검토할 수도 있습니다. 자세한 내용은 참여자 가이드를 참조하세요.

Windows developer