Work with action data
Action-based data sources differ from the more popular tabular data sources. You use functions to interact with the data source instead of just reading and writing data. One important difference to note between tabular and action-based data sources is action-based data sources can't be used with the Forms control. Forms only work with tabular data sources. This doesn't mean action-based data sources can only read data. Most action-based data sources provide functions for updating the data as appropriate. An action-based data source can also be for things like sending emails or other notifications, not necessarily only for reading and writing data.
In the following examples, you'll learn how to:
Add the Office 365 Users connector to your app.
Query for users.
Find the logged-in user's manager.
Update the logged in user's profile.
Add the Office 365 Users data source
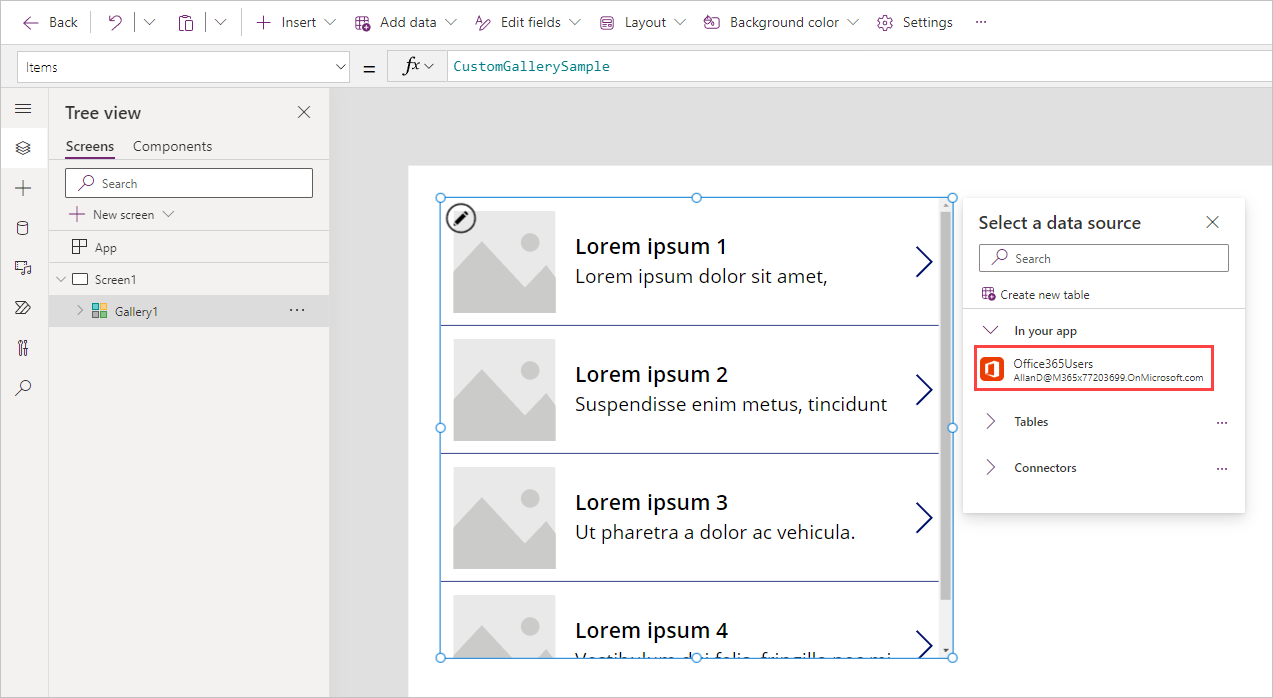
In this example, you'll add the Office 365 Users data source, an action-based data source, to an app. The process is the same as adding a tabular data source.
In the Power Apps Studio, select Add data from the top menu ribbon.
In the search box, type "Office 365".
The list of options will filter, select Office 365 Users, then select the account connection you wish to use.
Confirm that the data source has been added by selecting the Add data button once more. Under In your app you should see the Office365Users connection you just added.
You've now added the Office 365 Users as a data source to your app.
Display a list of users in a gallery
Now that you have the data source added to your app, you can display a list of the Office 365 users in a gallery.
On the menu ribbon, select Insert.
Find/select a Vertical gallery.
With your new gallery selected, you can Select a data source, select Office365Users.
Notice that your Office 365 users data doesn't show up in your gallery and there are some error fields that display. It's because the gallery only shows tabular data. You can still use your action connector with the gallery. It just takes some modification of the data via a formula.
In the formula bar, there's an Items property that currently says
Office365Users.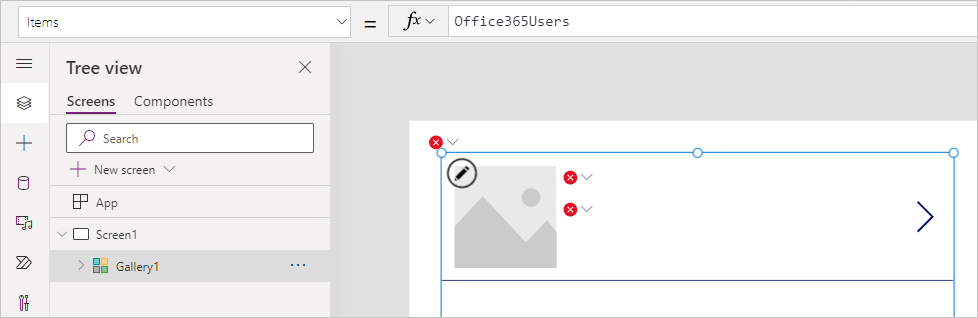
Now make the following addition to your items property:
Office365Users.SearchUser()Notice that when you do so, the errors in your gallery disappear because we have given the gallery a table of data. So now we just need to modify what data from our table is being portrayed in the gallery.
In the gallery panel on the right of your screen, change the Layout to Title and Subtitle. Notice how the errors go away and you're beginning to show data in your gallery, although it's not quite what we want.
Now select the Edit in the Fields from the panel, and set the Title label to DisplayName.
Set the Subtitle label to Mail.
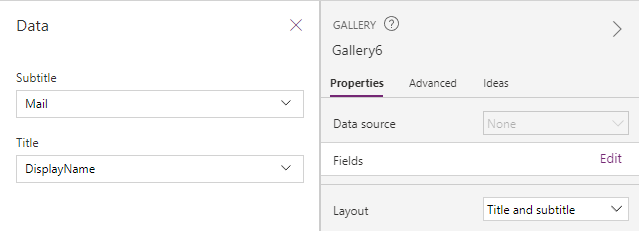


Now your gallery shows your Microsoft 365 users' DisplayNames and Mail properties just like you were using a tabular data source. This is because that function of the Office365Users data connection returns tabular data. You could use the output of this data with any function, like SortByColumns or Sum, that accepts a table of data as an input.
Find the email address of the logged in user's manager
Another common use of the Office 365 data source is to query the user's manager. With tabular data sources, you would use the LookUp function to find this type of information. With this action data source, you use a function to directly query the information as shown in the following example.
Select an area outside of your gallery from the previous example.
Select the Insert button from the top ribbon.
Select Text label.
In the formula bar, delete "Text" and type the following formula:
Office365Users.ManagerV2(User().Email).mail
Note
If you receive an error after entering this formula then the user does not have a manager assigned in Office 365 user table.
In the label, you'll now see the current user's manager email address. The following table shows a breakdown of the formula.
| Formula argument | Formula input | Notes |
|---|---|---|
| id | User().Email | User() is a built-in function that returns information about the current logged in user including FullName, Email, and Image. |
| .property | The function returns the whole user record for the manager. To display only the email address in a Label, use the dot (.) notation. |
Update the logged-in user's profile info
Another way you might use an action-based connector is to update data. With a tabular data source, you could update directly using a Form or a Patch function. Those capabilities don't work with action-based data sources. Instead, for each action-based data source, you depend on the functions provided by that connector for your options. The following example shows how to update your Microsoft User Profile by using the provided function.
Let's insert a button on your canvas app screen. Select + Insert from the top ribbon, and select Button.
For the OnSelect property of the button, set the formula to
Office365Users.UpdateMyProfile({aboutMe: "Project manager with 5 years of technical project management experience."})
That process will update your Microsoft 365 Profile. The following table shows a breakdown of the formula.
| Formula argument | Formula input | Notes |
|---|---|---|
| Optional | {aboutMe: " Project manager with 5 years of technical project management experience."} |
Other optional parameters: birthday, interests, mySite, pastProjects, schools, skills |
Another example would be to update the profile by referencing a text input control on the screen. If you had a text input control on the screen named textinput1, the formula would update to:
Office365Users.UpdateMyProfile({aboutMe: TextInput1.Text})
The Office 365 Users data source is a rich data source and is commonly used in many apps. Take some time to get more familiar it. For more information, see Connectors.
These examples demonstrate how to integrate an action data source into your app. The concepts can be similar to tabular data sources, like when displaying users in a gallery. But they can also be different, like when writing back to a user's profile.
In the next unit, you'll learn more about Power Automate and how to integrate it with Power Apps.