Exercise - Import data
In this exercise, you learn about the steps that Reed takes to ingest the spreadsheets that Alex provided. Data import is a vital task to bring large volumes of data into Microsoft Sustainability Manager. Excel is used in this exercise; however, many prebuilt connectors are available, and partners can build custom connectors to integrate with more data sources. For more information, see Overview of data connectors.
Important
Make sure that you've completed the previous exercise to create reference data. The data import process requires all reference data to exist. The process is case-sensitive, so ensure that the added reference data is an exact match to the case formatting that's found in the exercise. Failure to do so will result in errors during the data import process.
Important
To download the sample Excel files that you'll ingest into Microsoft Sustainability Manager, go to sample data. In the GitHub page that appears, select the Download button. Extract the two Excel files to a folder on your local computer for use in this exercise.
Use an In-Private or Incognito window and open the go to Sustainability Environment you created in Set up the Microsoft Cloud for Sustainability trial exercise.
Sign in with the credentials of Reed Flores.
Task: Add custom dimension metadata
In this task, Reed adds three custom dimensions metadata for the mapping before importing the data from the Purchased electricity Wide World Importers 2022.xlsx Excel spreadsheet.
In the left navigation pane, select Data > Custom dimensions.
Select New on the top right on the Active Custom dimensions page.

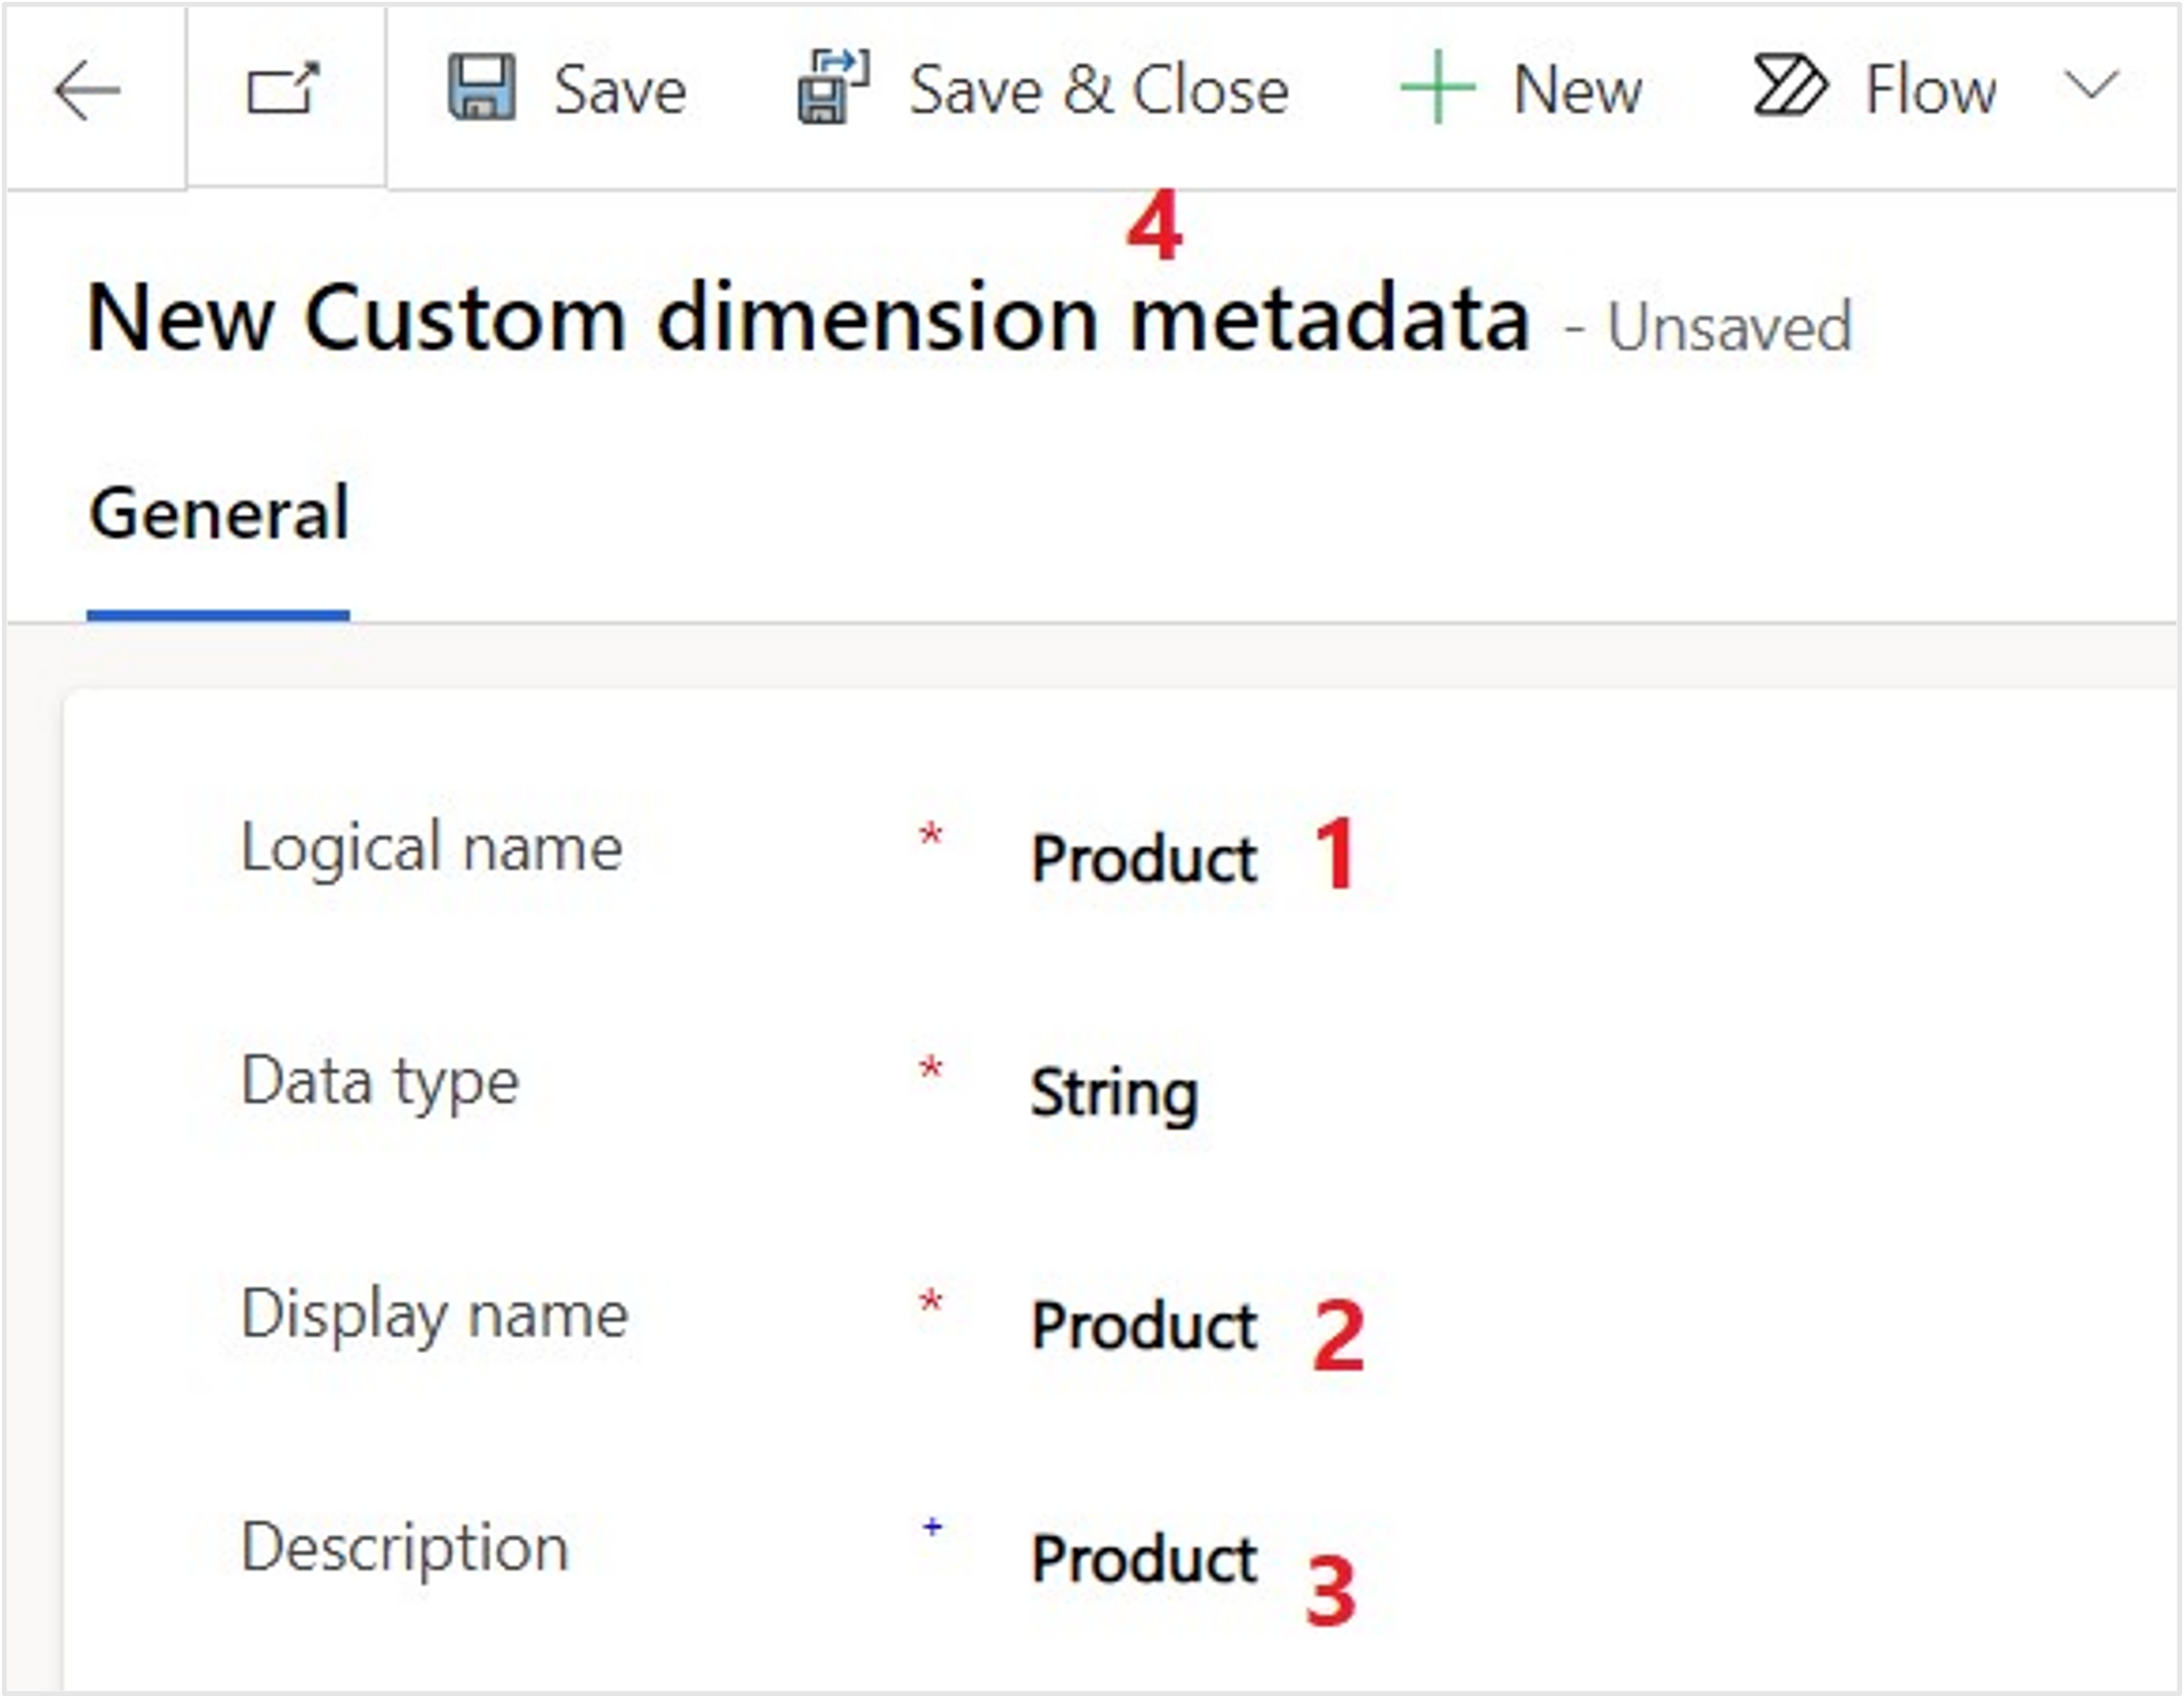
Enter the details as follows:
Logical name - Product
Display name - Product
Description - Product (optional)
Select Save & Close.
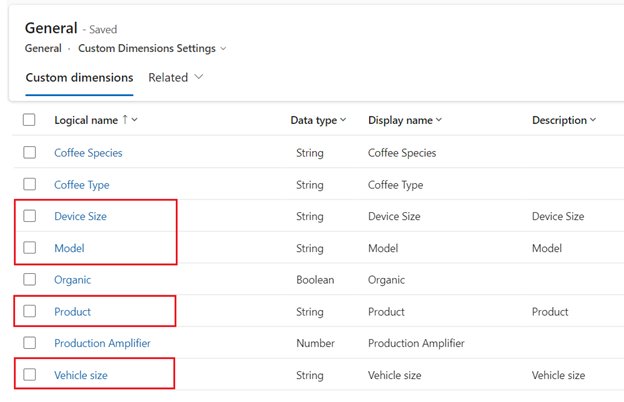
Repeat the previous steps to create two more new custom dimension metadata as follows:
Custom dimension metadata for Model
Logical name - Model
Display name - Model
Custom dimensions metadata for Device Size
Logical name - Device Size
Display name - Device Size
Custom dimensions metadata for Vehicle Size
Logical name - Vehicle Size
Display name - Vehicle Size


Task: Import 2022 data for electricity purchased for facilities
In this task, Reed imports the first Excel spreadsheet that Alex provided: Purchased electricity Wide World Importers 2022.xlsx. This import brings in the electricity that was purchased by Wide World Importers facilities for 2022 into the purchased electricity activity data.
In the left navigation pane, select Data > Imports.
Select +New.
On the Imports, select POWER QUERY CONNECTORS.

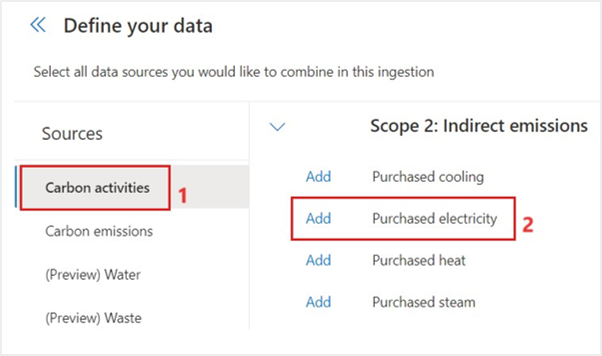
Under Carbon activities, select Add, next to Purchased electricity under Category name.

Select Next.
Review the large list of connectors by selecting the Excel workbook, as the Data Connector.

A new dialog opens for Power Query. Select the Upload file option and then select Browse.
Note
You can also choose to import an existing file that's located in OneDrive. For simplicity of this exercise, you'll use the Upload file functionality.
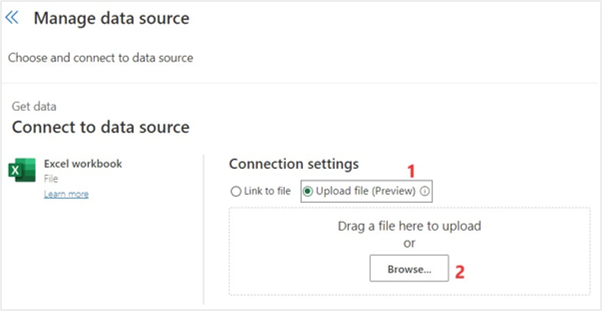
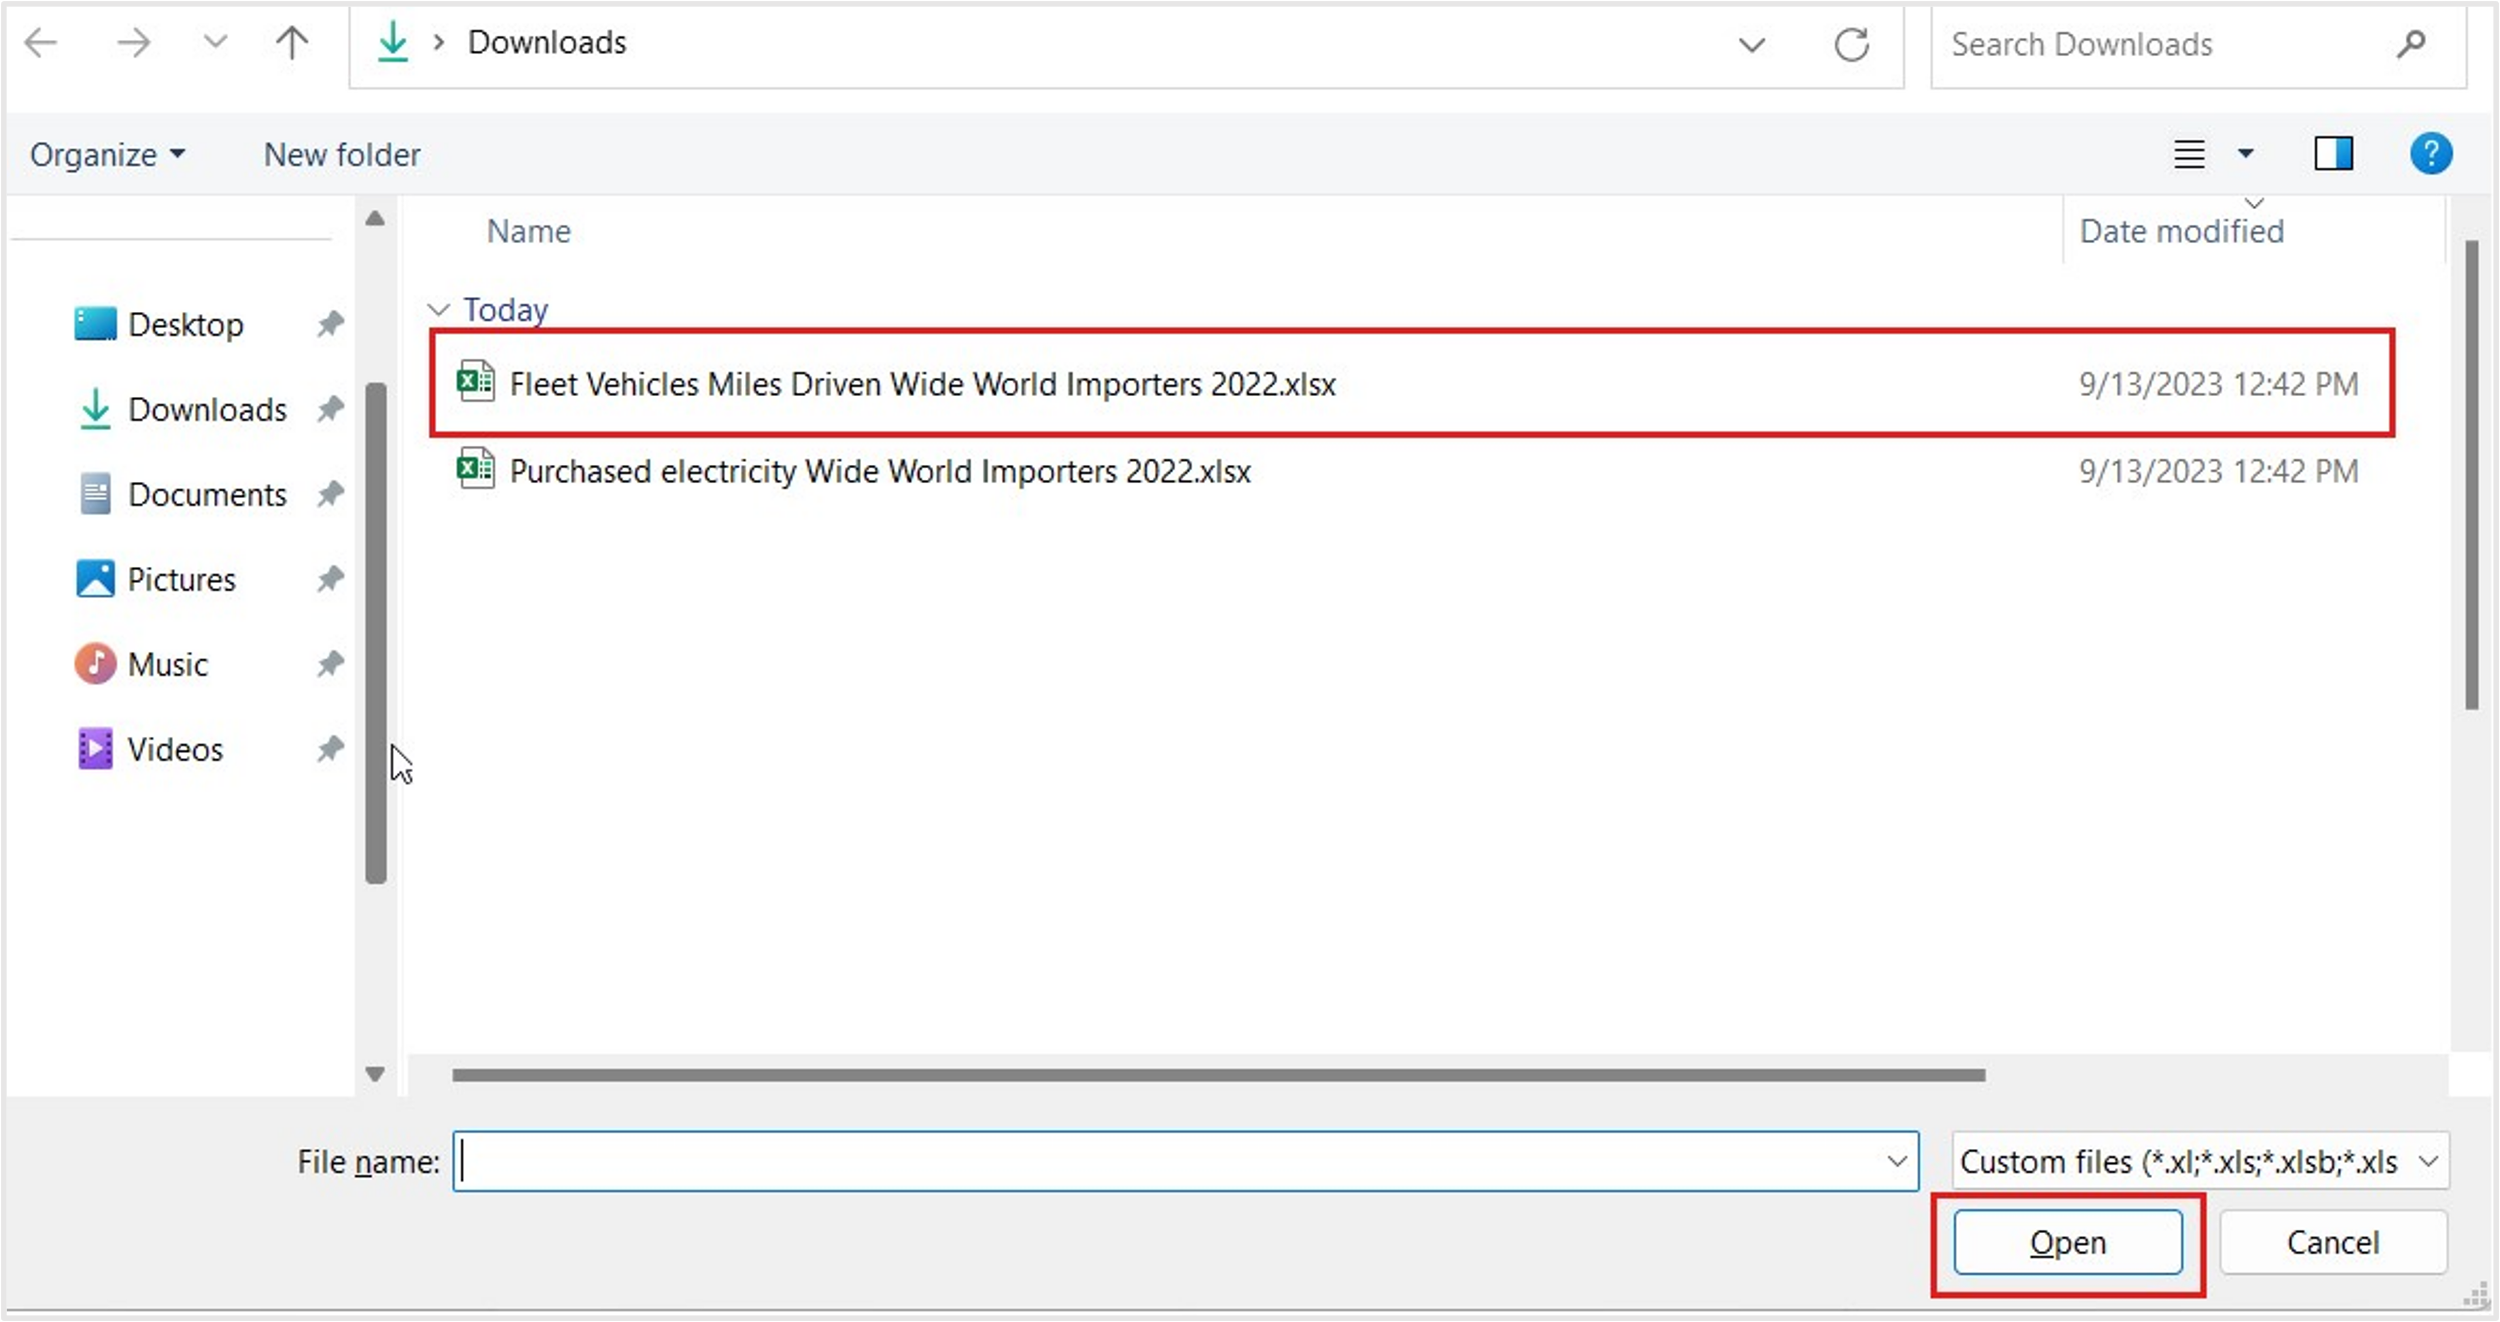
On the file selection window, browse to the location of the Excel files that were downloaded.
Select the Purchased electricity Wide World Importers 2022.xlsx file.
Select Open.

After the file is successfully uploaded, you might be required to select Sign in to create a new connection credential.
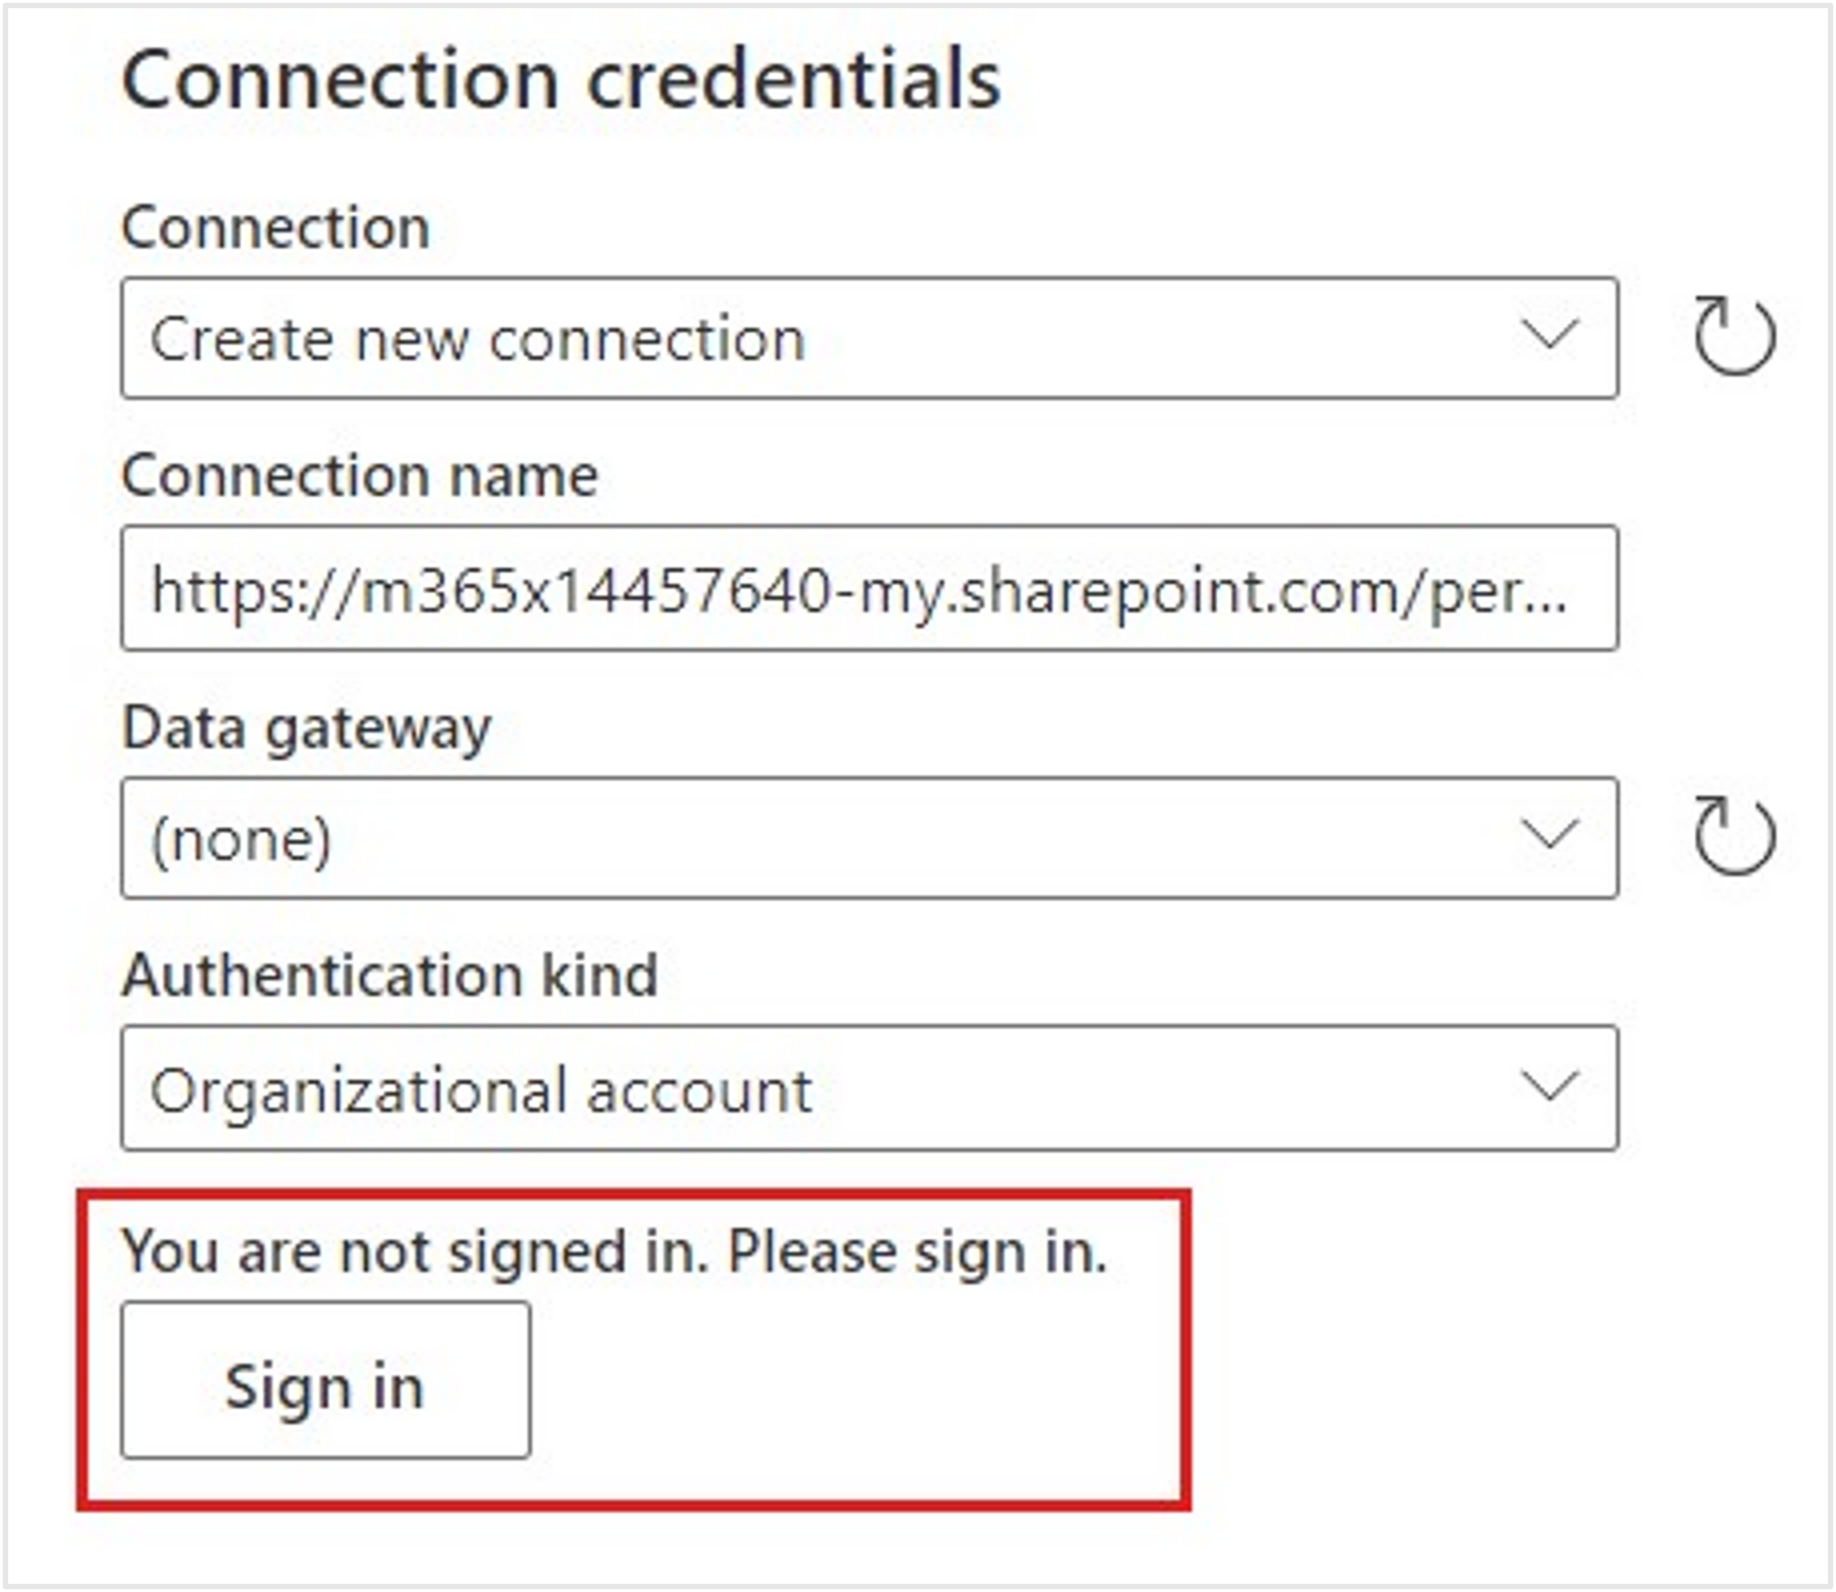
An Office 365 Sign-in dialog appears. Reed selects their user from the list. In this exercise, select your user account from the list.
After the sign-in process is complete, the new connection will be selected automatically. Select Next.
Note
If you receive an error after uploading the Excel file, check your browser cookie settings.
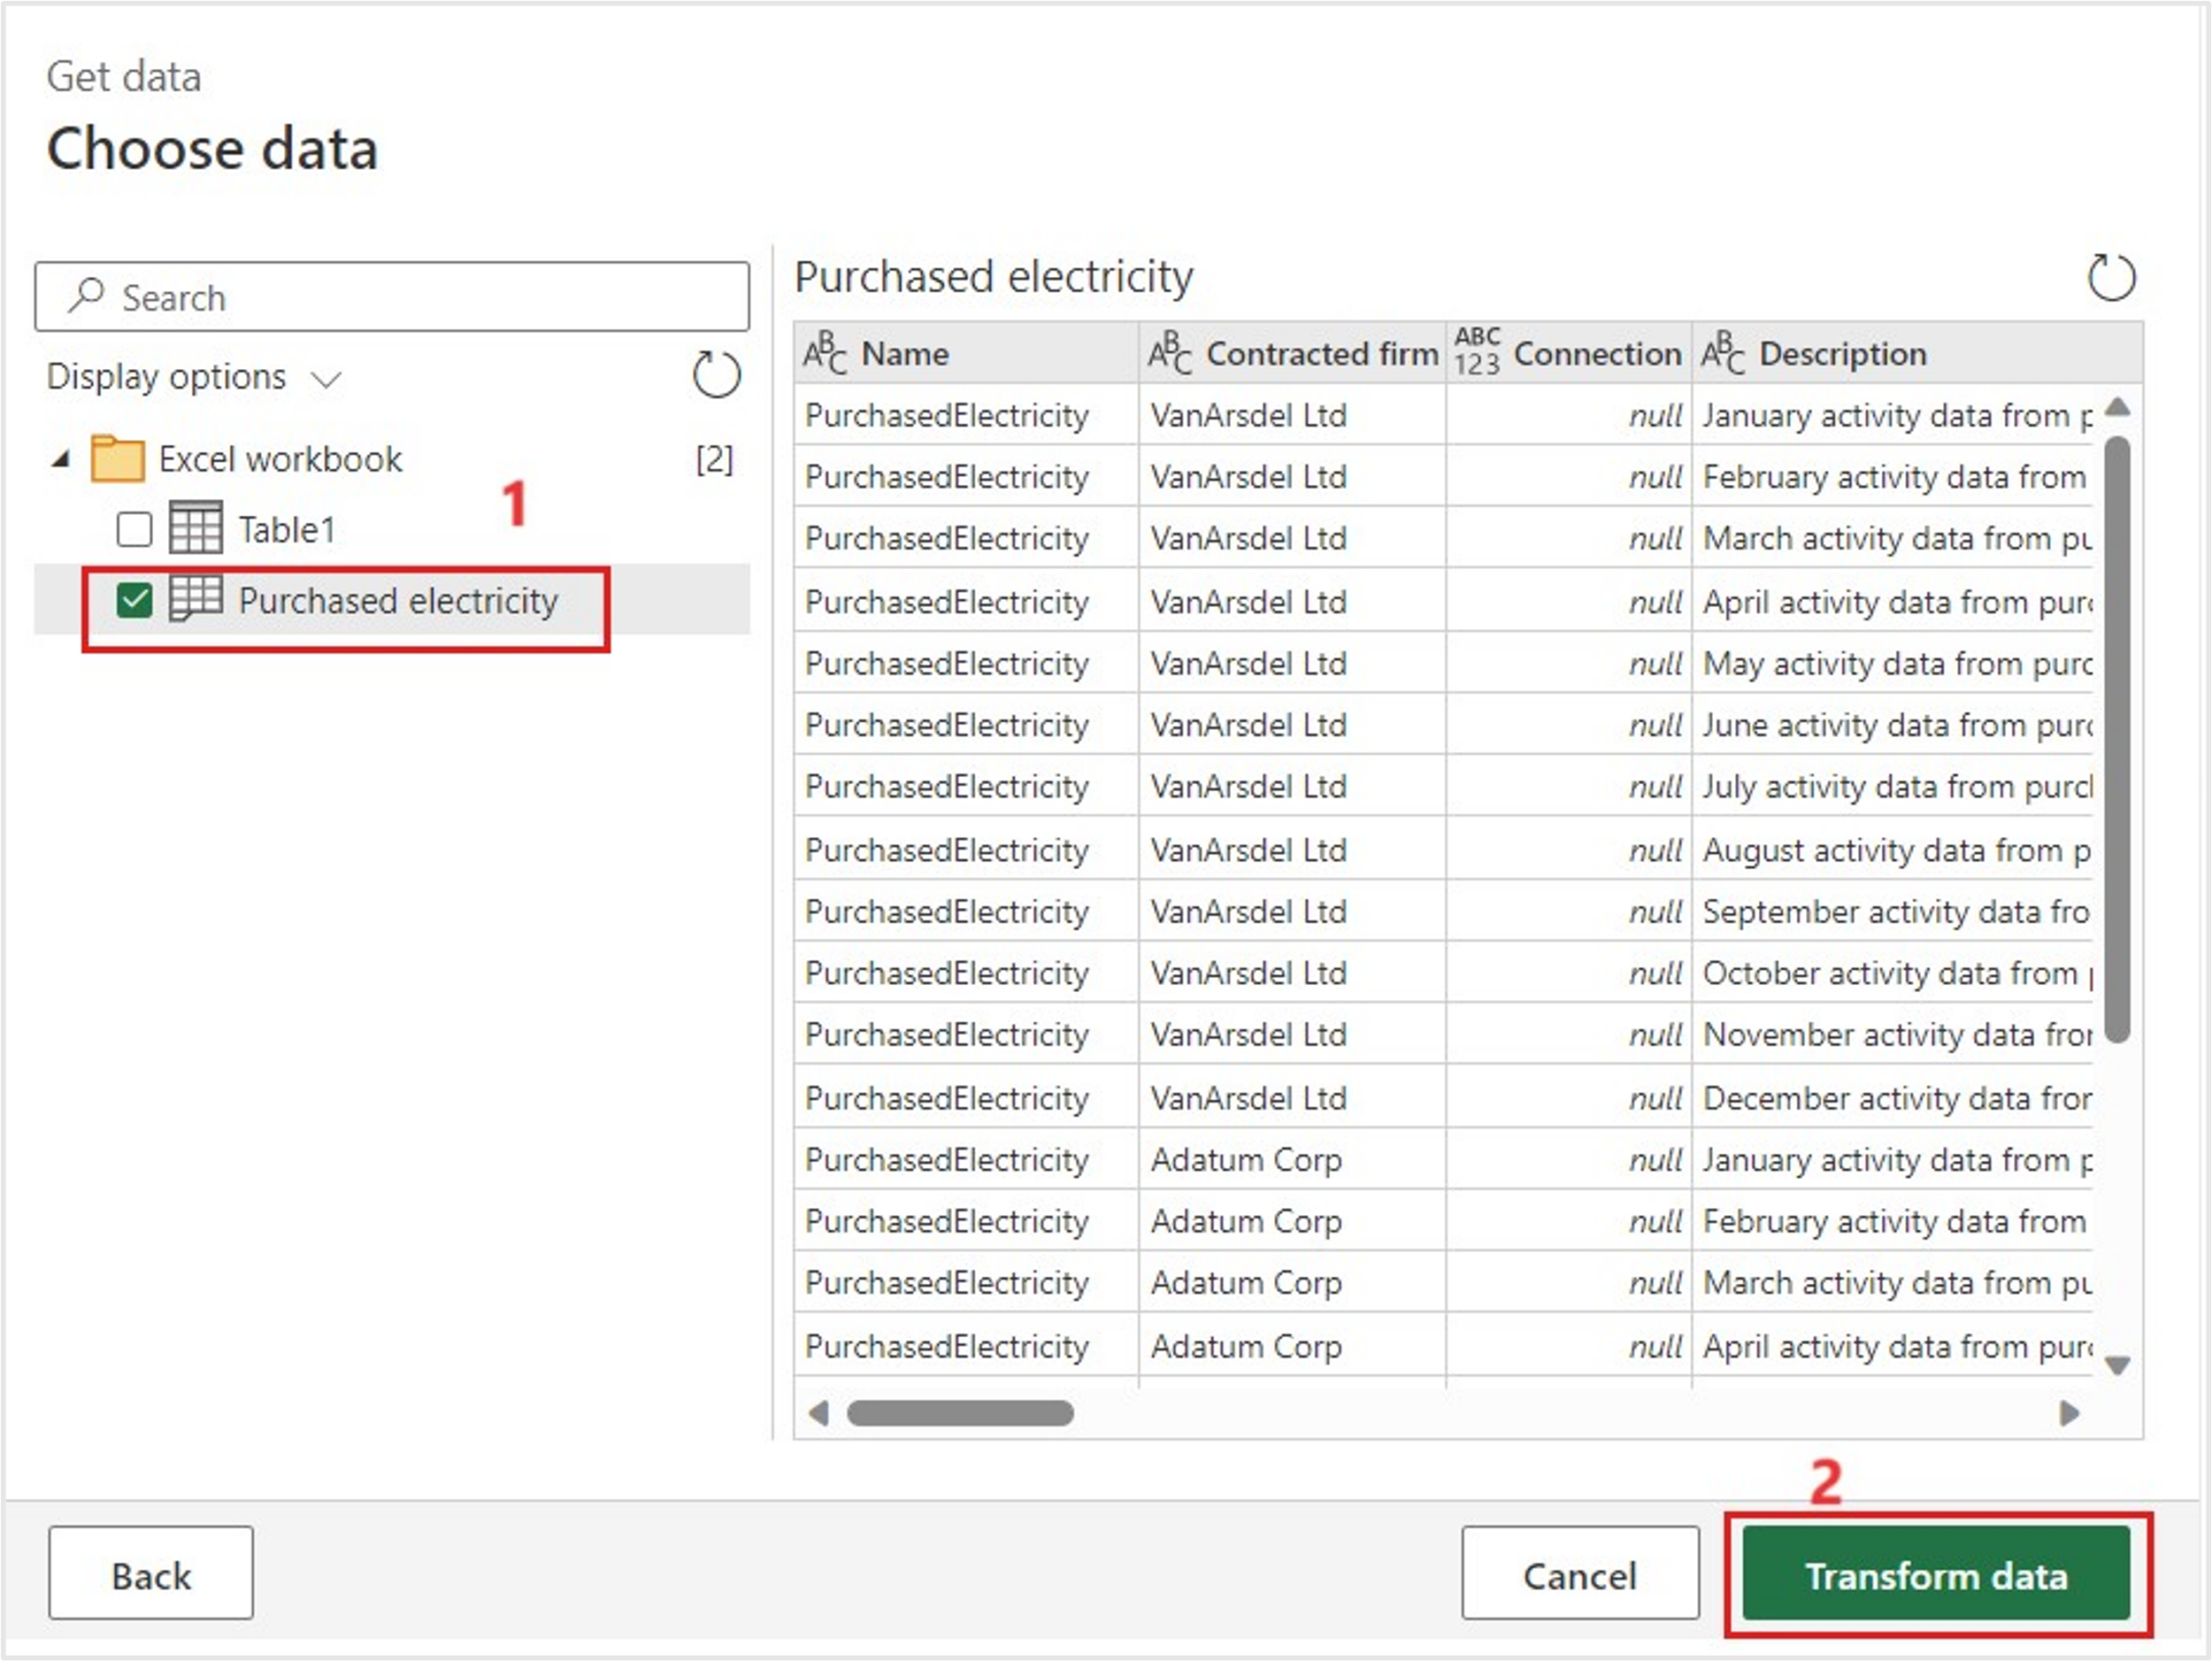
On the Choose data page of the Power Query wizard:
Select the Purchased electricity Excel spreadsheet.
Select Transform data.
You can complete various data and column transformations on the Transform data page of the Power Query wizard. As a result, you can adjust data types, update column mappings, and perform advanced transformations that you're familiar with in Microsoft Power Platform dataflows or Microsoft Power BI datasets. In this exercise, don't apply any transformations, select Create.
Note
Wait for the transformations to be applied properly, before you select Create, else you might get an error.

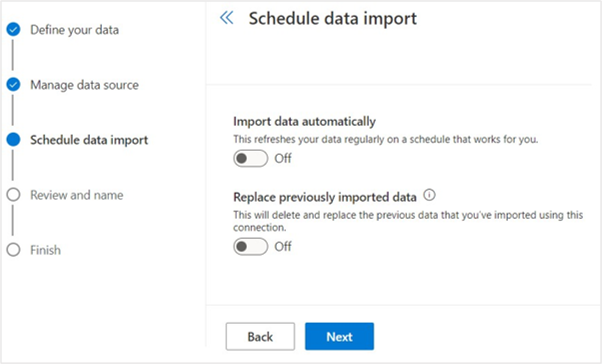
The New data connection wizard is on the Schedule data import page, where you complete the following actions:
Turn on the Import data automatically toggle to allow the option to set a schedule for the data to be imported automatically. Selecting this option is beneficial if the connector is used in a scenario where the data changes frequently, such as a web API or FTP server.
Turn on the Replace previously imported data toggle to remove all previously imported data and bring in the full dataset that was retrieved. Selecting this option is beneficial if the data source isn't providing data from only the last import or if it always includes a full set of data. For this scenario of importing historical data, leave both options turned off.
Select Next when finished.
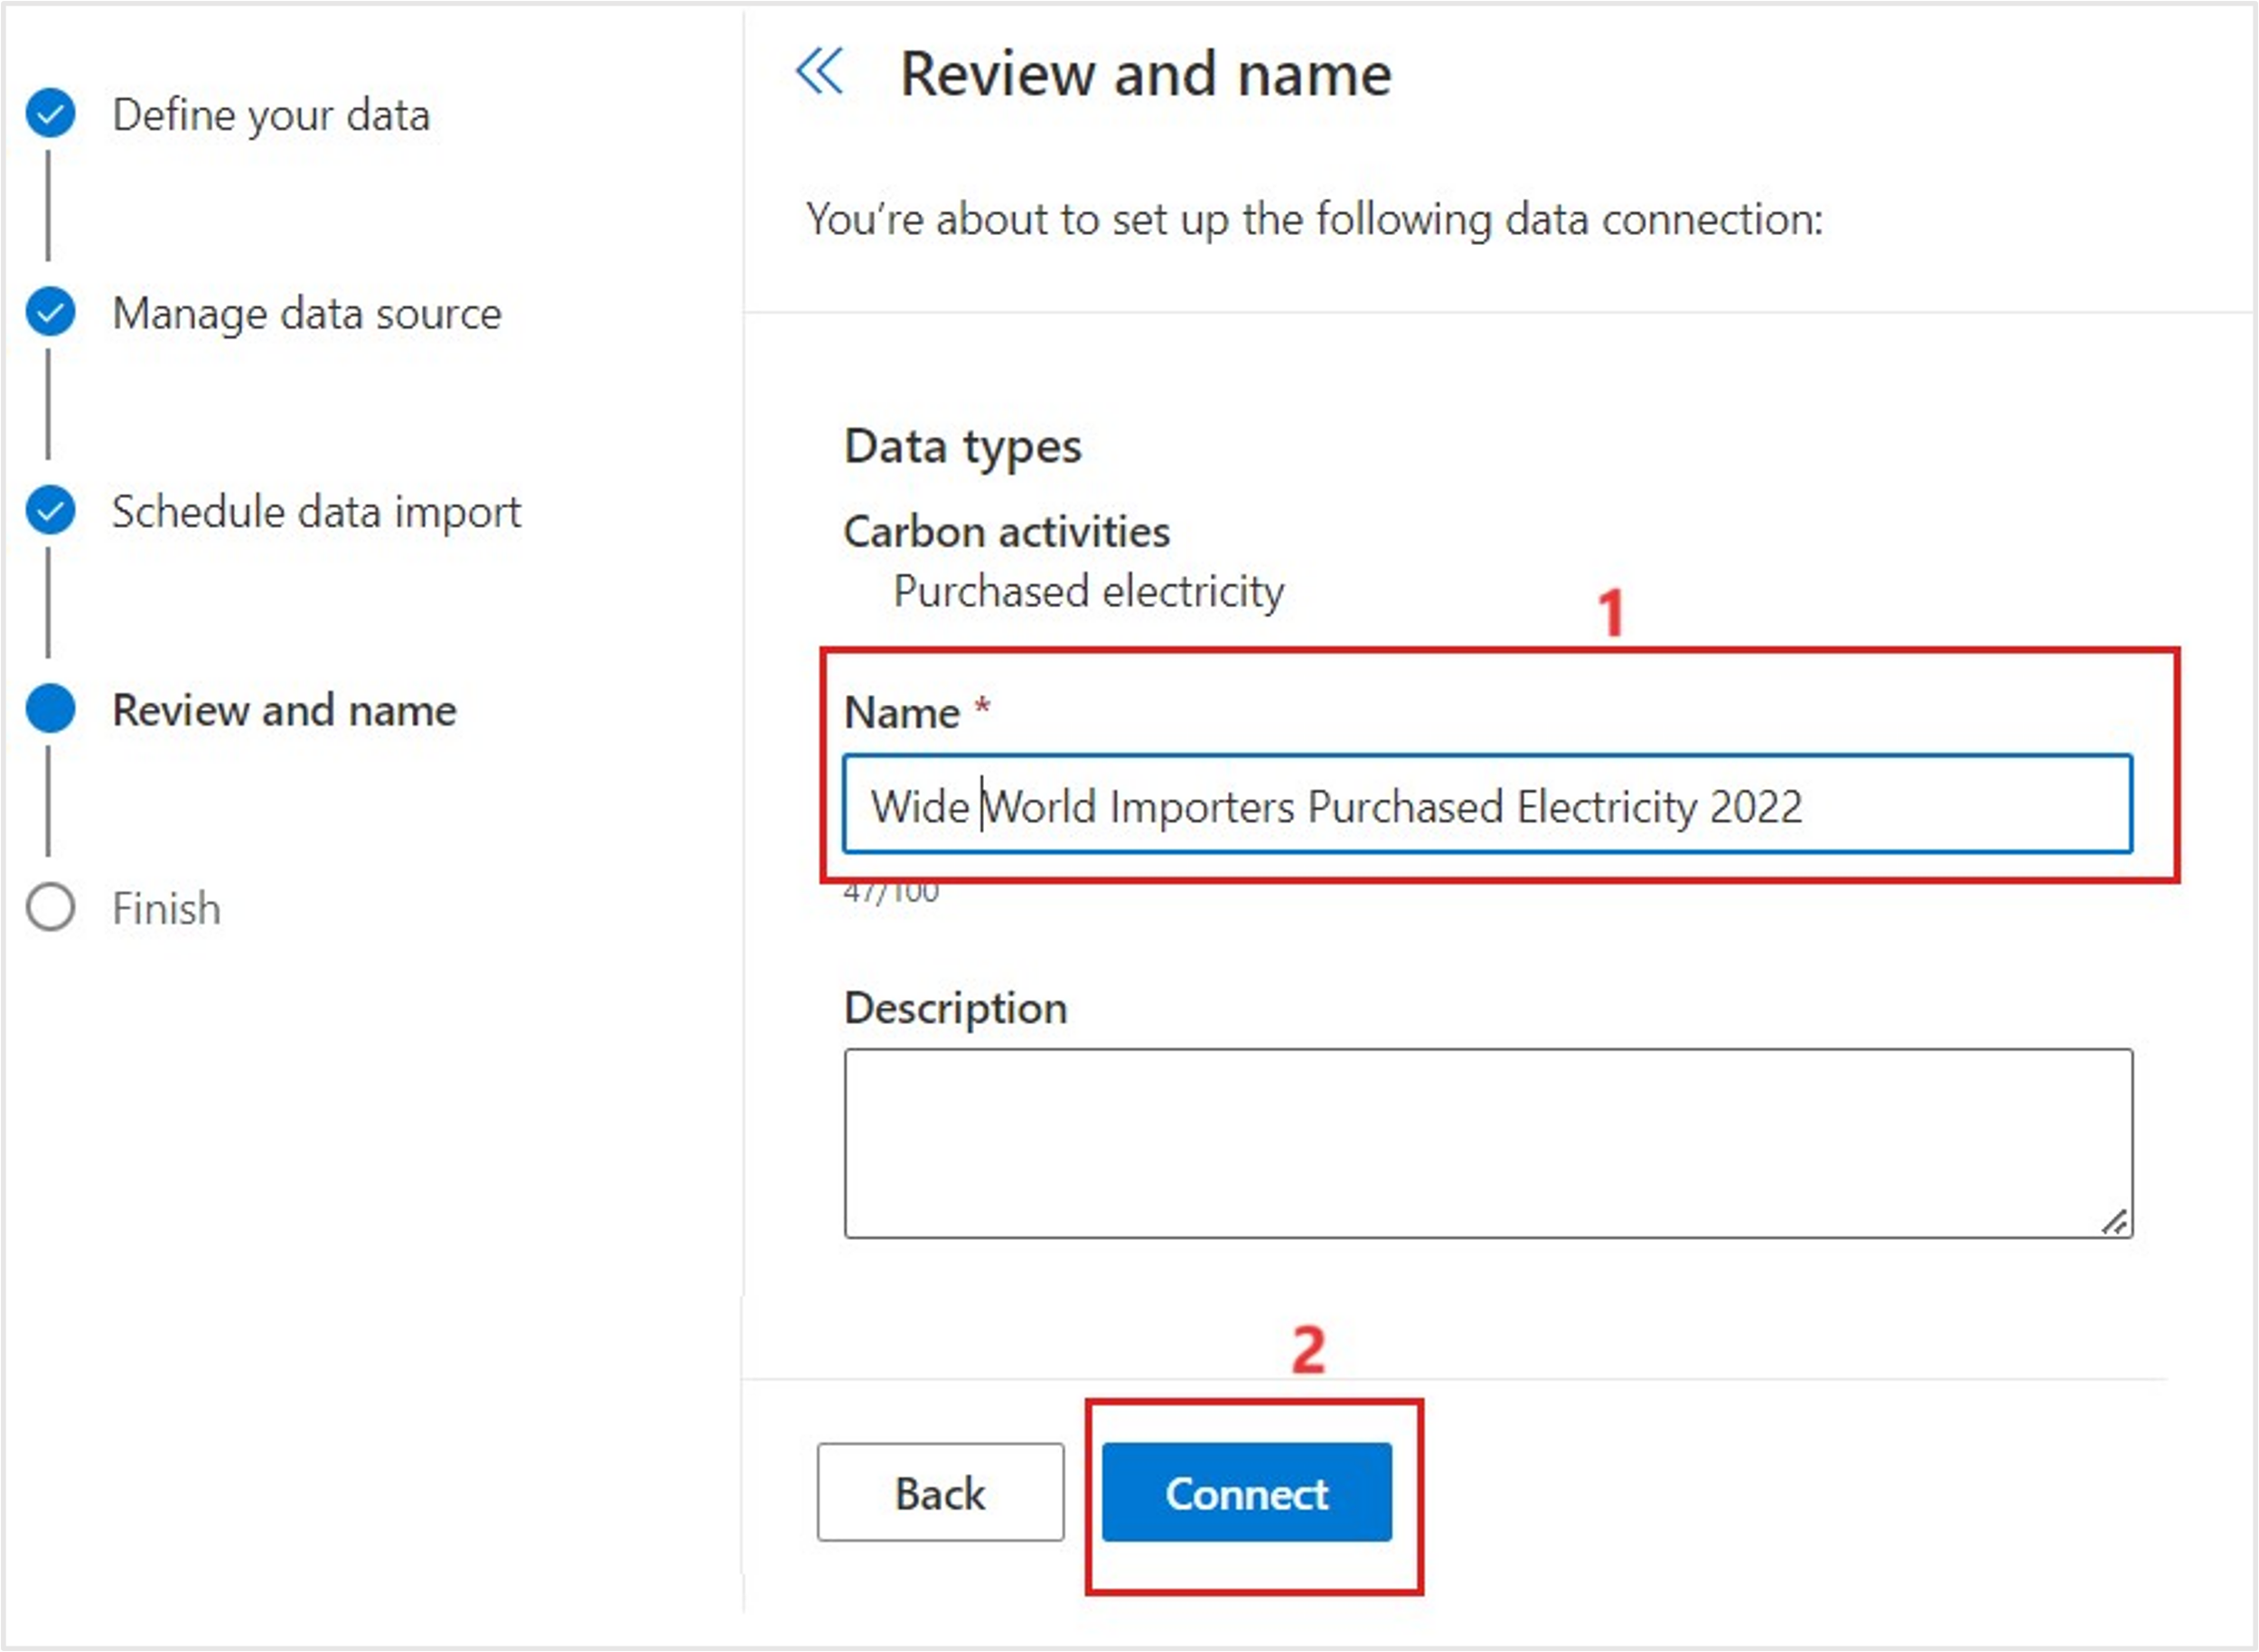
On the Review and finish page, complete the following tasks:
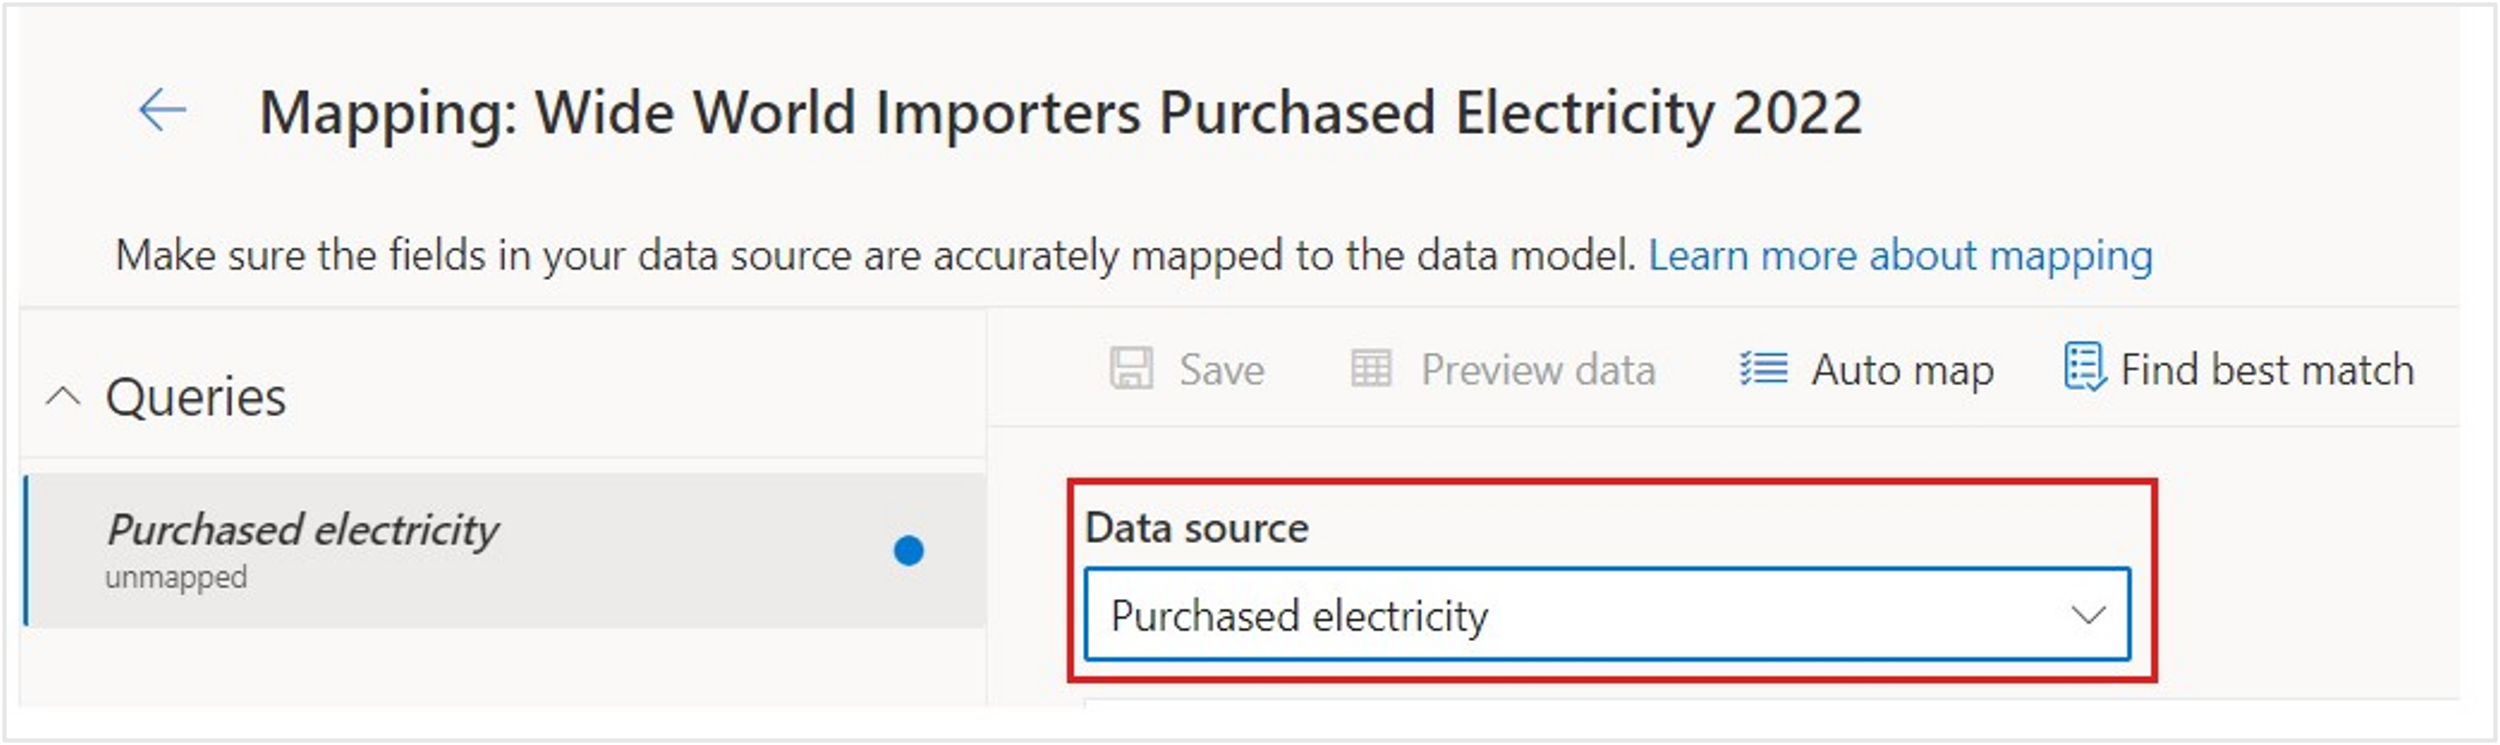
Enter a name for the new connection, such as Wide World Importers Purchased Electricity 2022.
Select Connect.
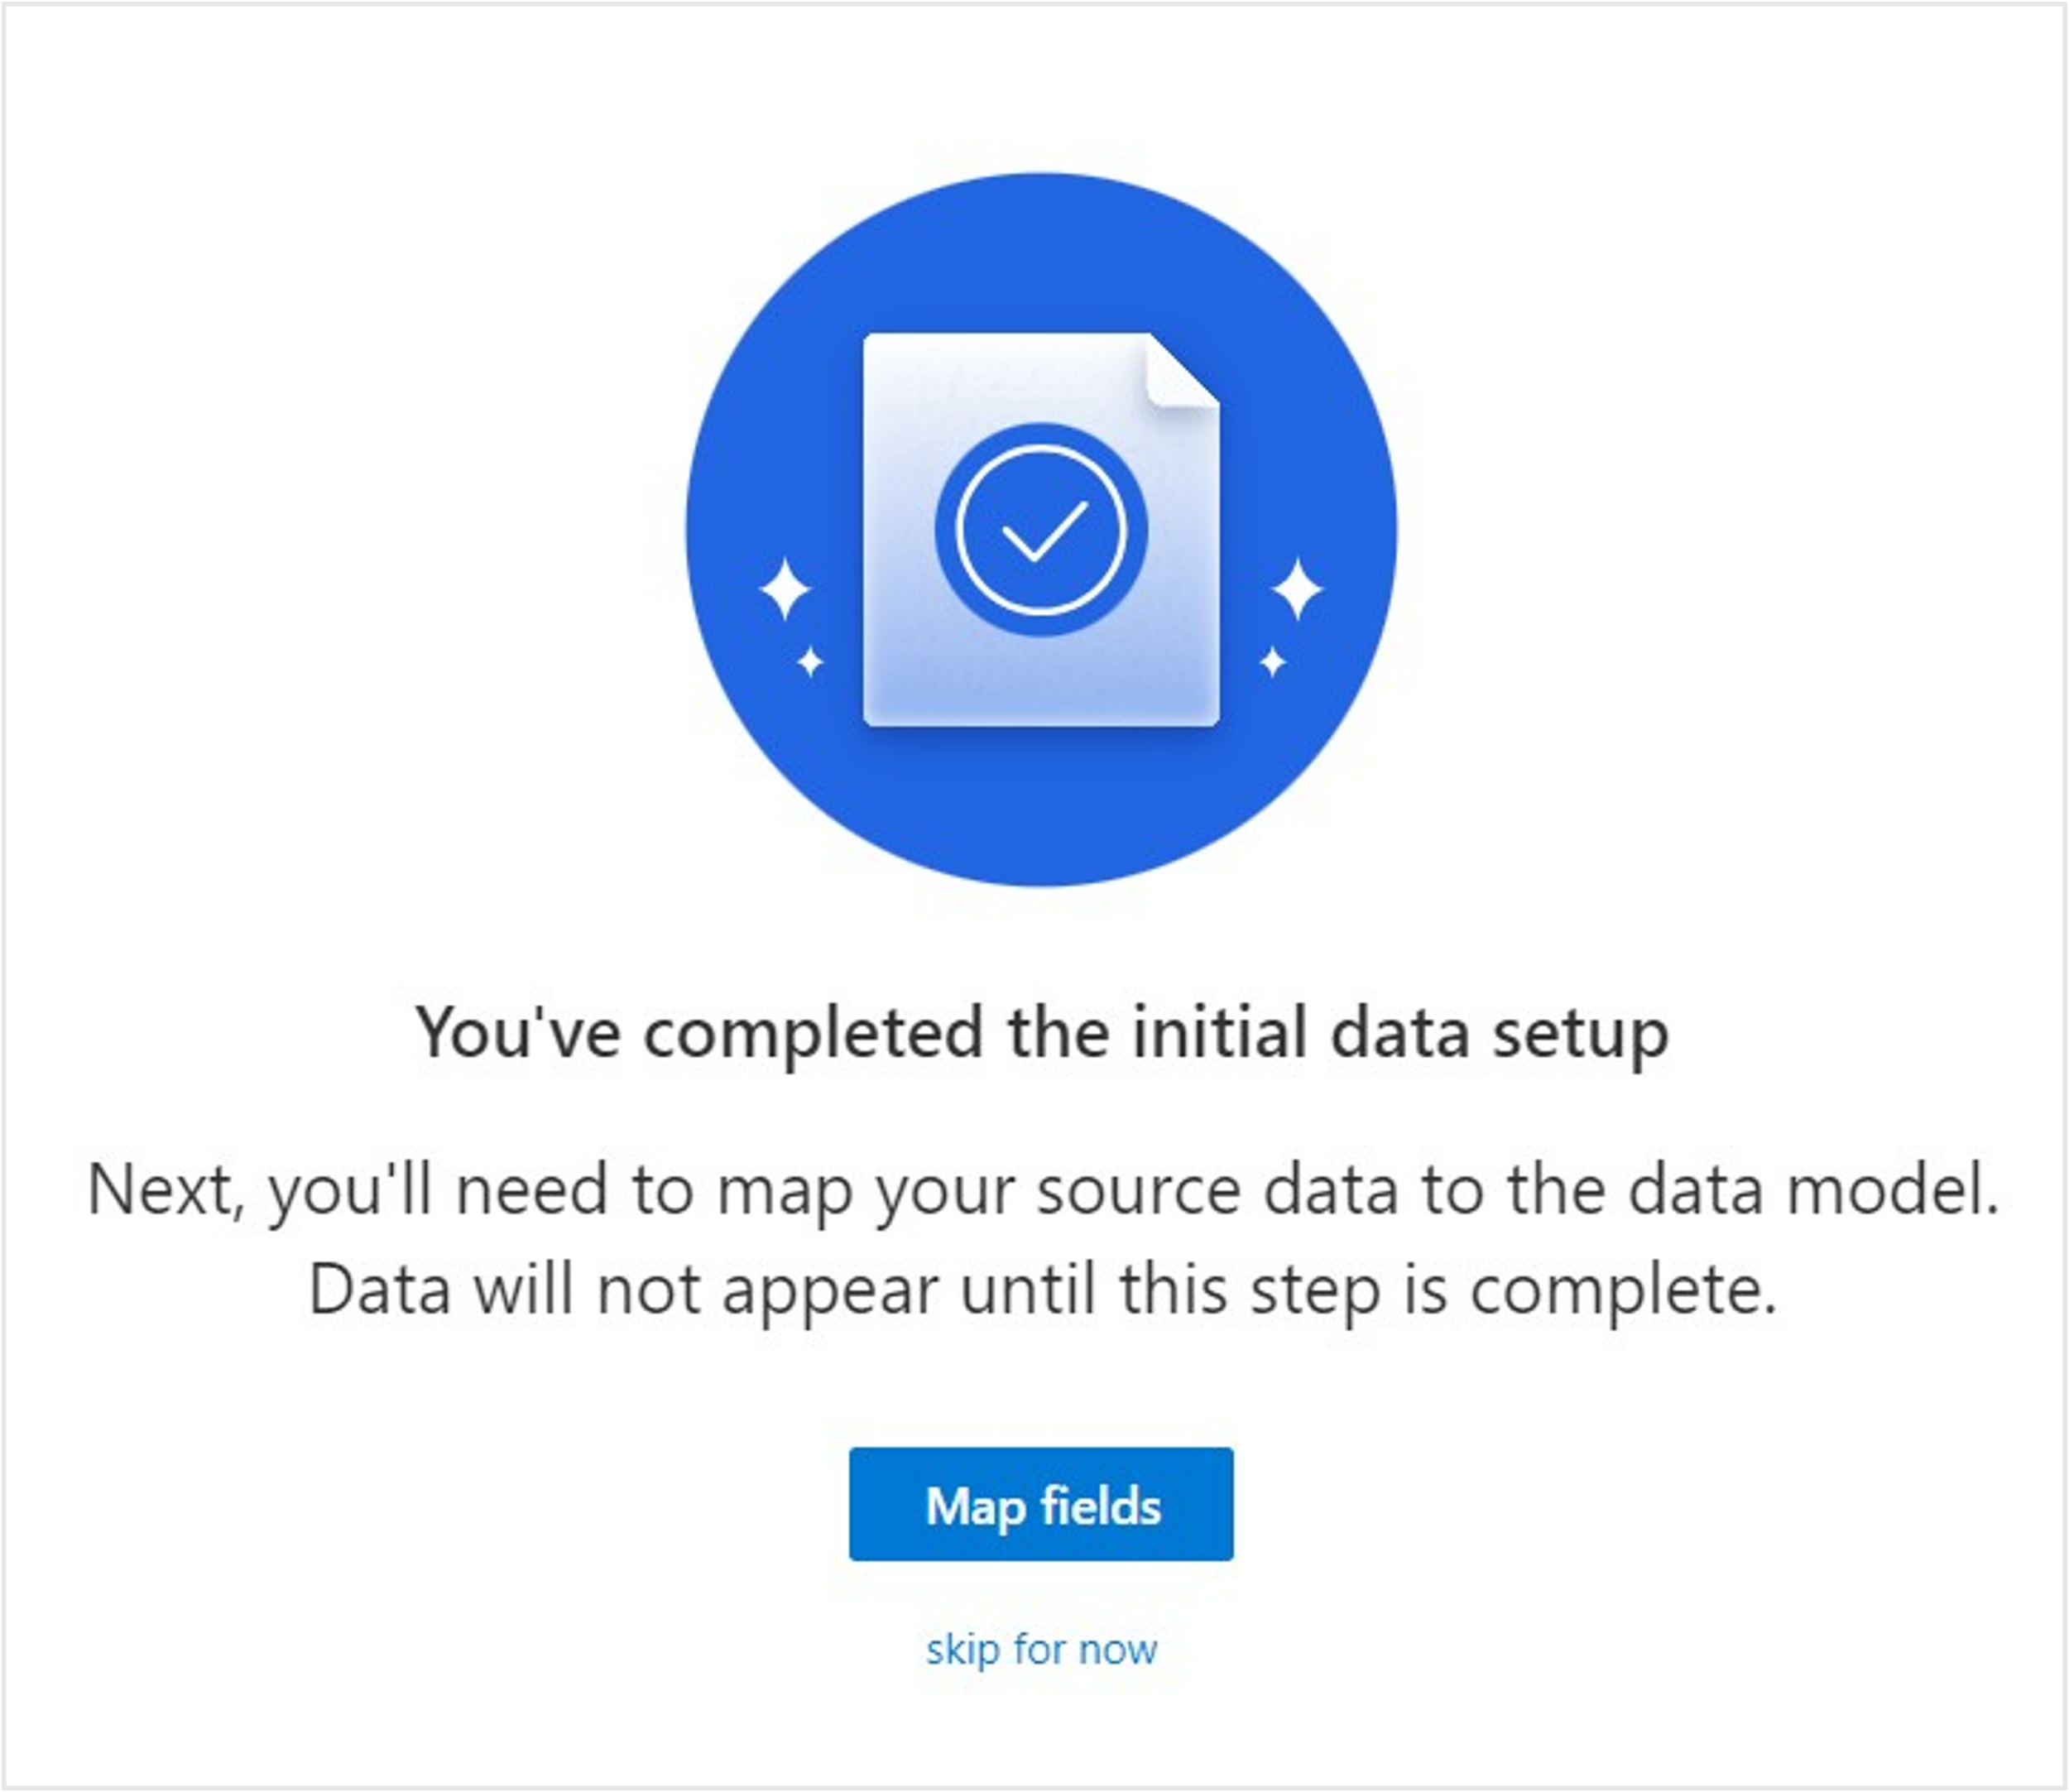
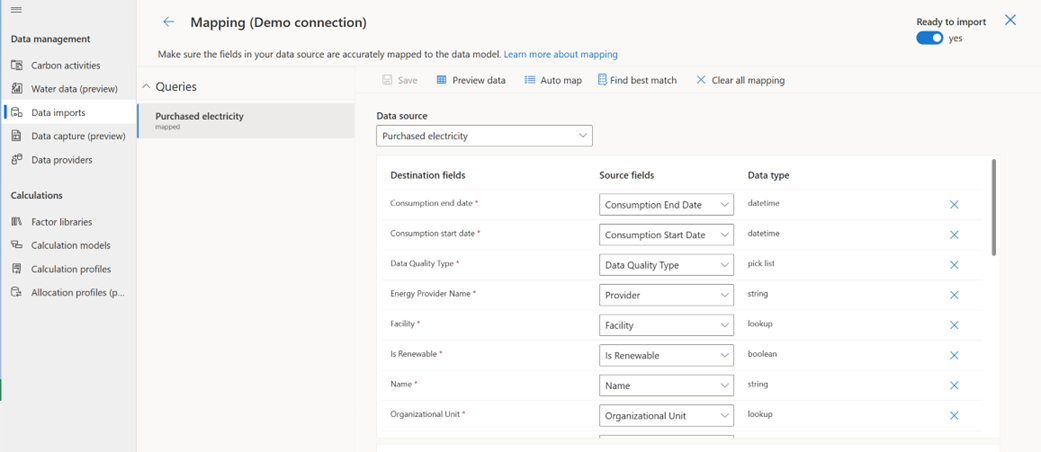
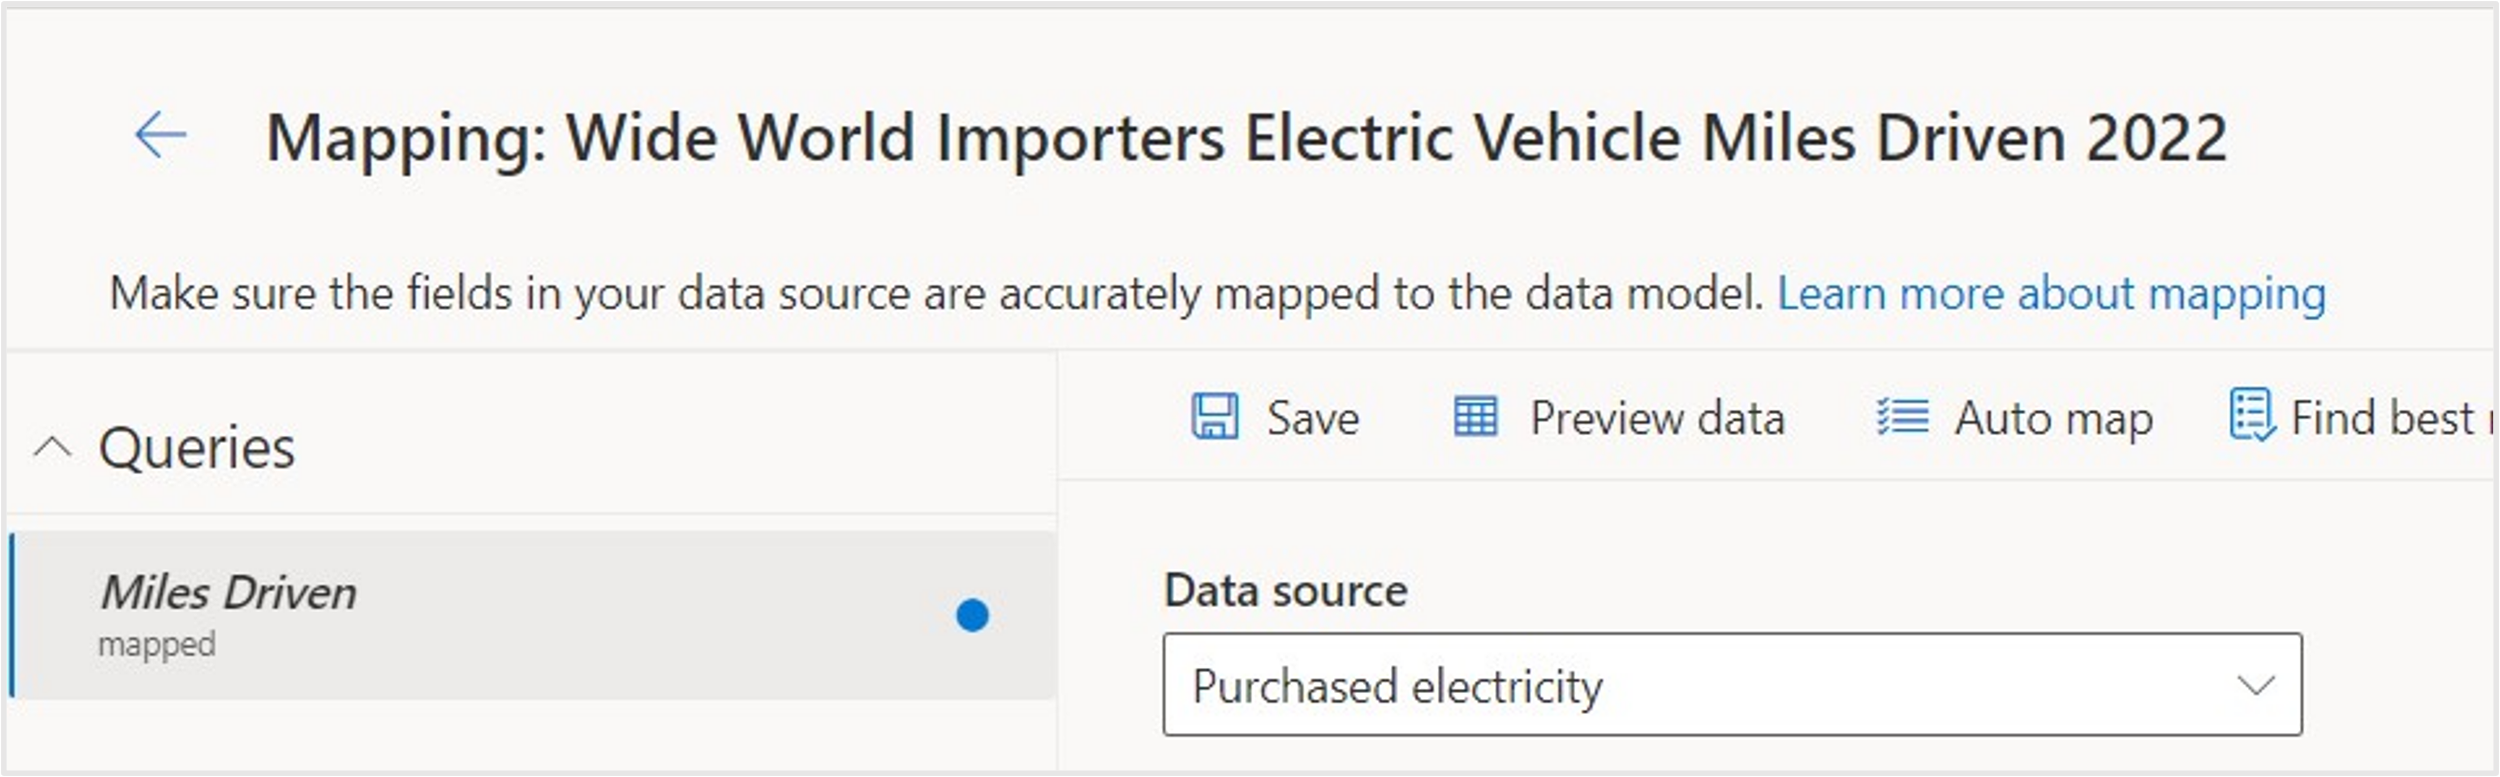
Next, you need to map your source data to the data model. Data won't appear until this step is complete. Select Map fields.
Select the Data source to map, in this exercise that is Purchased electricity under Carbon Activities.
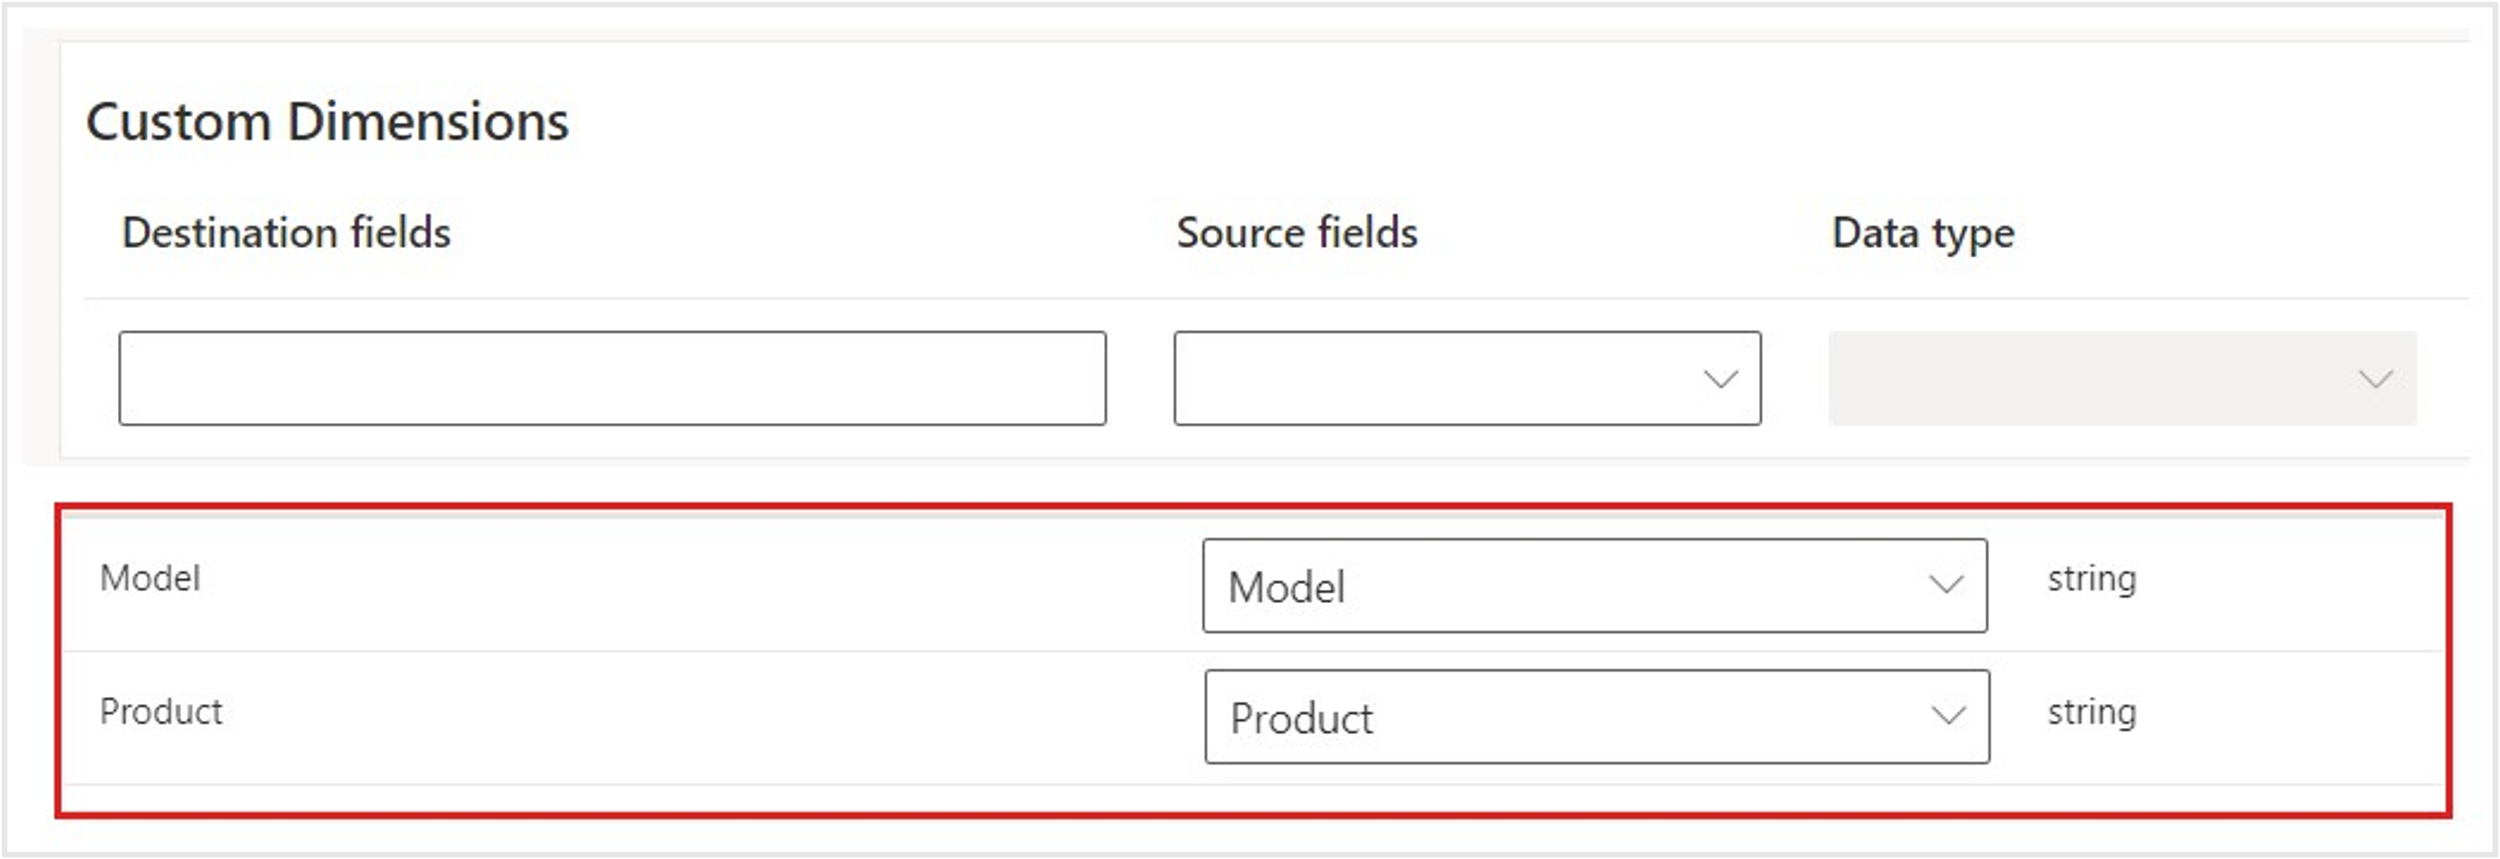
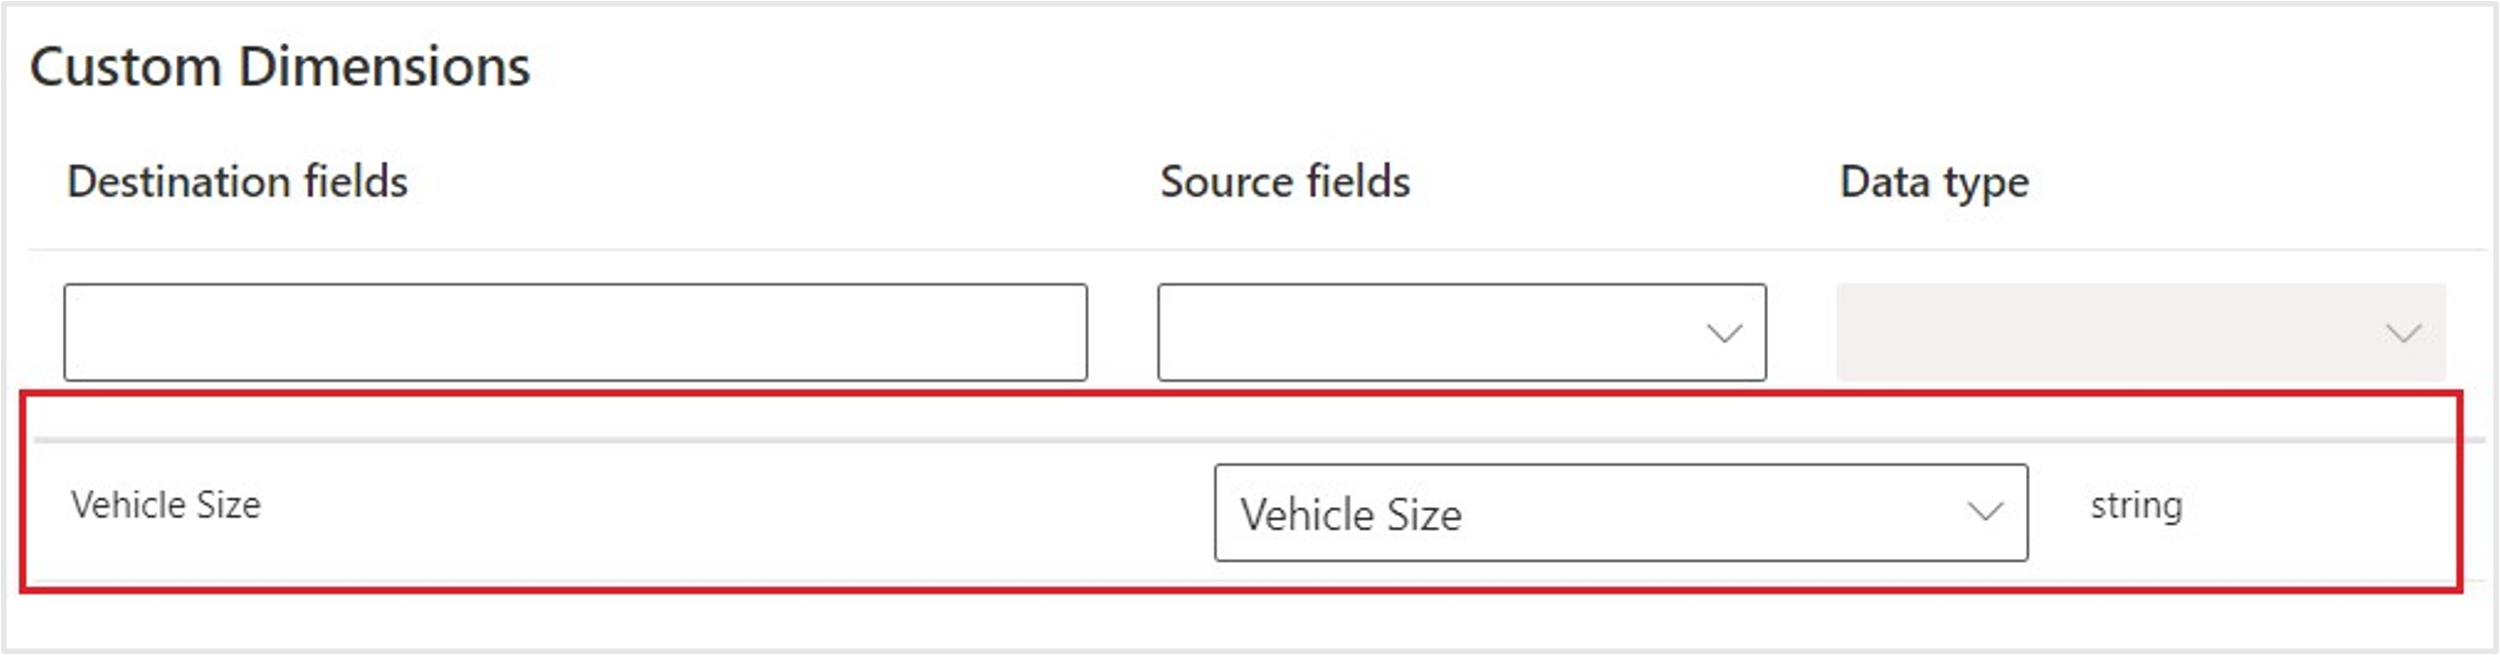
In this scenario, Reed needs to map the columns from the spreadsheet to the columns in Microsoft Sustainability Manager. Select Auto Map for the solution to automatically map the file’s source fields with the destination fields, for any field that isn't an exact match the best match is found and highlighted in blue, make sure to review them. Review the custom dimensions to ensure Model, Product, and Device Size are added as part of mapping. Remove the unnecessary custom dimensions if they're added when you're done with the mapping.
Note
Please make sure that the below Contractual Instrument Type field is mapped to Contracted firm.

Select Save.

Note
You can add a new custom dimension metadata or use existing custom dimension metadata that you added as mentioned in previous Add custom dimension metadata task. You must provide a name in the Destination fields, select the respective custom dimension metadata and enter the Source fields and Data type and select Add. The metadata will be added.
Now that you reviewed the field mappings, toggle Ready to Import as yes. Select the back arrow. Select Done.
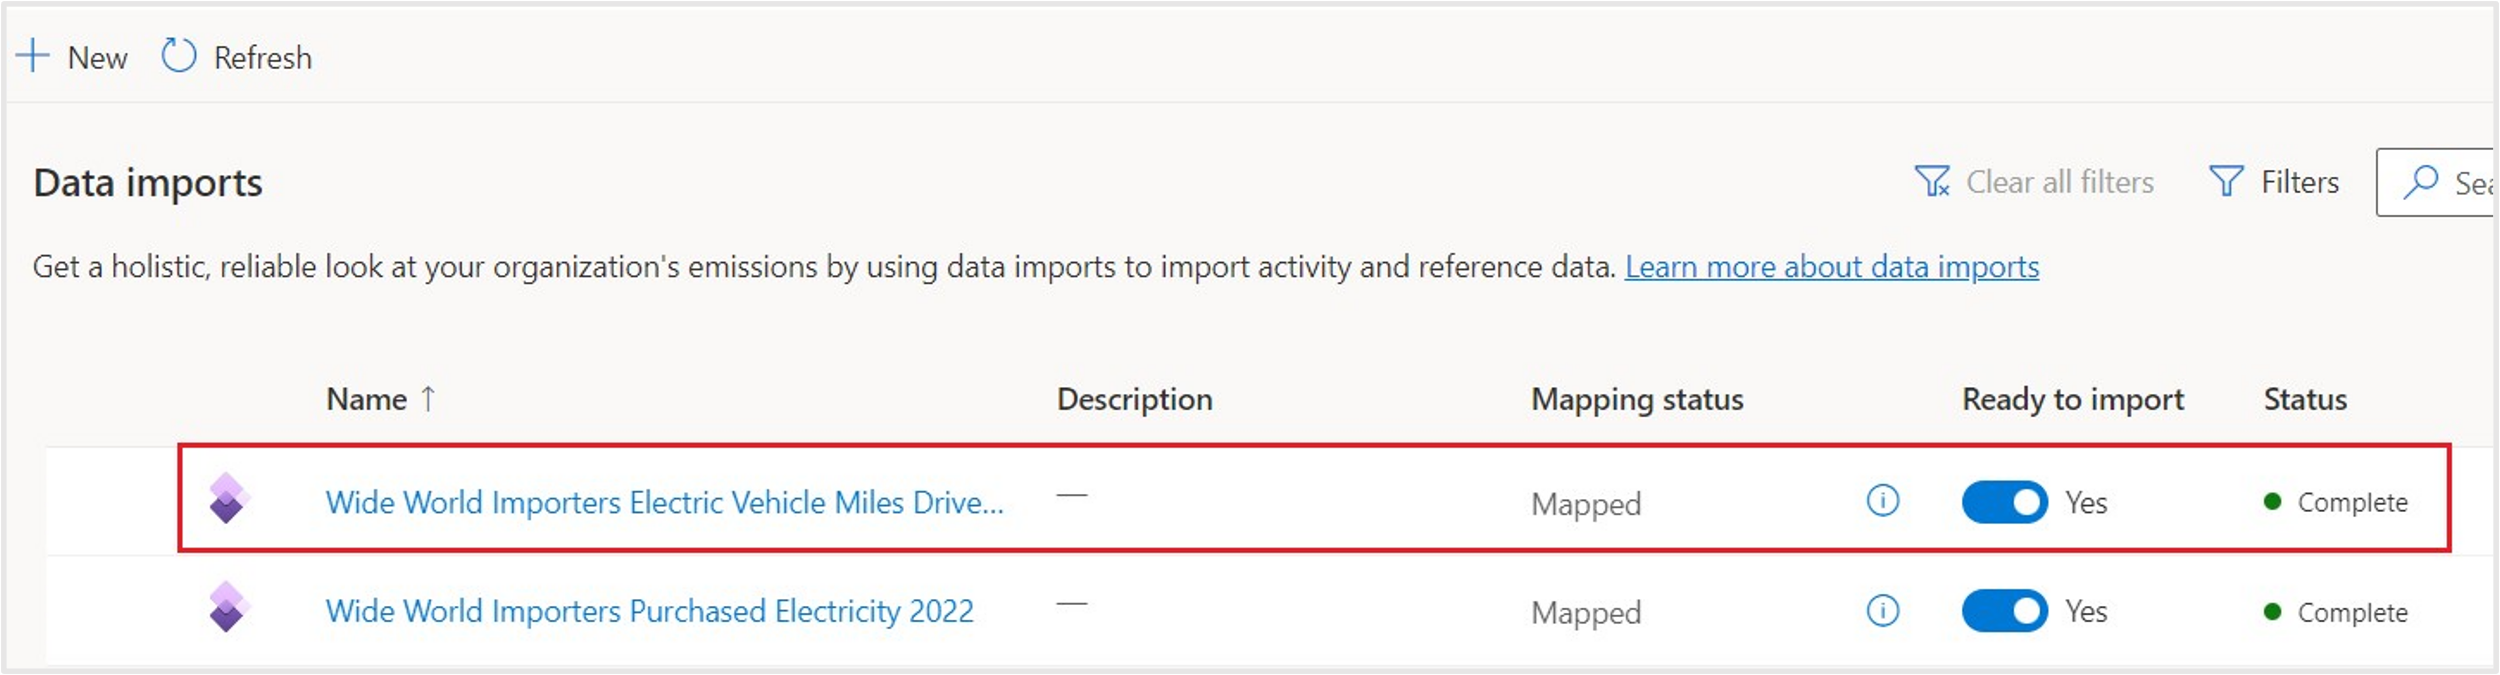
On Data imports page you can view the import you created.
The Data Import job runs and the status displayS Scheduled and then in a moment it switches to Processing. You might need to refresh your page to view the change.
After a minute or two select Refresh above the list to view the updated status, which should be Complete.
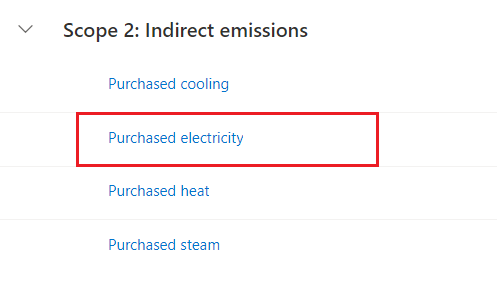
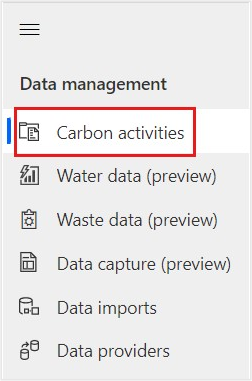
Go to Data > Carbon Activities on the left navigation pane.
Find and select Purchased electricity in the Scope 2: Indirect emissions section.
The Purchased electricity view shows all purchased electricity activity data that has been imported.

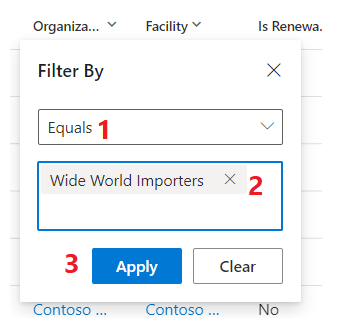
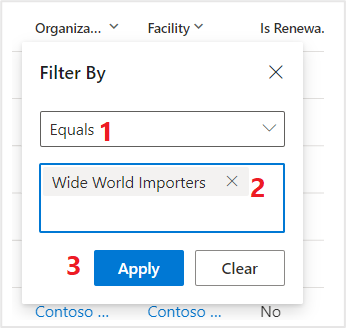
Filter the view by selecting the Organizational Unit dropdown menu and then selecting Filter By.
Select Wide World Importers from the Filter By dialog.
Select Apply to apply the filter to the column.
After a few moments, the view will refresh and the activity data records that were imported during this exercise will be displayed.
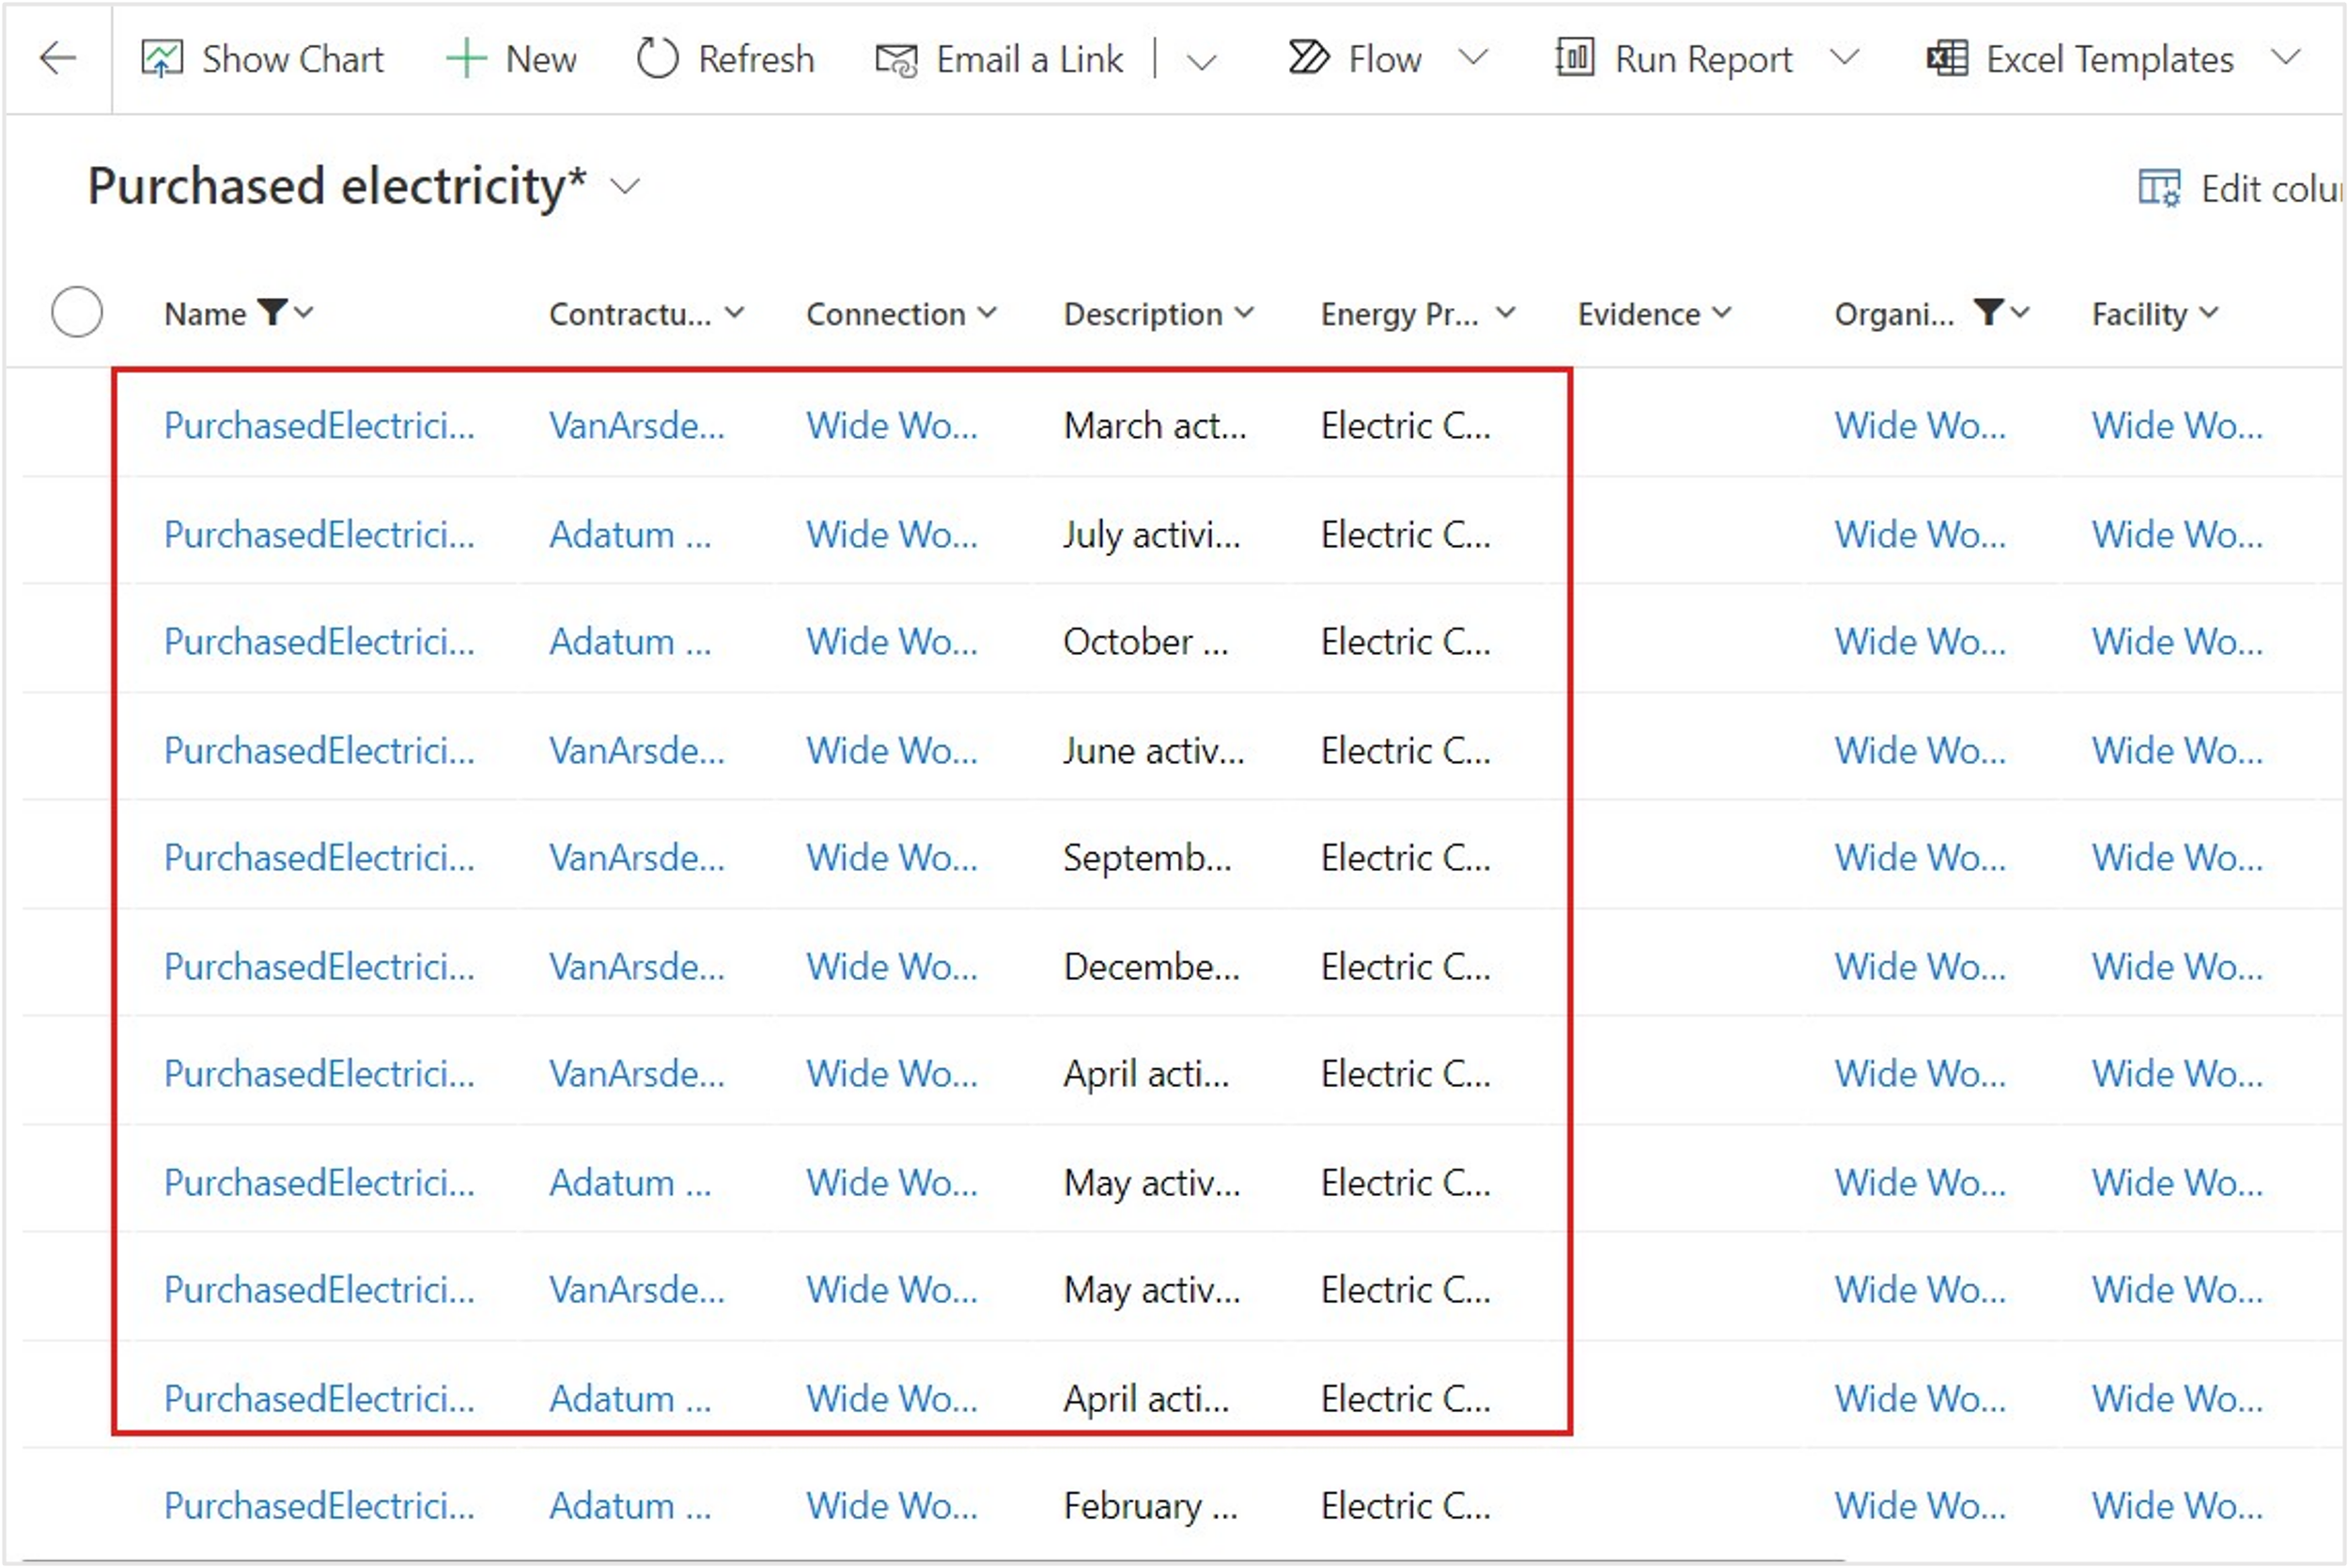


You completed the data import of 2022 Purchased Electricity for Wide World Importers. This step is imperative in realizing the goal of recording, reporting, and reducing carbon emissions. Next, you import the 2022 Miles Driven for Wide World Importers fleet of electric vehicles.
Task: Import 2022 Miles Driven data for electric trucks
In this task, Reed imports the second Excel spreadsheet that Alex provided: Fleet Vehicles Miles Driven Wide World Importers 2022.xlsx. While electric vehicles don't produce direct tailpipe emissions, they do produce Scope 2: Purchased electricity from charging. This import brings in the Miles driven by Wide World Importers fleet of electric trucks for the year 2022 data into the Purchased electricity carbon activity data.
Select Data > Imports on the left navigation pane, select + New.
On the Data imports, select POWER QUERY CONNECTORS.

Select Add, next to Purchased Electricity.
Select Next.
On the list of connectors. select Excel workbook, as the Data Connector.

A new dialog opens for Power Query, where yoU select Upload file > Browse.
On the file selection window, browse to the location of the downloaded Excel files.
Select the Fleet Vehicles Miles Driven Wide World Importers 2022.xlsx file.
Select Open.
Once the file is successfully uploaded, you might be required to select the sign in button to create a new Connection credential, this is done by selecting Sign in.

An Office 365 Sign-in dialog appears. Reed selects their user from the list. For the purposes of this exercise, select your user account from the list.
If signed in, the new connection is automatically selected. Select Next.
On the Choose data page of the Power Query wizard, select the Miles Driven spreadsheet and then select Transform data.

On the Transform data page of the Power Query wizard, you can complete various data and column transformations. These transformations allow you to adjust data types, column mappings updates, and perform advanced transformations that you're familiar with in Microsoft Power Platform dataflows or Power BI datasets. For this exercise, you don't need to apply any transformations, select Create.
Note
Wait for the transformations to be applied properly, before you click Create, else you might get an error.

The New data connection wizard is on the Schedule data import page, where you complete the following tasks:
Turn on the Import data automatically toggle to allow the option to set a schedule for the data to be imported automatically. Selecting this option is beneficial if the connector will be used in a scenario where the data changes frequently, such as a web API or FTP server.
Turn on the Replace previously imported data toggle to remove all previously imported data and to bring in the full dataset that was retrieved. Selecting this option is beneficial if the data source isn't providing data from only the last import or if it always includes a full set of data.
For this scenario of importing historical data, leave both options turned off.
Select Next.
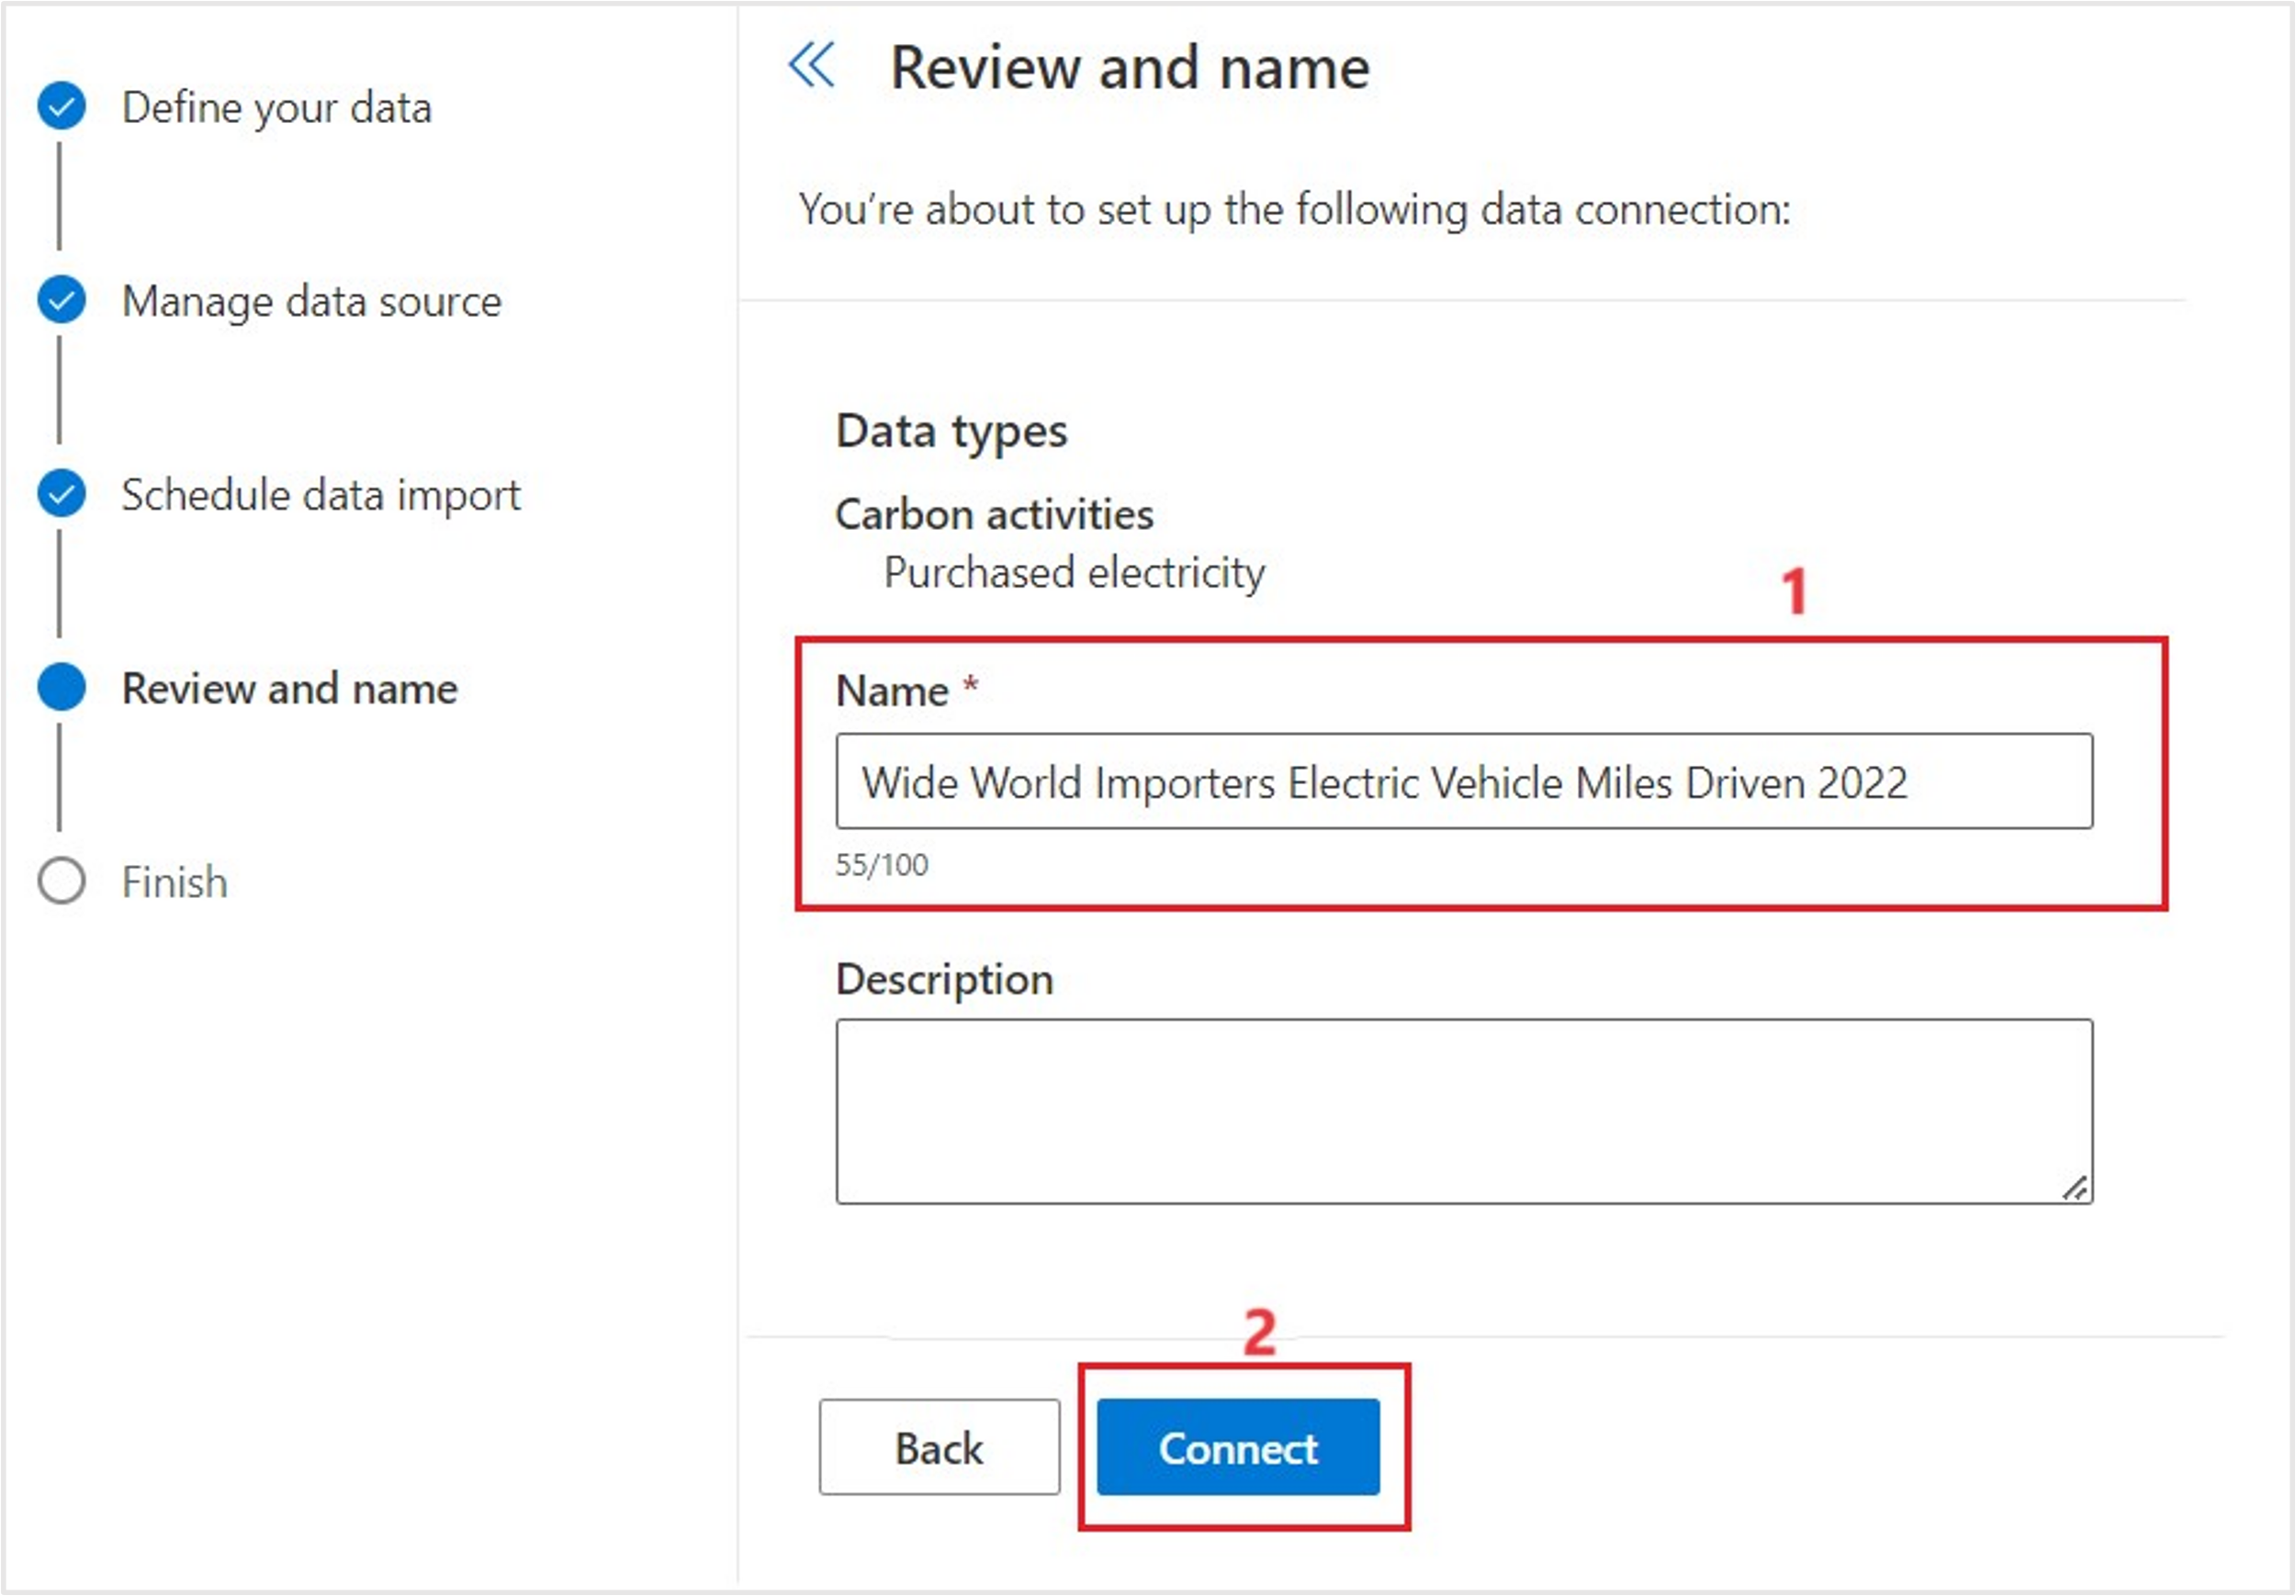
On the Review and finish page, complete the following tasks:
Enter a name for the new connection, such as Wide World Importers Electric Vehicle Miles Driven 2022.
Select Connect.
Next, you map your source data to the data model. Data won't appear until this step is complete. Select Map fields.
Select the data source to map. In this exercise, it's Purchased electricity under Carbon Activities.

In this scenario, Reed needs to map the columns from the spreadsheet to the columns in Microsoft Sustainability Manager. To do so, you select Auto Map for the solution to automatically map the file’s source fields with the destination fields, for any field that isn't an exact match the best match will be found and highlighted in blue. Delete if any other dimensions are added.

Note
Please make sure that the below Contractual Instrument Type field is mapped to Contracted firm.
Review and select Save.
Select the toggle as Yes for Ready to import. Select the back arrow.
Select Done. The Data Import job runs and you can view the status as Scheduled and then in a moment it switches to Processing. Refresh the page to see the change.
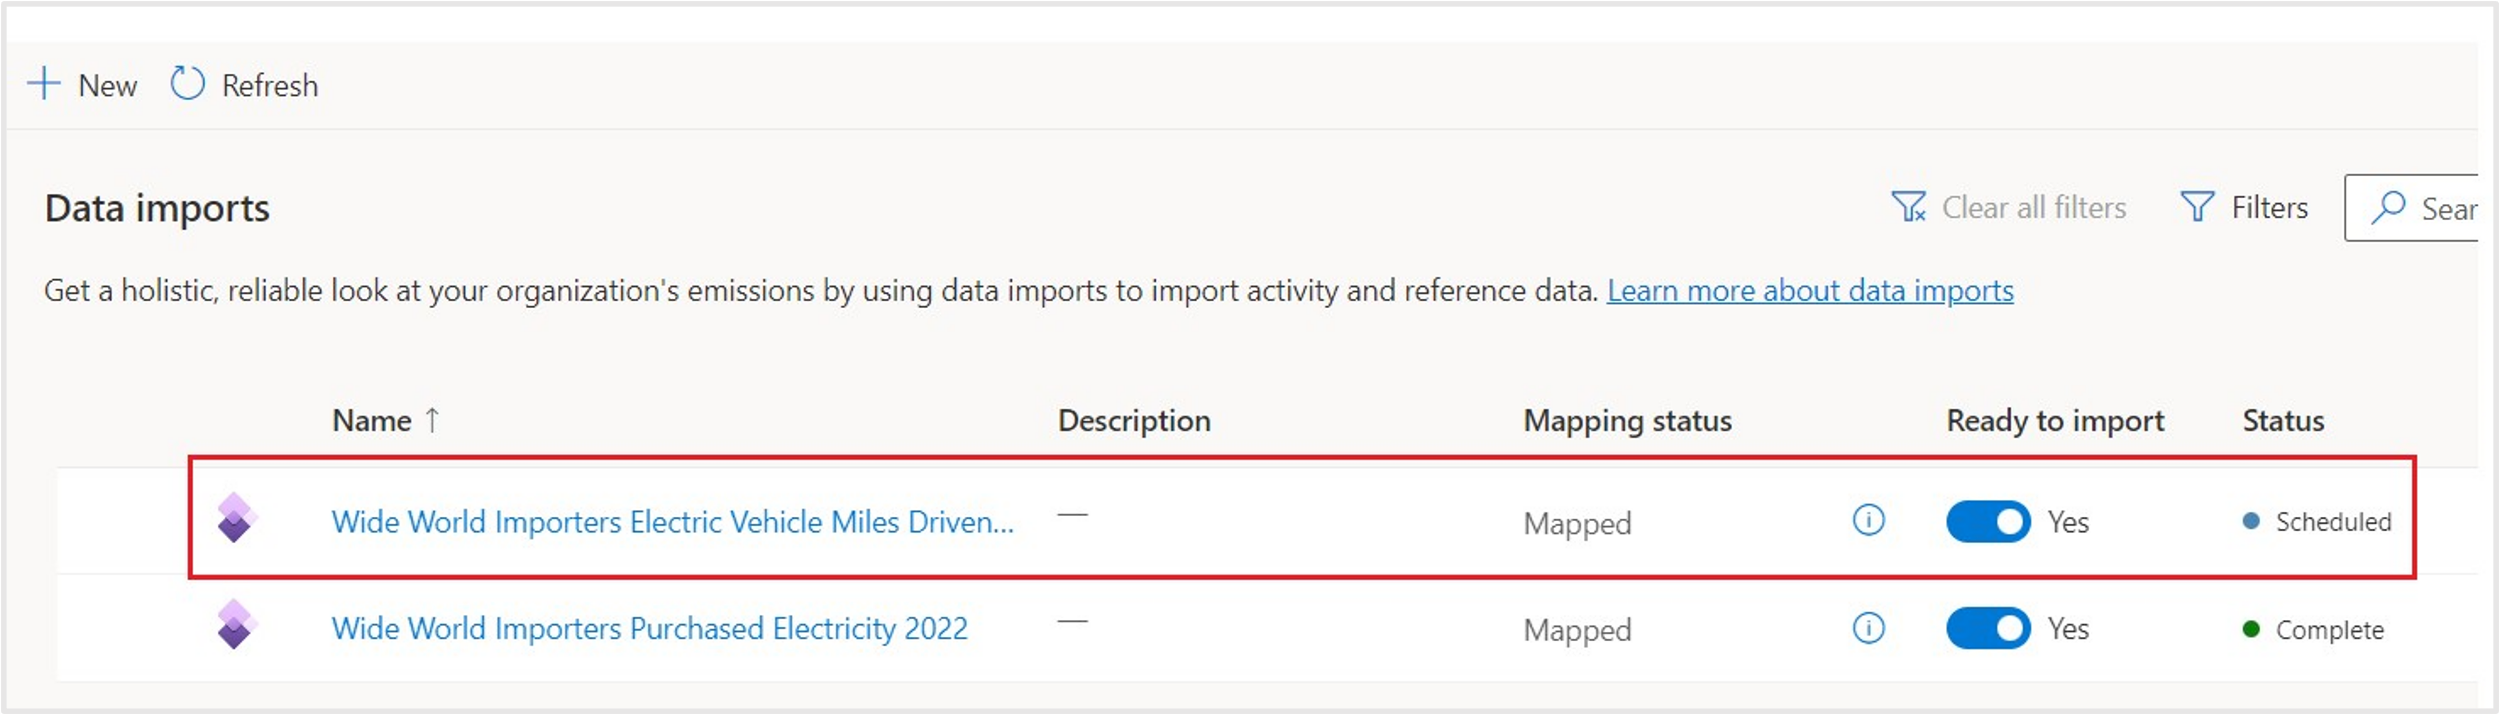
After a minute or two, select the Refresh button above the list to view the updated status, which should be Completed. Ensure you have the correct number of records and the status of the data connections is Complete before you go to the next steps.
Go to Carbon activities data on the left side of the page.
Find and select Purchased electricity in the Scope 2: Indirect emissions section.
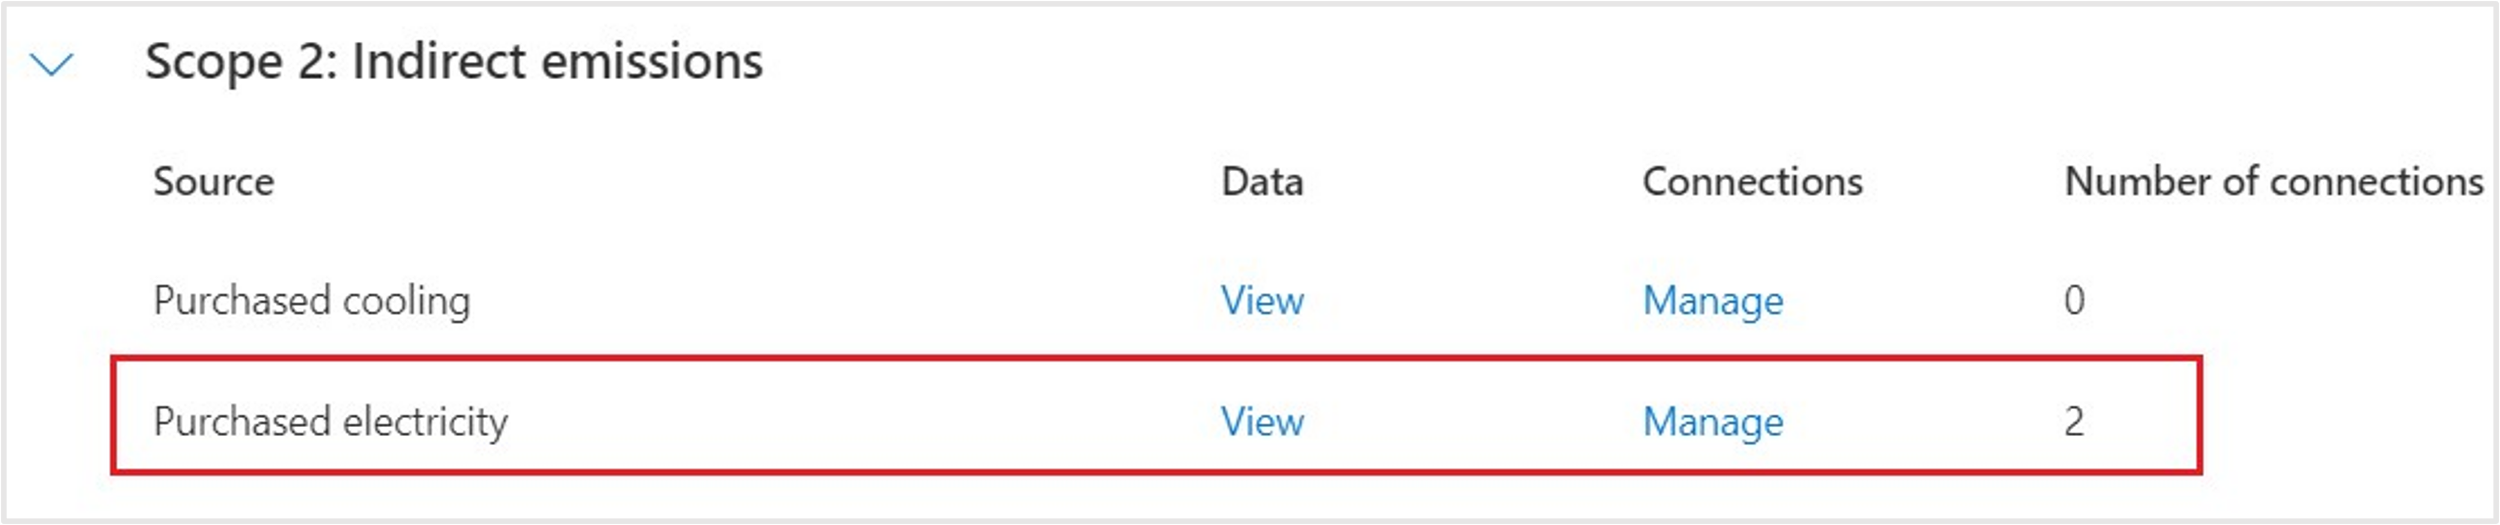
The Purchased electricity view shows all purchased electricity activity data is imported.
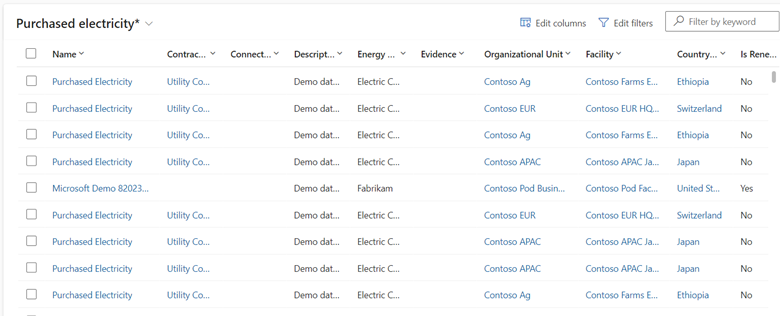
Filter the view by selecting the Organizational Unit dropdown menu and then selecting Filter By.
After a few moments, the view will refresh. You should be able to view the activity data records that were imported during this exercise.


You completed the data import for 2022 Miles Driven for Wide World Importers. This step is important for realizing the goal of recording, reporting, and reducing carbon emissions. In the following exercises, you calculate emissions, review insights and reporting, and define your reduction scorecards and goals.