Move from private access (virtual network integrated) to public access or Private Link with the Azure portal
APPLIES TO:  Azure Database for MySQL - Flexible Server
This article describes moving an Azure Database for MySQL flexible server from Private access (virtual network integrated) to Public access or a Private Link with the Azure portal.
Prerequisites
- An Azure account with an active subscription. Create an account for free.
- An Azure Database for MySQL server started with private access (integrated virtual network).
- An Azure Virtual Network with a subnet and a service endpoint to the Azure Database for MySQL server.
- An Azure Database for MySQL server with a private endpoint.
How to move from private access
The steps below describe moving from private access (virtual network integrated) to public access or Private Link with the Azure portal.
In the Azure portal, select your existing Azure Database for MySQL flexible server instance.
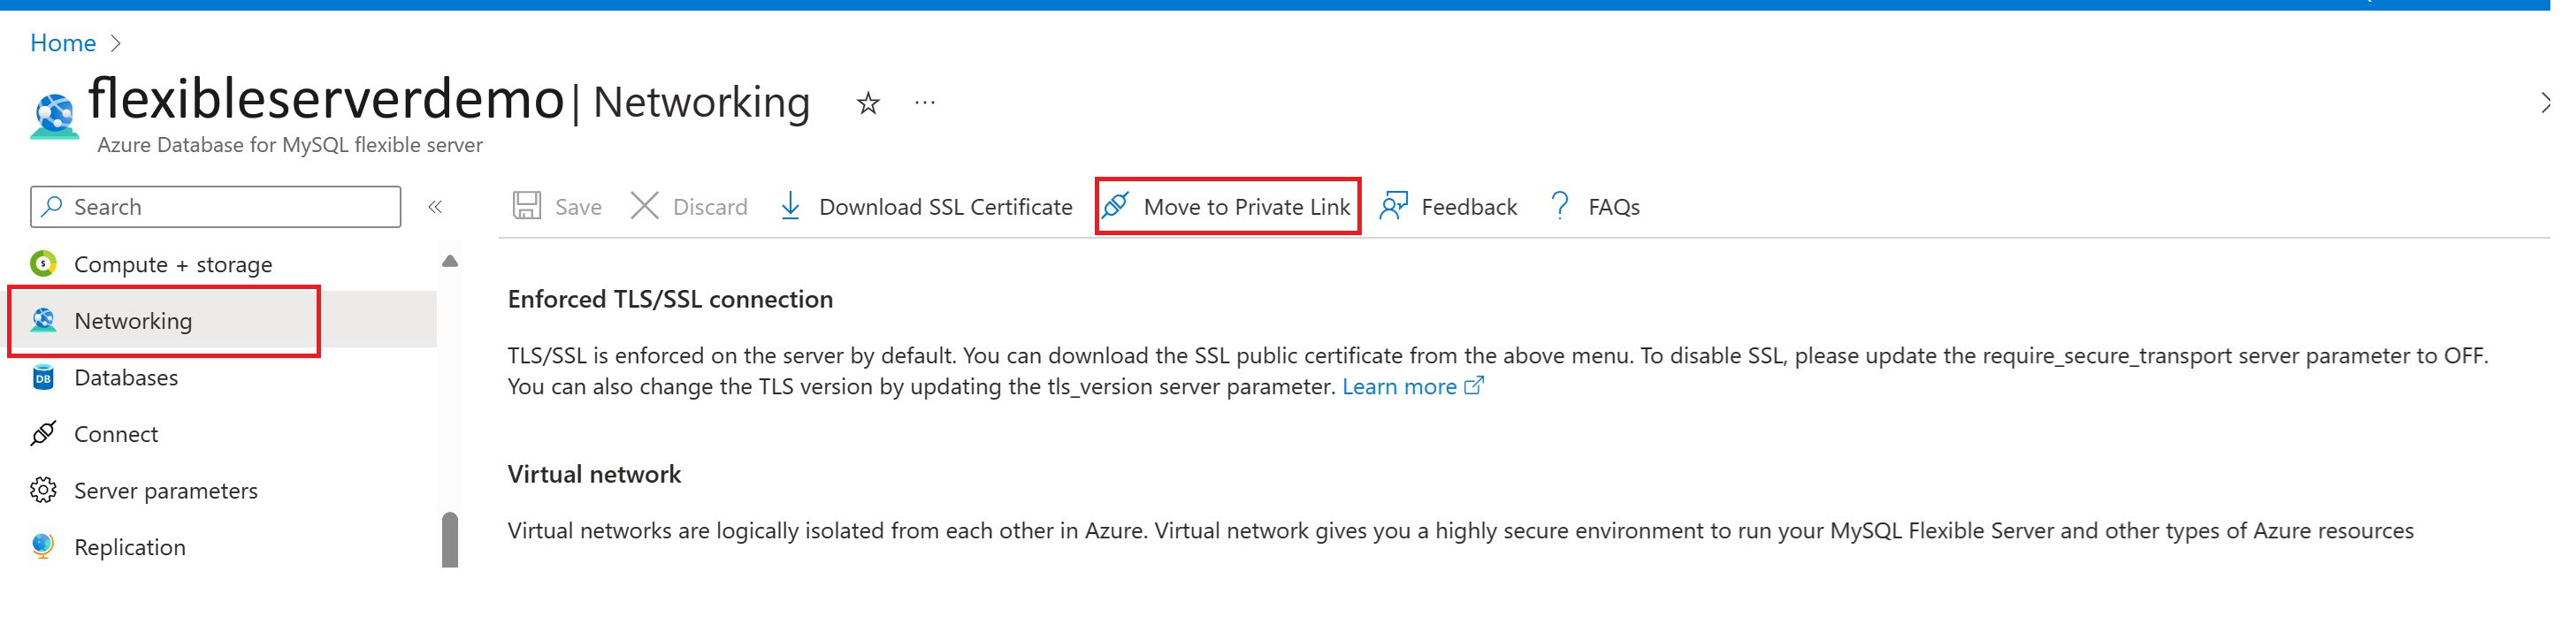
On the Private access (virtual network Integrated) Azure Database for MySQL flexible server instance page, select Networking from the front panel to open the high availability page.
Select Move to Private Link.
Note
A warning appears explaining that this operation is irreversible and has downtime.
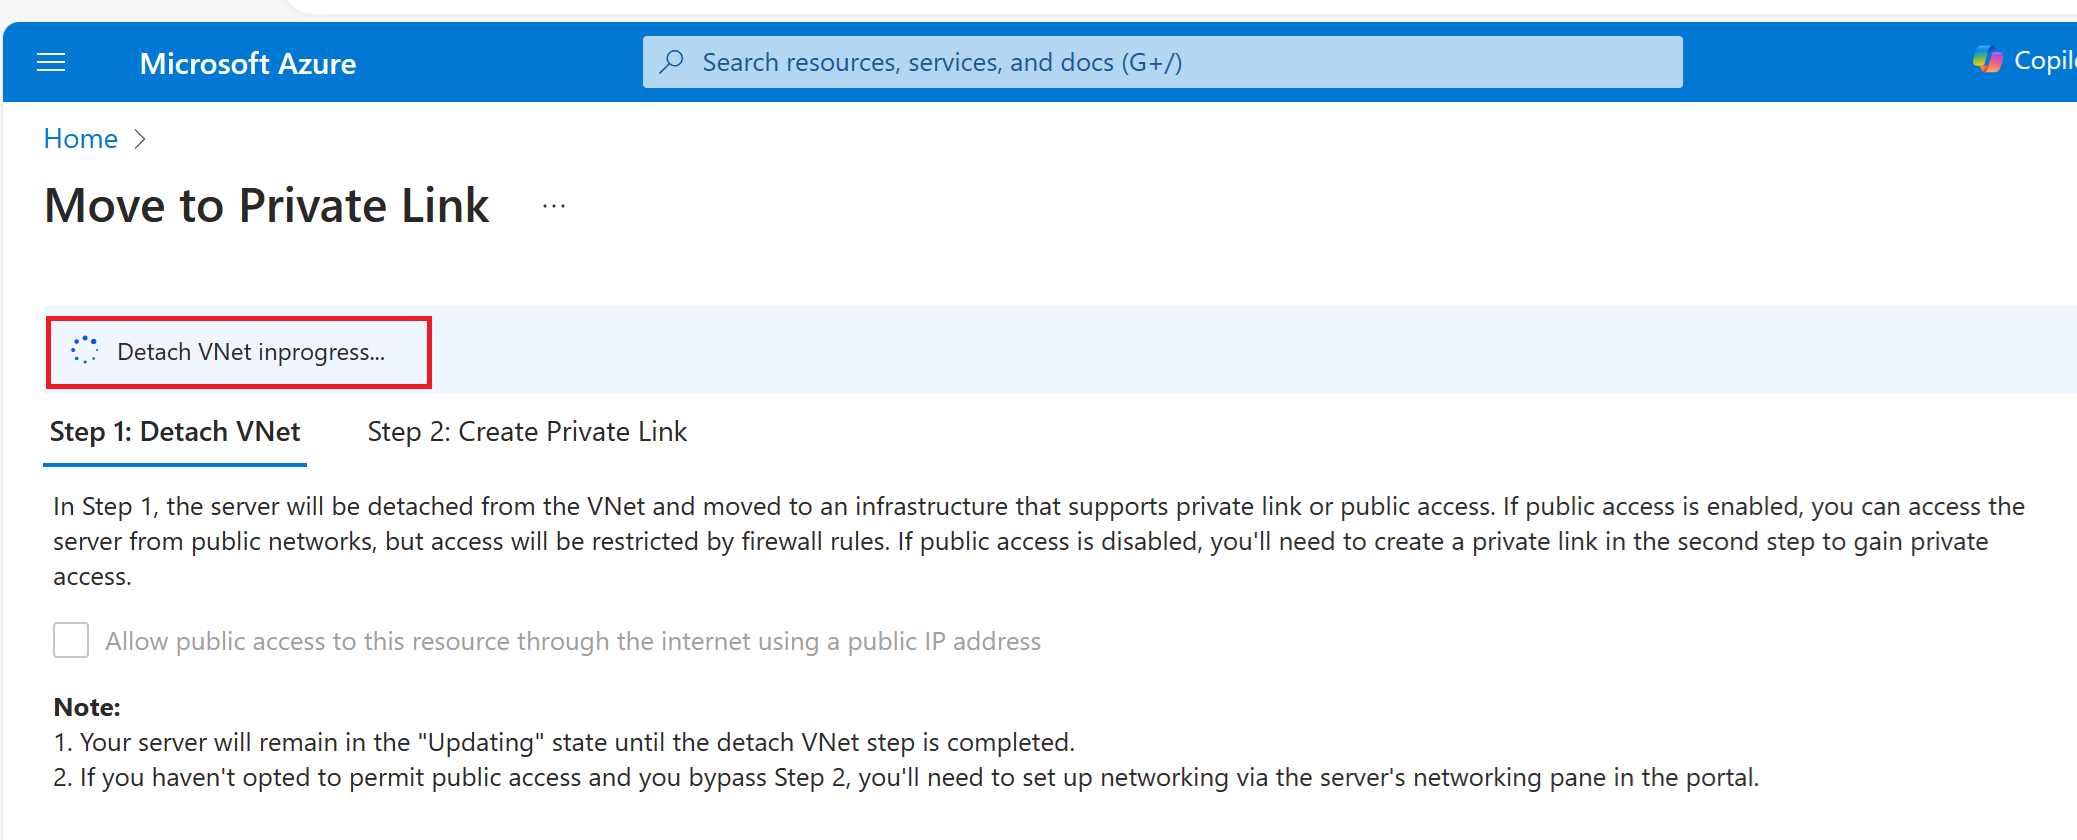
Once you select Yes, a wizard appears with two steps.

Work in the wizard
Detach the server from the virtual network infrastructure and transition it to the Private Link or Public access infrastructure.
If you need public access only, you need to check
Allow public access to this resource through the internet using a public IP address, or If you need private access only, then move to step 2 and don't checkAllow public access to this resource through the internet using a public IP address. If you need public and private access, check the box forAllow public access to this resource through the internet using a public IP addressand move to Step 2 to create a private link.Once you select Next, detaching the server is initiated.
Once detached, you can create a private link.
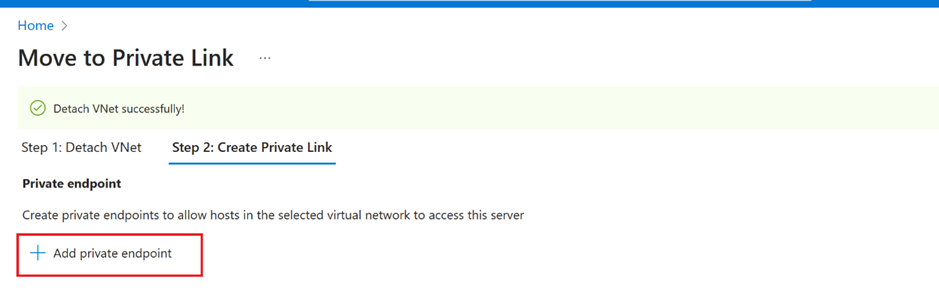
When the server detaches from the virtual network, the server is put into an updating state. You can monitor the status of the server in the portal.
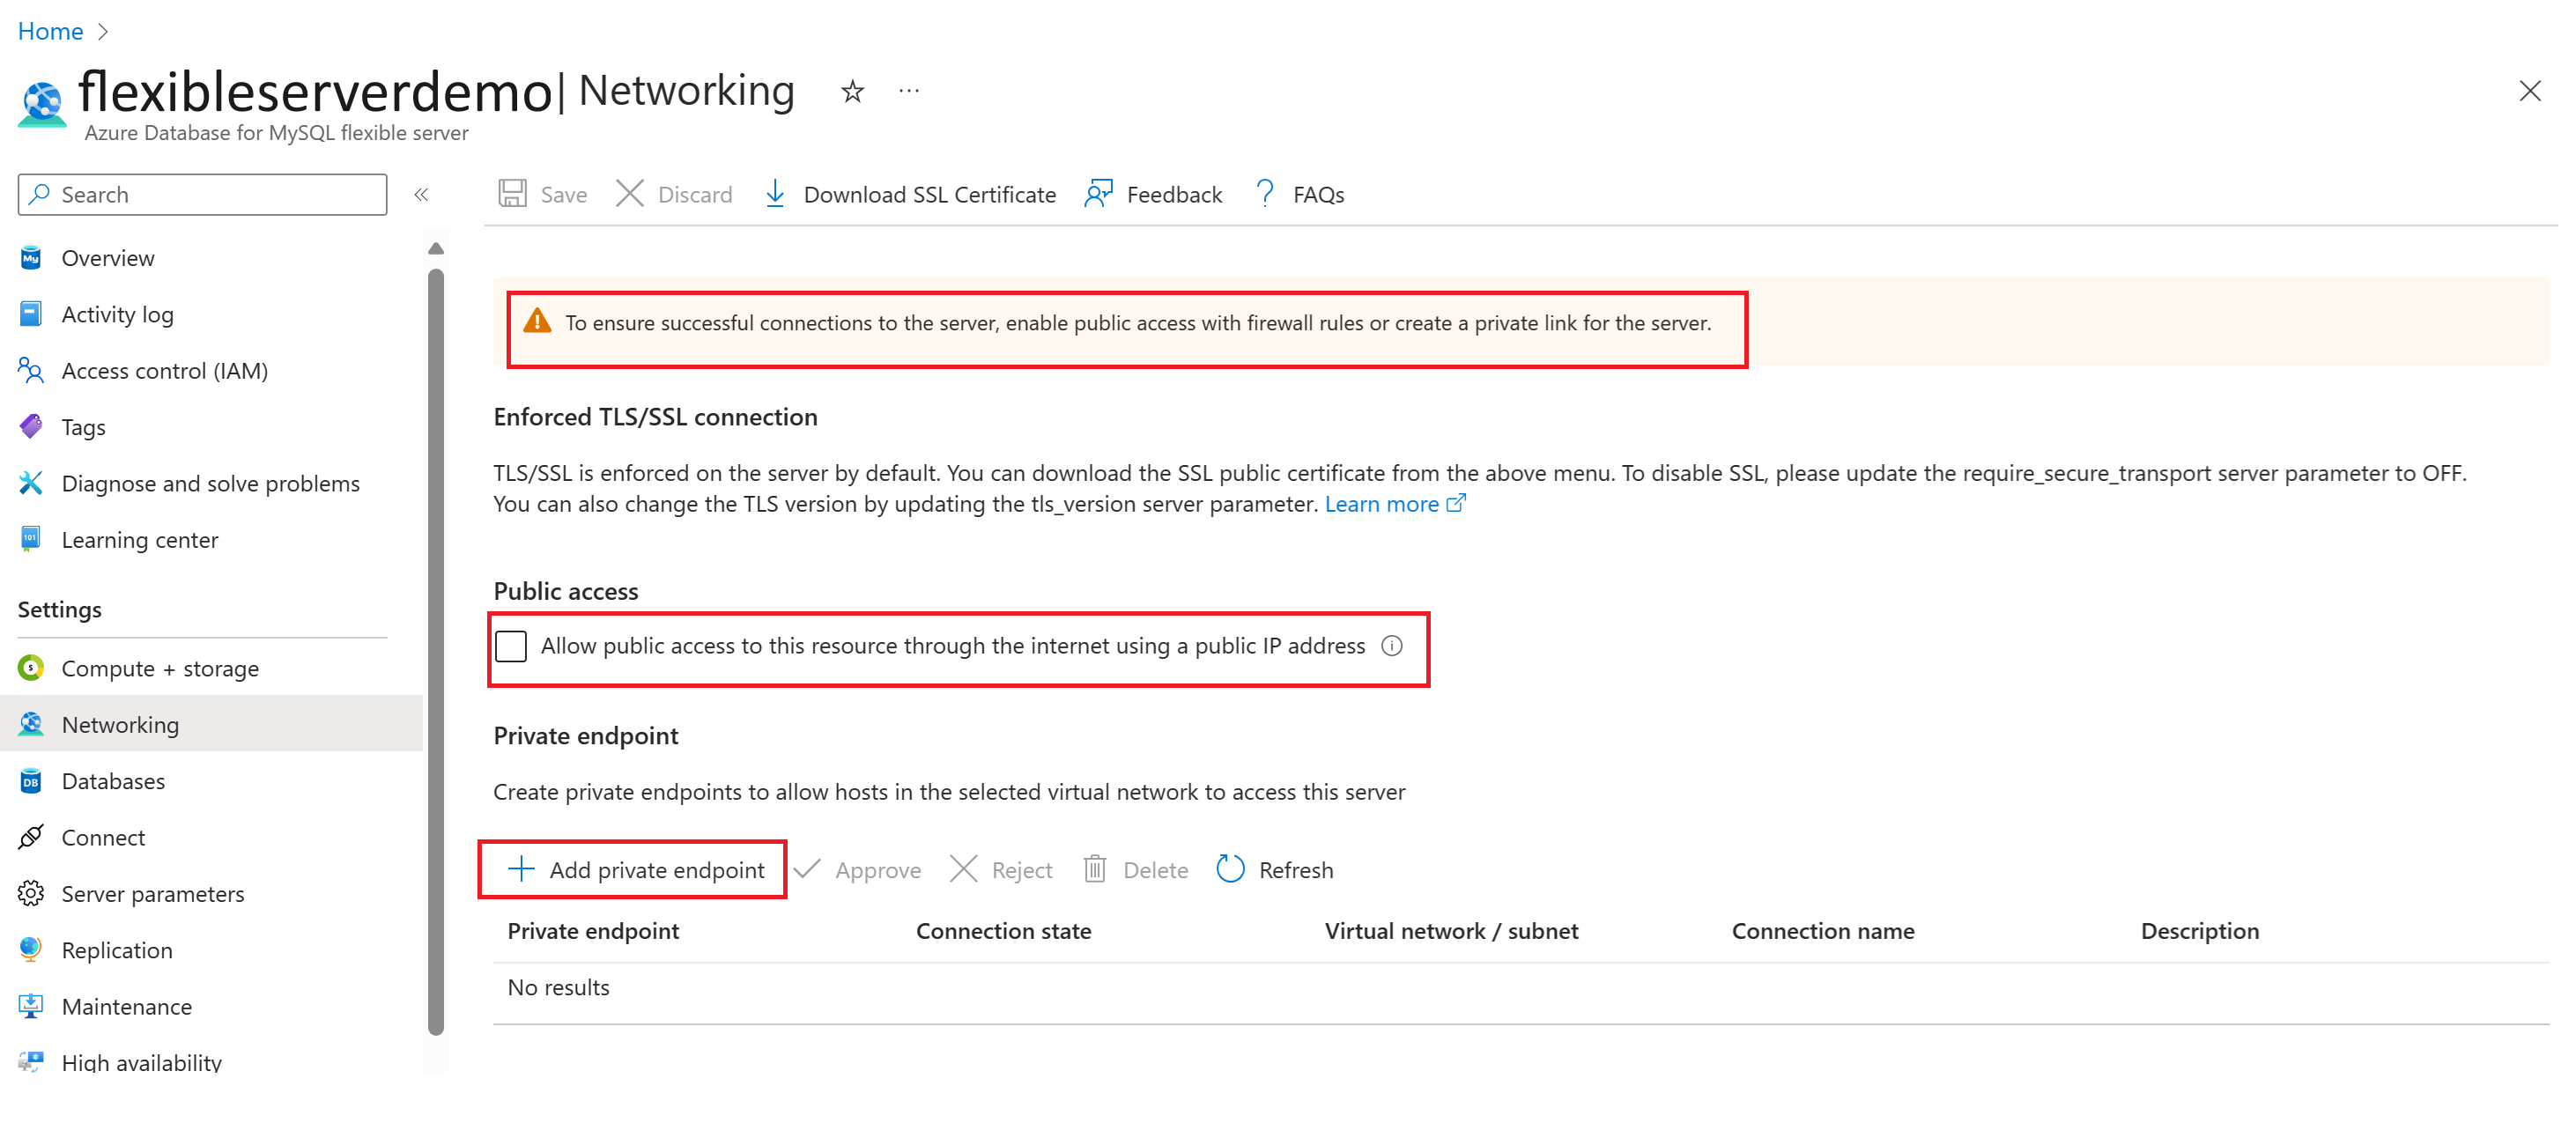
You can select to configure the network setting or move to the networking pane and configure public access, private endpoint, or both.
Note
After detaching the server from the virtual network infrastructure, if you didn't opt for "Allow public access to this resource through the internet using a public IP address" and omitted Step 2 or exited the portal before completing the necessary steps, your server becomes inaccessible. You encounter a specific message indicating the server's update status.


Related content
Maklum balas
Akan datang: Sepanjang 2024, kami akan menghentikan secara berperingkat Isu GitHub sebagai kaedah maklum balas untuk kandungan dan menggantikannya dengan sistem maklum balas baharu. Untuk mendapatkan maklumat lanjut lihat: https://aka.ms/ContentUserFeedback.
Kirim dan lihat maklum balas untuk