Quickstart: Een virtuele Linux-server maken met behulp van PowerShell in Azure Stack Hub
U kunt een virtuele machine (VM) voor Ubuntu Server 20.04 LTS maken met behulp van Azure Stack Hub PowerShell. In dit artikel maakt en gebruikt u een virtuele machine. In dit artikel wordt ook uitgelegd hoe u het volgende kunt doen:
- Maak verbinding met de VM met een externe client.
- Installeer een NGINX-webserver en bekijk de standaardstartpagina.
- Ongebruikte resources opschonen.
Vereisten
Een Linux-installatiekopieën in de Azure Stack Hub Marketplace. De Azure Stack Hub Marketplace heeft standaard geen Linux-installatiekopieën. Laat de Azure Stack Hub-operator de Ubuntu Server 20.04 LTS-installatiekopie leveren die u nodig hebt. De operator kan de instructies in Marketplace-items downloaden van Azure naar Azure Stack Hub gebruiken.
Azure Stack Hub vereist een specifieke versie van de Azure CLI om de bijbehorende resources te maken en te beheren.
- Als u PowerShell niet hebt geconfigureerd voor Azure Stack Hub, raadpleegt u PowerShell installeren voor Azure Stack Hub.
- Nadat Azure Stack Hub PowerShell is ingesteld, maakt u verbinding met uw Azure Stack Hub-omgeving. Zie Verbinding maken met Azure Stack Hub met PowerShell als gebruiker voor instructies.
Een openbare SSH-sleutel (Secure Shell) met de naam id_rsa.pub die is opgeslagen in de map .ssh van uw Windows-gebruikersprofiel. Zie Een SSH-sleutelpaar gebruiken met Azure Stack Hub voor gedetailleerde informatie over het maken van SSH-sleutels.
Een resourcegroep maken
Een resourcegroep is een logische container waarin u Azure Stack Hub-resources kunt implementeren en beheren. Voer het volgende codeblok uit om een resourcegroep te maken:
Notitie
We hebben waarden toegewezen voor alle variabelen in de volgende codevoorbeelden. U kunt echter uw eigen waarden toewijzen.
# Create variables to store the location and resource group names.
$location = "local"
$ResourceGroupName = "myResourceGroup"

New-AzResourceGroup `
  -Name $ResourceGroupName `
  -Location $location
Opslagresources maken
Maak een opslagaccount dat wordt gebruikt voor het opslaan van de uitvoer van diagnostische gegevens over opstarten.
# Create variables to store the storage account name and the storage account SKU information
$StorageAccountName = "mystorageaccount"
$SkuName = "Standard_LRS"

# Create a new storage account
$StorageAccount = New-AzStorageAccount `
  -Location $location `
  -ResourceGroupName $ResourceGroupName `
  -Type $SkuName `
  -Name $StorageAccountName

Set-AzCurrentStorageAccount `
  -StorageAccountName $storageAccountName `
  -ResourceGroupName $resourceGroupName
Netwerkresources maken
Maak een virtueel netwerk, een subnet en een openbaar IP-adres. Deze resources worden gebruikt om netwerkconnectiviteit met de VM te bieden.
# Create a subnet configuration
$subnetConfig = New-AzVirtualNetworkSubnetConfig `
  -Name mySubnet `
  -AddressPrefix 192.168.1.0/24

# Create a virtual network
$vnet = New-AzVirtualNetwork `
  -ResourceGroupName $ResourceGroupName `
  -Location $location `
  -Name MyVnet `
  -AddressPrefix 192.168.0.0/16 `
  -Subnet $subnetConfig

# Create a public IP address and specify a DNS name
$pip = New-AzPublicIpAddress `
  -ResourceGroupName $ResourceGroupName `
  -Location $location `
  -AllocationMethod Static `
  -IdleTimeoutInMinutes 4 `
  -Name "mypublicdns$(Get-Random)"
Een netwerkbeveiligingsgroep en een regel voor de netwerkbeveiligingsgroep maken
De netwerkbeveiligingsgroep beveiligt de virtuele machine met behulp van regels voor inkomend en uitgaand verkeer. Maak een regel voor inkomend verkeer voor poort 3389 om binnenkomende Extern bureaublad-verbindingen toe te staan en een regel voor inkomend verkeer voor poort 80 om binnenkomend webverkeer toe te staan.
# Create variables to store the network security group and rules names.
$nsgName = "myNetworkSecurityGroup"
$nsgRuleSSHName = "myNetworkSecurityGroupRuleSSH"
$nsgRuleWebName = "myNetworkSecurityGroupRuleWeb"


# Create an inbound network security group rule for port 22
$nsgRuleSSH = New-AzNetworkSecurityRuleConfig -Name $nsgRuleSSHName -Protocol Tcp `
-Direction Inbound -Priority 1000 -SourceAddressPrefix * -SourcePortRange * -DestinationAddressPrefix * `
-DestinationPortRange 22 -Access Allow

# Create an inbound network security group rule for port 80
$nsgRuleWeb = New-AzNetworkSecurityRuleConfig -Name $nsgRuleWebName -Protocol Tcp `
-Direction Inbound -Priority 1001 -SourceAddressPrefix * -SourcePortRange * -DestinationAddressPrefix * `
-DestinationPortRange 80 -Access Allow

# Create a network security group
$nsg = New-AzNetworkSecurityGroup -ResourceGroupName $ResourceGroupName -Location $location `
-Name $nsgName -SecurityRules $nsgRuleSSH,$nsgRuleWeb
Een netwerkkaart maken voor de VM
De netwerkkaart verbindt de VM met een subnet, netwerkbeveiligingsgroep en openbaar IP-adres.
# Create a virtual network card and associate it with public IP address and NSG
$nic = New-AzNetworkInterface `
  -Name myNic `
  -ResourceGroupName $ResourceGroupName `
  -Location $location `
  -SubnetId $vnet.Subnets[0].Id `
  -PublicIpAddressId $pip.Id `
  -NetworkSecurityGroupId $nsg.Id
Een virtuele machine maken
Maak een VM-configuratie. Deze configuratie bevat de instellingen die moeten worden gebruikt bij het implementeren van de VM (bijvoorbeeld gebruikersreferenties, grootte en de VM-installatiekopieën).
# Define a credential object
$UserName='demouser'
$securePassword = ConvertTo-SecureString ' ' -AsPlainText -Force
$cred = New-Object System.Management.Automation.PSCredential ($UserName, $securePassword)

# Create the VM configuration object
$VmName = "VirtualMachinelatest"
$VmSize = "Standard_D1"
$VirtualMachine = New-AzVMConfig `
  -VMName $VmName `
  -VMSize $VmSize

$VirtualMachine = Set-AzVMOperatingSystem `
  -VM $VirtualMachine `
  -Linux `
  -ComputerName "MainComputer" `
  -Credential $cred

$VirtualMachine = Set-AzVMSourceImage `
  -VM $VirtualMachine `
  -PublisherName "Canonical" `
  -Offer "UbuntuServer" `
  -Skus "20.04-LTS" `
  -Version "latest"

# Set the operating system disk properties on a VM
$VirtualMachine = Set-AzVMOSDisk `
  -VM $VirtualMachine `
  -CreateOption FromImage | `
  Set-AzVMBootDiagnostic -ResourceGroupName $ResourceGroupName `
  -StorageAccountName $StorageAccountName -Enable |`
  Add-AzVMNetworkInterface -Id $nic.Id

# Configure SSH keys
$sshPublicKey = Get-Content "$env:USERPROFILE\.ssh\id_rsa.pub"

# Add the SSH key to the VM
Add-AzVMSshPublicKey -VM $VirtualMachine `
 -KeyData $sshPublicKey `
 -Path "/home/$UserName/.ssh/authorized_keys"

# Create the VM
New-AzVM `
  -ResourceGroupName $ResourceGroupName `
 -Location $location `
  -VM $VirtualMachine
VM snel maken: volledig script
Notitie
Deze stap is in feite de voorgaande code samengevoegd, maar met een wachtwoord in plaats van een SSH-sleutel voor verificatie.
## Create a resource group

<#
A resource group is a logical container where you can deploy and manage Azure Stack Hub resources. From your development kit or the Azure Stack Hub integrated system, run the following code block to create a resource group. Though we've assigned values for all the variables in this article, you can use these values or assign new ones.
#>

# Edit your variables, if required

# Create variables to store the location and resource group names
$location = "local"
$ResourceGroupName = "myResourceGroup"

# Create variables to store the storage account name and the storage account SKU information
$StorageAccountName = "mystorageaccount"
$SkuName = "Standard_LRS"

# Create variables to store the network security group and rules names
$nsgName = "myNetworkSecurityGroup"
$nsgRuleSSHName = "myNetworkSecurityGroupRuleSSH"
$nsgRuleWebName = "myNetworkSecurityGroupRuleWeb"

# Create variable for VM password
$VMPassword = 'Password123!'

# End of variables - no need to edit anything past that point to deploy a single VM

# Create a resource group
New-AzResourceGroup `
  -Name $ResourceGroupName `
  -Location $location

## Create storage resources

# Create a storage account, and then create a storage container for the Ubuntu Server 20.04 LTS image

# Create a new storage account
$StorageAccount = New-AzStorageAccount `
  -Location $location `
  -ResourceGroupName $ResourceGroupName `
  -Type $SkuName `
  -Name $StorageAccountName

Set-AzCurrentStorageAccount `
  -StorageAccountName $storageAccountName `
  -ResourceGroupName $resourceGroupName

# Create a storage container to store the VM image
$containerName = 'osdisks'
$container = New-AzureStorageContainer `
  -Name $containerName `
  -Permission Blob


## Create networking resources

# Create a virtual network, a subnet, and a public IP address, resources that are used provide network connectivity to the VM

# Create a subnet configuration
$subnetConfig = New-AzVirtualNetworkSubnetConfig `
  -Name mySubnet `
  -AddressPrefix 192.168.1.0/24

# Create a virtual network
$vnet = New-AzVirtualNetwork `
  -ResourceGroupName $ResourceGroupName `
  -Location $location `
  -Name MyVnet `
  -AddressPrefix 192.168.0.0/16 `
  -Subnet $subnetConfig

# Create a public IP address and specify a DNS name
$pip = New-AzPublicIpAddress `
  -ResourceGroupName $ResourceGroupName `
  -Location $location `
  -AllocationMethod Static `
  -IdleTimeoutInMinutes 4 `
  -Name "mypublicdns$(Get-Random)"


### Create a network security group and a network security group rule

<#
The network security group secures the VM by using inbound and outbound rules. Create an inbound rule for port 3389 to allow incoming Remote Desktop connections and an inbound rule for port 80 to allow incoming web traffic.
#>

# Create an inbound network security group rule for port 22
$nsgRuleSSH = New-AzNetworkSecurityRuleConfig -Name $nsgRuleSSHName -Protocol Tcp `
-Direction Inbound -Priority 1000 -SourceAddressPrefix * -SourcePortRange * -DestinationAddressPrefix * `
-DestinationPortRange 22 -Access Allow

# Create an inbound network security group rule for port 80
$nsgRuleWeb = New-AzNetworkSecurityRuleConfig -Name $nsgRuleWebName -Protocol Tcp `
-Direction Inbound -Priority 1001 -SourceAddressPrefix * -SourcePortRange * -DestinationAddressPrefix * `
-DestinationPortRange 80 -Access Allow

# Create a network security group
$nsg = New-AzNetworkSecurityGroup -ResourceGroupName $ResourceGroupName -Location $location `
-Name $nsgName -SecurityRules $nsgRuleSSH,$nsgRuleWeb

### Create a network card for the VM

# The network card connects the VM to a subnet, network security group, and public IP address.

# Create a virtual network card and associate it with public IP address and NSG
$nic = New-AzNetworkInterface `
  -Name myNic `
  -ResourceGroupName $ResourceGroupName `
  -Location $location `
  -SubnetId $vnet.Subnets[0].Id `
  -PublicIpAddressId $pip.Id `
  -NetworkSecurityGroupId $nsg.Id

## Create a VM
<#
Create a VM configuration. This configuration includes the settings used when deploying the VM. For example: user credentials, size, and the VM image.
#>

# Define a credential object
$UserName='demouser'
$securePassword = ConvertTo-SecureString $VMPassword -AsPlainText -Force
$cred = New-Object System.Management.Automation.PSCredential ($UserName, $securePassword)

# Create the VM configuration object
$VmName = "VirtualMachinelatest"
$VmSize = "Standard_D1"
$VirtualMachine = New-AzVMConfig `
  -VMName $VmName `
  -VMSize $VmSize

$VirtualMachine = Set-AzVMOperatingSystem `
  -VM $VirtualMachine `
  -Linux `
  -ComputerName "MainComputer" `
  -Credential $cred

$VirtualMachine = Set-AzVMSourceImage `
  -VM $VirtualMachine `
  -PublisherName "Canonical" `
  -Offer "UbuntuServer" `
  -Skus "20.04-LTS" `
  -Version "latest"

$osDiskName = "OsDisk"
$osDiskUri = '{0}vhds/{1}-{2}.vhd' -f `
  $StorageAccount.PrimaryEndpoints.Blob.ToString(),`
  $vmName.ToLower(), `
  $osDiskName

# Set the operating system disk properties on a VM
$VirtualMachine = Set-AzVMOSDisk `
  -VM $VirtualMachine `
  -Name $osDiskName `
  -VhdUri $OsDiskUri `
  -CreateOption FromImage | `
  Add-AzVMNetworkInterface -Id $nic.Id

# Create the VM
New-AzVM `
  -ResourceGroupName $ResourceGroupName `
 -Location $location `
  -VM $VirtualMachine
Verbinding maken met de virtuele machine
Nadat u de VM hebt geïmplementeerd, configureert u er een SSH-verbinding voor. Als u het openbare IP-adres van de VM wilt ophalen, gebruikt u de opdracht Get-AzPublicIpAddress :
Get-AzPublicIpAddress -ResourceGroupName myResourceGroup | Select IpAddress
Gebruik vanuit een clientsysteem waarop SSH is geïnstalleerd, de volgende opdracht om verbinding te maken met de VM. Als u in Windows werkt, kunt u PuTTY gebruiken om de verbinding te maken.
ssh <Public IP Address>
Wanneer u hierom wordt gevraagd, meldt u zich aan als azureuser. Als u een wachtwoordzin hebt gebruikt bij het maken van de SSH-sleutels, moet u de wachtwoordzin opgeven.
De NGINX-webserver installeren
Voer het volgende script uit om pakketresources bij te werken en het meest recente NGINX-pakket te installeren:
#!/bin/bash

# update package source
apt-get -y update

# install NGINX
apt-get -y install nginx
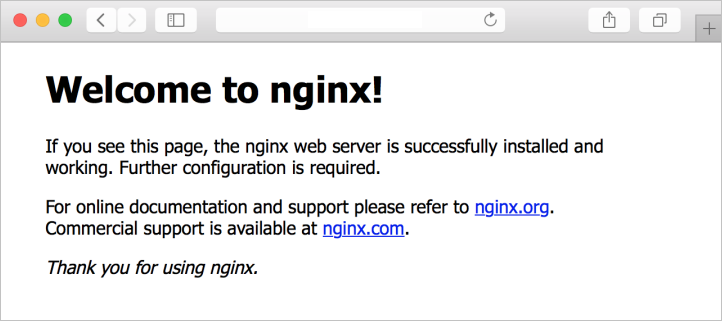
De welkomstpagina van NGINX weergeven
Als de NGINX-webserver is geïnstalleerd en poort 80 is geopend op uw VM, hebt u toegang tot de webserver met behulp van het openbare IP-adres van de VIRTUELE machine. Open een webbrowser en ga naar http://<public IP address>.
Resources opschonen
U kunt de resources die u niet meer nodig hebt, opschonen met behulp van de opdracht Remove-AzResourceGroup . Voer de volgende opdracht uit om de resourcegroep en alle bijbehorende resources te verwijderen:
Remove-AzResourceGroup -Name myResourceGroup
Volgende stappen
In deze quickstart hebt u een basis-VM voor een Linux-server geïmplementeerd. Ga naar Overwegingen voor VM's in Azure Stack Hub voor meer informatie over azure Stack Hub-VM's.
Feedback
Binnenkort beschikbaar: In de loop van 2024 zullen we GitHub-problemen geleidelijk uitfaseren als het feedbackmechanisme voor inhoud en deze vervangen door een nieuw feedbacksysteem. Zie voor meer informatie: https://aka.ms/ContentUserFeedback.
Feedback verzenden en weergeven voor