
Training
Module
Grote hoeveelheden gegevens uit Azure exporteren met behulp van Azure Import/Export - Training
Informatie over hoe en wanneer u Azure Import/Export kunt gebruiken om grote hoeveelheden gegevens vanuit Azure te kopiëren
Deze browser wordt niet meer ondersteund.
Upgrade naar Microsoft Edge om te profiteren van de nieuwste functies, beveiligingsupdates en technische ondersteuning.
Notitie
Voor toegang tot deze pagina is autorisatie vereist. U kunt proberen u aan te melden of de directory te wijzigen.
Voor toegang tot deze pagina is autorisatie vereist. U kunt proberen de mappen te wijzigen.
This article provides step-by-step instructions on how to use the Azure Import/Export service to securely import large amounts of data to Azure Blob storage. To import data into Azure Blobs, the service requires you to ship encrypted disk drives containing your data to an Azure datacenter.
In deze zelfstudie leert u het volgende:
Before you create an import job to transfer data into Azure Blob Storage, carefully review and complete the following list of prerequisites for this service. U moet het volgende doen:
WaImportExportV1. Bijvoorbeeld: C:\WaImportExportV1.This step generates a journal file. The journal file stores basic information such as drive serial number, encryption key, and storage account details.
Perform the following steps to prepare the drives.
Connect your disk drives to the Windows system via SATA connectors.
Create a single NTFS volume on each drive. Assign a drive letter to the volume. Don't use mountpoints.
Enable BitLocker encryption on the NTFS volume. If using a Windows Server system, use the instructions in How to enable BitLocker on Windows Server 2012 R2.
Copy data to encrypted volume. Use drag and drop or Robocopy or any such copy tool. A journal (.jrn) file is created in the same folder where you run the tool.
If the drive is locked and you need to unlock the drive, the steps to unlock may be different depending on your use case.
If you have added data to a pre-encrypted drive (WAImportExport tool wasn't used for encryption), use the BitLocker key (a numerical password that you specify) in the popup to unlock the drive.
If you have added data to a drive that was encrypted by WAImportExport tool, use the following command to unlock the drive:
WAImportExport Unlock /bk:<BitLocker key (base 64 string) copied from journal (*.jrn*) file>
Open een PowerShell- of opdrachtregelvenster met beheerdersbevoegdheden. To change directory to the unzipped folder, run the following command:
cd C:\WaImportExportV1
To get the BitLocker key of the drive, run the following command:
manage-bde -protectors -get <DriveLetter>:
To prepare the disk, run the following command. Depending on the data size, disk preparation may take several hours to days.
./WAImportExport.exe PrepImport /j:<journal file name> /id:session<session number> /t:<Drive letter> /bk:<BitLocker key> /srcdir:<Drive letter>:\ /dstdir:<Container name>/ /blobtype:<BlockBlob or PageBlob> /skipwrite
A journal file is created in the same folder where you ran the tool. Two other files are also created - an .xml file (folder where you run the tool) and a drive-manifest.xml file (folder where data resides).
The parameters used are described in the following table:
| Optie | Beschrijving |
|---|---|
| /j: | The name of the journal file, with the .jrn extension. A journal file is generated per drive. We recommend that you use the disk serial number as the journal file name. |
| /id: | De sessie-id. Use a unique session number for each instance of the command. |
| /t: | The drive letter of the disk to be shipped. For example, drive D. |
| /bk: | The BitLocker key for the drive. Its numerical password from output of manage-bde -protectors -get D: |
| /srcdir: | The drive letter of the disk to be shipped followed by :\. Bijvoorbeeld: D:\. |
| /dstdir: | The name of the destination container in Azure Storage. |
| /blobtype: | This option specifies the type of blobs you want to import the data to. For block blobs, the blob type is BlockBlob and for page blobs, it's PageBlob. |
| /skipwrite: | Specifies that there's no new data required to be copied and existing data on the disk is to be prepared. |
| /enablecontentmd5: | The option when enabled, ensures that MD5 is computed and set as Content-md5 property on each blob. Use this option only if you want to use the Content-md5 field after the data is uploaded to Azure. This option doesn't affect the data integrity check (that occurs by default). The setting does increase the time taken to upload data to cloud. |
Notitie
Repeat the previous step for each disk that needs to be shipped.
A journal file with the provided name is created for every run of the command line.
Together with the journal file, a <Journal file name>_DriveInfo_<Drive serial ID>.xml file is also created in the same folder where the tool resides. The .xml file is used in place of the journal file when creating a job if the journal file is too large.
Belangrijk
Do the following steps to order an import job in Azure Import/Export job via the portal.
Gebruik uw Microsoft Azure-referenties om u aan te melden op deze URL: https://portal.azure.com.
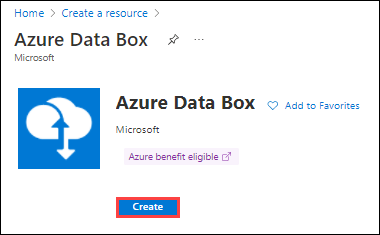
Select + Create a resource, and search for Azure Data Box. Kies Azure Data Box.
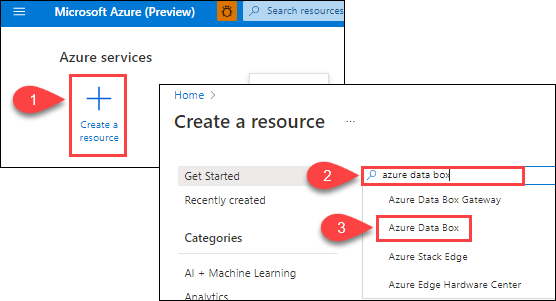
Klik op Creëren.
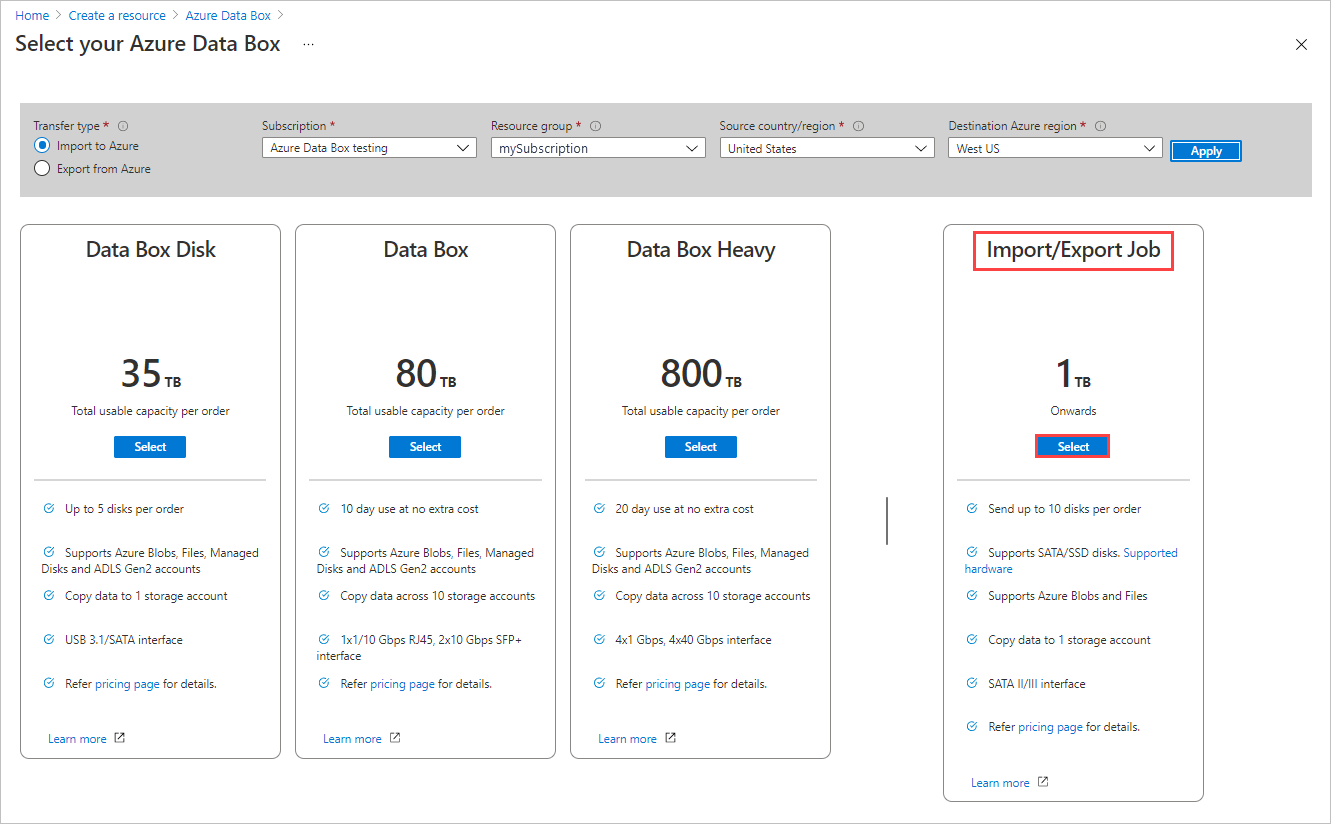
Selecteer de volgende opties om aan de slag te gaan met de importorder:

Kies de knop Selecteren voor de import-/exporttaak.
In Basis:
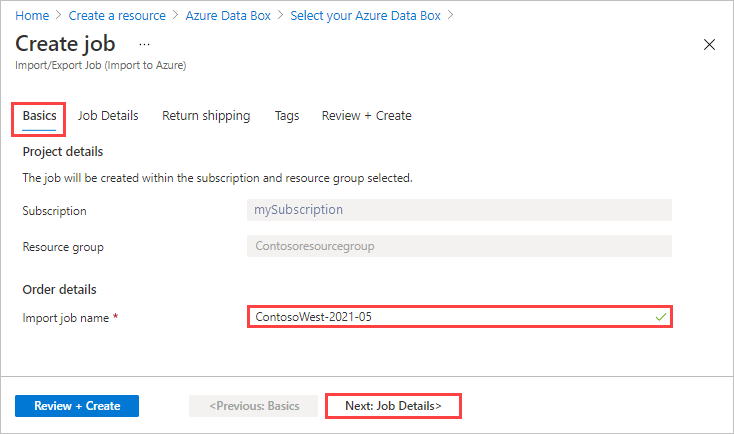
Select Next: Job Details > to proceed.
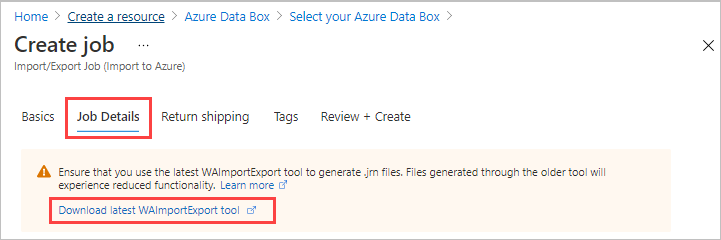
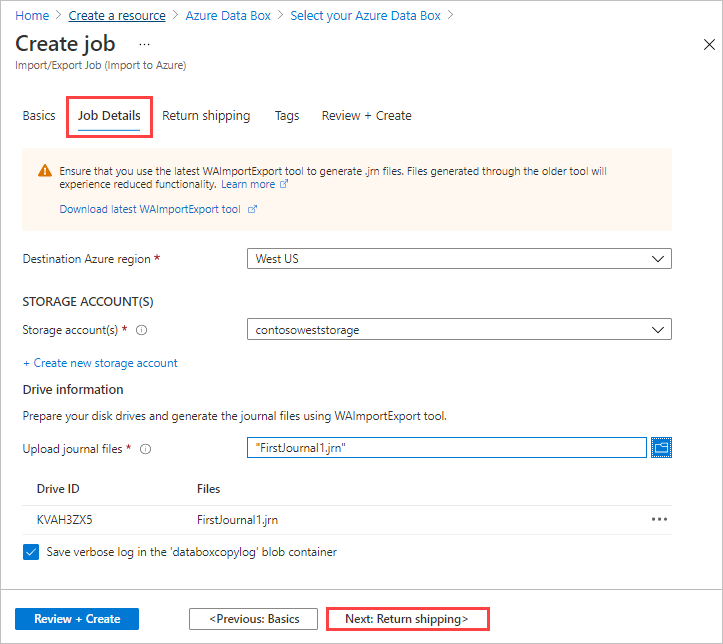
In Job Details:
Before you go further, make sure you're using the latest WAImportExport tool. The tool is used to read the journal file(s) that you upload. You can use the download link to update the tool.
Change the destination Azure region for the job if needed.
Select one or more storage accounts to use for the job. You can create a new storage account if needed.
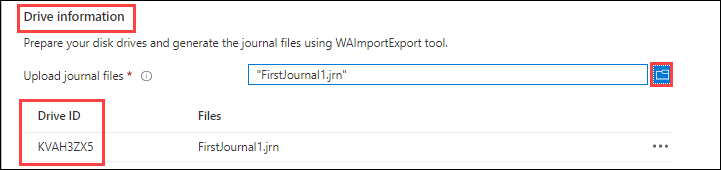
Under Drive information, use the Copy button to upload each journal file that you created during the preceding Step 1: Prepare the drives. When you upload a journal file, the Drive ID is displayed.
If waimportexport.exe version1 was used, upload one file for each drive that you prepared.
If the journal file is larger than 2 MB, then you can use the <Journal file name>_DriveInfo_<Drive serial ID>.xml, which was created along with the journal file.
In Return shipping:
Selecteer een vervoerder in de vervolgkeuzelijst voor Carrier. De locatie van het Microsoft-datacenter voor de geselecteerde regio bepaalt welke providers beschikbaar zijn.
Voer een nummer van het provideraccount in. Het rekeningnummer voor een geldig provideraccount is vereist.
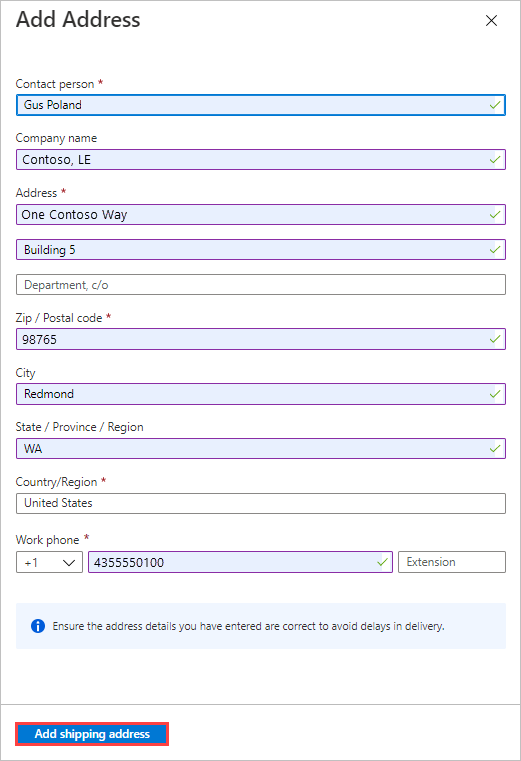
In the Return address area, select the + Add Address button, and add the address to ship to.
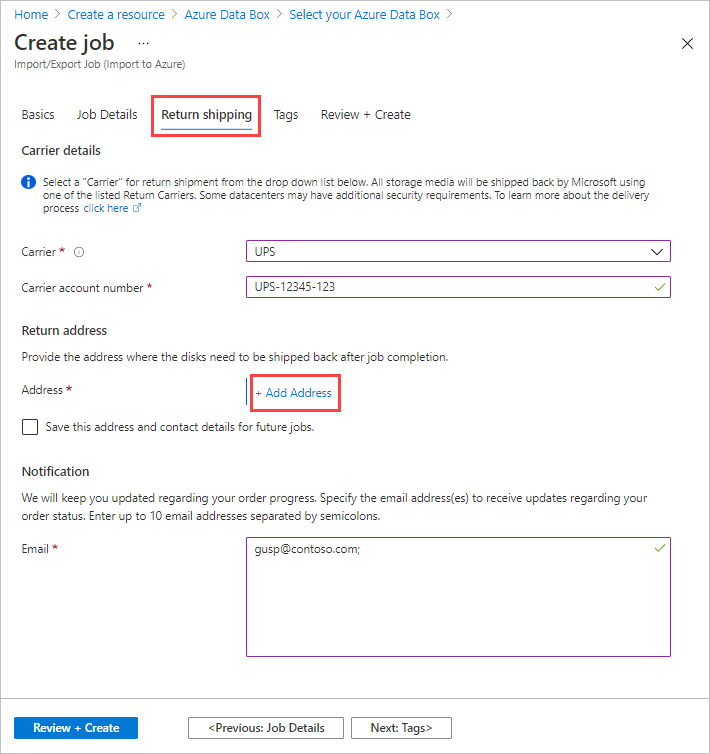
Op de blade Adres toevoegen kunt u een adres toevoegen of een bestaand adres gebruiken. When you complete the address fields, select Add shipping address.
Voer in het meldingsgebied e-mailadressen in voor de personen die u op de hoogte wilt stellen van de voortgang van de opdracht.
Tip
In plaats van een e-mailadres voor één gebruiker op te geven, geeft u een groeps-e-mail op om ervoor te zorgen dat u meldingen ontvangt, zelfs als een beheerder vertrekt.
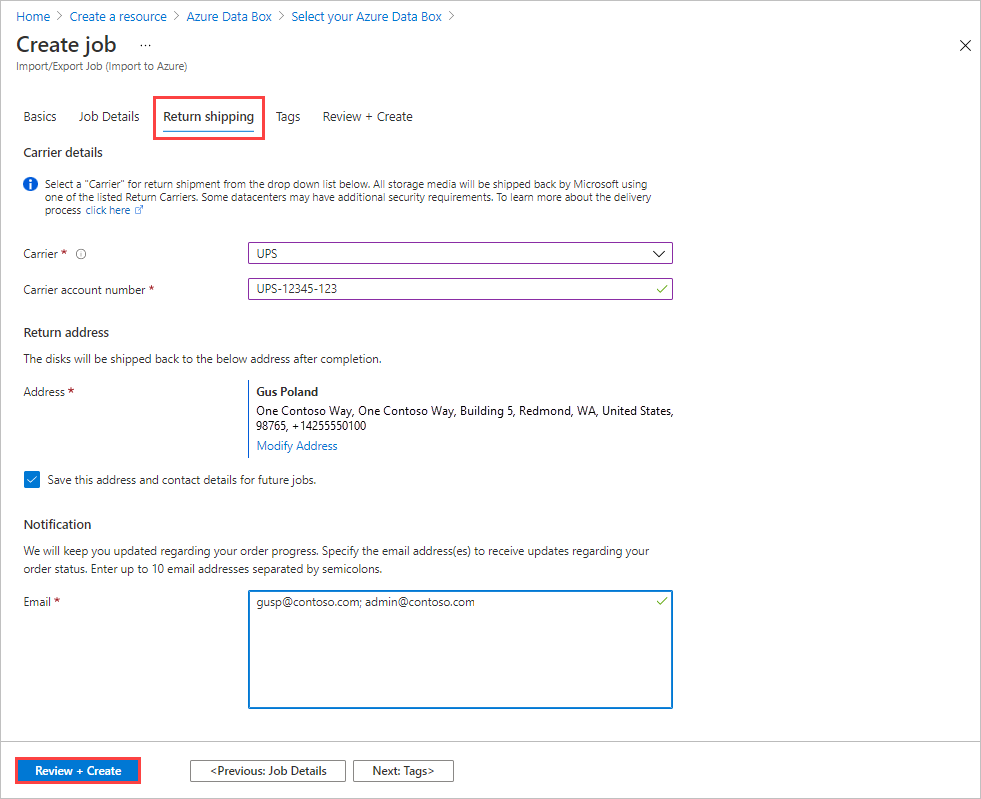
Selecteer Beoordelen + Maken om door te gaan.
In Beoordelen en maken:
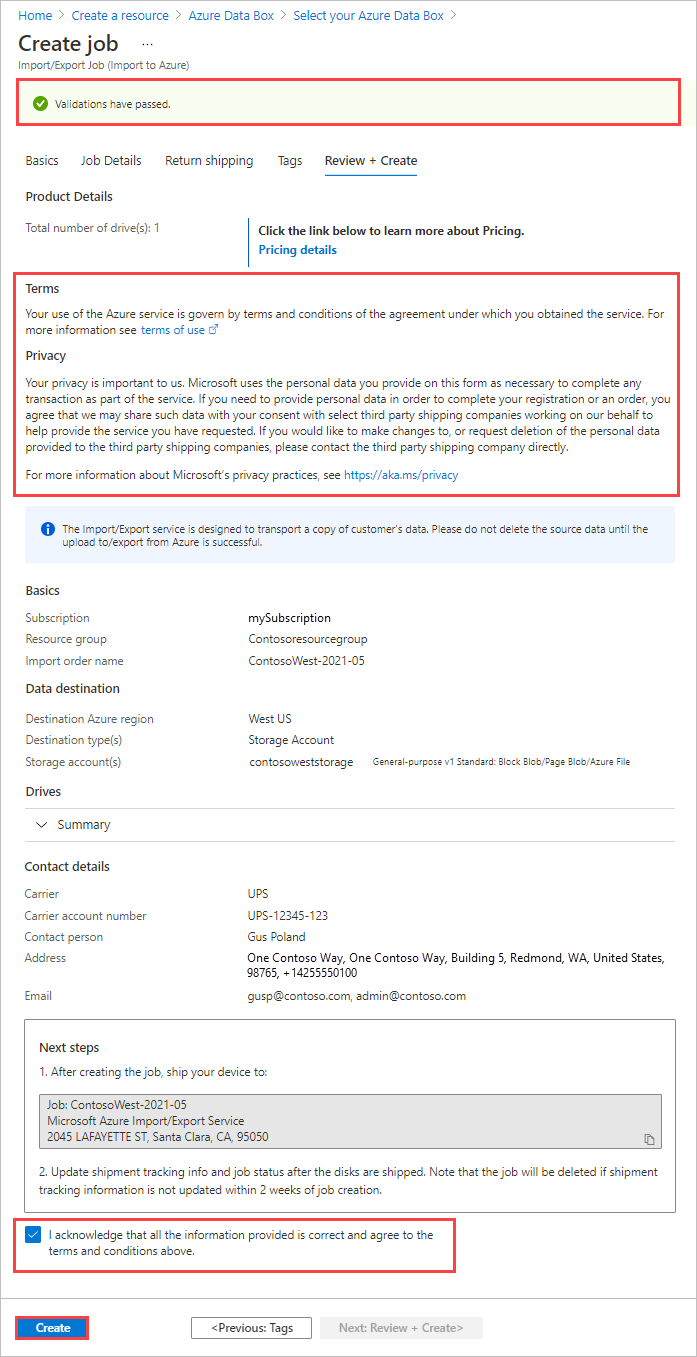
Nadat de taak is gemaakt, ziet u het volgende bericht.
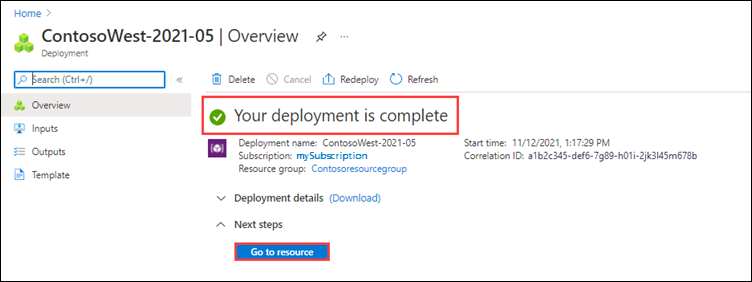
You can select Go to resource to open the Overview of the job.

Skip this step and go to the next step if you want to use the Microsoft managed key to protect your BitLocker keys for the drives. To configure your own key to protect the BitLocker key, follow the instructions in Configure customer-managed keys with Azure Key Vault for Azure Import/Export in the Azure portal.
FedEx, UPS of DHL kan worden gebruikt om het pakket naar het Azure-datacenter te verzenden. Als u een andere vervoerder dan FedEx/DHL wilt gebruiken, neemt u contact op met het Azure Data Box Operations-team op adbops@microsoft.com
Nadat u de schijven hebt verzonden, keert u terug naar de taak in Azure Portal en vult u de traceringsgegevens in.
Nadat u traceringsgegevens hebt opgegeven, wordt de taakstatus gewijzigd in Verzending en kan de taak niet worden geannuleerd. U kunt een taak alleen annuleren terwijl deze de status Maken heeft.
Belangrijk
Als het traceringsnummer niet binnen 2 weken na het maken van de taak wordt bijgewerkt, verloopt de taak.
Voer de volgende stappen uit om de traceringsgegevens te voltooien voor een taak die u in de portal hebt gemaakt:
Open de taak in Azure Portal/.
Schuif in het deelvenster Overzicht omlaag naar Traceringsgegevens en voltooi de vermeldingen:
![]()
U kunt de voortgang van de taak bijhouden in het deelvenster Overzicht . Ga naar De taakstatus weergeven voor een beschrijving van elke taakstatus.
![]()
Track the job to completion, then verify that the upload was successful and all data is present.
Review the Data copy details of the completed job to locate the logs for each drive included in the job:

For more information, see Review copy logs from imports and exports.
After you verify the data transfers, you can delete your on-premises data. Delete your on-premises data only after you verify that the upload was successful.
Notitie
If any path and file name exceeds 256 characters, and long paths aren't enabled on the client, the data upload will fail. To avoid this kind of failure, enable long paths on your Windows client.
Training
Module
Grote hoeveelheden gegevens uit Azure exporteren met behulp van Azure Import/Export - Training
Informatie over hoe en wanneer u Azure Import/Export kunt gebruiken om grote hoeveelheden gegevens vanuit Azure te kopiëren