Configure Azure Cloud Services (extended support) roles with Visual Studio
Note
This article applies to Azure Azure Cloud Services (extended support). Cloud Services (classic) is retired as of August 31, 2024. For more information, see Cloud services (classic) deployment model is retiring on August 31, 2024. For new development, we recommend that you use a newer service type designed for your specific purpose, such as Azure App Service, Azure Functions, or Azure Container Apps. For the latest list of available services, see Directory of Azure products.
An Azure Cloud Services (extended support) project can have one or more worker or web roles. For each role, you need to define how that role is set up and also configure how that role runs.
The information for your cloud service is stored in the following files:
- ServiceDefinition.csdef - The service definition file defines the run-time settings for your cloud service including what roles are required, endpoints, and virtual machine size. None of the data stored in
ServiceDefinition.csdefcan be changed when your role is running. - ServiceConfiguration.cscfg - The service configuration file configures how many instances of a role are run and the values of the settings defined for a role. The data stored in
ServiceConfiguration.cscfgcan be changed while your role is running.
To store different values for the settings that control how a role runs, you can define multiple service configurations. You can use a different service configuration for each deployment environment. For example, you can set your storage account connection string to use the local Azure Storage Emulator in a local service configuration and create another service configuration to use Azure Storage in the cloud.
When you create an Azure Cloud Services (extended support) project in Visual Studio, two service configurations are automatically created and added to your Azure project:
ServiceConfiguration.Cloud.cscfgServiceConfiguration.Local.cscfg
Prerequisites
- Visual Studio (see [Visual Studio downloads] (https://visualstudio.microsoft.com/downloads/?cid=learn-onpage-download-cta)) with the Azure development workload installed and the Individual Component .NET Framework project and item templates installed. See Modify Visual Studio.
- An Azure account. If you don't have an Azure account, activate your Azure benefits for Visual Studio subscribers or sign up for a free trial.
Configure an Azure Cloud Services (extended support) project
You can configure an Azure Cloud Services (extended support) project from Solution Explorer in Visual Studio, as shown in the following steps:
Create or open an Azure Cloud Services (extended support) project in Visual Studio.
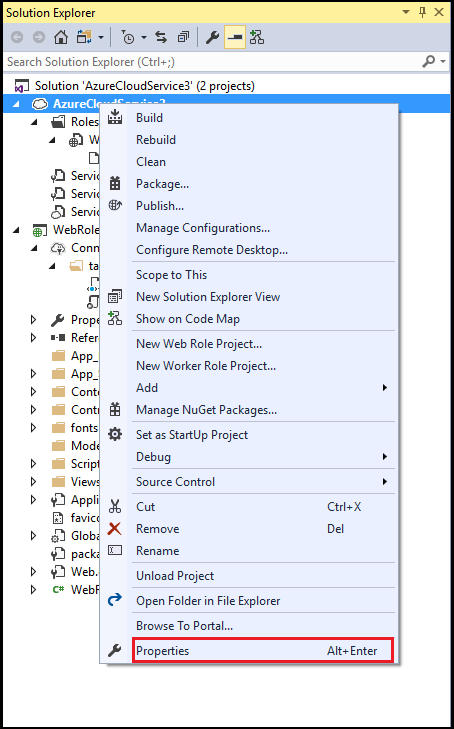
In Solution Explorer, right-click the project, and, from the context menu, select Properties.
In the project's properties page, select the Development tab.
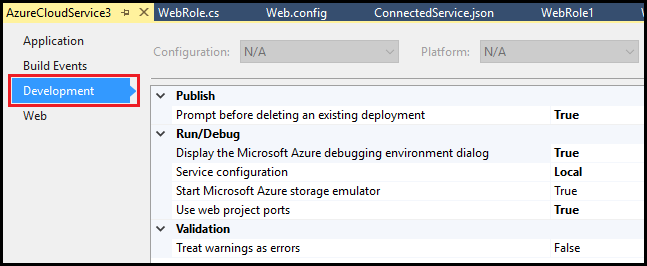
In the Service Configuration list, select the name of the service configuration that you want to edit.

Change the number of role instances
To improve the performance of your cloud service, you can change the number of instances of a role that are running, based on the number of users or the load expected for a particular role. A separate virtual machine is created for each instance of a role when the cloud service runs in Azure. This affects the billing for the deployment of this cloud service. For more information about billing, see Understand your bill for Microsoft Azure.
Create or open an Azure Cloud Services (extended support) project in Visual Studio.
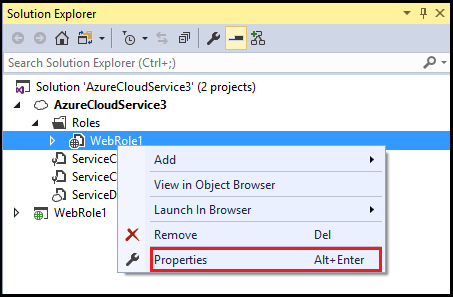
In Solution Explorer, expand the project node. Under the Roles node, right-click the role you want to update, and, from the context menu, select Properties.
Select the Configuration tab.
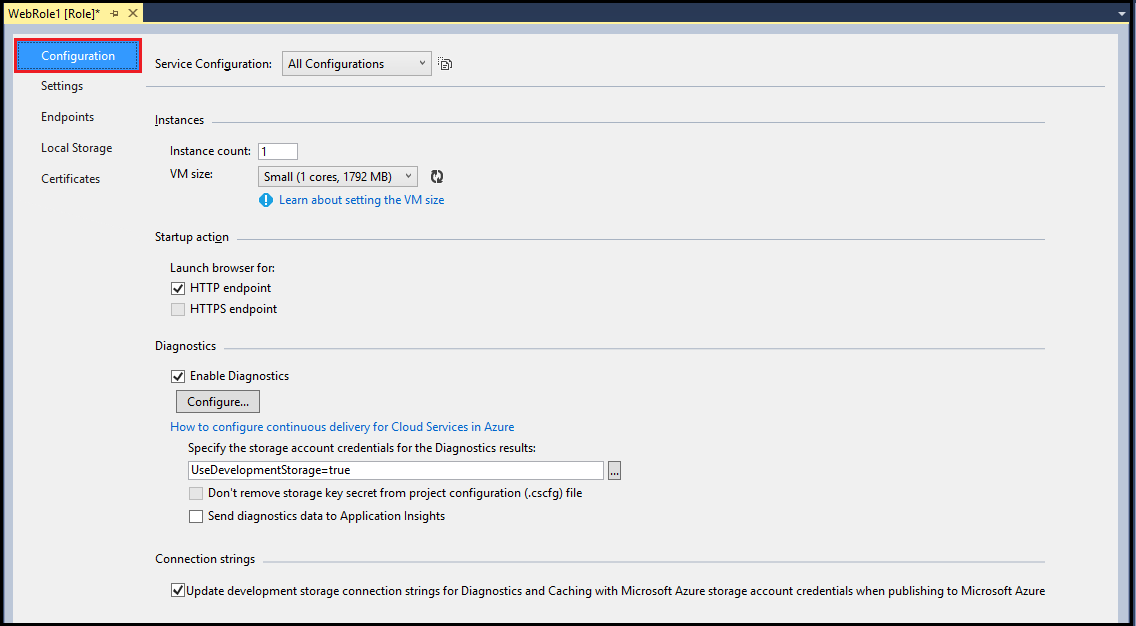
In the Service Configuration list, select the service configuration that you want to update. (If you want to make changes to all the service configurations for this role, select All Configurations.)
Important
If you choose a specific service configuration, some properties are disabled because they can only be set for all configurations. To edit these properties, you must select All Configurations.
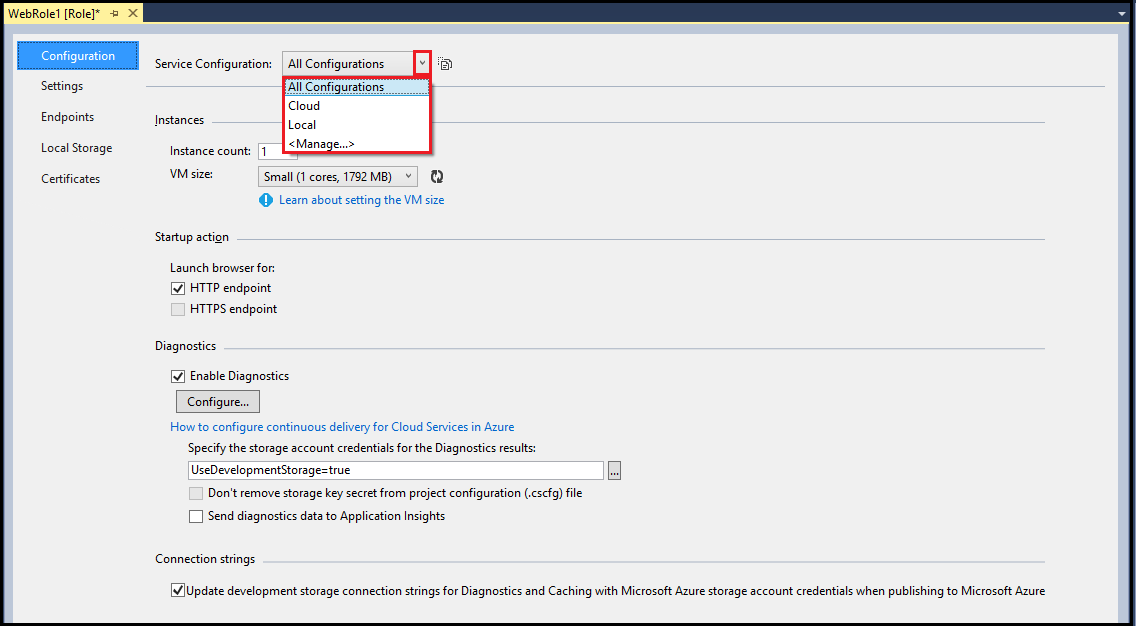
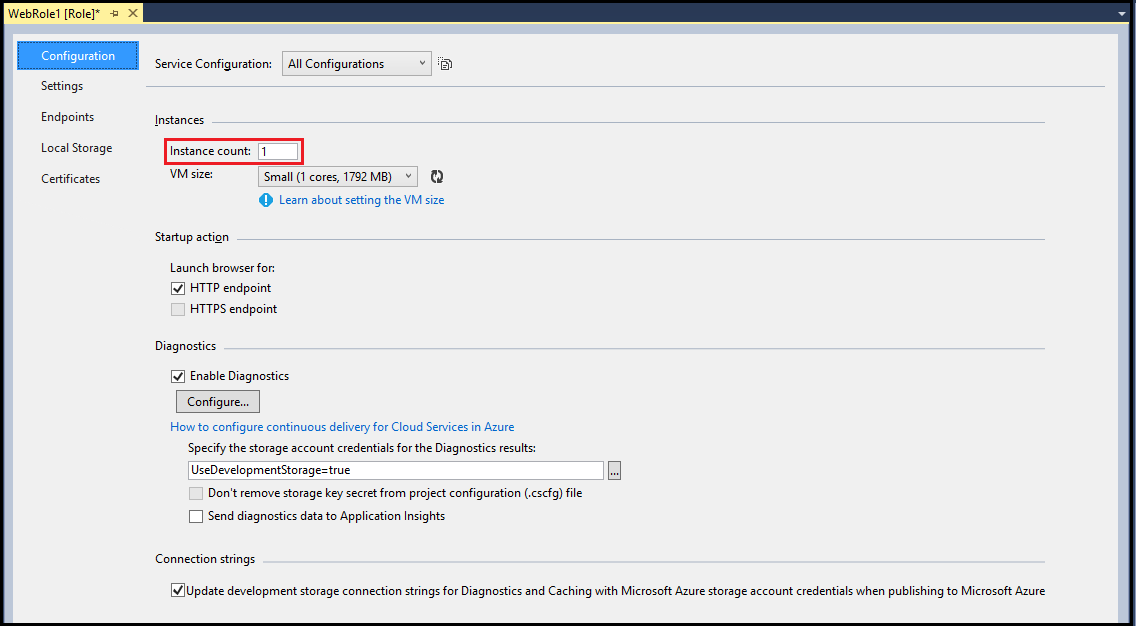
In the Instance count text box, enter the number of instances that you want to start for this role. Each instance runs on a separate virtual machine when you publish the cloud service to Azure.
From the Visual Studio, toolbar, select Save.
Manage connection strings for storage accounts
You can add, remove, or modify connection strings for your service configurations. You might also want to configure a cloud service configuration that uses a storage account in Azure.
Warning
When you enter the Azure Storage account key information for a storage account connection string, this information is stored locally in the service configuration file. However, this information is currently not stored as encrypted text.
By using a different value for each service configuration, you do not have to use different connection strings in your cloud service or modify your code when you publish your cloud service to Azure. You can use the same name for the connection string in your code and the value is different, based on the service configuration that you select when you build your cloud service or when you publish it.
Create or open an Azure Cloud Services (extended support) project in Visual Studio.
In Solution Explorer, expand the project node. Under the Roles node, right-click the role you want to update, and, from the context menu, select Properties.

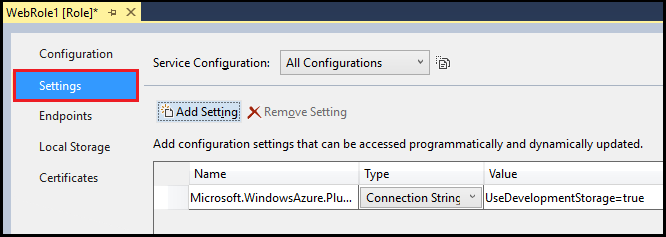
Select the Settings tab.
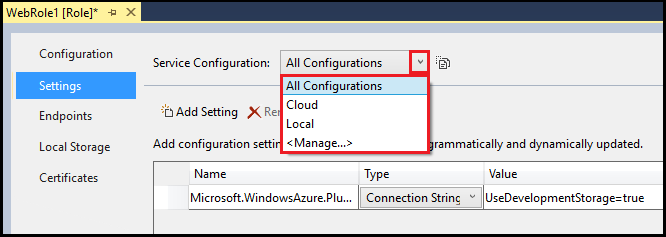
In the Service Configuration list, select the service configuration that you want to update.
To add a connection string, select Add Setting.
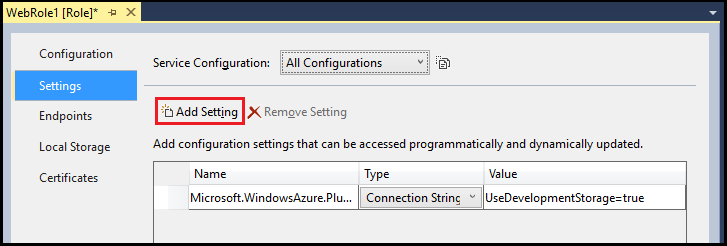
Once the new setting has been added to the list, update the row in the list with the necessary information.
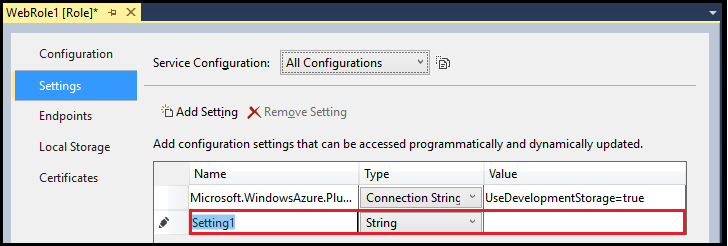
- Name - Enter the name that you want to use for the connection string.
- Type - Select Connection String from the dropdown list.
- Value - You can either enter the connection string directly into the Value cell, or select the ellipsis (...) to work in the Create Storage Connection String dialog.
In the Create Storage Connection String dialog, select an option for Connect using. Then follow the instructions for the option you select:
- Microsoft Azure Storage Emulator - If you select this option, the remaining settings on the dialog are disabled as they apply only to Azure. Select OK.
- Your subscription - If you select this option, use the dropdown list to either select and sign in to a Microsoft account, or add a Microsoft account. Select an Azure subscription and storage account. Select OK.
- Manually entered credentials - Enter the storage account name, and either the primary or second key. Select an option for Connection (HTTPS is recommended for most scenarios.) Select OK.
To delete a connection string, select the connection string, and then select Remove Setting.
From the Visual Studio, toolbar, select Save.
Programmatically access a connection string
The following steps show how to programmatically access a connection string using C#.
Add the following using directives to a C# file where you are going to use the setting:
using Microsoft.WindowsAzure;
using Microsoft.WindowsAzure.Storage;
using Microsoft.WindowsAzure.ServiceRuntime;
The following code illustrates an example of how to access a connection string. Replace the <ConnectionStringName> placeholder with the appropriate value.
// Setup the connection to Azure Storage
var storageAccount = CloudStorageAccount.Parse(RoleEnvironment.GetConfigurationSettingValue("<ConnectionStringName>"));
Add custom settings to use in your Azure Cloud Services (extended support) project
Custom settings in the service configuration file let you add a name and value for a string for a specific service configuration. You might choose to use this setting to configure a feature in your cloud service by reading the value of the setting and using this value to control the logic in your code. You can change these service configuration values without having to rebuild your service package or when your cloud service is running. Your code can check for notifications of when a setting changes. For more information, see RoleEnvironment.Changing Event.
You can add, remove, or modify custom settings for your service configurations. You might want different values for these strings for different service configurations.
By using a different value for each service configuration, you do not have to use different strings in your cloud service or modify your code when you publish your cloud service to Azure. You can use the same name for the string in your code and the value is different, based on the service configuration that you select when you build your cloud service or when you publish it.
Create or open an Azure Cloud Services (extended support) project in Visual Studio.
In Solution Explorer, expand the project node. Under the Roles node, right-click the role you want to update, and, from the context menu, select Properties.

Select the Settings tab.

In the Service Configuration list, select the service configuration that you want to update.

To add a custom setting, select Add Setting.

Once the new setting has been added to the list, update the row in the list with the necessary information.

- Name - Enter the name of the setting.
- Type - Select String from the dropdown list.
- Value - Enter the value of the setting. You can either enter the value directly into the Value cell, or select the ellipsis (...) to enter the value in the Edit String dialog.
To delete a custom setting, select the setting, and then select Remove Setting.
From the Visual Studio, toolbar, select Save.
Programmatically access a custom setting's value
The following steps show how to programmatically access a custom setting using C#.
Add the following using directives to a C# file where you are going to use the setting:
using Microsoft.WindowsAzure;
using Microsoft.WindowsAzure.Storage;
using Microsoft.WindowsAzure.ServiceRuntime;
The following code illustrates an example of how to access a custom setting. Replace the <SettingName> placeholder with the appropriate value.
var settingValue = RoleEnvironment.GetConfigurationSettingValue("<SettingName>");
Manage local storage for each role instance
You can add local file system storage for each instance of a role. The data stored in that storage is not accessible by other instances of the role for which the data is stored, or by other roles.
Create or open an Azure Cloud Services (extended support) project in Visual Studio.
In Solution Explorer, expand the project node. Under the Roles node, right-click the role you want to update, and, from the context menu, select Properties.

Select the Local Storage tab.
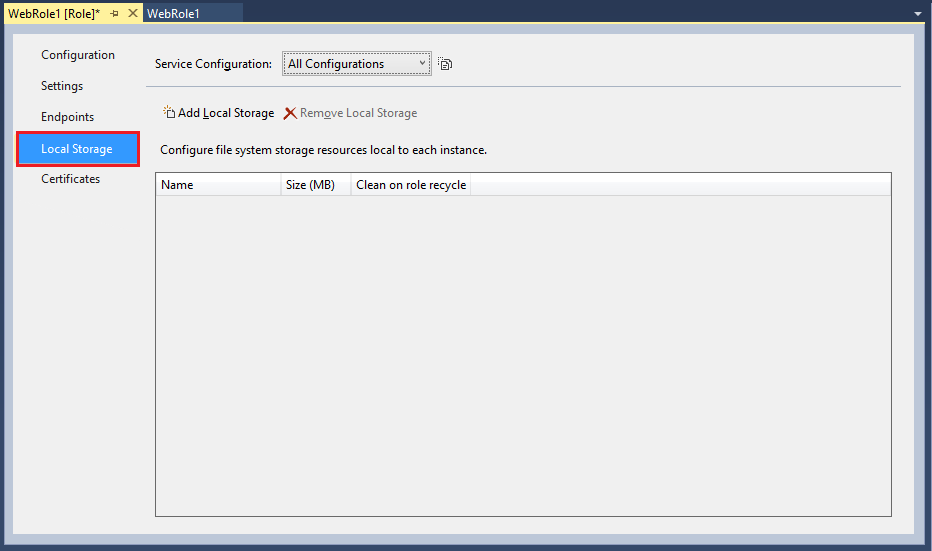
In the Service Configuration list, ensure that All Configurations is selected as the local storage settings apply to all service configurations. Any other value results in all the input fields on the page being disabled.
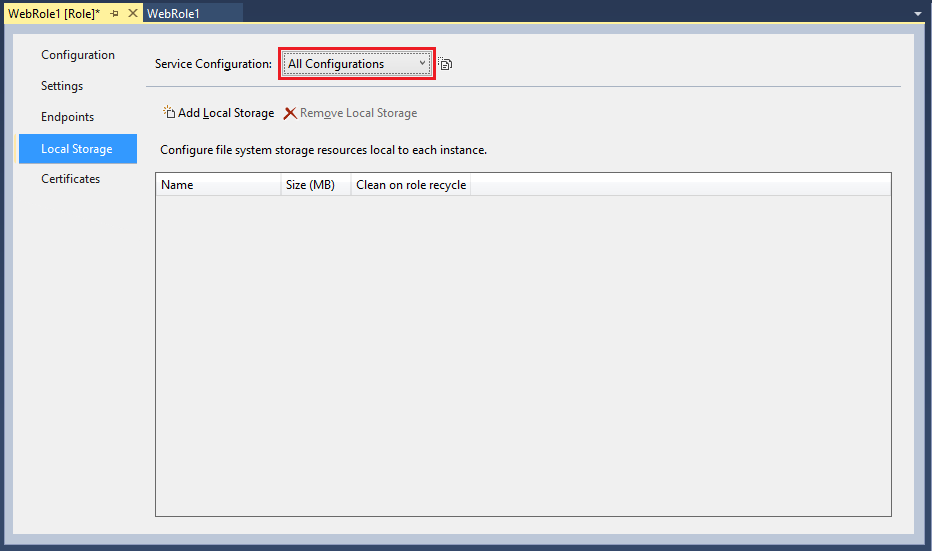
To add a local storage entry, select Add Local Storage.
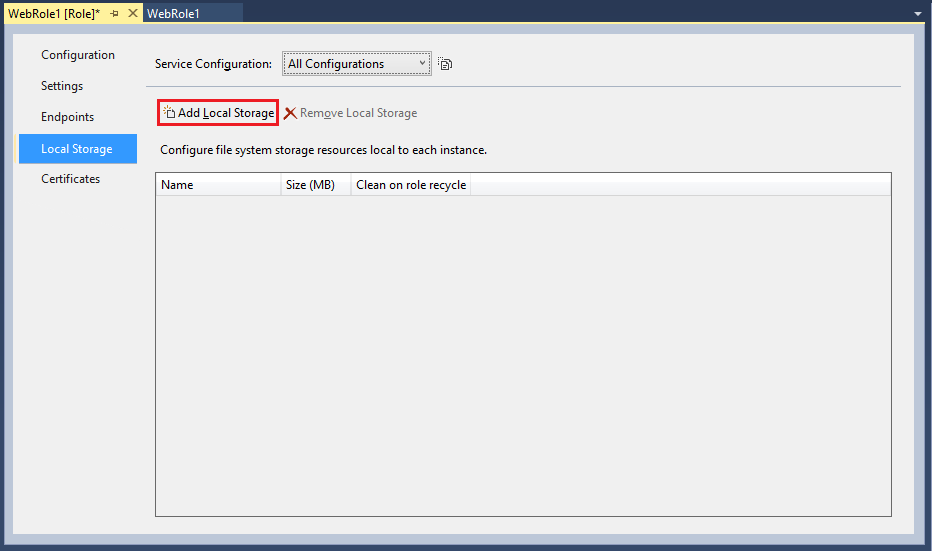
Once the new local storage entry has been added to the list, update the row in the list with the necessary information.
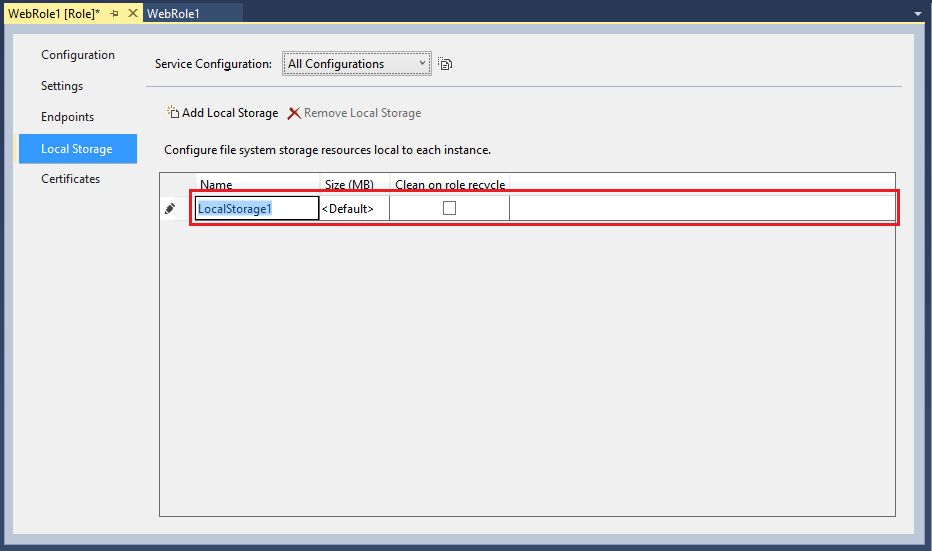
- Name - Enter the name that you want to use for the new local storage.
- Size (MB) - Enter the size in MB that you need for the new local storage.
- Clean on role recycle - Select this option to remove the data in the new local storage when the virtual machine for the role is recycled.
To delete a local storage entry, select the entry, and then select Remove Local Storage.
From the Visual Studio, toolbar, select Save.
Programmatically accessing local storage
This section illustrates how to programmatically access local storage using C# by writing a test text file MyLocalStorageTest.txt.
Write a text file to local storage
The following code shows an example of how to write a text file to local storage. Replace the <LocalStorageName> placeholder with the appropriate value.
// Retrieve an object that points to the local storage resource
LocalResource localResource = RoleEnvironment.GetLocalResource("<LocalStorageName>");

//Define the file name and path
string[] paths = { localResource.RootPath, "MyLocalStorageTest.txt" };
String filePath = Path.Combine(paths);

using (FileStream writeStream = File.Create(filePath))
{
    Byte[] textToWrite = new UTF8Encoding(true).GetBytes("Testing Web role storage");
    writeStream.Write(textToWrite, 0, textToWrite.Length);
}
Find a file written to local storage
To view the file created by the code in the previous section, follow these steps:
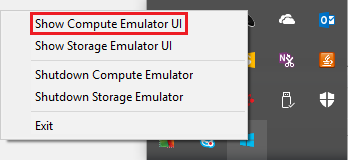
In the Windows notification area, right-click the Azure icon, and, from the context menu, select Show Compute Emulator UI.
Select the web role.
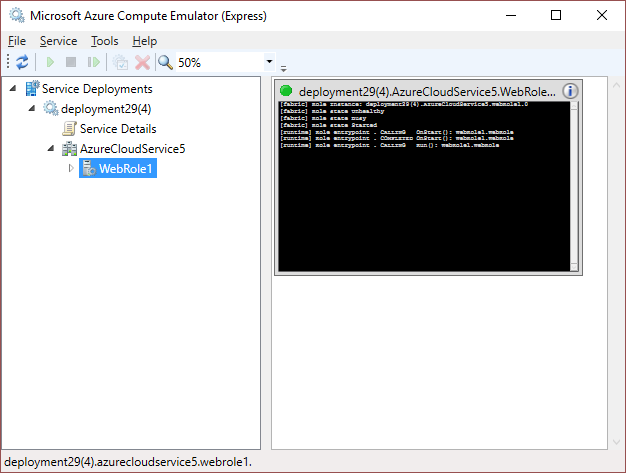
On the Microsoft Azure Compute Emulator menu, select Tools > Open local store.
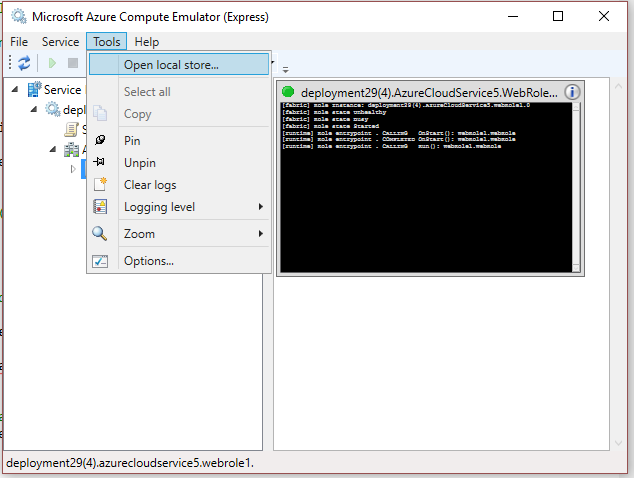
When the Windows Explorer window opens, enter `MyLocalStorageTest.txt`` into the Search text box, and select Enter to start the search.
Related content
Learn more about Azure projects in Visual Studio by reading Configuring an Azure Project. Learn more about the cloud service schema by reading Schema Reference.