Notitie
Voor toegang tot deze pagina is autorisatie vereist. U kunt proberen u aan te melden of de directory te wijzigen.
Voor toegang tot deze pagina is autorisatie vereist. U kunt proberen de mappen te wijzigen.
In dit artikel leert u hoe u volledig nieuwe Visual Studio-projecten maakt en deze gebruikt om de artefacten op te slaan die u nodig hebt om uw apps te bouwen. Als u niet bekend bent met projecten in Visual Studio, raadpleegt u dit overzicht van projecten en oplossingen. Zie Een nieuw project maken in Visual Studiovoor meer informatie over het snel maken van een project op basis van een sjabloon.
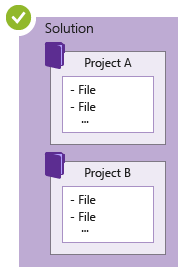
Projects de items bevatten die nodig zijn voor het bouwen van uw app in Visual Studio, zoals broncodebestanden, bitmaps, pictogrammen en onderdelen- en serviceverwijzingen. Wanneer u een nieuw project maakt, maakt Visual Studio een oplossing om het project te bevatten. U kunt desgewenst andere nieuwe of bestaande projecten toevoegen aan de oplossing. U kunt ook lege of blanco oplossingen maken. Oplossingen kunnen ook bestanden bevatten die niet zijn verbonden met een specifiek project.
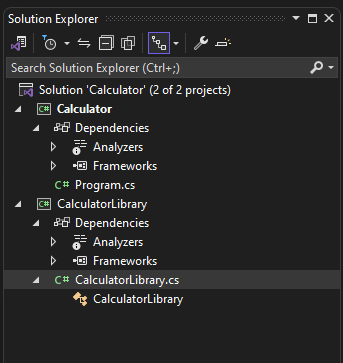
U kunt uw oplossingen en projecten weergeven in een hulpprogrammavenster met de naam Solution Explorer. In de volgende schermopname ziet u een voorbeeld van een C#-consoleoplossing in Solution Explorer. De oplossing bevat twee projecten: Calculator en CalculatorLibrary. Elk project bevat meerdere bestanden en mappen. De projectnaam vetgedrukt is het opstartproject; Dat wil gezegd, het project dat begint wanneer u de app uitvoert. U kunt opgeven welk project het opstartproject is.
Hoewel u zelf een project kunt maken door de benodigde bestanden eraan toe te voegen, biedt Visual Studio een selectie van projectsjablonen om u een voorsprong te geven. Als u een nieuw project maakt op basis van een sjabloon, krijgt u een project met de essentiële functies voor dat projecttype. U kunt de naam van de bestanden wijzigen of zo nodig nieuwe of bestaande code en andere resources toevoegen aan het project.
Dat gezegd hebbende, hoeft u geen oplossingen en projecten te gebruiken om apps te ontwikkelen in Visual Studio. U kunt ook code openen die u hebt gekloond vanuit Git of gedownload van een andere bron. Zie Code ontwikkelen in Visual Studio zonder projecten of oplossingenvoor meer informatie.
Een project maken met behulp van een projectsjabloon
Zie Een nieuw project maken in Visual Studiovoor meer informatie over het selecteren van een sjabloon om een project te maken. Zie Inleiding tot projecten en oplossingenals u een voorbeeldproject en -oplossing als oefening wilt maken.
Een project maken op basis van bestaande codebestanden
Als u een verzameling codebronbestanden hebt, kunt u ze eenvoudig toevoegen aan een project.
Selecteer in het menu van Visual Studio File>New>Project From Existing Code.
Selecteer in de wizard Project maken op basis van bestaande codebestandenhet gewenste projecttype in de Welk type project wilt u maken? lijst en selecteer vervolgens Volgende.
Blader op de pagina Projectdetails opgeven naar de locatie van de bestanden en voer een naam in voor het nieuwe project in het vak Naam. Wanneer u klaar bent, selecteert u voltooien.
Notitie
Deze optie werkt het beste voor een relatief eenvoudige verzameling bestanden. Momenteel worden alleen C++-, Visual Basic- en C#-projecttypen ondersteund.
Bestanden toevoegen aan een oplossing
Als u een bestand hebt dat van toepassing is op meerdere projecten, zoals een leesmij-bestand voor de oplossing, of andere bestanden die logisch bij het oplossingsniveau horen in plaats van onder een specifiek project, kunt u deze toevoegen aan de oplossing zelf. Als u een item aan een oplossing wilt toevoegen, selecteert u in het contextmenu (met de rechtermuisknop) van het oplossingsknooppunt in Solution Explorer Add>New Item of Add>Existing Item.
Tip
Een oplossingsbestand is een structuur voor het ordenen van projecten in Visual Studio. Het bevat de status van oplossingsinformatie in twee bestanden: een bestand met .sln (op tekst gebaseerd, gedeeld) en een .suo- (binair, verborgen, gebruikersspecifieke oplossingsopties). Daarom moet u een oplossing niet kopiëren en de naam ervan wijzigen. Het is raadzaam om een nieuwe oplossing te maken en vervolgens bestaande items eraan toe te voegen.
Bestanden vergelijken
Vanaf versie 17.7kunt u bestanden in Solution Explorer vergelijken met behulp van de snelmenuopties. Zie Het hulpprogramma voor bestandsvergelijking in Meer informatie over Solution Explorer.
Bestanden kopiëren tussen Visual Studio-exemplaren
Met Visual Studio versie 17.12 en hoger kunt u nu codebestanden en -mappen kopiëren en plakken tussen verschillende Visual Studio-exemplaren met behulp van Solution Explorer.
- Selecteer het gewenste bestand of de gewenste map in Solution Explorer.
- Kopieer of knip het geselecteerde bestand of de geselecteerde map met Ctrl+C of Ctrl+X.
- Schakel over naar een ander Visual Studio-exemplaar waar u het bestand of de map wilt plakken.
- Plak het bestand of de map met Ctrl+V- om deze bestanden of mappen op te nemen in uw nieuwe oplossing.
Alle gekopieerde wijzigingen worden nauwkeurig weergegeven in het bestandssysteem.

Naast kopiëren en plakken kunt u ook de bestanden en mappen van het ene exemplaar van Visual Studio naar het andere slepen.
Een .NET-project maken dat is gericht op een specifieke versie van .NET Framework
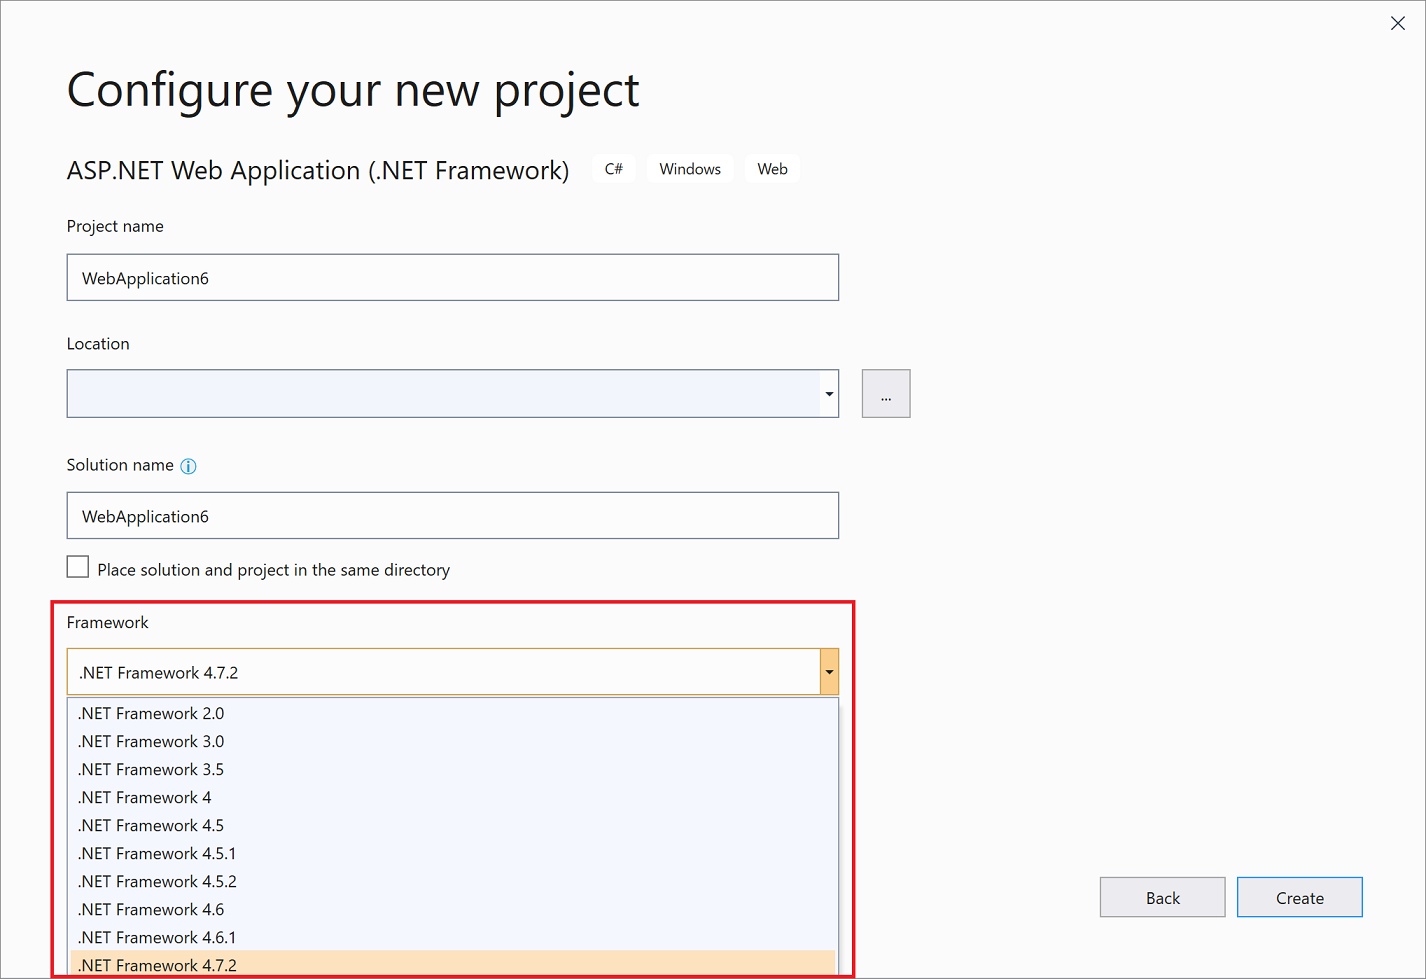
Wanneer u een .NET Framework-project maakt, kunt u een specifieke versie opgeven van het .NET Framework dat u wilt gebruiken voor het project. (Wanneer u een .NET Core-project maakt, geeft u geen frameworkversie op.)
Als u een .NET Framework-versie wilt opgeven, selecteert u een item in de Framework lijst op de pagina Uw nieuwe project configureren.

Lege oplossingen maken
U kunt ook lege oplossingen maken die geen projecten bevatten. Deze optie werkt mogelijk goed als u uw oplossing en projecten helemaal opnieuw wilt bouwen.
Een lege oplossing maken
Selecteer in de menubalk Bestand>Nieuw>Project.
Voer op de pagina Project aanmakenoplossing in het zoekvak in.
Selecteer de sjabloon Lege oplossing en selecteer vervolgens Volgende.
Voer de waarden oplossingsnaam en locatie voor uw oplossing in en selecteer vervolgens Aanmaken.
Nadat u een lege oplossing hebt gemaakt, kunt u er nieuwe of bestaande projecten of items aan toevoegen door Nieuw item toevoegen of Bestaand item toevoegen te selecteren in het menu Project.
Zoals eerder vermeld, kunt u ook codebestanden openen zonder een project of oplossing te gebruiken. Om te leren hoe je op deze manier code ontwikkelt, zie Code ontwikkelen in Visual Studio zonder projecten of oplossingen.
Oplossing voor meerdere projecten
U kunt een oplossing maken die meerdere projecten bevat. Begin met een lege oplossing of een oplossing met een project en voeg er meerdere nieuwe of bestaande projecten aan toe met behulp van Add>New project/Existing project. U kunt bijvoorbeeld een oplossing maken die een C#-project en een Visual Basic-project bevat.
Zie Projectafhankelijkheden maken en verwijderen en Meerdere opstartprojecten instellenvoor meer informatie over het bouwen van een oplossing die meerdere projecten bevat.
Een oplossing, project of item verwijderen
U kunt het contextmenu met de rechtermuisknop gebruiken om oplossingen, projecten of items in Visual Studio te verwijderen of te verwijderen, maar die alleen uit de huidige oplossing of het huidige project worden verwijderd.
Als u een oplossing of andere onderdelen permanent van uw systeem wilt verwijderen, gebruikt u Verkenner in Windows om de map met de .sln en .suo oplossingsbestanden te verwijderen. (Voordat u een oplossing verwijdert, wilt u mogelijk een back-up maken van uw projecten en bestanden voor het geval u ze opnieuw nodig hebt.)
Notitie
Het .suo--bestand is een verborgen bestand dat niet wordt weergegeven als u de standaardinstellingen voor Verkenner gebruikt. Als u verborgen bestanden wilt weergeven, selecteer dan in Verkenner het menu Weergave en kies Verborgen items weergeven>.
Een oplossing definitief verwijderen
U kunt de Windows Verkenner openen met behulp van Solution Explorer in Visual Studio. Dit doet u als volgt.
Selecteer in Solution Explorer in het snelmenu van de oplossing die u wilt verwijderen Map openen in Verkenner.
Navigeer in Verkenner één niveau omhoog.
Selecteer de map met de oplossing en selecteer vervolgens de sleutel Verwijderen.