Detailed configuration for hosted test drives
This article describes how to configure a hosted test drive for Dynamics 365 apps on Dataverse and Power Apps or Dynamics 365 Operations Apps.
Tip
To see the customer's view of test drive in the commercial marketplace, see What is Azure Marketplace? and What is Microsoft AppSource?
Configure for Dynamics 365 apps on Dataverse and Power Apps
Sign in to Partner Center.
If you can't access the above link, you need to submit a request to publish your application. Once we review the request, you'll be granted access to start the publish process.
Find an existing Dynamics 365 apps on Dataverse and Power Apps offer or create a new Dynamics 365 apps on Dataverse and Power Apps offer.
On the Offer setup page, select the Enable a test drive check box and select a Type of test drive (see bullet below), then select Save.

- Type of test drive – Choose Dynamics 365 apps on Dataverse and Power Apps. This indicates that Microsoft will host and maintain the service that performs the test drive user provisioning and deprovisioning.
Grant Microsoft AppSource permission to provision and deprovision test drive users in your tenant. In this step, you'll generate the Microsoft Entra App ID and Microsoft Entra App Key values mentioned below.
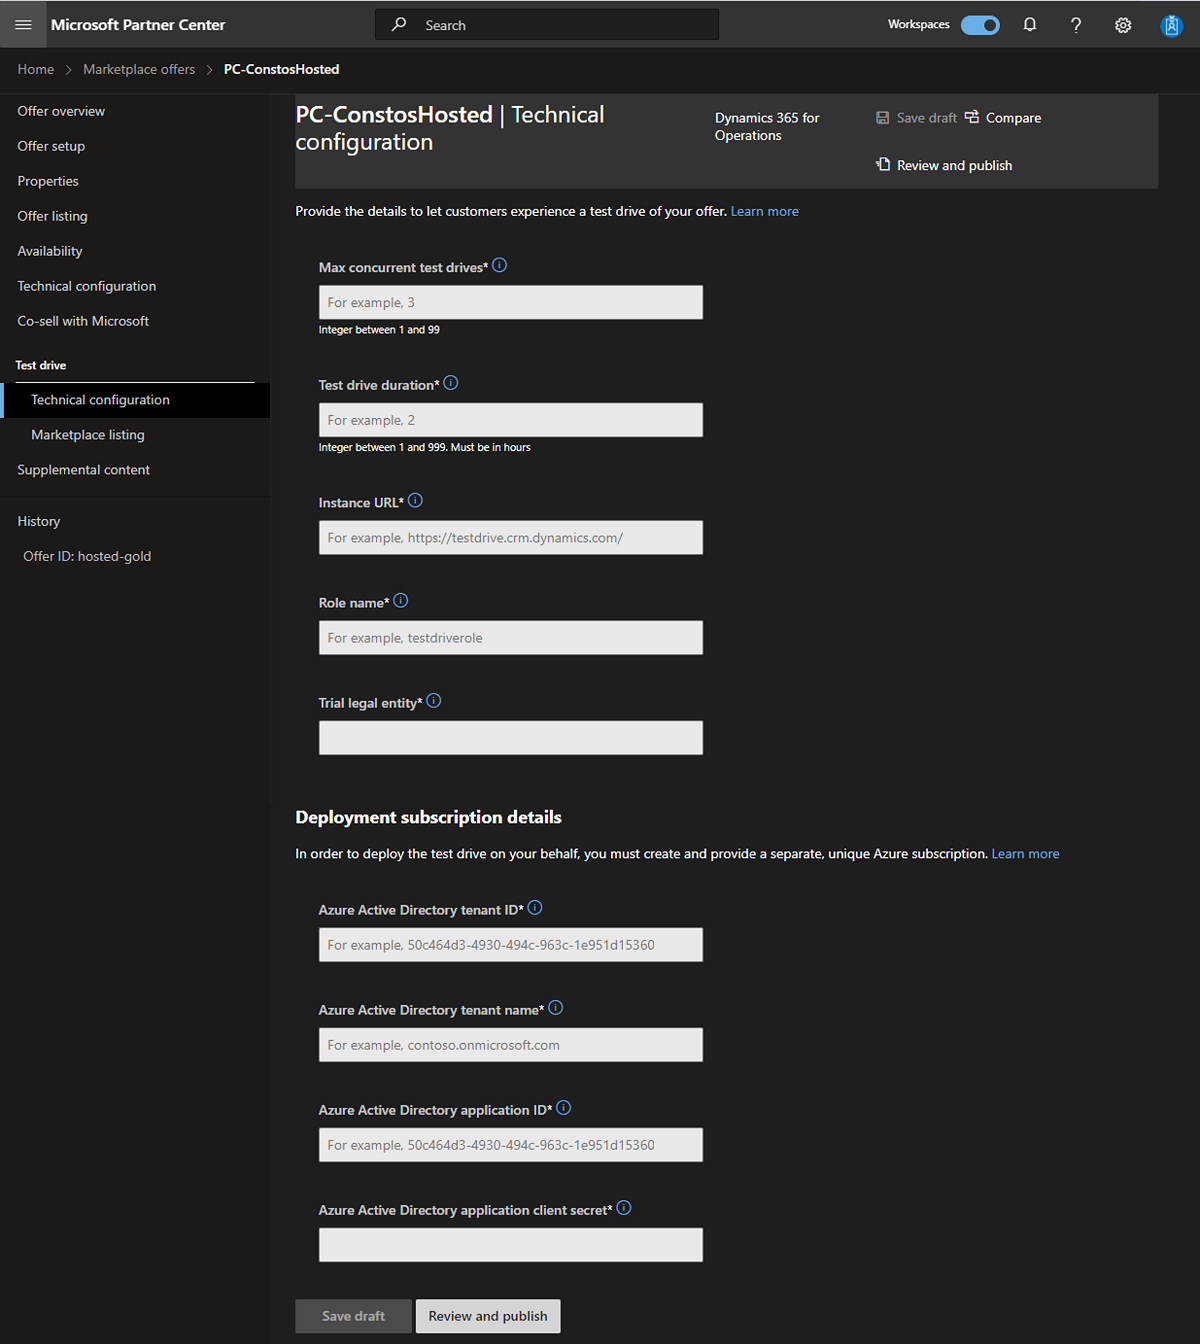
Complete these fields on the Test drive technical configuration page.

Max concurrent test drives – The number of concurrent users that can have an active test drive running at the same time. Each user will consume a Dynamics license while their test drive is active, so ensure you have at least this many Dynamics licenses available for test drive users. We recommended 3 to 5.
Test drive duration – The number of hours the user's test drive will be active. After the time has expired, the user will be deprovisioned from your tenant. We recommended 2-24 hours depending on the complexity of your app. The user can always request another test drive if they run out of time and want to access the test drive again.
Instance URL
Customer Engagement – The URL the test drive user will be sent to when they start the test drive. This is typically the URL of your Dynamics 365 instance on which your app and sample data is installed. Example value:
https://testdrive.crm.dynamics.com.Canvas App (Power Apps) –
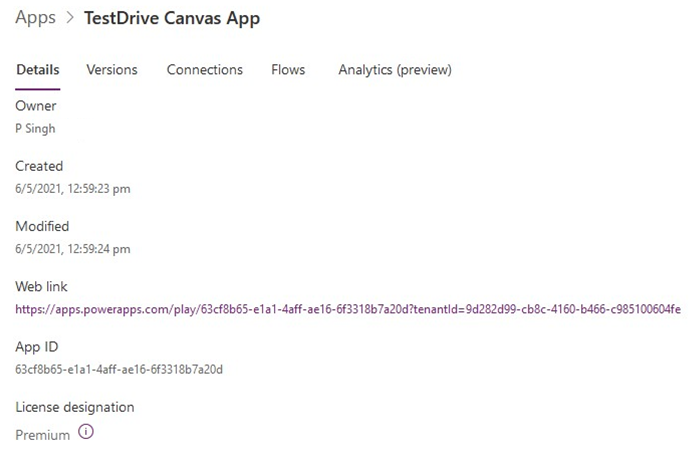
- Open the PowerApps portal page and sign in.
- Select Apps and then the ellipses at the app.
- Select Details.
- Copy the Web link from the Details tab:
Instance web API URL
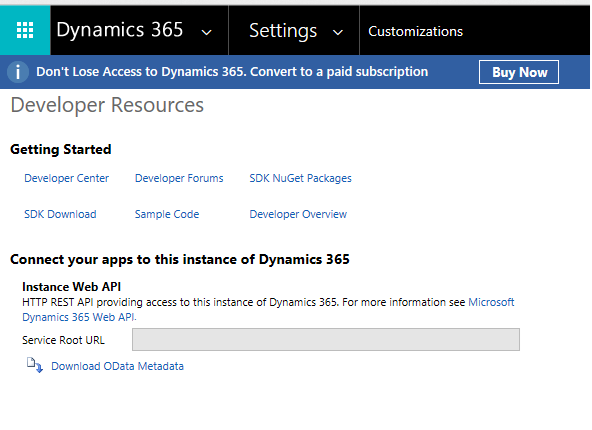
Customer Engagement – The Web API URL for your Dynamics 365 Instance. Retrieve this value by signing into your Microsoft Dynamics 365 instance, selecting Setting > Customization > Developer Resources > Instance Web API, and copying the address (URL). Example value:
Canvas App (Power Apps) – If you aren't using CE/Dataverse as a backend to your Canvas App, use
https://localhostas a placeholder.
Role name
Customer Engagement – The name of the custom Dynamics 365 security role you created for test drive or you can use an existing role. A new role should have minimum required privileges added to the role to sign into a Customer Engagement instance. This is the role that will be assigned to users during their test drive. Example value:
testdriverole.Canvas App (Power Apps) – Use "NA" when not using CE/Dataverse as the backend data source.
Important
Ensure the security group check isn't added. This allows the user to be synced to the Customer Engagement instance.
Microsoft Entra tenant ID – The ID of the Azure tenant for your Dynamics 365 instance. To retrieve this value, sign in to Azure portal and navigate to Microsoft Entra ID > Properties and copy the directory ID. Example value: 172f988bf-86f1-41af-91ab-2d7cd01112341.
Microsoft Entra tenant name – The name of the Azure Tenant for your Dynamics 365 Instance. Use the format
<tenantname>.onmicrosoft.com. Example Value:testdrive.onmicrosoft.com.Microsoft Entra application ID – The ID of the Microsoft Entra app you created in Step 5. Example value:
53852862-a2ae-4e43-9461-faa49650a096.Microsoft Entra application client secret – Secret for the Microsoft Entra app created in Step 5. Example value:
IJUgaIOfq9b9LbUjeQmzNBW4VGn6grr1l/n3aMrnfdk=.
Provide the marketplace listing details. Select Language to see further required fields.

- Description – An overview of your test drive. This text will be shown to the user while the test drive is being provisioned. This field supports HTML if you want to provide formatted content (required).
- User manual – A PDF user manual that helps test drive users understand how to use your app (required).
- Test drive demo video – A video that showcases your app (optional).


Dynamics 365 Operations Apps
Sign in to Partner Center.
If you can't access the above link, you need to submit a request to publish your application. Once we review the request, you'll be granted access to start the publish process.
Find an existing Dynamics 365 Operations Apps offer or create a new Dynamics 365 Operations Apps offer.
On the Offer setup page, select the Enable a test drive check box and select a Type of test drive (see bullet below), then select Save draft.

- Type of test drive – Choose Dynamics 365 Operations Apps option. This means Microsoft will host and maintain the service that performs the test drive user provisioning and deprovisioning.
Grant Microsoft AppSource permission to provision and deprovision test drive users in your tenant. In this step, you'll generate the Microsoft Entra App ID and Microsoft Entra App Key values mentioned below.
Complete these fields on the Test drive > Technical configuration page.
Max concurrent test drives – The number of concurrent users that can have an active test drive running at the same time. Each user will consume a Dynamics license while their test drive is active, so ensure you have at least this many Dynamics licenses available for test drive users. We recommended 3 to 5.
Test drive duration – The number of hours the user's test drive will be active. After the time has expired, the user will be deprovisioned from your tenant. We recommended 2-24 hours depending on the complexity of your app. The user can always request another test drive if they run out of time and want to access the test drive again.
Instance URL – The URL the test drive user will be sent to when they start the test drive. This is typically the URL of your Dynamics 365 instance on which your app and sample data is installed. Example value:
https://testdrive.crm.dynamics.com.Microsoft Entra tenant ID – The ID of the Azure tenant for your Dynamics 365 instance. To retrieve this value, sign in to Azure portal and navigate to Microsoft Entra ID > Properties and copy the directory ID. Example value: 172f988bf-86f1-41af-91ab-2d7cd01112341.
Microsoft Entra tenant name – The name of the Azure Tenant for your Dynamics 365 Instance. Use the format
<tenantname>.onmicrosoft.com. Example Value:testdrive.onmicrosoft.com.Microsoft Entra application ID – The ID of the Microsoft Entra app you created in Step 5. Example value:
53852862-a2ae-4e43-9461-faa49650a096.Microsoft Entra application client secret – Secret for the Microsoft Entra app created in Step 5. Example value:
IJUgaIOfq9b9LbUjeQmzNBW4VGn6grr1l/n3aMrnfdk=.Trial Legal Entity – Provide a Legal Entity to assign a trial user. You can create a new one at Create or modify a legal entity.
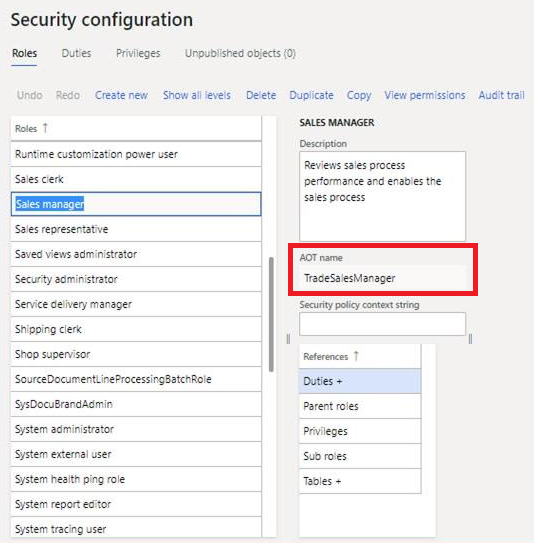
Role name – The AOT name (Application Object Tree) of the custom Dynamics 365 security role you created for test drive. This is the role that will be assigned to users during their test drive.
Complete the fields on the Test drive marketplace listing page.
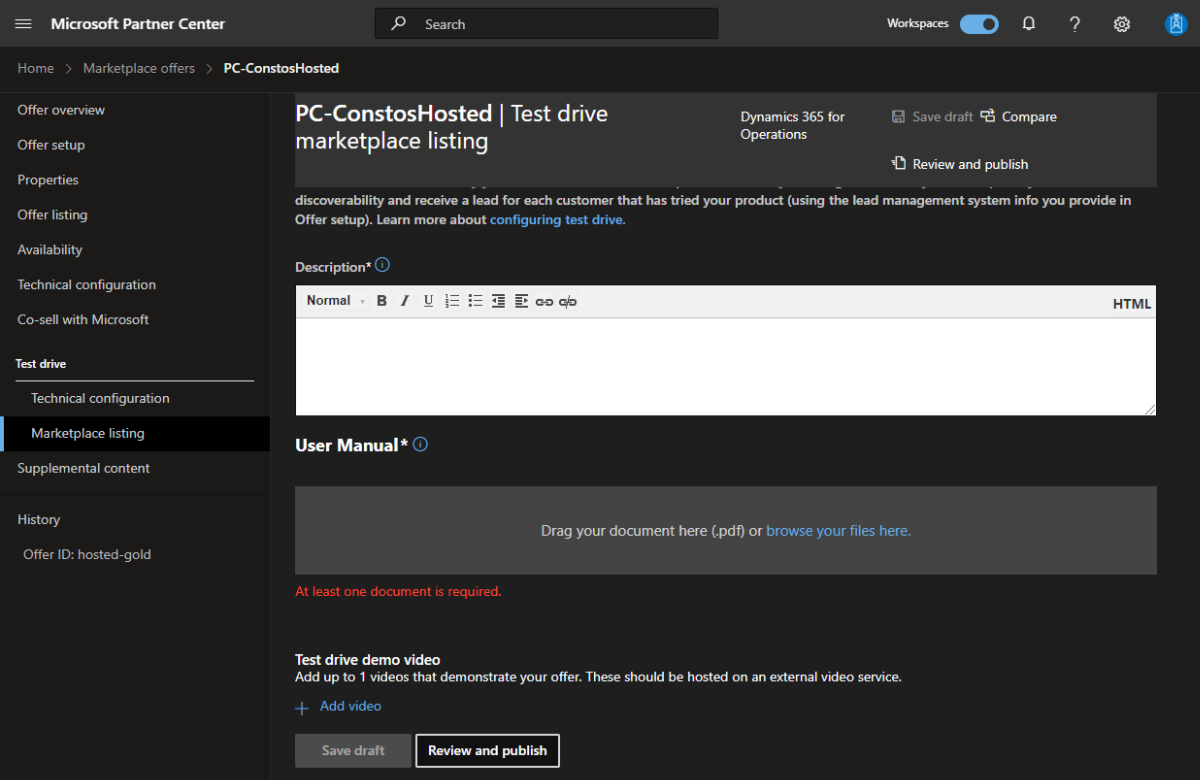
- Description – An overview of your test drive. This text will be shown to the user while the test drive is being provisioned. This field supports HTML if you want to provide formatted content (required).
- User manual – A PDF user manual that helps test drive users understand how to use your app (required).
- Test drive demo video – A video that showcases your app (optional).


Feedback
Coming soon: Throughout 2024 we will be phasing out GitHub Issues as the feedback mechanism for content and replacing it with a new feedback system. For more information see: https://aka.ms/ContentUserFeedback.
Submit and view feedback for