Uwaga
Dostęp do tej strony wymaga autoryzacji. Może spróbować zalogować się lub zmienić katalogi.
Dostęp do tej strony wymaga autoryzacji. Możesz spróbować zmienić katalogi.
DOTYCZY: Azure Data Factory
  Azure Synapse Analytics
Tip
Wypróbuj usługę Data Factory w usłudze Microsoft Fabric — rozwiązanie analityczne typu all-in-one dla przedsiębiorstw. Usługa Microsoft Fabric obejmuje wszystko, od przenoszenia danych do nauki o danych, analizy w czasie rzeczywistym, analizy biznesowej i raportowania. Dowiedz się, jak bezpłatnie rozpocząć nową wersję próbną !
In this quickstart, you use the Copy Data tool in Azure Data Factory Studio to create a pipeline that copies data from a source folder in Azure Blob Storage to a target folder.
Wymagania wstępne
Subskrypcja platformy Azure
Jeśli nie masz subskrypcji platformy Azure, przed rozpoczęciem utwórz bezpłatne konto.
Przygotowywanie danych źródłowych w usłudze Azure Blob Storage
To prepare source data by using a template:
Wybierz poniższy przycisk.

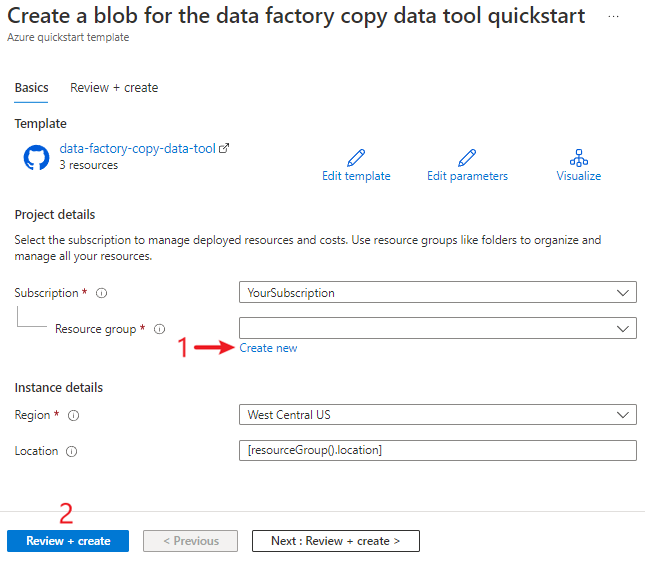
Zostanie przekierowana do strony konfiguracji w celu wdrożenia szablonu. Na tej stronie:
W obszarze Grupa zasobów wybierz pozycję Utwórz nową , aby utworzyć grupę zasobów. Możesz pozostawić wszystkie inne wartości z ich wartościami domyślnymi.
Wybierz Przejrzyj i utwórz, a następnie wybierz Utwórz, aby wdrożyć zasoby.
Uwaga
Użytkownik wdrażający szablon musi przypisać rolę do tożsamości zarządzanej. Ten krok wymaga uprawnień, które można udzielić za pośrednictwem roli Właściciel, Administrator dostępu użytkowników lub Operator tożsamości zarządzanej.
A new Blob Storage account is created in the new resource group. The moviesDB2.csv file is stored in a folder called input in Blob Storage.
Tworzenie fabryki danych
You can use your existing data factory, or you can create a new one as described in Quickstart: Create a data factory.
Use the Copy Data tool to copy data
The Copy Data tool has five pages that walk you through the task of copying data. To start the tool:
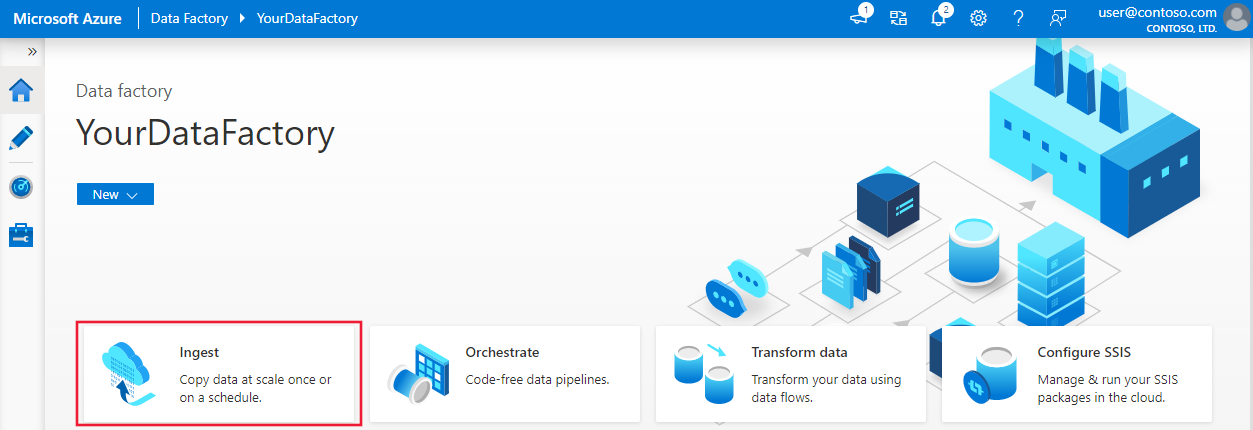
In Azure Data Factory Studio, go to your data factory.
Select the Ingest tile.
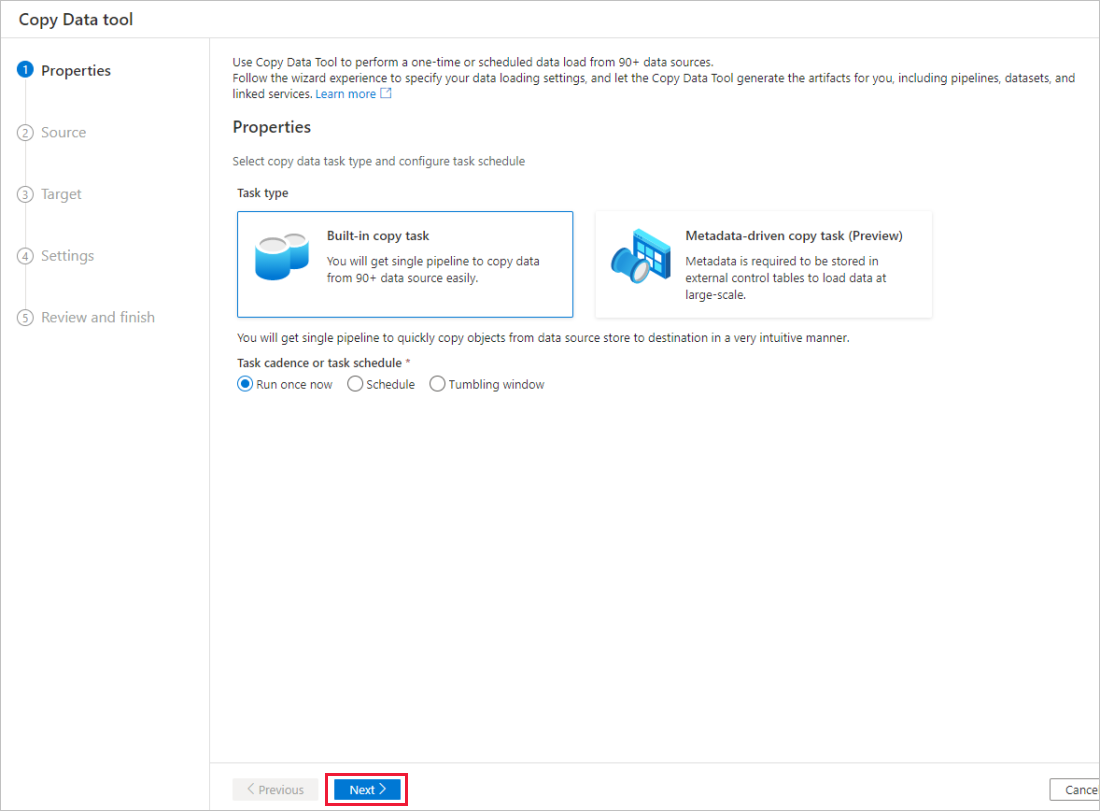
Step 1: Select the task type
On the Properties page of the Copy Data tool, choose Built-in copy task under Task type.
Wybierz Dalej.
Krok 2. Ukończenie konfiguracji źródła
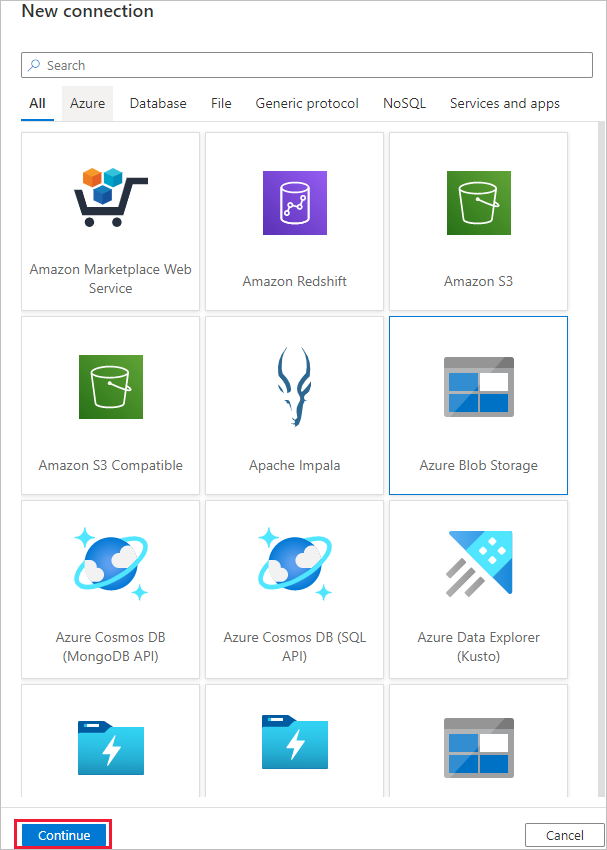
On the Source page of the Copy Data tool, select + Create new connection to add a connection.
Wybierz typ połączonej usługi, który chcesz utworzyć dla połączenia źródłowego. (The example in this quickstart uses Azure Blob Storage.) Then select Continue.
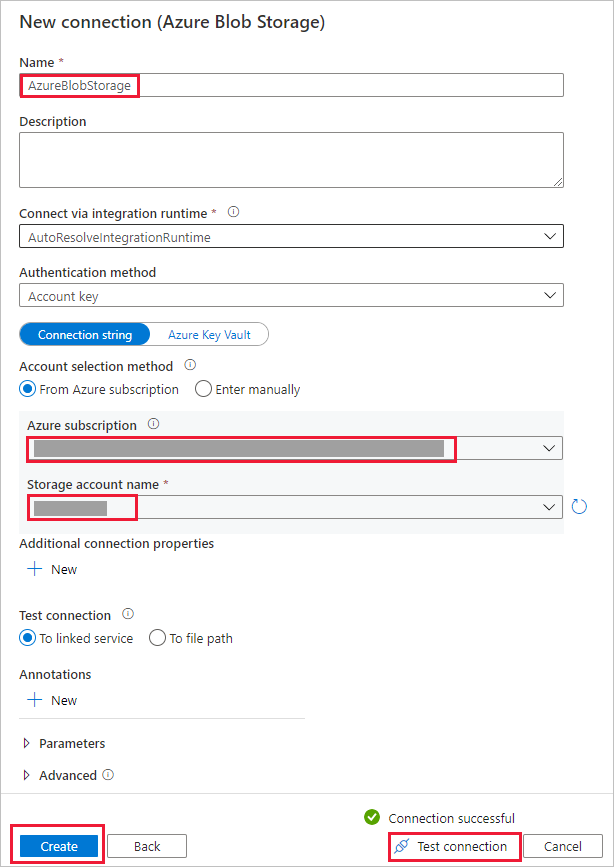
In the New connection (Azure Blob Storage) dialog:
- For Name, specify a name for your connection.
- Under Account selection method, select From Azure subscription.
- In the Azure subscription list, select your Azure subscription.
- In the Storage account name list, select your storage account.
- Select Test connection and confirm that the connection is successful.
- Wybierz Utwórz.
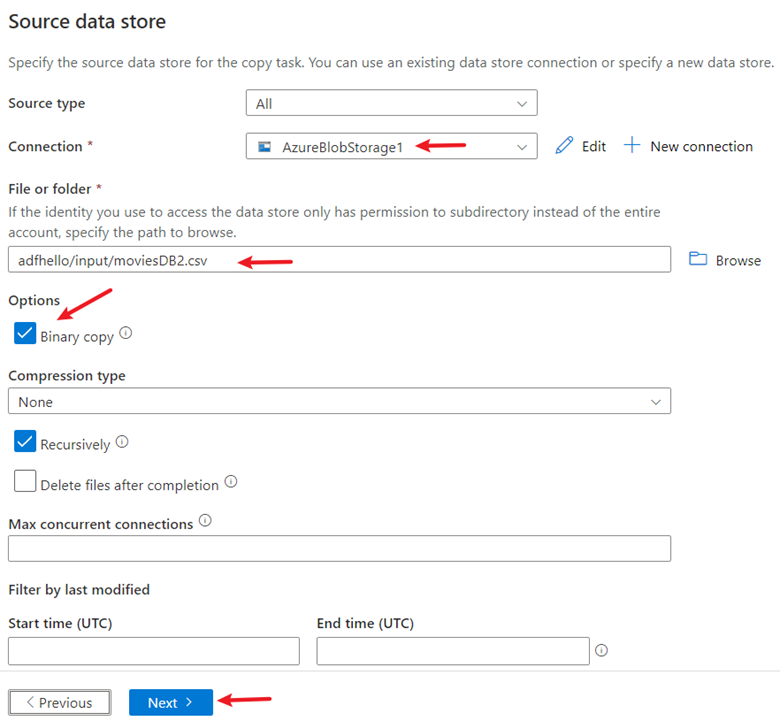
Under Source data store:
- For Connection, select the newly created connection.
- In the File or folder section, select Browse to go to the adftutorial/input folder. Select the moviesDB2.csv file, and then select OK.
- Select the Binary copy checkbox to copy the file as is.
- Wybierz Dalej.
Krok 3. Ukończenie konfiguracji docelowej
On the Target page of the Copy Data tool, for Connection, select the AzureBlobStorage connection that you created.
In the Folder path section, enter adftutorial/output.
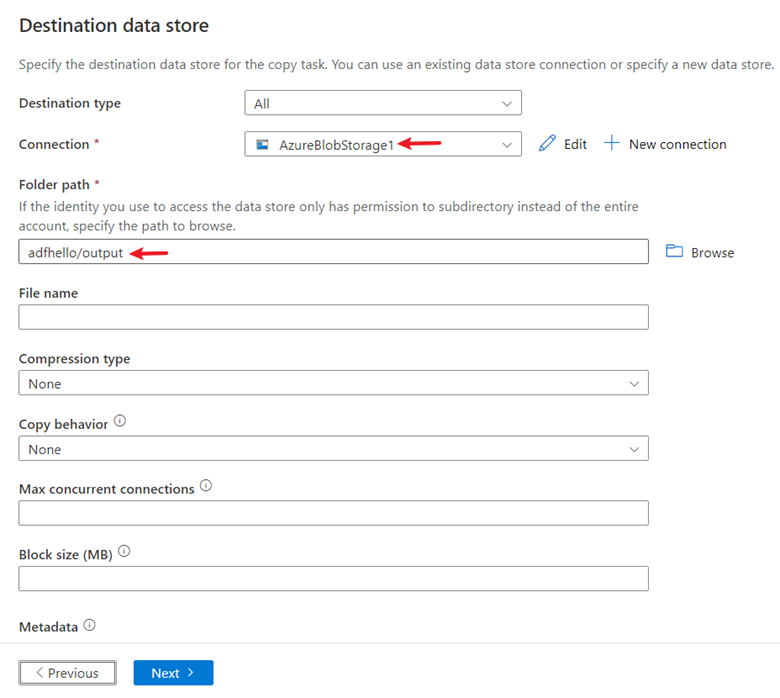
Leave other settings as default. Wybierz Dalej.
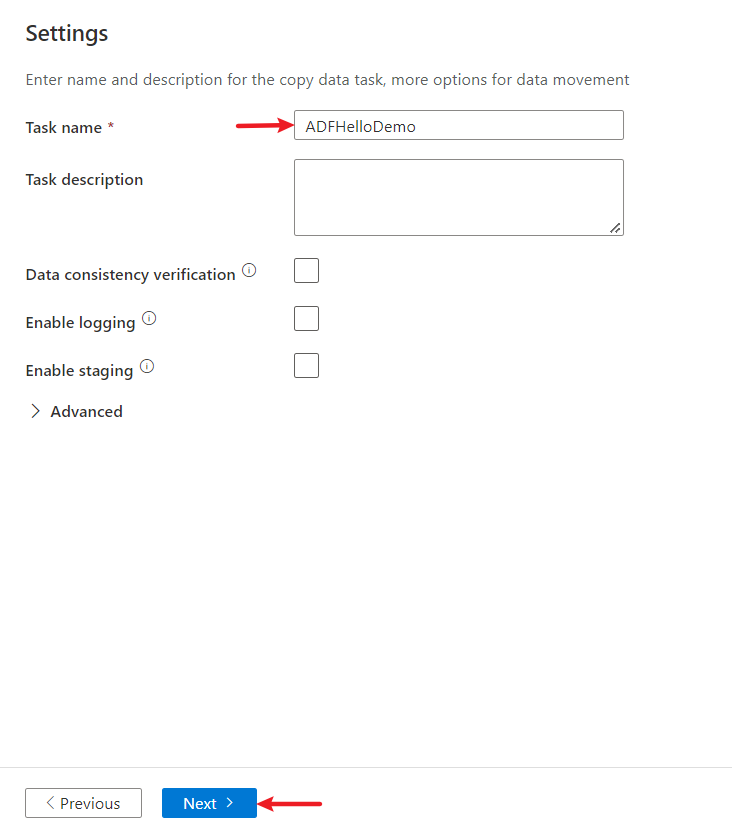
Step 4: Enter a name and description for the pipeline
On the Settings page of the Copy Data tool, specify a name for the pipeline and its description.
Select Next to use other default configurations.
Step 5: Review settings and deploy
On the Review and finish page, review all settings.
Wybierz Dalej.
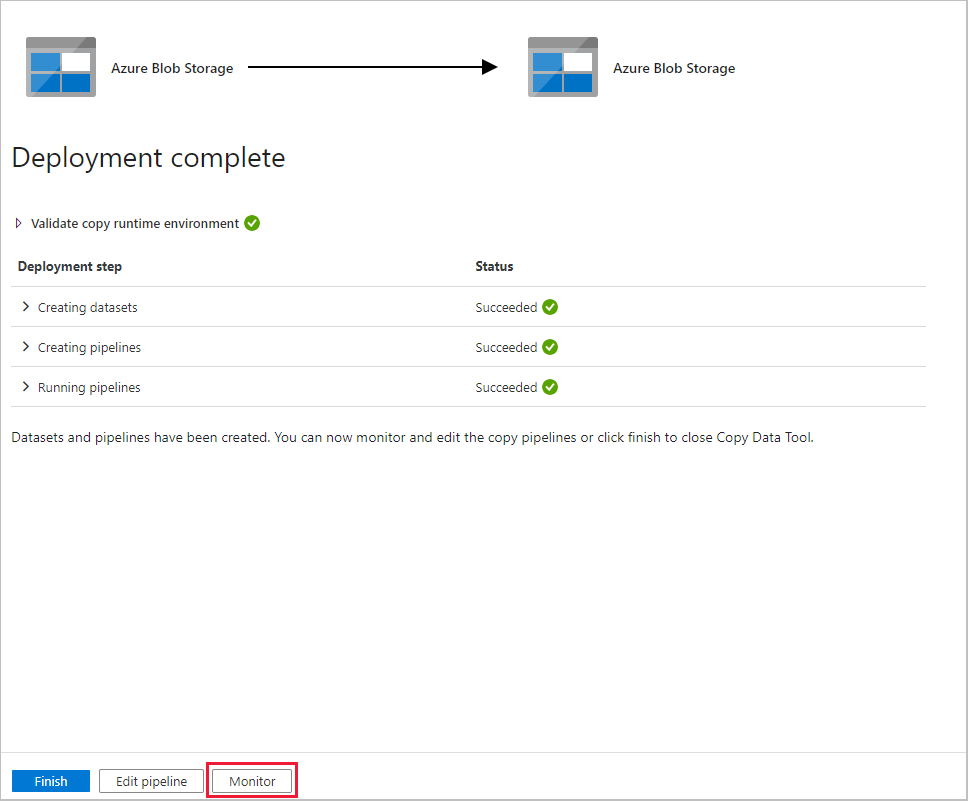
The Deployment complete page shows whether the deployment is successful.
Monitor the running results
After you finish copying the data, you can monitor the pipeline that you created:
On the Deployment complete page, select Monitor.
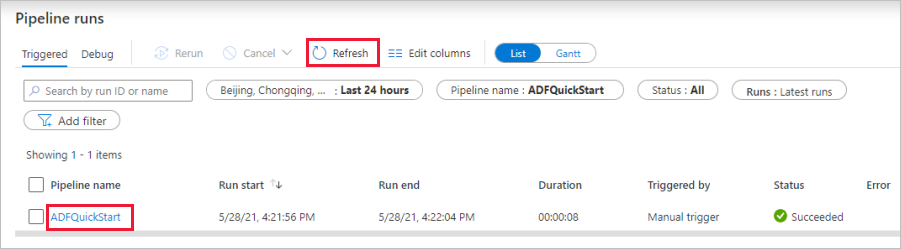
The application switches to the Monitor tab, which shows the status of the pipeline. Select Refresh to refresh the list of pipelines. Select the link under Pipeline name to view activity run details or to rerun the pipeline.
On the page that shows the details of the activity run, select the Details link (eyeglasses icon) in the Activity name column for more details about the copy operation. For information about the properties, see the overview article about the copy activity.
Powiązana zawartość
The pipeline in this sample copies data from one location to another location in Azure Blob Storage. To learn about using Data Factory in more scenarios, see the following tutorial: