Deploy Microsoft Defender for Cloud Apps
Microsoft Defender for Cloud Apps (previously known as Microsoft Cloud App Security) helps organizations take advantage of the benefits of cloud applications while maintaining control of their corporate resources. It works by improving visibility of cloud activity and helping to increase the protection of corporate data. This unit walks you through the steps to set up and work with Microsoft Defender for Cloud Apps.
Microsoft Defender for Cloud Apps prerequisites
Before companies deploy Microsoft Defender for Cloud Apps, they should ensure the following prerequisites are in place:
An organization must be in compliance for licensing Microsoft Defender for Cloud Apps. To do so, it must obtain a license for every user protected by Microsoft Defender for Cloud Apps.
Note
Microsoft Defender for Cloud Apps is a security tool and therefore doesn't require Office 365 productivity suite licenses. For Office 365 Cloud App Security (Microsoft Defender for Cloud Apps only for Office 365), see Office 365 Cloud App Security licensing.
After you have a license for Microsoft Defender for Cloud Apps, you'll receive an email with activation information and a link to the Microsoft Defender for Cloud Apps portal.
To set up Microsoft Defender for Cloud Apps, you must be a Global Administrator or a Security Administrator in Microsoft Entra ID or Microsoft 365. A user with an administrator role has the same permissions across all the cloud apps that your organization subscribed to. This situation occurs regardless of the location from which an administrator assigned the role. For example, the Microsoft 365 admin center, the Microsoft Entra admin center, or Windows PowerShell.
Note
Azure Active Directory (Azure AD) is now Microsoft Entra ID. Learn more.
Access the Defender for Cloud Apps portal
You can access the Microsoft Defender for Cloud Apps portal in either of two ways - through the Microsoft 365 admin center, or by navigating directly to https://portal.cloudappsecurity.com.
In the Microsoft 365 admin center, select Show all in the navigation pane, and then under the Admin centers section, select Security. The Microsoft Defender portal should open.
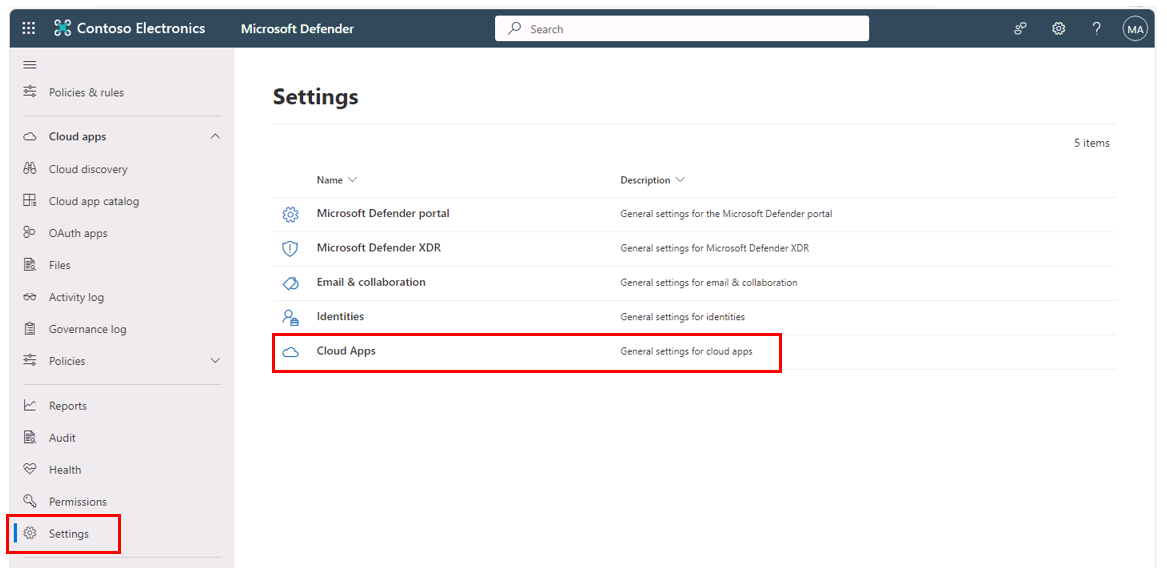
In the Microsoft Defender portal, the Cloud Apps section in the left-hand navigation pane provides links to the Microsoft Defender for Cloud Apps features. Select Settings to navigate to the Settings page.
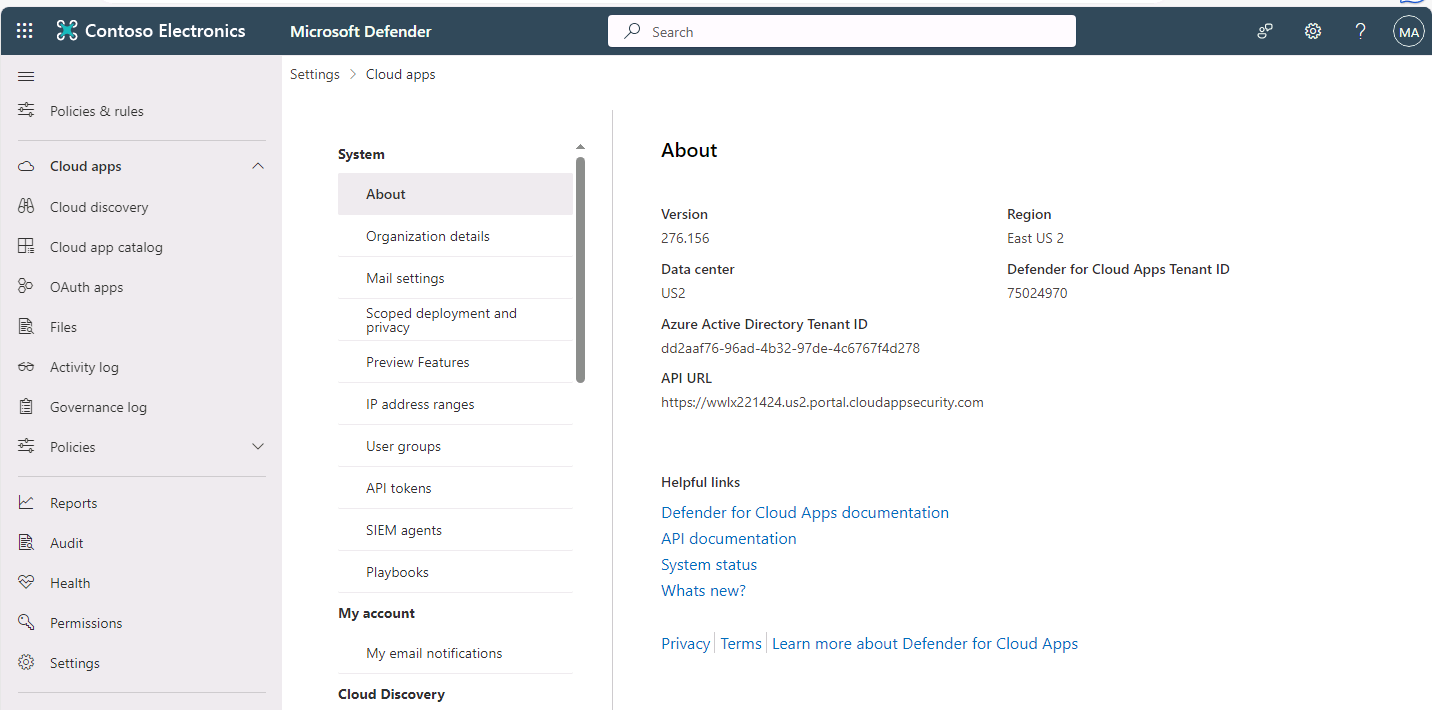
On the Settings page, select Cloud Apps to navigate to the Settings page for Cloud Apps.
Note
Microsoft 365 Defender is now Microsoft Defender XDR (Extended Detection and Response).
Organizations should complete the following steps to deploy Microsoft Defender for Cloud Apps. The following list identifies the required and recommended steps:
- Required. Set instant visibility, protection, and governance actions for your apps.
- Recommended. Protect sensitive information with DLP policies.
- Required. Control cloud apps with policies.
- Required. Set up Cloud Discovery.
- Recommended. Deploy Conditional Access App Control for catalog apps.
- Recommended. Personalize your experience.
- Recommended. Organize the data according to your needs.
The following sections outline each of these steps in greater detail.
Step 1. Set instant visibility, protection, and governance actions for your apps
This step is a required task. Complete the following steps to connect apps to Microsoft Defender for Cloud Apps:
- In the Microsoft Defender portal, select Settings in the left-hand navigation pane.
- On the Settings page, in the list of settings, select Cloud Apps.
- On the Settings | Cloud apps page, under the Connected apps section in the middle navigation pane, select App Connectors.
- On the App connectors page, select +Connect an app on the menu bar. Select the appropriate app in the drop-down menu that appears. Doing so initiates the App Connectors wizard.
- On the Instance name page, enter a value in the Instance name field and then select Next.
- Complete the remaining steps in the wizard to create your connection to the app. The app instructions can vary by app.
All communication between Microsoft Defender for Cloud Apps and connected apps is encrypted using HTTPS. Each service has its own framework and API limitations. For example, throttling, API limits, dynamic time-shifting API windows, and others.
Step 2. Protect sensitive information with DLP policies
This step is a recommended task. Complete the following steps to enable file monitoring and create file policies:
- In the Microsoft Defender portal, select Settings in the left-hand navigation pane.
- On the Settings page, in the list of settings, select Cloud Apps.
- On the Settings | Cloud apps page, under the Information Protection section in the middle navigation pane, select Files.
- On the Files page, if the Enable file monitoring checkbox is blank, then select it now and then select Save. This option enables Microsoft Defender for Cloud Apps to see files in your SaaS apps.
- If you use Microsoft Purview Information Protection sensitivity labels, then on the Settings | Cloud apps page, in the middle navigation pane under the Information Protection section, select Microsoft Information Protection.
- On the Microsoft Information Protection page, select the required settings per your organization's business requirements and then select Save.
- Proceed to the next step to create file policies to meet your organizational requirements.
Caution
For third-party apps, verify the current load doesn't exceed the app's maximum number of allowed API calls.
Step 3. Control cloud apps with policies
This step is a required task. Complete the following steps to create policies in Microsoft Defender for Cloud Apps:
- In the Microsoft Defender portal, the Cloud Apps section in the left-hand navigation pane provides links to the Microsoft Defender for Cloud Apps features.
- Under the Cloud Apps section in the left-hand navigation pane, select Policies, and then select Policy management.
- On the Policies page, note the tabs at the top of the page (Threat detection, Information protection, Conditional access, Shadow IT, and All policies). The All policies tab is displayed by default. You can leave this tab selected, or select one of the tabs to the left of it that relates to a specific risk category.
- In the selected risk category tab, select +Create policy on the menu bar. A drop-down menu appears that displays the policy types available for the selected risk category. Select the appropriate policy type.
- On the Create [policy type] page, select the Policy template of your choice, or whether you don't want to use a template (No template). Enter the Policy name, and then configure the remaining fields to customize the policy per your organization's requirements. Select the Create button at the bottom of the page when you finish.
- On the Policies page, select the policy that you created to see the relevant matches (activities, files, alerts).
Tip
To cover all your cloud environment security scenarios, create a policy for each risk category.
Organizations can use policies to help monitor trends, see security threats, and generate customized reports and alerts. With policies, they can create governance actions, and set data loss prevention and file-sharing controls.
Step 4. Set up Cloud Discovery
This step is a required task. Complete the following steps to enable Microsoft Defender for Cloud Apps to view your cloud app use.
- Integrate with Microsoft Defender for Endpoint to automatically enable Defender for Cloud Apps to monitor your Windows 10 and Windows 11 devices inside and outside your corporation.
- If you use Zscaler, integrate it with Microsoft Defender for Cloud Apps. If an organization works with both Microsoft Defender for Cloud Apps and Zscaler, it can integrate the two products to enhance its Cloud Discovery experience. Zscaler, as a standalone cloud proxy, monitors an organization's traffic. By doing so, the organization can set policies for blocking transactions.
- In the Microsoft Defender portal, select Settings in the left-hand navigation pane.
- On the Settings page, in the list of settings, select Cloud Apps.
- On the Settings | Cloud apps page, under the Cloud Discovery section in the middle navigation pane, select Automatic log upload.
- On the Automatic log upload page, the Data sources tab is selected by default. Under this tab, select +Add data source.
- On the Add data source window, enter the data source Name, select the Source and Receiver type, and then select Add.
- On the Automatic log upload page, select the Log collectors tab.
- On the Log collectors tab, select +Add log collector on the menu bar.
- On the Create log collector window, enter the log collector Name, the Host IP address or FQDN (fully qualified domain name), and the Data source. Select Create.
- You can now create either a snapshot or continuous Cloud Discovery report. To achieve full coverage, create a continuous Cloud Discovery report. On the Settings | Cloud apps page, under the Cloud Discovery section in the middle navigation pane, select either Snapshot reports or Continuous reports, and then complete the steps as directed.
Why should you configure Cloud Discovery reports? Having visibility into Shadow IT in your organization is critical. After your organization analyzes the logs, you can easily find which cloud apps your organization uses, by which people, and on which devices.
Step 5. Deploy Conditional Access App Control for catalog apps
This step is a recommended task. Complete the following steps to deploy Conditional Access App Control for catalog apps:
- Configure your IdP to work with Microsoft Defender for Cloud Apps. If you have Microsoft Entra ID, you can use inline controls such as Monitor only and Block downloads. These controls work for any catalog app out of the box.
- In the Microsoft Defender portal, select Settings in the left-hand navigation pane.
- On the Settings page, in the list of settings, select Cloud Apps.
- On the Settings | Cloud apps page, under the Connected apps section in the middle navigation pane, select Conditional Access App Control apps.
- On the Conditional Access App Control apps page, select the deployment instructions link that appears at the top of the page to enable Conditional Access App Control capabilities on your apps. These instructions are outside the scope of this training. However, you should review them to become familiar with the steps involved, which include:
- Configure Microsoft Entra ID to work with Defender for Cloud Apps.
- Sign in to each app using a user scoped to the policy.
- Verify you configured the apps to use access and session controls.
- Enable the app for use in your organization.
- Test the deployment.
- Select the +Add option on the menu bar to add Conditional Access App Control apps. In the Add a SAML application with your identity provider window that appears, select the Search for an app field, and then select the appropriate SAML application in the drop-down menu that appears. Select the Start wizard button, and then complete the required steps to add the SAML application with your identity provider to enable real-time monitoring and control.
Access and session controls in Microsoft Defender for Cloud Apps work with any web application. These apps can be both custom applications and apps from the Cloud app catalog.
Additional reading. For more information on configuring session controls for custom line-of-business apps, nonfeatured SaaS apps, and on-premises apps, see Onboard and deploy Conditional Access App Control for any app.
Warning
Using Conditional Access App Control in parallel with another CASB solution can potentially lead to an app being proxied twice, causing latency or other errors. Therefore, Microsoft recommends that organizations progressively migrate apps and policies to Conditional Access App Control. Doing so creates the relevant session or access policies in Defender for Cloud Apps as you go.
Step 6. Personalize your experience
This step is a recommended task. Some features work best when organizations customize them to meet their unique requirements. Complete the following steps to add your organization details:
To enter email settings
Complete the following steps to provide a better experience for your users with your own email templates:
- In the Microsoft Defender portal, select Settings in the left-hand navigation pane.
- On the Settings page, in the list of settings, select Cloud Apps.
- On the Settings | Cloud apps page, under the System section in the middle navigation pane, select Mail settings.
- On the Mail settings page, under Email sender identity, select either:
- Default settings. This option uses the following option settings:
- Display name. Microsoft Defender for Cloud Apps
- "From" email address. no-reply@cloudappssecurity.com
- Reply-to email address. no-reply@cloudappssecurity.com
- Custom settings. This option enables you to enter custom values for:
- Display name
- "From" email address
- Reply-to email address
- For custom settings, you must select the check box acknowledging that you agree to the MailChimp terms and conditions.
- Default settings. This option uses the following option settings:
- Under Email design, select the Upload a template button. Browse to the appropriate folder location and upload your organization's email template.
- Select Save.
To set email notifications
Complete the following steps to customize the email notifications that you want to receive:
- In the Microsoft Defender portal, select Settings in the left-hand navigation pane.
- On the Settings page, in the list of settings, select Cloud Apps.
- On the Settings | Cloud apps page, under the My account section in the middle navigation pane, select My email notifications.
- On the My email notifications page, configure the methods you want to set for system notifications for your user account.
- Select Save.
To customize the score metrics
Complete the following steps to customize the risk score metrics to fit your organization's preferences:
- In the Microsoft Defender portal, select Settings in the left-hand navigation pane.
- On the Settings page, in the list of settings, select Cloud Apps.
- On the Settings | Cloud apps page, under the Cloud Discovery section in the middle navigation pane, select Score metrics.
- On the Score metrics page, configure your organization's preferences and priorities for each app to customize the calculation of discovered app scores.
- Select Save when you finish.
Step 7. Organize the data according to your needs
This step is a recommended task. Organizations have different needs and preferences, especially when it comes to organizing data. Complete the following steps to customize the control of features in the Microsoft Defender for Cloud Apps console:
To create IP address tags
With IP tags, it's easier to create policies that fit an organization's needs, accurately filter data, and create continuous reports. Complete the following steps to create IP address tags:
- In the Microsoft Defender portal, select Settings in the left-hand navigation pane.
- On the Settings page, in the list of settings, select Cloud Apps.
- On the Settings | Cloud apps page, under the System section in the middle navigation pane, select IP address ranges.
- On the IP address ranges page, select +Add IP address range on the menu bar.
- On the New IP address range window, enter the IP range details, location, tags, and category.
- Select Create.
To create continuous reports
Complete the following steps to create continuous reports:
- In the Microsoft Defender portal, select Settings in the left-hand navigation pane.
- On the Settings page, in the list of settings, select Cloud Apps.
- On the Settings | Cloud apps page, under the Cloud Discovery section in the middle navigation pane, select Continuous reports.
- On the Continuous reports page, select +Create report on the menu bar.
- On the Create continuous report page, enter the report details.
- Select Create.
To add domains
Complete the following reports to add business units:
- In the Microsoft Defender portal, select Settings in the left-hand navigation pane.
- On the Settings page, in the list of settings, select Cloud Apps.
- On the Settings | Cloud apps page, under the System section in the middle navigation pane, select Organization details.
- On the Organization details page, in the Managed domains field, add your organization's internal domains.
- Select Save.