Nota
O acesso a esta página requer autorização. Pode tentar iniciar sessão ou alterar os diretórios.
O acesso a esta página requer autorização. Pode tentar alterar os diretórios.
Important
Azure Data Studio is retiring on February 28, 2026. Recomendamos que você use Visual Studio Code. Para obter mais informações sobre como migrar para o Visual Studio Code, visite O que está acontecendo com o Azure Data Studio?
Applies to:![]() SQL Server
SQL Server![]() Azure SQL Database
Azure SQL Database![]() Azure SQL Managed Instance
Azure SQL Managed Instance
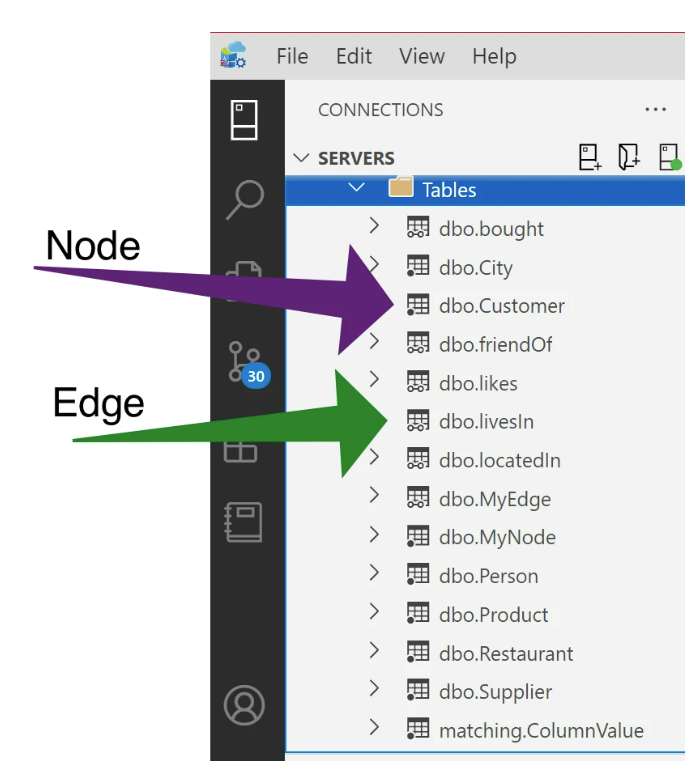
Graph tables establish relationships between entities in your database using node and edge table relationships. No Azure Data Studio, você pode criar facilmente essas relações diretamente na GUI sem digitar manualmente longas linhas de código T-SQL. To learn more about graph tables, check out this documentation on SQL Graph Architecture. The table type can be seen in the Connections Pane by the icon shown to the left of the table name. Um único ponto representa uma tabela de gráfico de nó, enquanto os dois pontos não sombreados representam tabelas de gráfico de aresta, tal como mostrado abaixo.
Creating a graph table is done directly in the Properties pane. Uma nova tabela deve ser criada para criar tabelas gráficas. Graph tables can't be implemented for existing tables.
In this example below, we use the table designer GUI to create two node tables: Person, City, and an edge table called "lives" with an edge constraint to establish the relationship between the two node tables (for example: Personlives inCity). For a T-SQL script version of this example, see Create a graph database and run some pattern matching queries using T-SQL.
Create the node tables
Create a table and name it City. Before saving this new table, in the Table Properties pane, change the Graph Table option to Node from the dropdown.
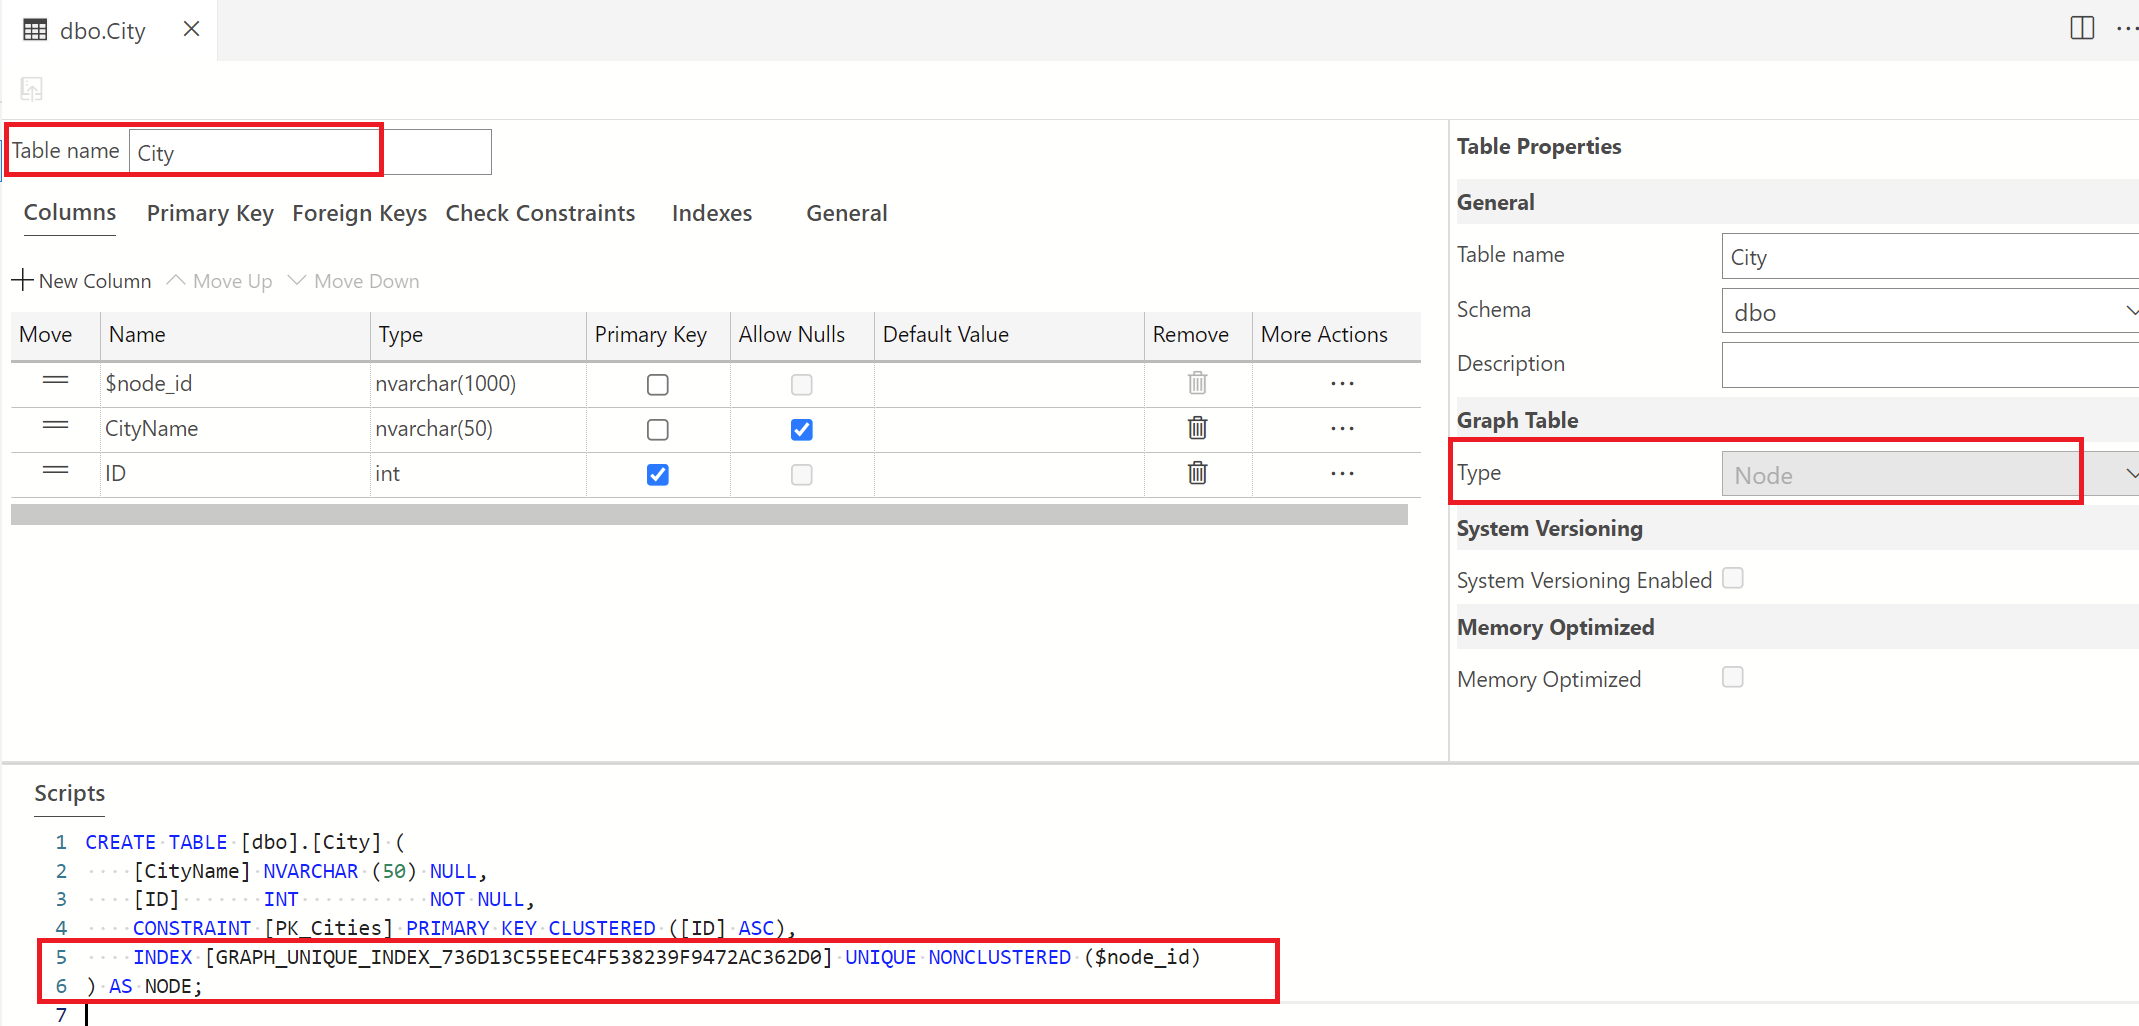
The script is updated to include the "as node" syntax.
Once this configuration is set, publish this update to the database. Once published, a new column for the node ID is created, and this ID is referenced in the script pane, as shown above.
Create another node table and name it Person, with the same settings as above.

Create the edge table
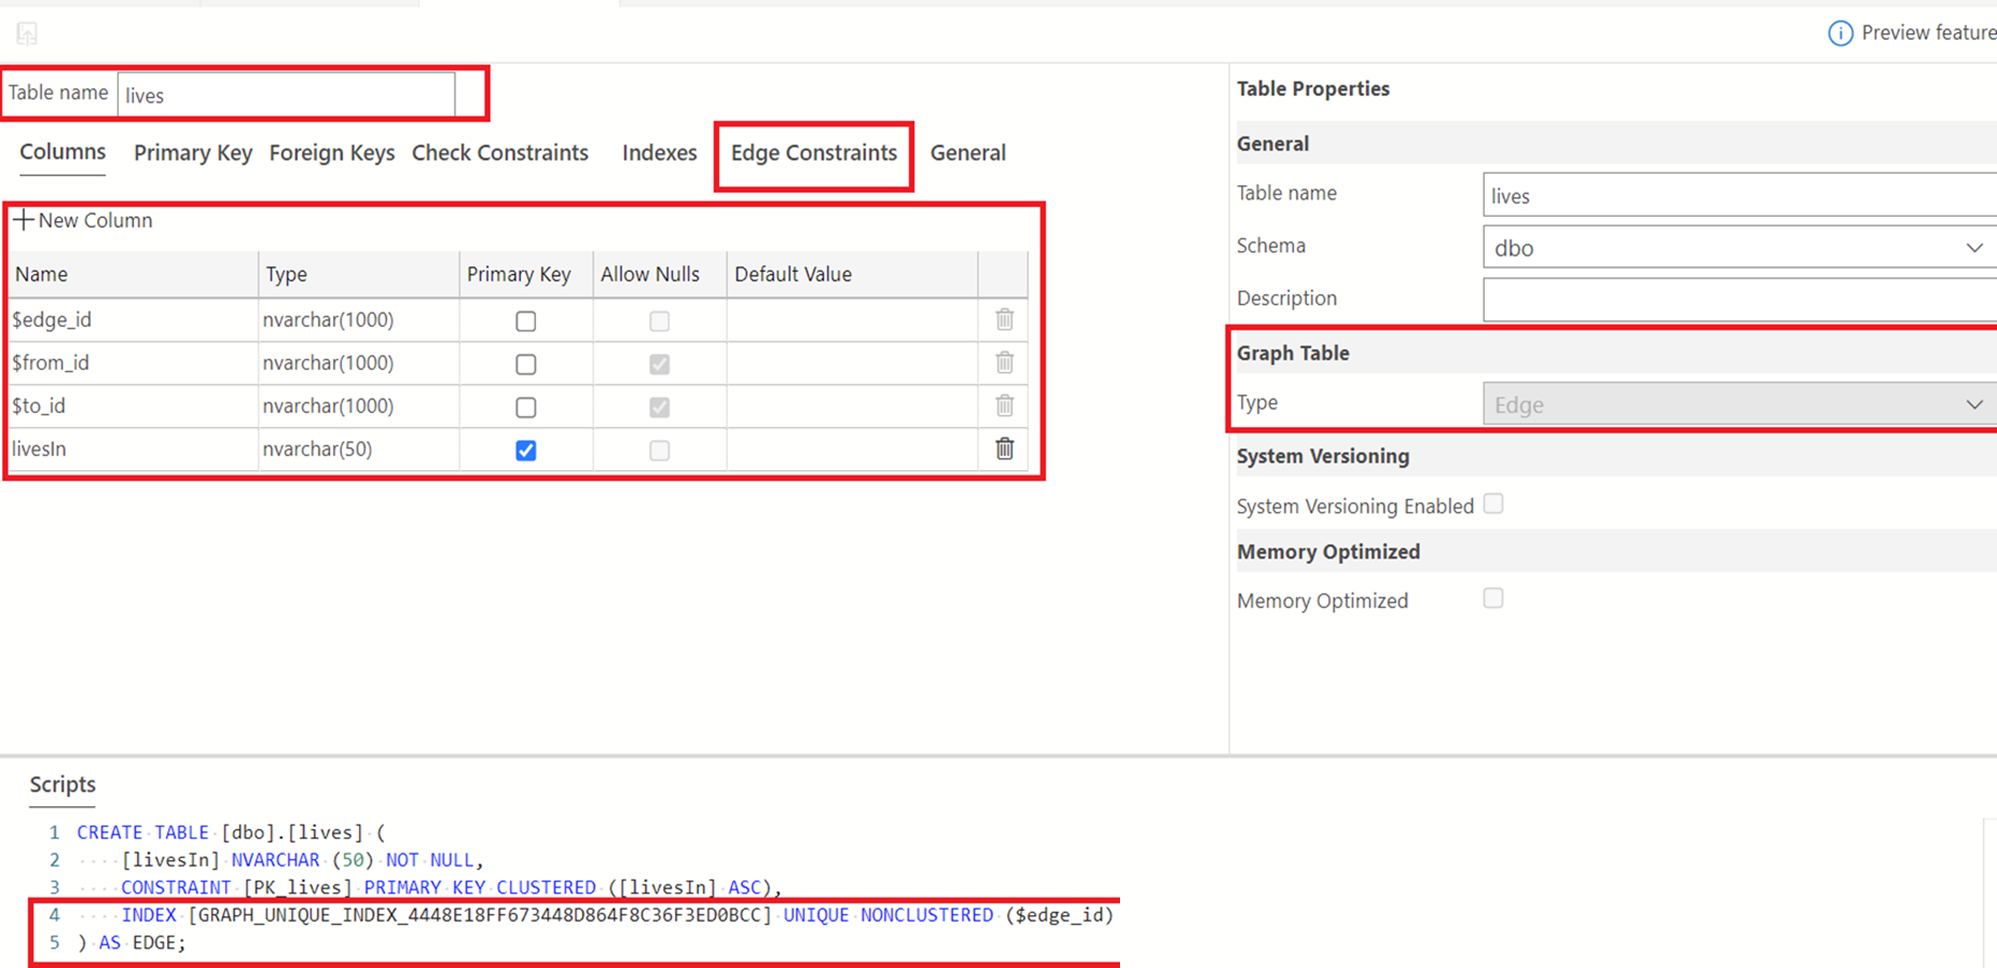
As mentioned earlier, we create our edge table, "lives." To do this, right-click on the Tables folder to create a new table. Change the name of this table from its default to "lives." To indicate that this is an edge table, select the Graph Table Type dropdown in the Table Properties pane and select "Microsoft Edge." See below.
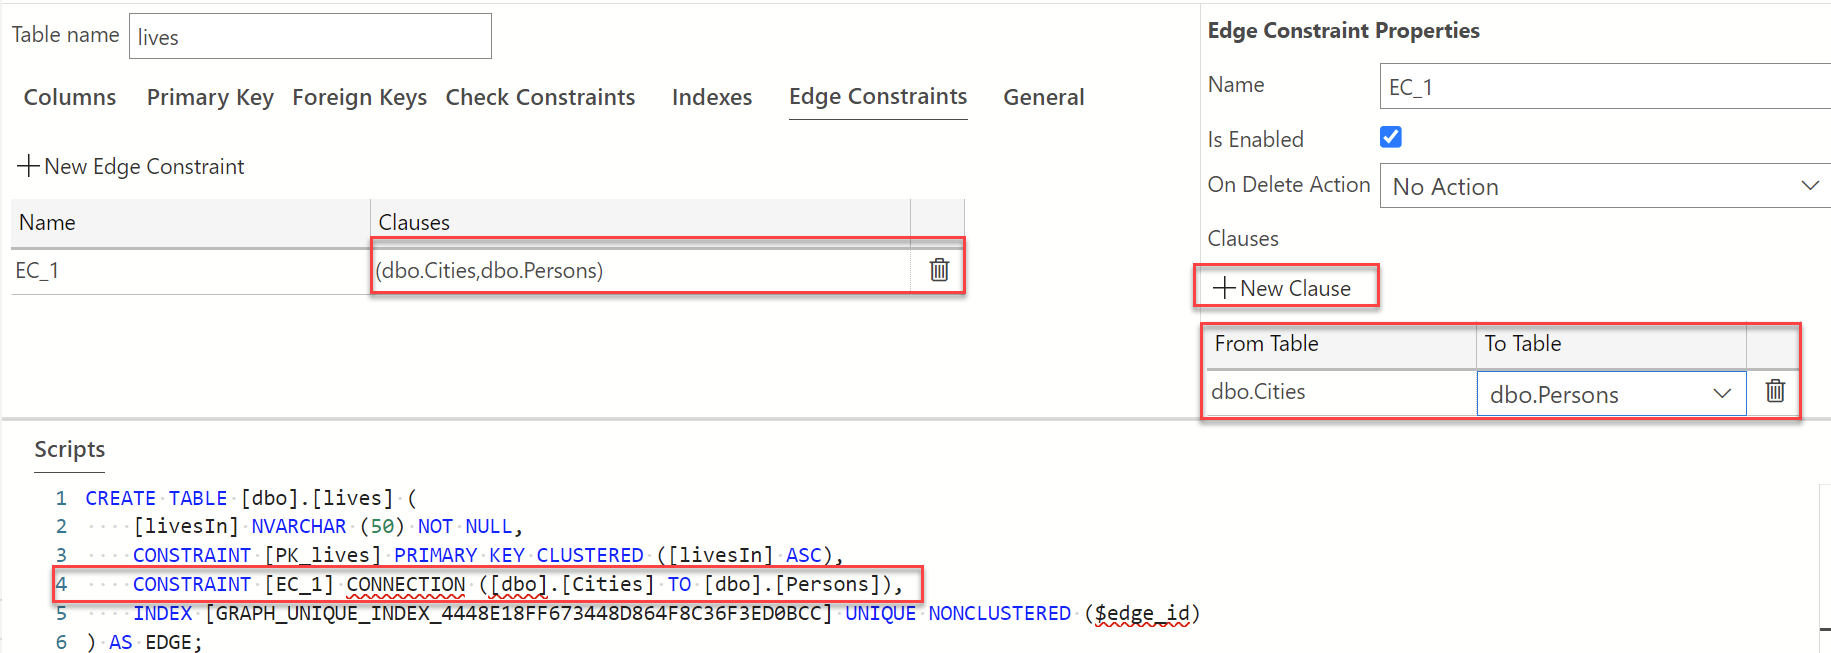
To create the relationship between the node and edge graphs, select "Microsoft Edge Constraints." Refer to the edge constraints documentation to learn more about edge constraints. Selecione o sinal de adição ao lado de "Nova restrição do Microsoft Edge" para criar uma nova restrição. Um nome padrão para "EC-1" é fornecido, como visto abaixo. Feel free to change the name for you, please. Neste tutorial, deixamos isso como está.
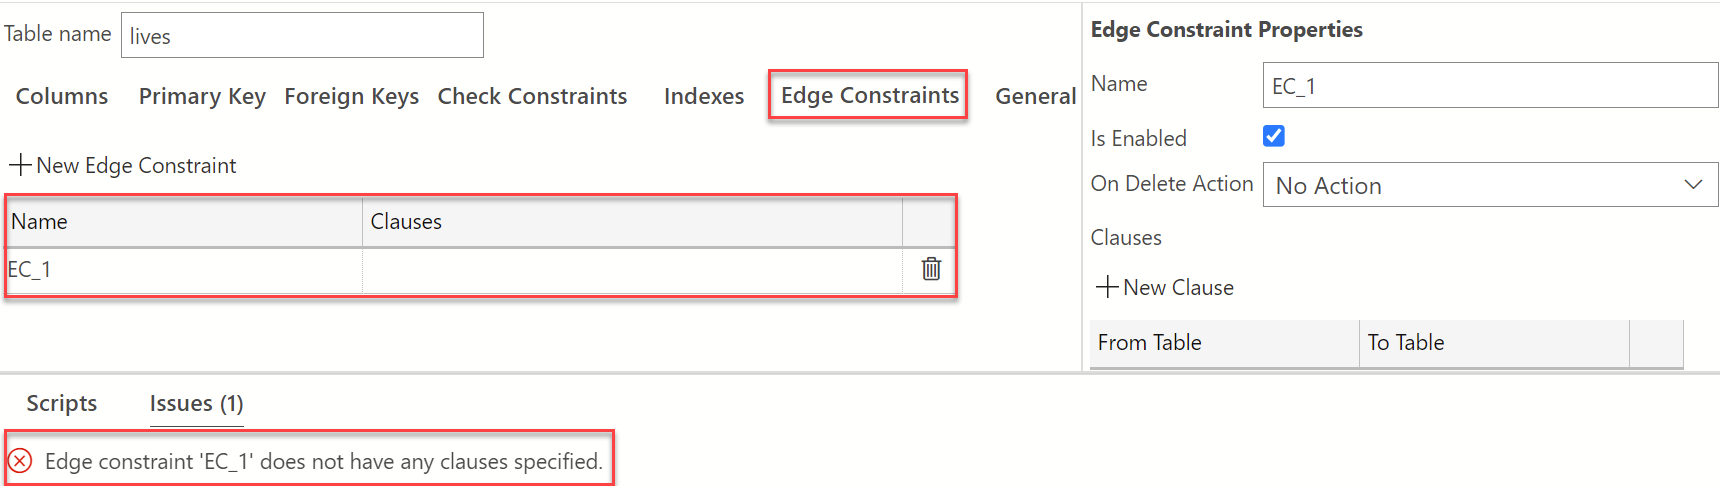
Como visto no painel de script na imagem acima, um aviso indica que uma cláusula não foi especificada. We must create the clause to establish the edge constraint between our Person and City node graph tables. No painel "Propriedades de Restrição do Microsoft Edge", em Cláusulas, selecione +Nova Cláusula. The From and To values will now appear in the clauses section. Hover over the From Table to view the dropdown, and select dbo.Persons and from the To Table drop-down, select dbo.City. Be sure to publish changes to save your work. Veja abaixo a visão geral de como deve ser a exibição do Designer de Tabela depois de executar as etapas acima.


You can add as few or as many constraints as needed depending on the nature of the relationships between the different tables in your database.