Notă
Accesul la această pagină necesită autorizare. Puteți încerca să vă conectați sau să modificați directoarele.
Accesul la această pagină necesită autorizare. Puteți încerca să modificați directoarele.
Use Power Query to connect to data, select the tables or files you need, and prepare them for use. This overview explains the connection stages in Power Query Desktop and Power Query Online and helps you choose an Online get data module.
For product-specific entry points, such as the ribbon command in Excel or Dataflow Gen2, see Where to get data. For source-specific settings and supported authentication, use the connector documentation.
The stages differ between Power Query Desktop and Power Query Online. In Power Query Desktop, connection settings and authentication are separate stages, and after previewing data, you choose a query destination. In Power Query Online, connection settings and credentials are combined in a reusable connection, and selected data always opens in the Power Query editor before you save it.
Important
Not every connector uses every stage of the get data experience. For the steps required by a specific connector, see its documentation in Connectors in Power Query.
Power Query Desktop experience
The stages for getting data in the Power Query Desktop experiences are:
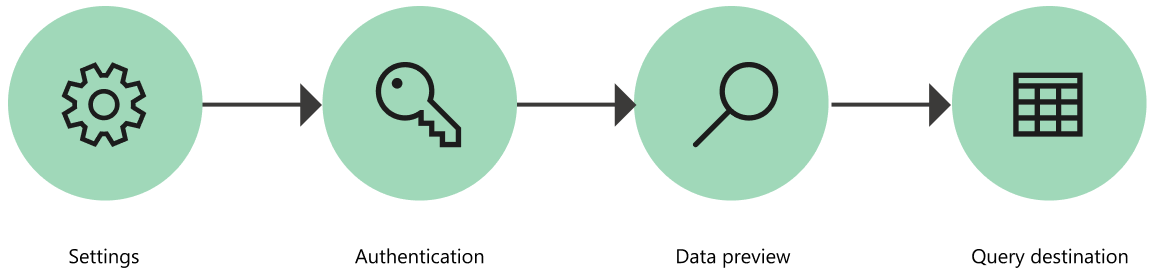
1. Connection settings
Most connectors initially require at least one parameter to initialize a connection to the data source. For example, the SQL Server connector requires at least the host name to establish a connection to the SQL Server database.
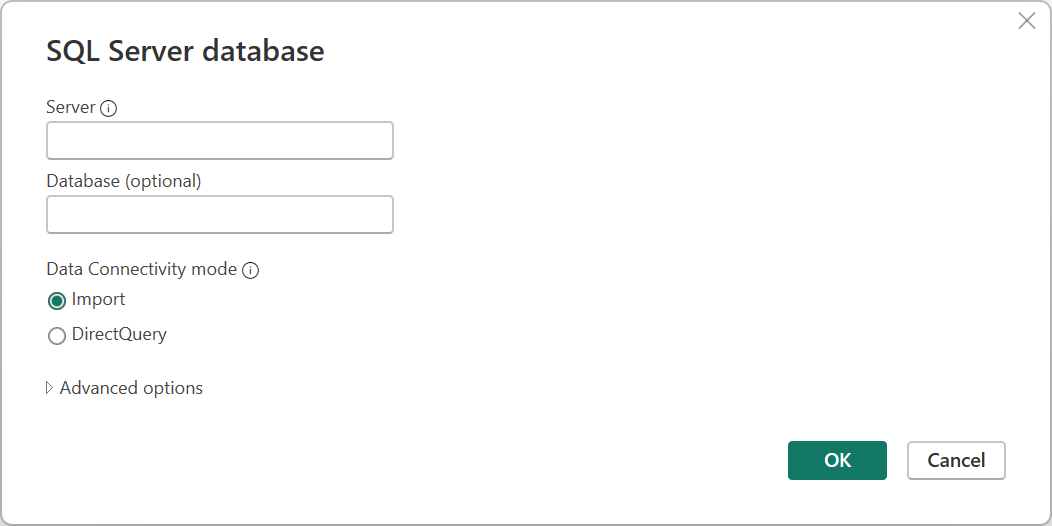
To connect to an Excel file, Power Query requires the file path to locate the file.
Use connector parameters to establish a connection to a data source. Together with the connector, these parameters define a data source path.
Note
Some connectors don't require any parameters. These connectors are called singleton connectors and have only one data source path available per environment. Some examples are Adobe Analytics, Mailchimp, and Google Analytics.
For a full list of available connectors and the products they support, see Connectors in Power Query.
2. Authentication
Power Query authenticates every connection. The authentication methods vary by connector, and some connectors offer multiple authentication methods.
The currently available methods of authentication for Power Query are:
- Anonymous: Commonly used when connecting to a data source that doesn't require user authentication, such as a webpage or a file available over public HTTP.
- API Key: Power Query accepts a single API key for authentication.
- Basic: Power Query accepts a username and password sent in base64 encoding.
- Database: This method is only available in some database connectors.
- Organizational account or Microsoft account: This method is also known as OAuth 2.0.
- Service Principal: Uses Microsoft Entra ID for authentication.
- Windows: Can be implicit or explicit.
For example, the available authentication methods for the SQL Server database connector are Windows, Database, and Microsoft account.
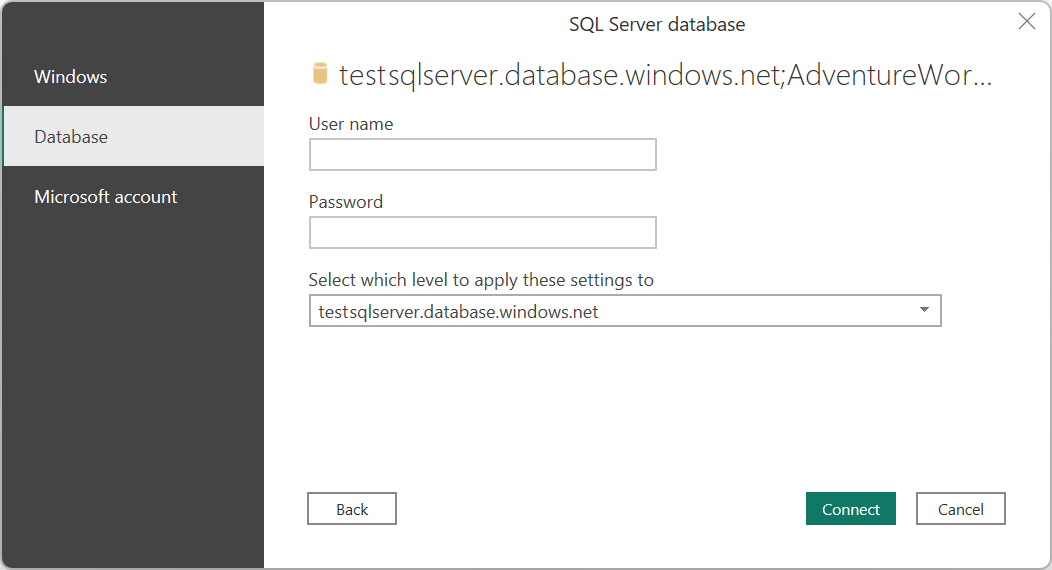
For information about how authentication works, how to change credentials, and how to troubleshoot authentication issues, see Connector authentication.
3. Data preview
The data preview stage lets you preview and select your data.
Depending on the connector that you use, you can preview data by using either:
- Navigator window
- Table preview dialog box
Navigator window (navigation table)
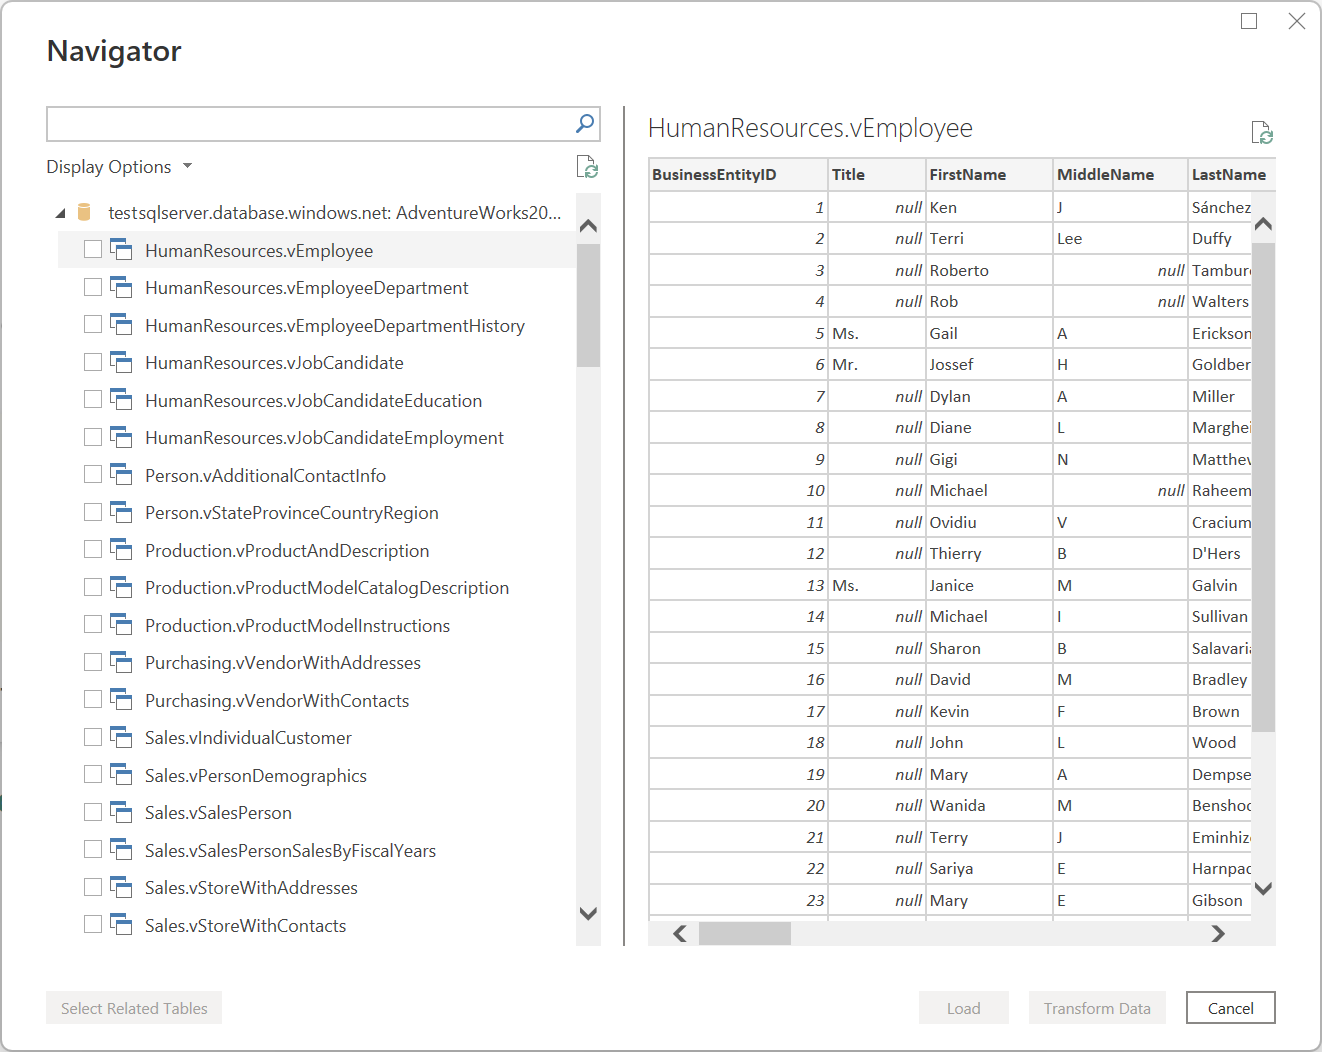
The Navigator window consists of two main sections:
The object selection pane appears on the left side of the window. You can interact with and select these objects.
Note
For Power Query in Excel, select the Select multiple items option from the upper-left corner of the Navigator window to select more than one object at a time in the object selection pane. The list of objects in Power Query Desktop is limited to 10,000 items. This limit doesn't exist in Power Query Online. For a workaround in Power Query Desktop, go to Object limitation workaround.
The data preview pane on the right side of the window shows a preview of the data from the object you selected.
Object limitation workaround
The Navigator in Power Query Desktop has a fixed limit of 10,000 objects. This limit doesn't apply to Power Query Online.
Use the following workaround:
Right-click the root node of the Navigator, and then select Transform Data.
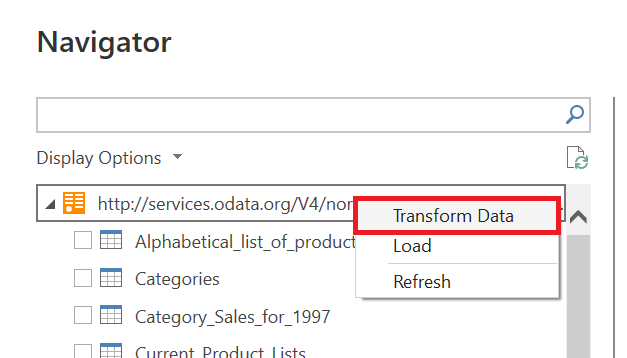
The Power Query editor opens with the full navigation table in the table preview area. This view doesn't have a limit on the number of objects. Use filters or other Power Query transforms to find the rows you want, for example by filtering the Name column.
When you find the item you want, you can access the contents by selecting the data link (such as the Table link in the following image).
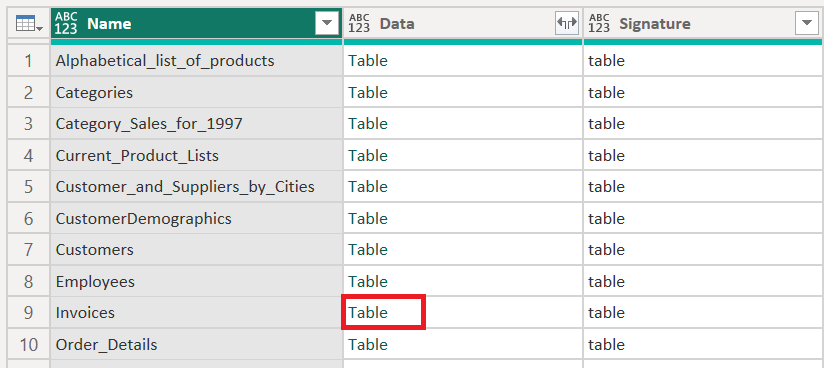
Table preview dialog box
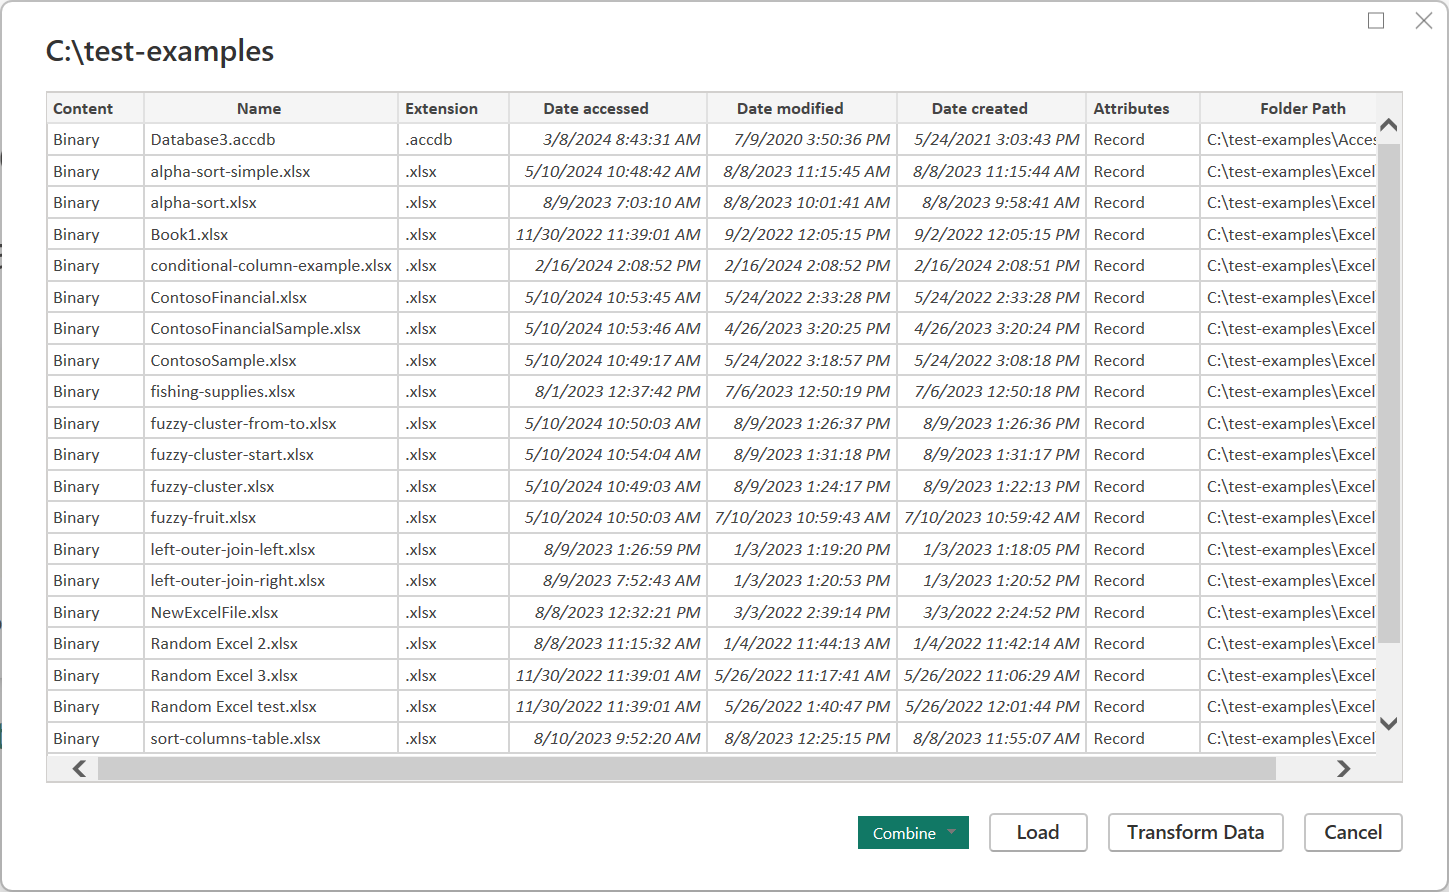
The table preview dialog box consists of only one section for the data preview. An example of a connector that provides this experience and window is the Folder connector.
4. Query destination
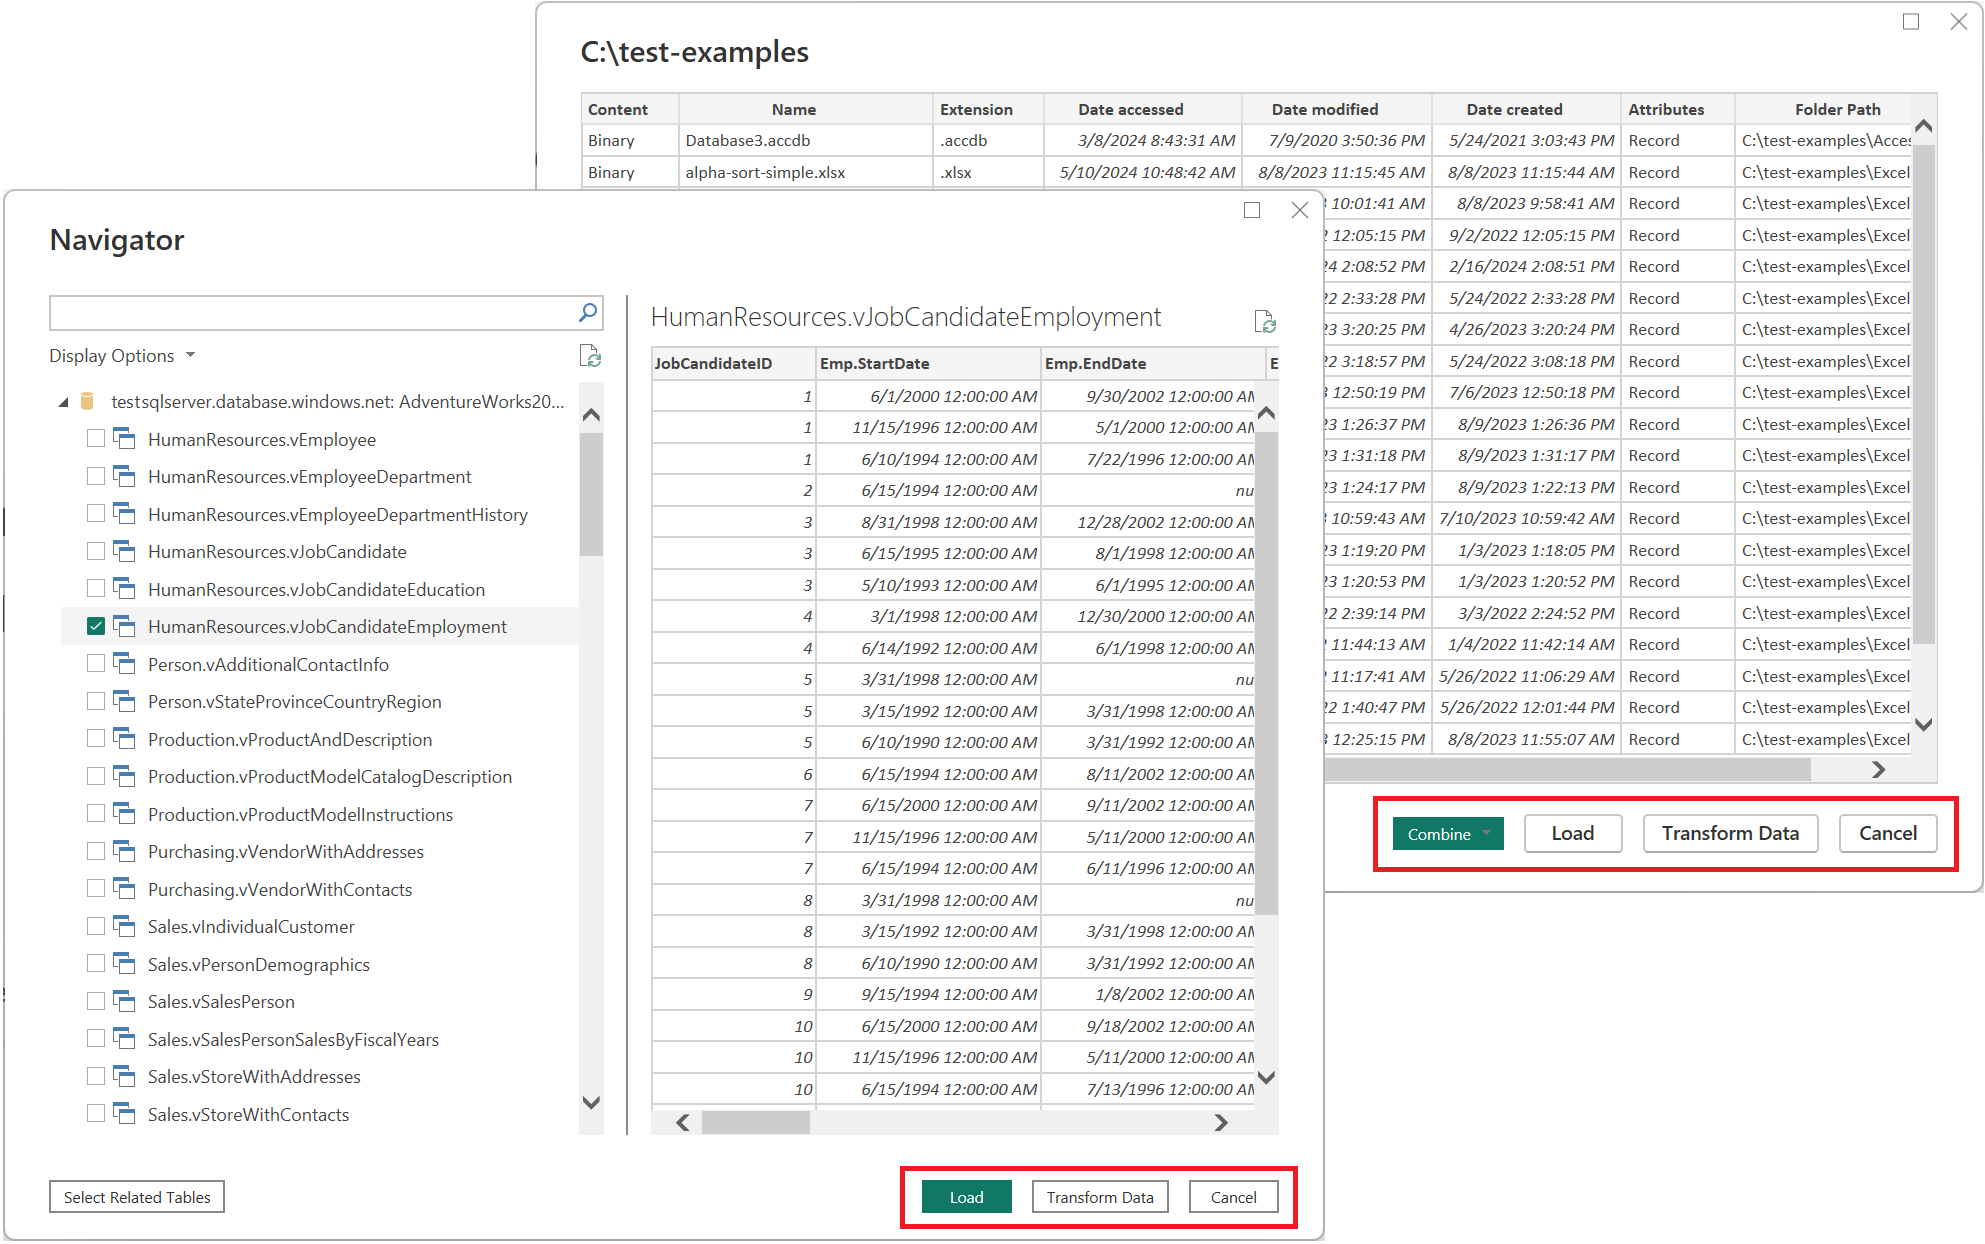
At this stage, specify where to load the query. The available destinations depend on the Power Query Desktop product, but Transform data is always available and loads the data into the Power Query editor for further transformation.
Power Query Online experience
The stages for getting data in Power Query Online are:
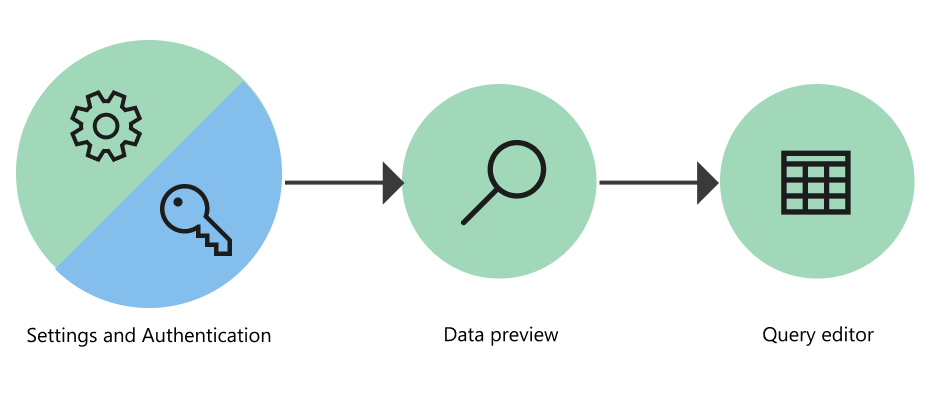
1. Connection settings and authentication
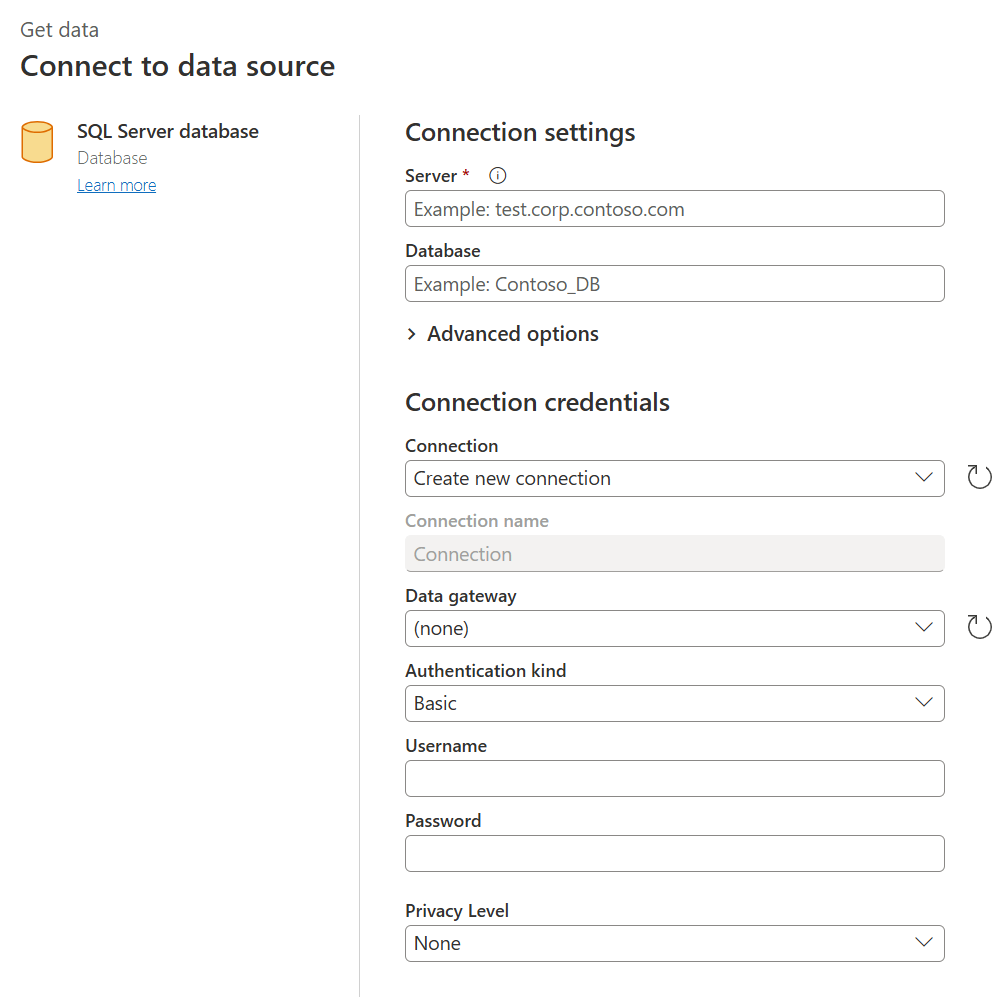
In Power Query Online, start at the Connect to data source page and enter values in two sections:
Connection settings
Connection credentials
Connection settings
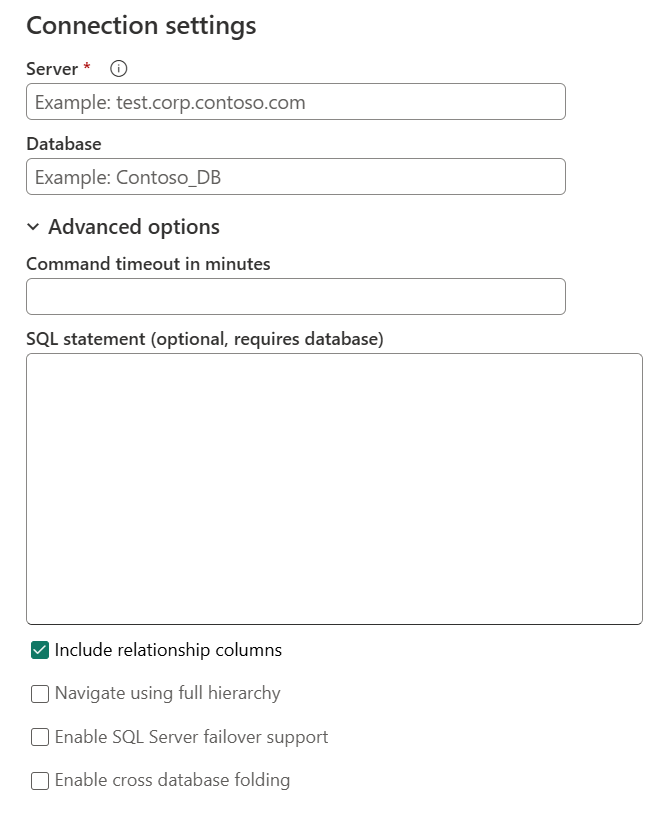
In the connection settings section, enter the information needed to connect to your data source. Depending on the connector, this information might include a server name, database name, folder path, or file path. Some connectors provide additional sections or advanced options for more control over the connection.
Connection credentials
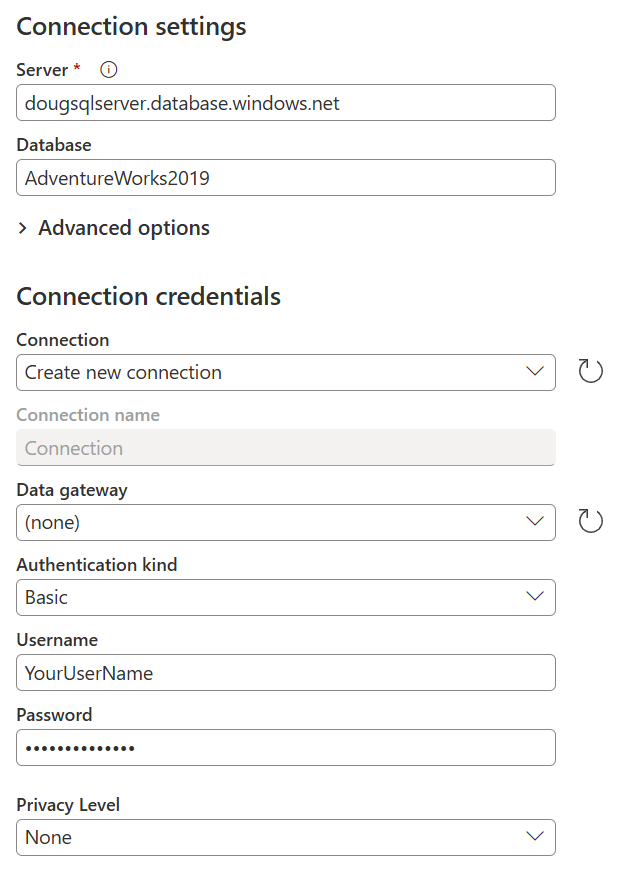
The first time you use Power Query to connect to a specific data source, you need to create a connection for that source. A connection includes the gateway, credentials, privacy levels, and other connector-specific fields needed to connect. For a detailed walkthrough, see Connections and authentication in Power Query Online.
Note
Some connectors offer fields in the connection credentials section to define security for the connection. For example, the Amazon Redshift connector offers the Use Encrypted Connection field.
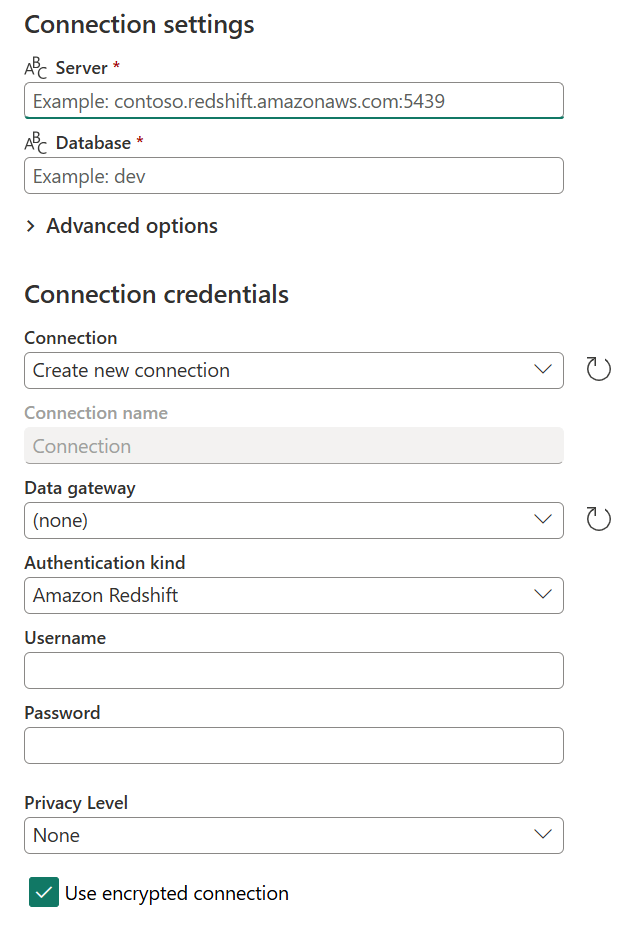
The main connection fields are:
- Connection name: A unique name for your connection. You can't use a name that's already in your environment.
- Data gateway: If your data source requires a data gateway, select it from the dropdown list. For details, see On-premises data gateways documentation.
- Authentication kind and credentials: The available authentication kinds and credential fields depend on the connector. For example, when you select Windows, the Username and Password fields appear.
- Privacy level: Set the privacy level for your data source to None, Private, Organizational, or Public). For details, see Privacy levels.
Important
Some Power Query integrations don't support a defined connection or a privacy level. Power Query Online experiences provide settings for the gateway, authentication kind, and credentials needed to connect to your source.
After you define a connection in Power Query Online, you can reuse it later without reentering the connection information. The Connection field offers a dropdown menu where you select a defined connection. After you select it, you don't need to enter any other details before selecting Next.
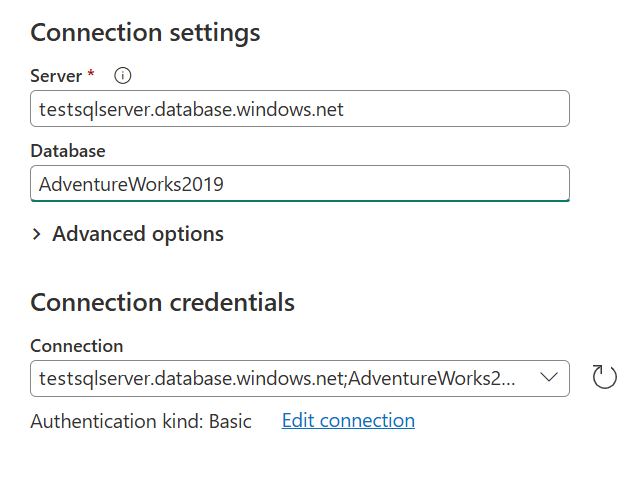
To use different credentials, a privacy level, a gateway, or other connector-specific settings in your project, select Edit connection. Under Connection, select Create new connection, then change the required fields.
For more information about managing, editing, and reusing connections, see Manage connections.
2. Data preview
The data preview stage lets you preview and select your data.
Depending on the connector that you're using, you can preview data by using either:
- Navigator window
- Table preview dialog box
Navigator window (navigation table) in Power Query Online
The Navigator window consists of two main sections:
The object selection pane appears on the left side of the window. You can interact with and select these objects.
The data preview pane on the right side of the window shows a preview of the data from the object you selected.
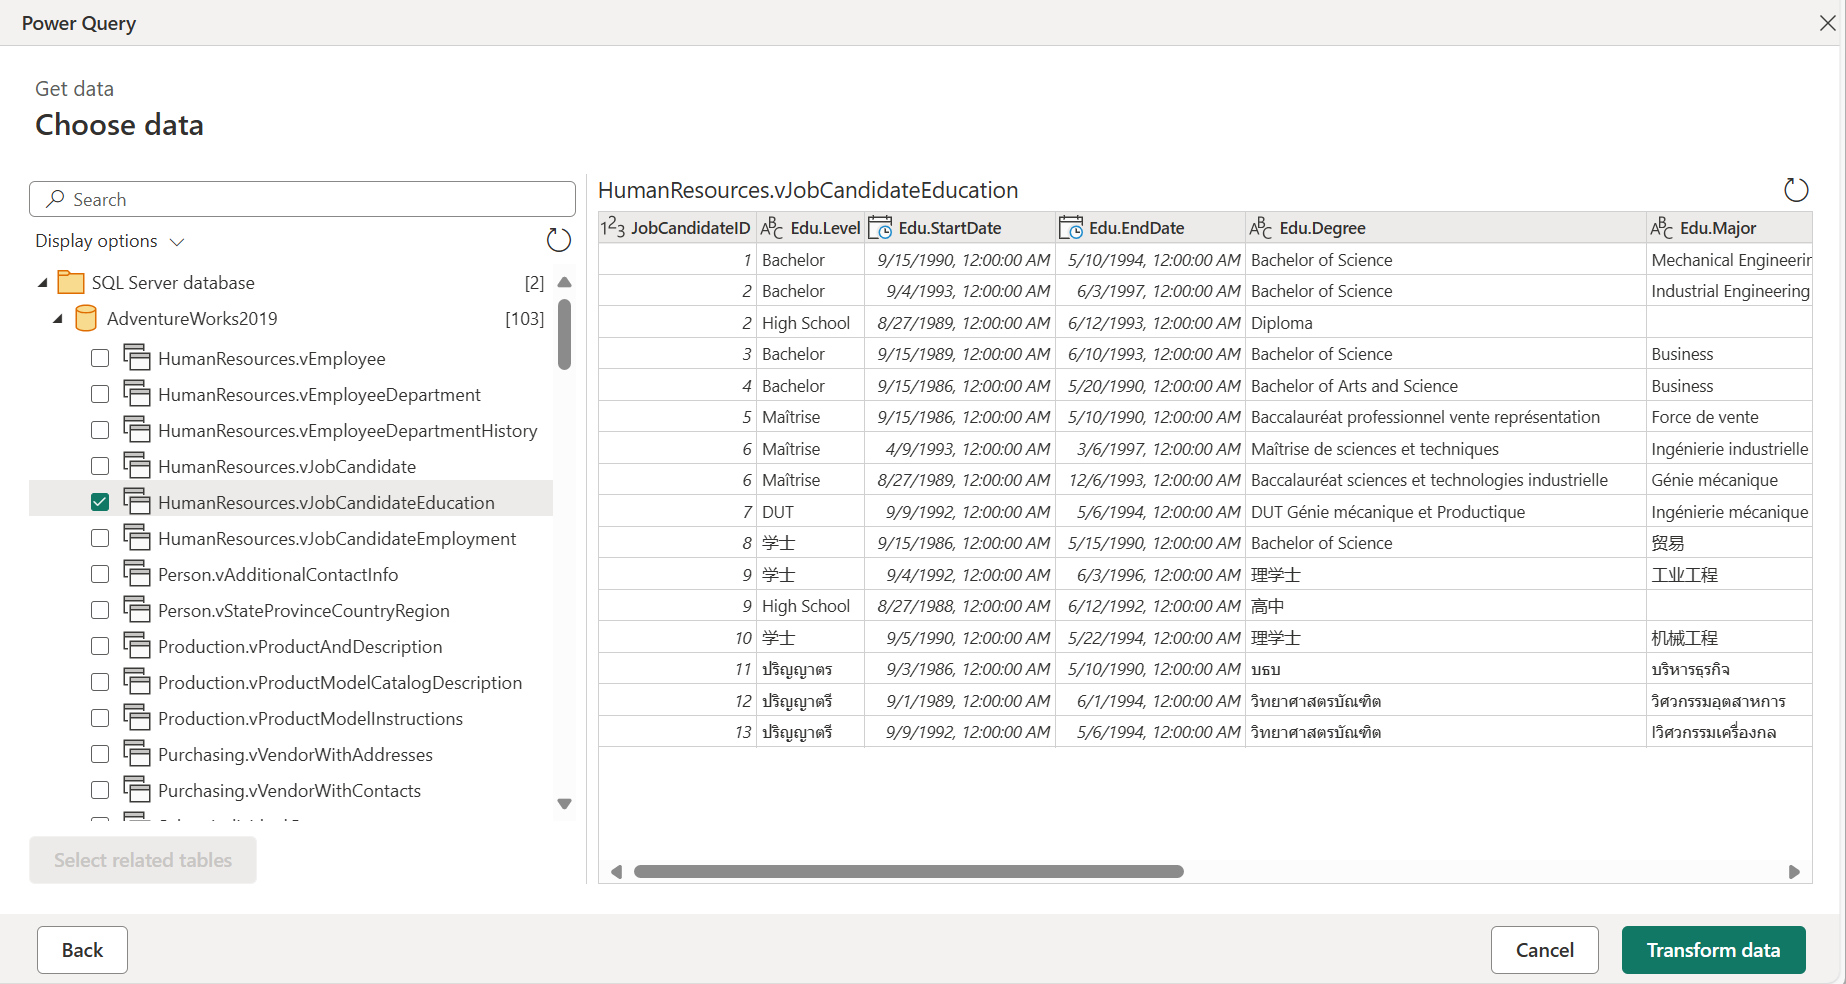
Table preview dialog box in Power Query Online
The table preview dialog box consists of only one section for the data preview. An example of a connector that provides this experience and window is the Folder connector.
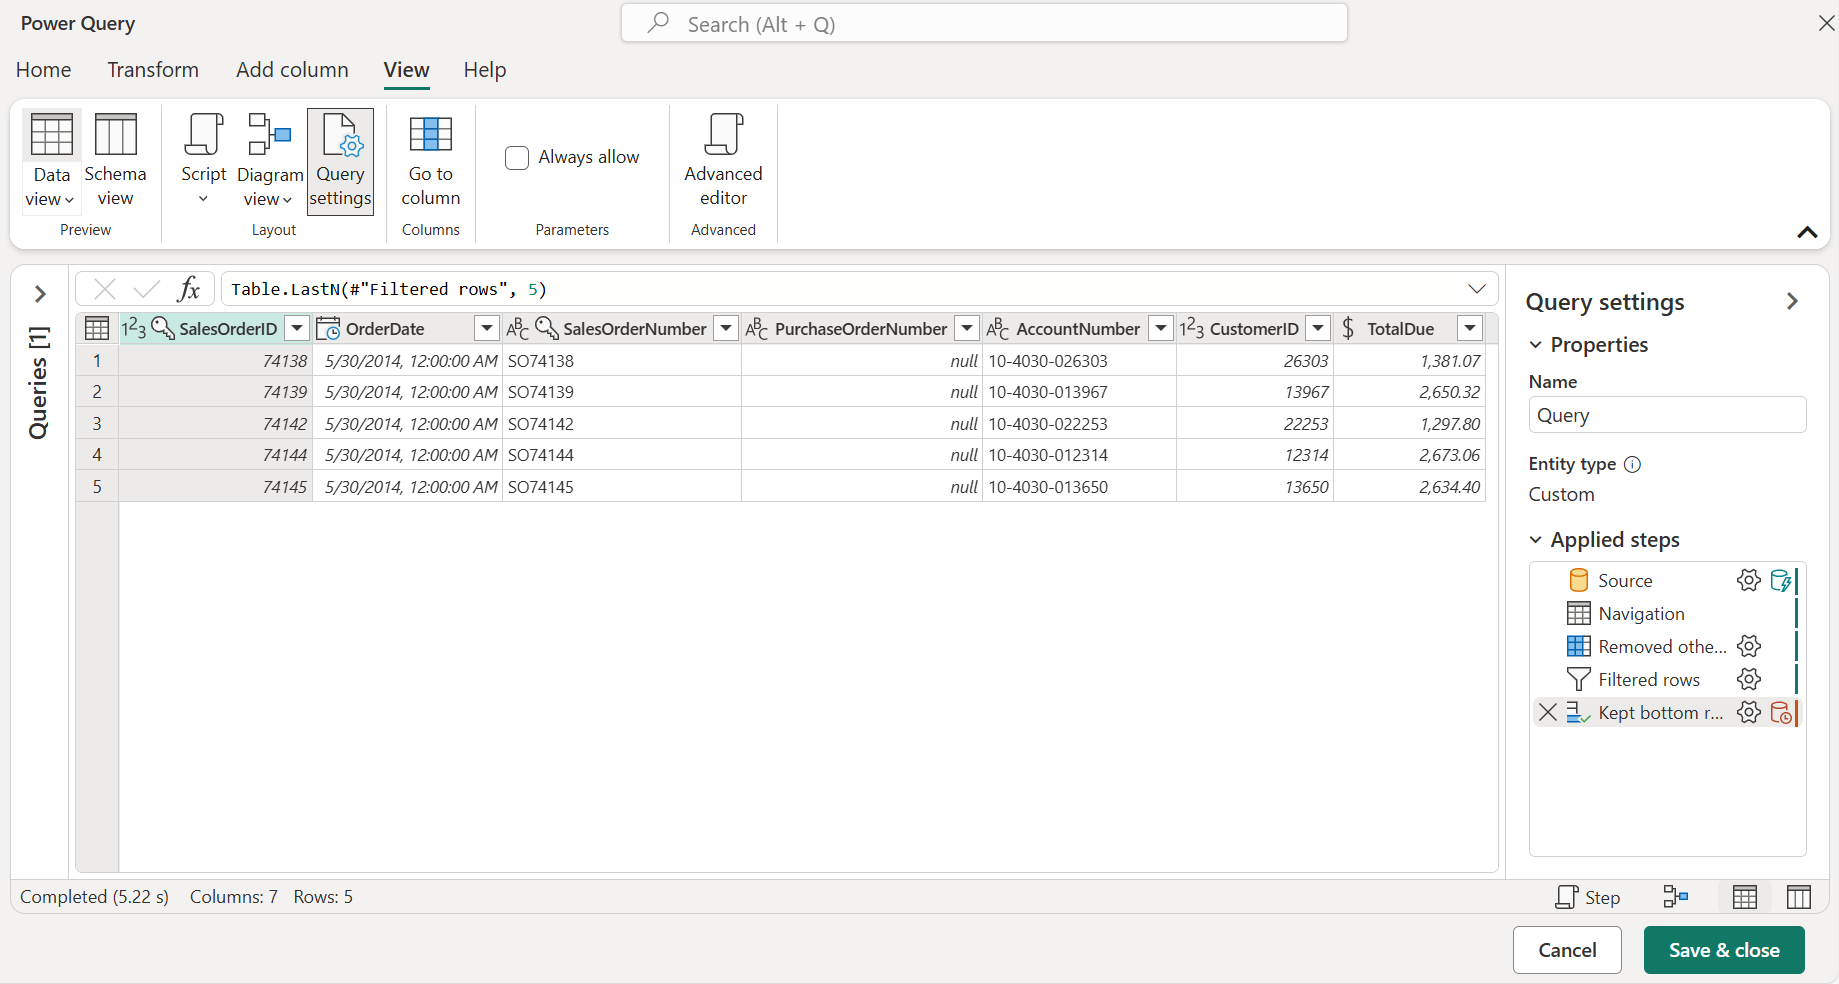
3. Query editor
For Power Query Online, you must load the data into the Power Query editor. In the editor, you can further transform and enrich the query.
Get data modules in Power Query Online
Use the modules on the left navigation bar to choose a starting point for your task. Each guide explains its controls and what the action creates.
| Module | Use it to |
|---|---|
| Home | Choose among shortcuts to new sources, recent data, and the catalog. |
| New data source | Find a connector and configure a connection. |
| Recents & My Queries | Return to recent or favorite items and reuse personal query scripts. |
| Templates | Start from a template that matches your scenario. |
| OneLake catalog | Find an existing Fabric data item and review its context before connecting. |
| New Fabric item | Create a destination item when configuring where to write data. |
| Azure data sources | Connect to Azure-hosted data sources through their connectors. |
| Upload file | Upload a local file and create a query from it. |
| Blank table | Enter or paste values into a new table. |
| Blank query | Write or paste an M expression and choose a gateway context where supported. |
Save and load your data
After you transform your data, use the product-specific command to save and load it: Close & Load in Excel, Close & Apply in Power BI Desktop, Save & close in Power Query Online, or Import or Close & Apply in Analysis Services.
In Excel, select Close & Load on the Home tab to save and load your changes.
In Power BI Desktop, select Close & Apply on the Home tab to save and load your changes.
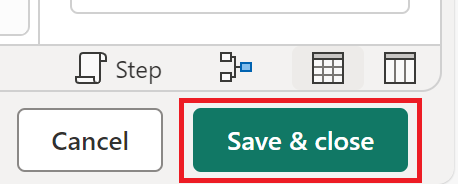
In Power Query Online, select Save & close in the lower-right corner of the editor to save and load your changes.
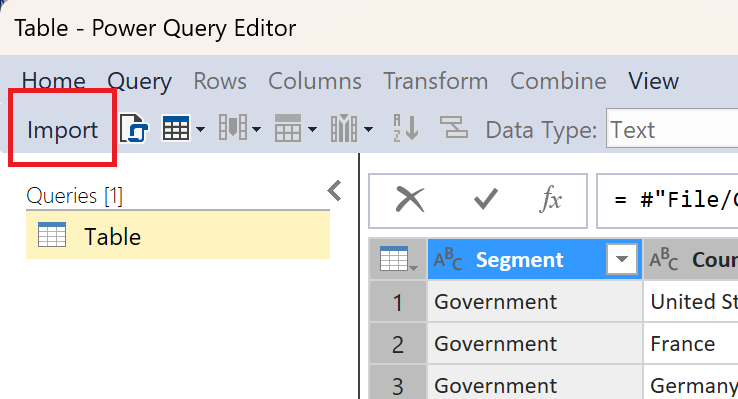
If you open the Power Query editor in Analysis Services, you can save and load your changes by either using the Import button or the Home > Close & Apply option in the Power Query editor ribbon.
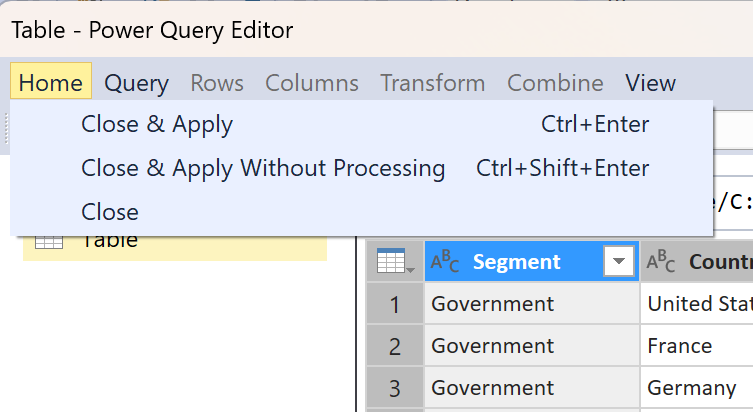
Browse and connect with new experiences
The following guides describe browsing and query experiences. Each guide explains how to select data and what happens when you connect.
| Module | Use it to |
|---|---|
| Browse Azure | Choose preview or legacy instructions for finding Azure resources and connecting to their data. |
| SharePoint (Preview) | Browse sites and folders to connect to a file or a file listing. |
| Copilot | Explore and transform selected data with natural-language prompts. |
| Shared Query (Preview) | Browse shared query logic and import independent copies. |