Примечание
Для доступа к этой странице требуется авторизация. Вы можете попробовать войти или изменить каталоги.
Для доступа к этой странице требуется авторизация. Вы можете попробовать изменить каталоги.
Обзор
This tutorial describes how to provision a Data Box Gateway on a host system running Hyper-V on Windows Server 2016, Windows Server 2012 R2, or Windows Server 2012.
You need administrator privileges to provision and configure a virtual device. The provisioning and initial setup can take around 10 minutes to complete.
В этом руководстве описано, как:
- Ensure host meets minimum device requirements
- Provision a virtual device in hypervisor
- Start the virtual device and get the IP address
Если у вас нет подписки Azure, создайте бесплатную учетную запись, прежде чем приступить к работе.
Предпосылки
The prerequisites to provision a virtual device on a host system running Hyper-V on Windows Server 2016 or Windows Server 2012 R2, are as follows.
For the Data Box Gateway resource
Перед тем как начать, убедитесь в следующем.
You have completed all the steps in Prepare the portal for Data Box Gateway.
You have downloaded the virtual device image for Hyper-V from the Azure portal as described in Prepare the portal for Data Box Gateway.
Это важно
Программное обеспечение, выполняемое на шлюзе Data Box, может использоваться только с ресурсом шлюза Data Box.
For the Data Box Gateway virtual device
Before you deploy a device, make sure that:
You have access to a host system running Hyper-V on Windows Server 2012 R2 or later that can be used to a provision a device.
The host system is able to dedicate the following resources to provision your virtual device:
- A minimum of 4 cores.
- По крайней мере 8 ГБ ОЗУ. Мы настоятельно рекомендуем не менее 16 ГБ ОЗУ.
- Один сетевой интерфейс.
- A 250 -GB OS disk.
- A 2-TB virtual disk for data.
For the network in the datacenter
Подготовка к работе:
- Review the networking requirements to deploy a Data Box Gateway and configure the datacenter network as per the requirements. For more information, see Data Box Gateway networking requirements.
- Make sure that the minimum Internet bandwidth is 20 Mbps to allow for optimal working of the device.
Check the host system
To create a virtual device, you need:
The Hyper-V role installed on Windows Server 2016, Windows Server 2012 R2, or Windows Server 2012.
Microsoft Hyper-V Manager on a Microsoft Windows client connected to the host.
Make sure that the underlying hardware (host system) on which you are creating the virtual device is able to dedicate the following resources to your virtual device:
- Минимум четыре виртуальных процессора.
- По крайней мере 8 ГБ ОЗУ. Мы настоятельно рекомендуем не менее 16 ГБ ОЗУ.
- One network interface connected to the network capable of routing traffic to Internet.
- A 250-GB OS disk.
- A 2-TB virtual disk for system data.
BitLocker Considerations
- We recommend that you enable BitLocker on your Data Box Gateway virtual machine. По умолчанию средство BitLocker выключено. Дополнительные сведения см. в следующем разделе:
Provision a virtual device in hypervisor
Perform the following steps to provision a device in your hypervisor.
On your Windows Server host, copy the virtual device image to a local drive. You downloaded this VHDX image through the Azure portal. Make a note of the location where you copied the image as you are using this image later in the procedure.
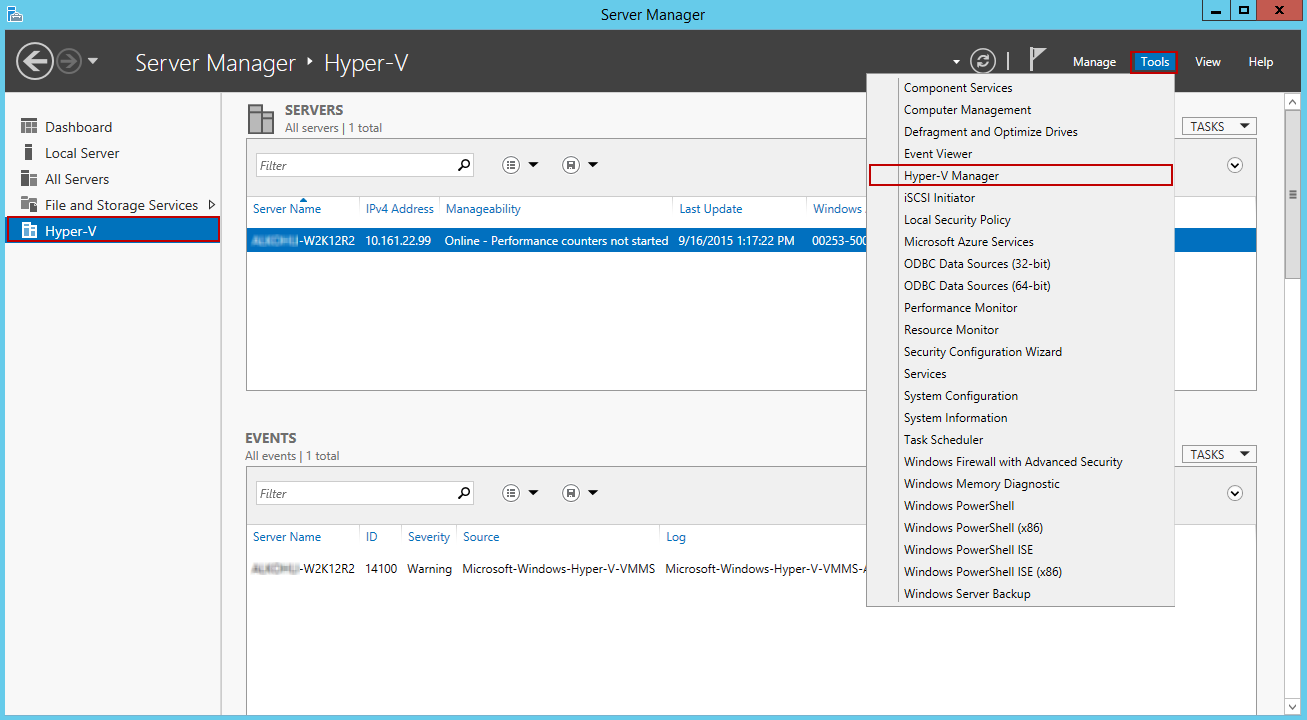
Откройте Диспетчер сервера. In the top-right corner, click Tools and select Hyper-V Manager.
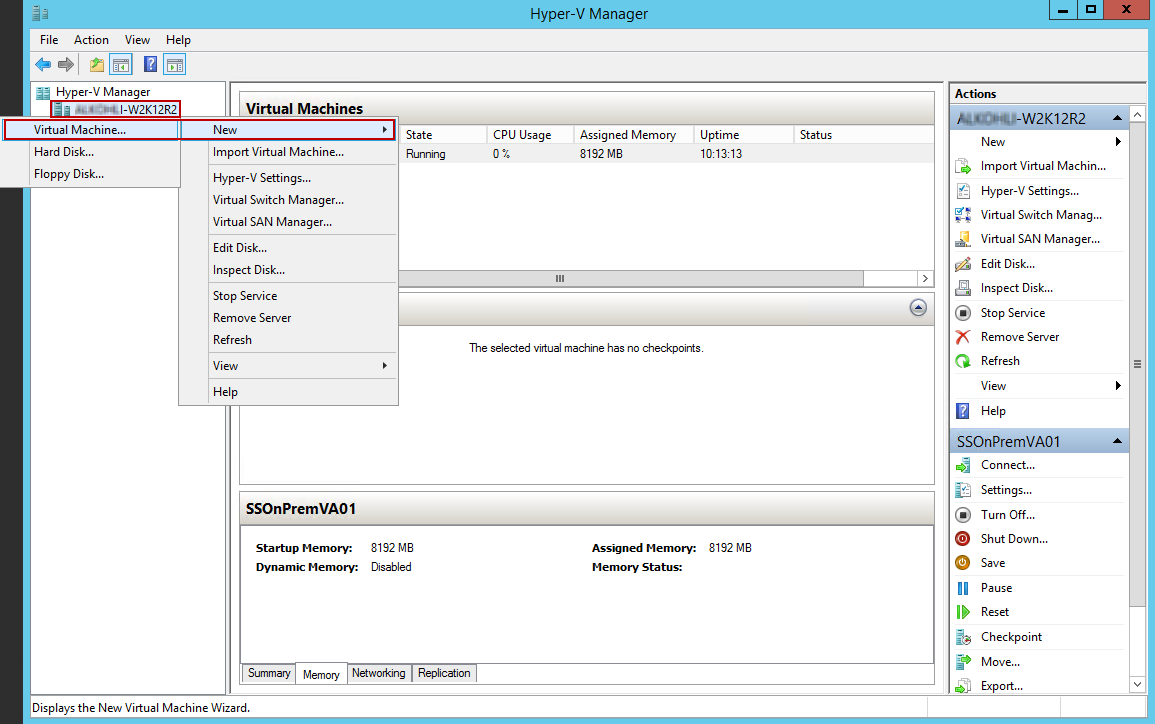
In Hyper-V Manager, in the scope pane, right-click your system node to open the context menu, and then click New>Virtual Machine.
On the Before you begin page of the New Virtual Machine Wizard, click Next.
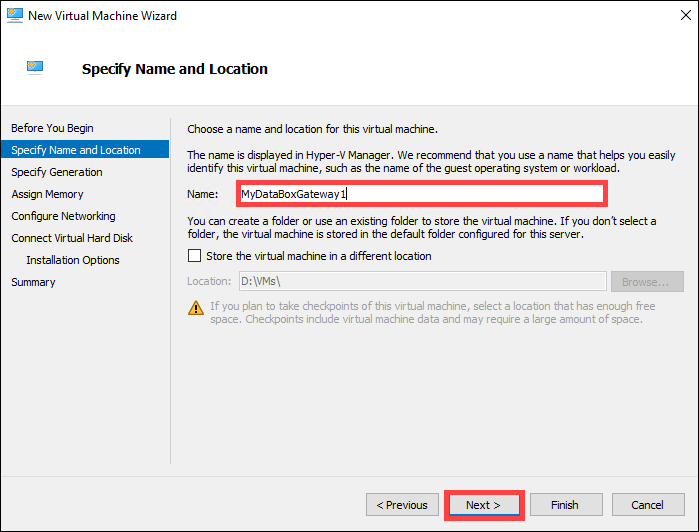
On the Specify name and location page, provide a Name for your virtual device. Нажмите кнопку Далее.
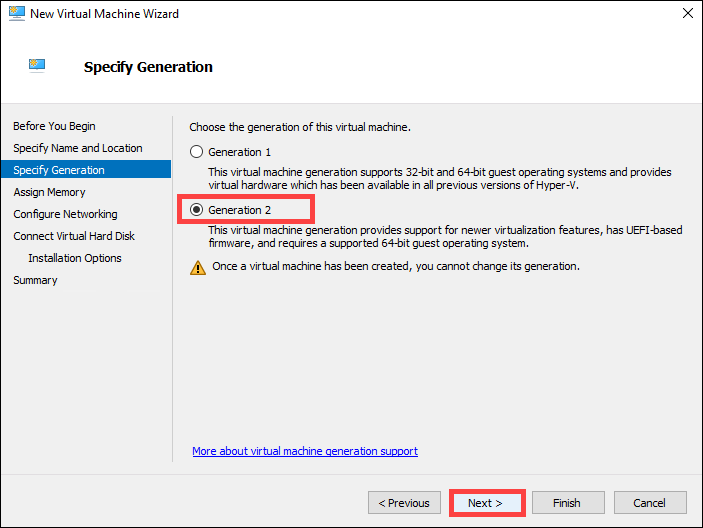
On the Specify generation page, choose Generation 2 for the .vhdx device image type, and then click Next.
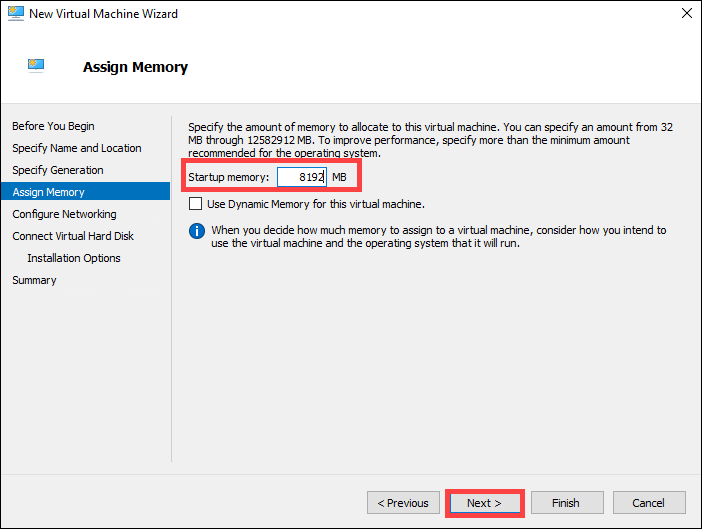
On the Assign memory page, specify a Startup memory of at least 8192 MB, don't enable dynamic memory, and then click Next.
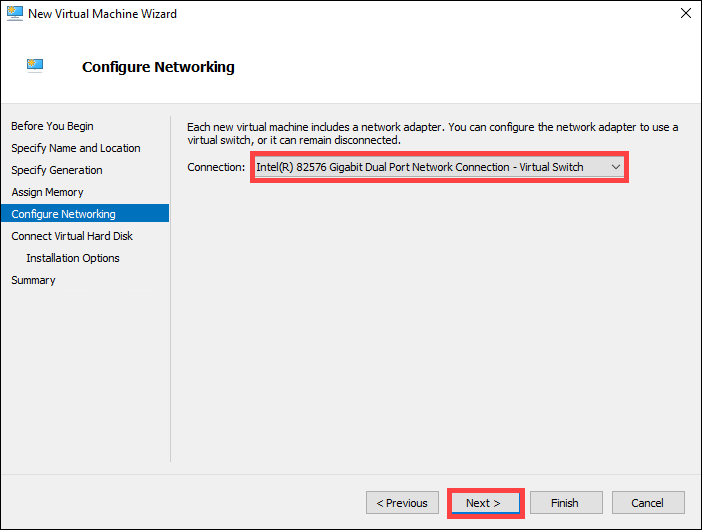
On the Configure networking page, specify the virtual switch that is connected to the Internet and then click Next.
On the Connect virtual hard disk page, choose Use an existing virtual hard disk, specify the location of the virtual device image, and then click Next.

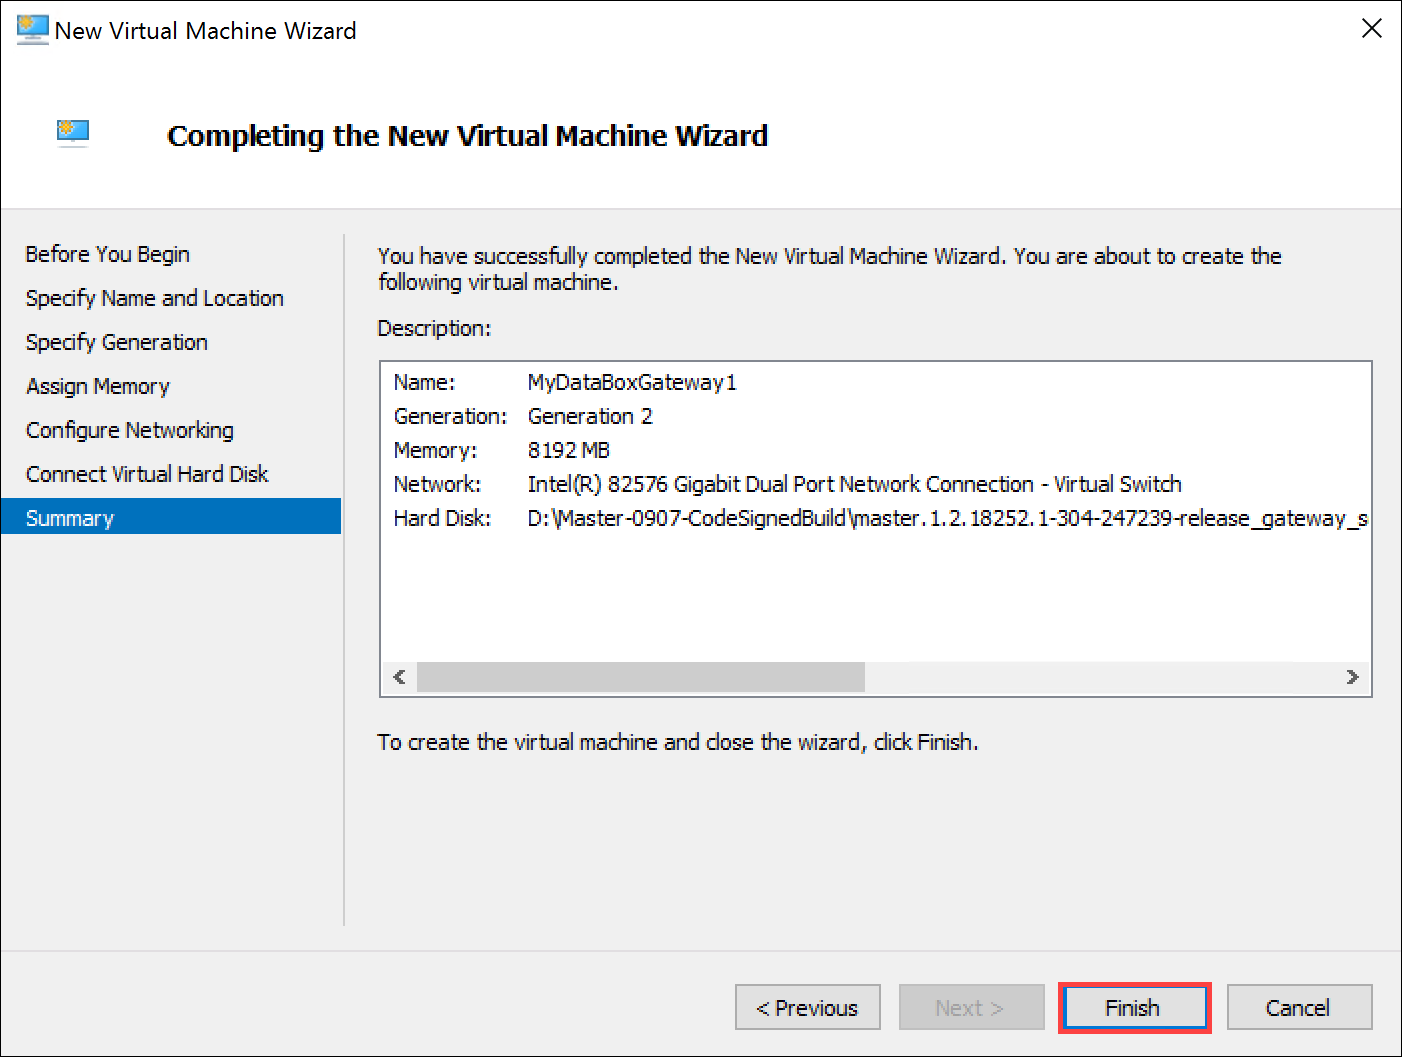
Review the Summary and then click Finish to create the virtual machine.
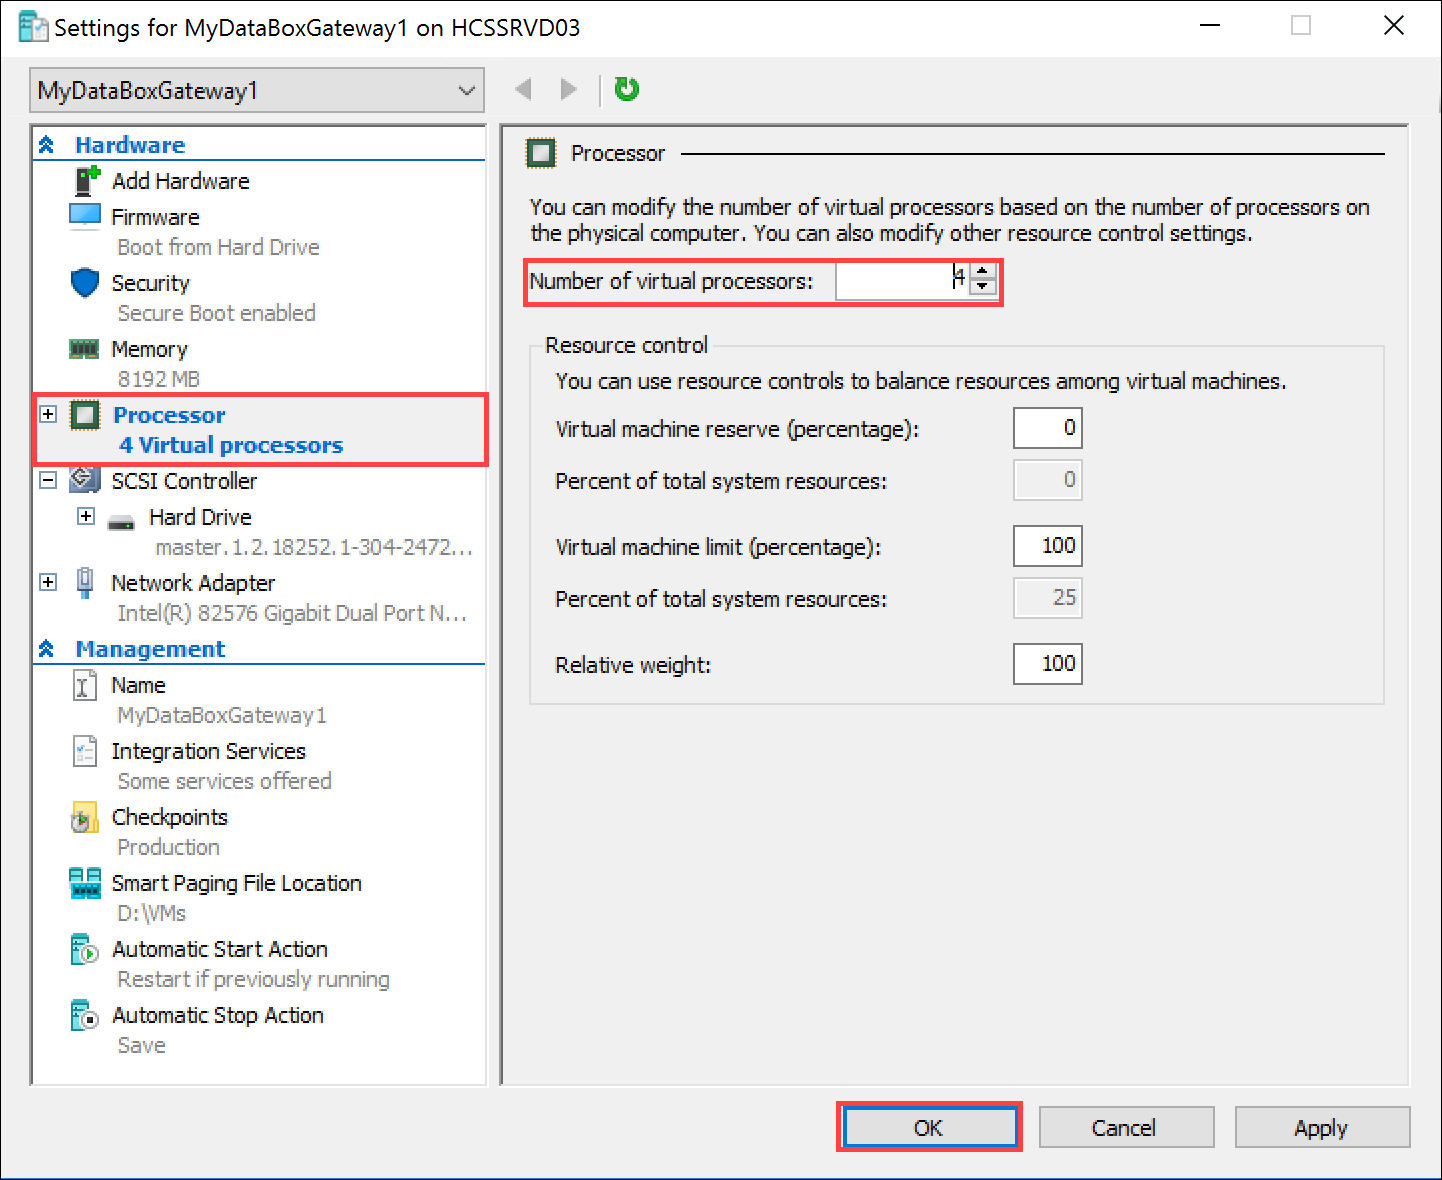
To meet the minimum requirements, you need four virtual processors. To add four virtual processors, select your host system in the Hyper-V Manager window. In the right-pane under the list of Virtual Machines, locate the virtual machine you just created. Select and right-click the machine name and select Settings.
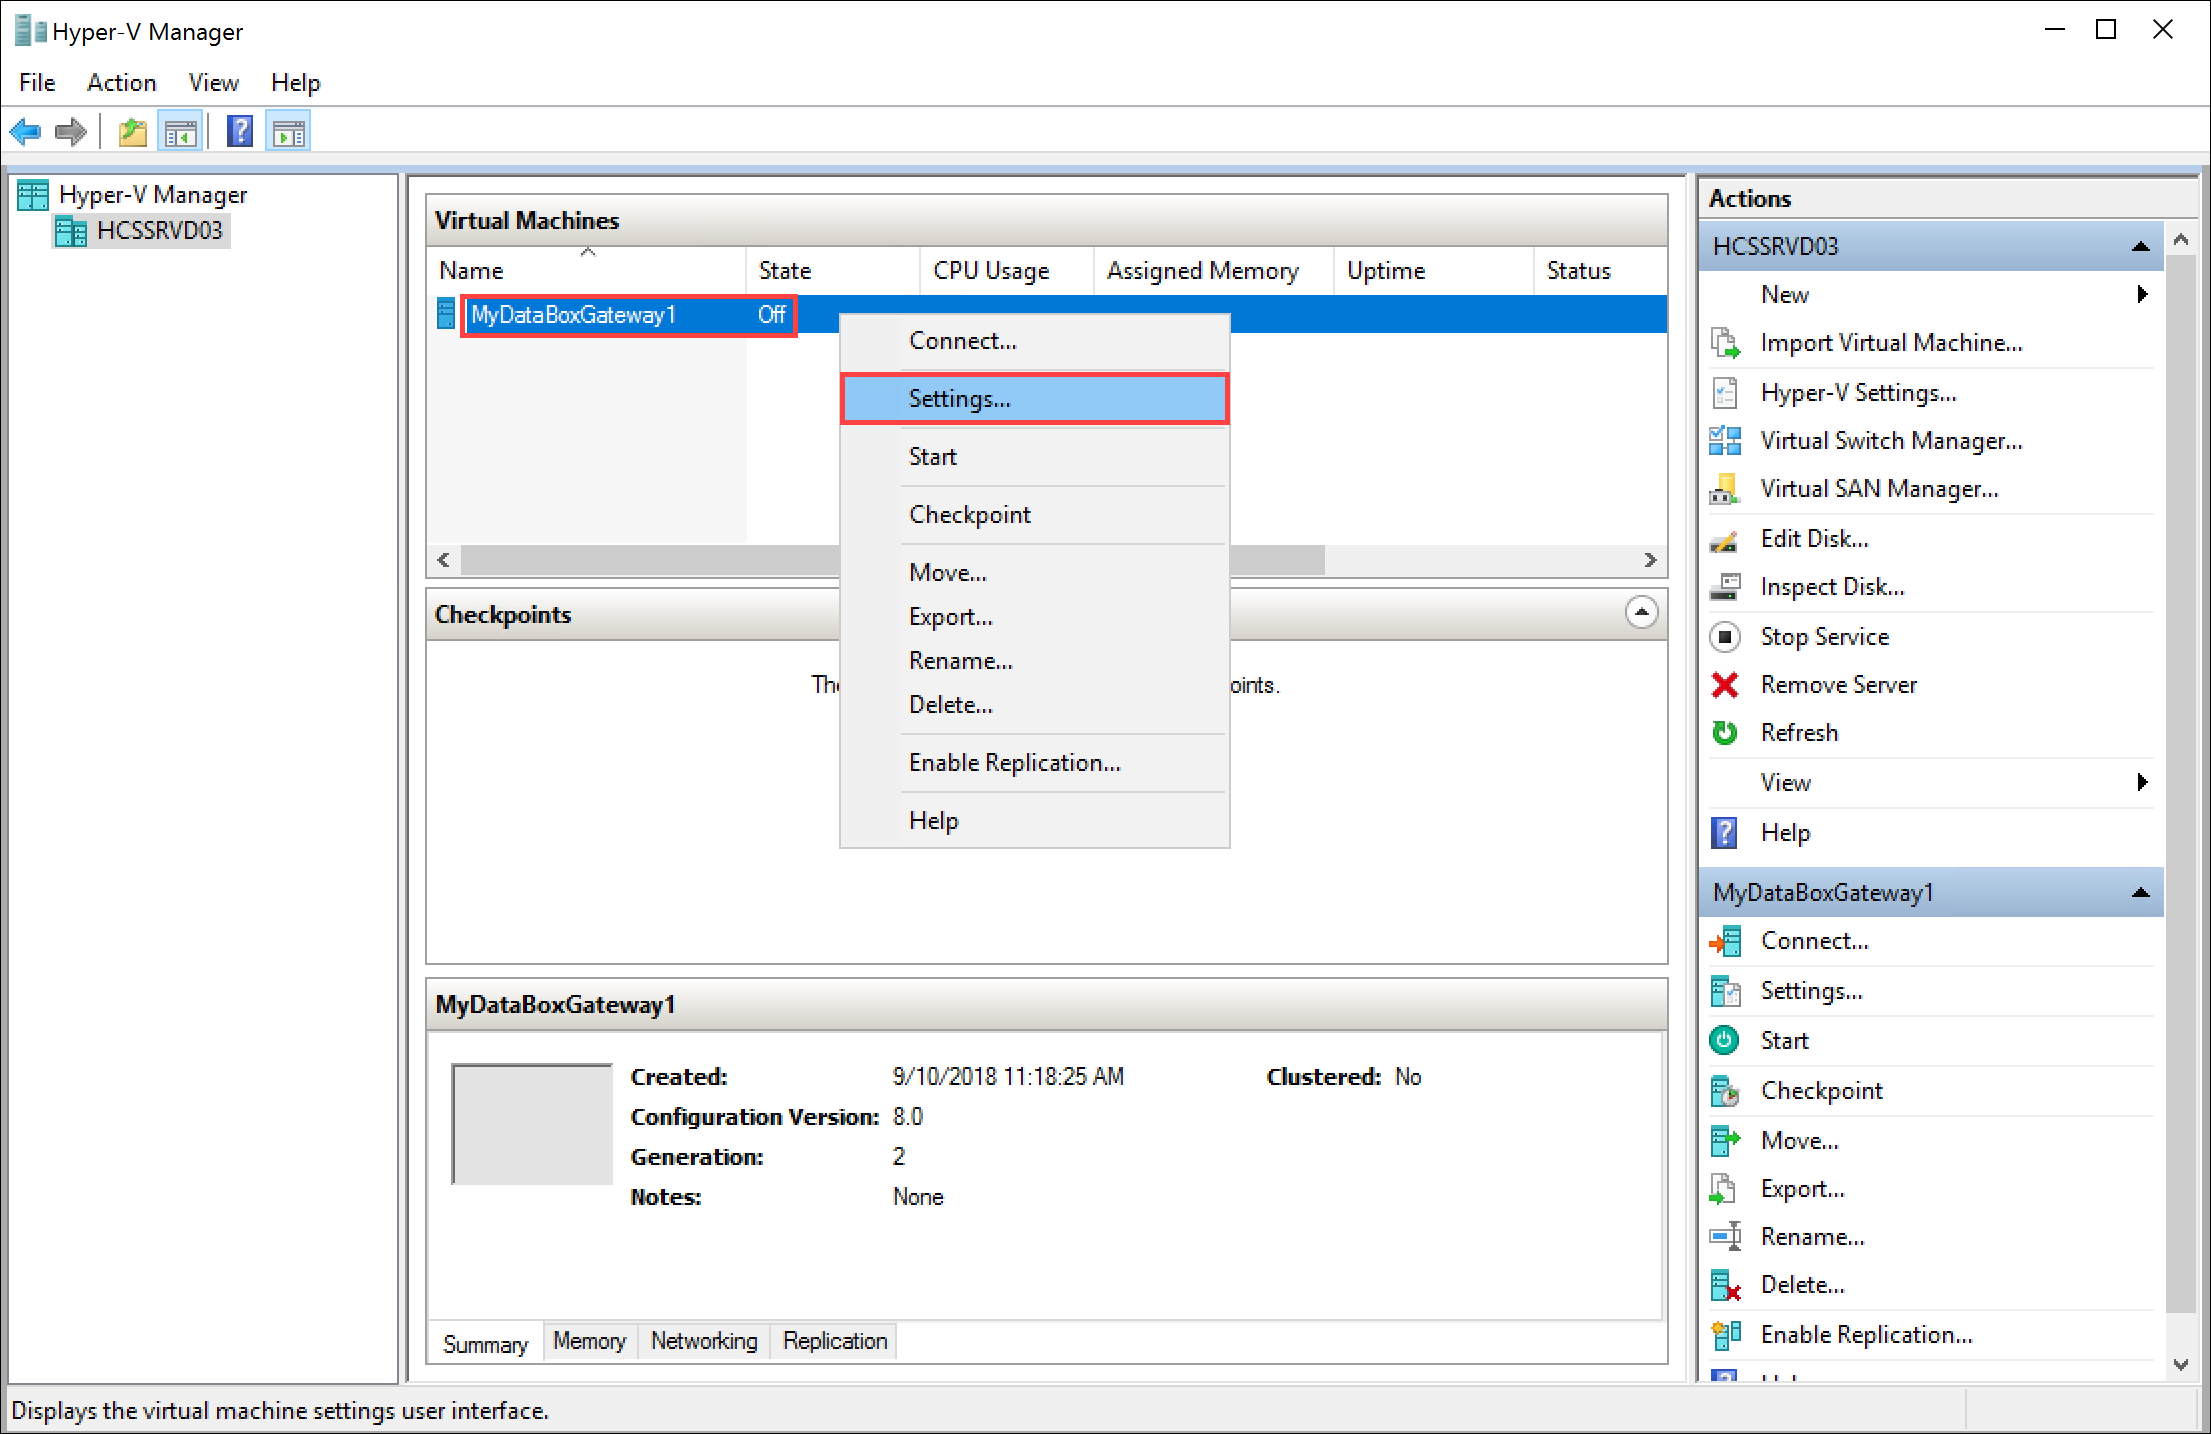
On the Settings page, in the left-pane, click Processor. In the right-pane, set number of virtual processors to 4 (or more). Щелкните Применить.
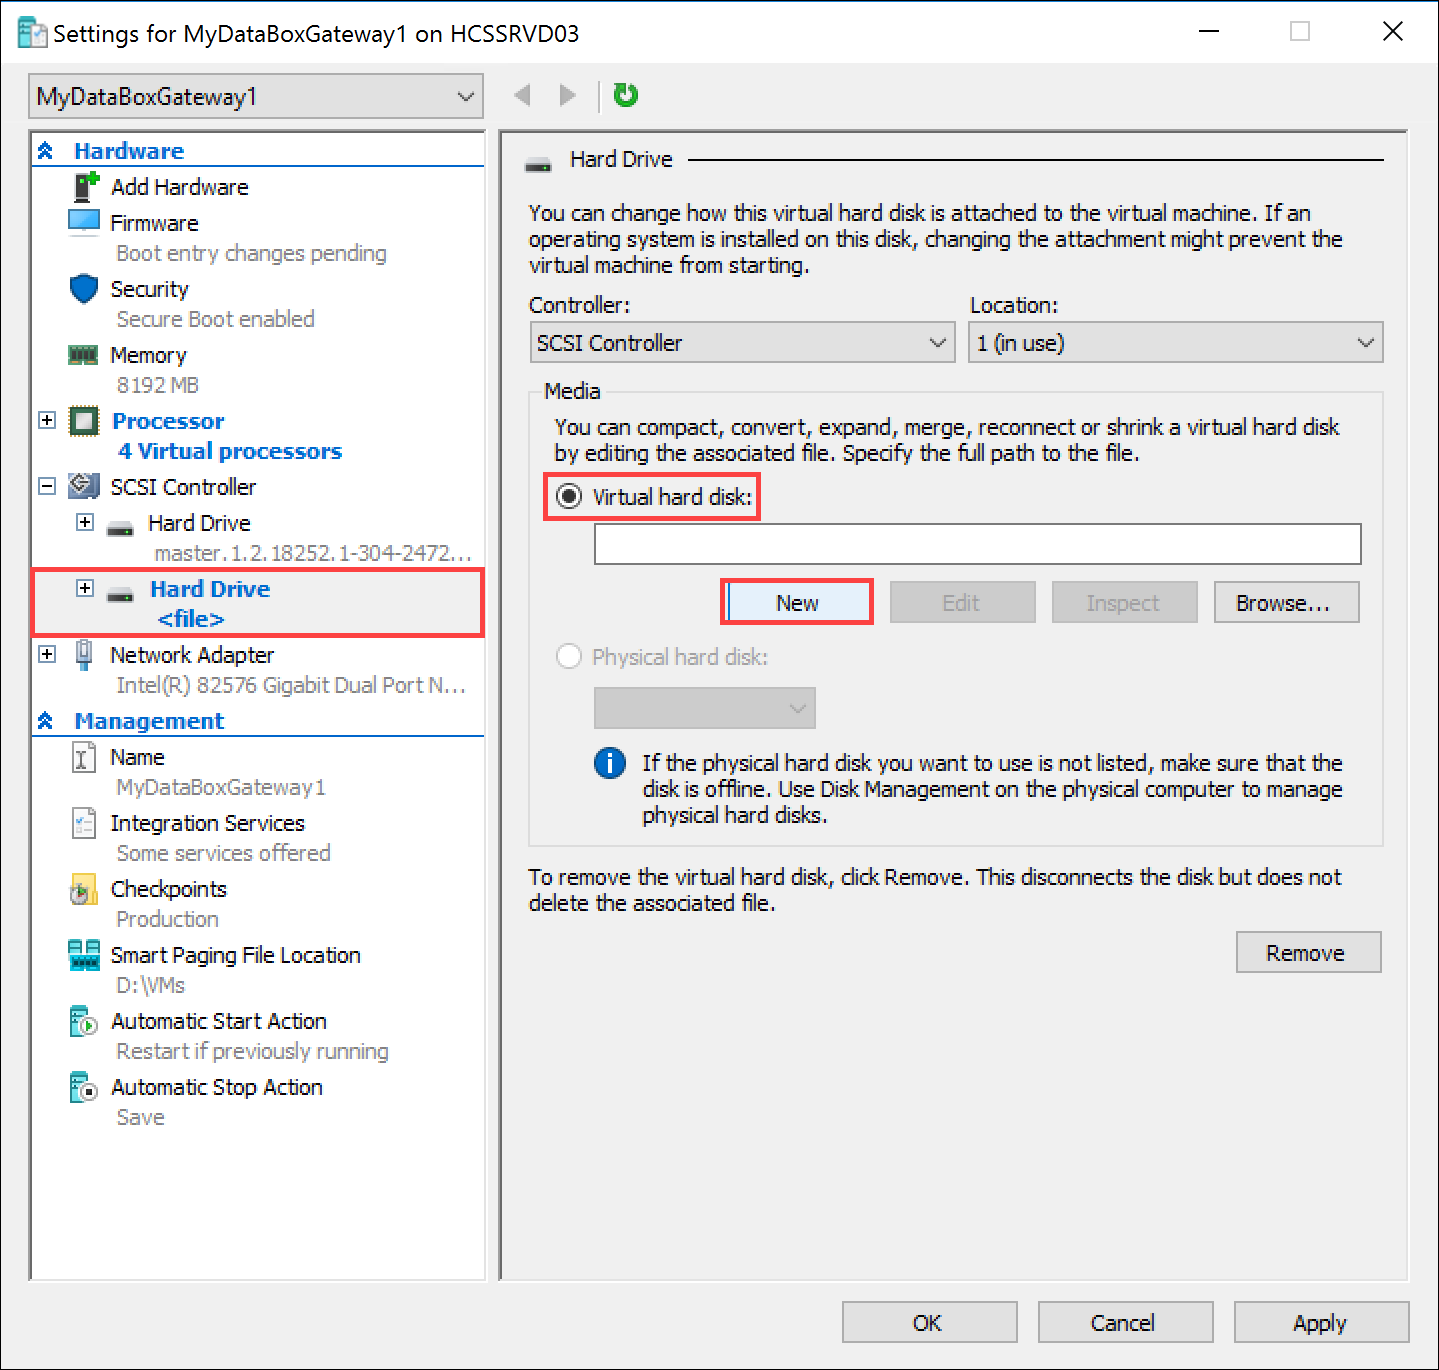
To meet the minimum requirements, you also need to add a 2-TB virtual data disk. In the Settings page:
- В области слева выберите Контроллер SCSI.
- In the right pane, select Hard Drive, and click Add.

On the Hard drive page, select the Virtual hard disk option and click New. The New Virtual Hard Disk Wizard starts.
On the Before you begin page of the New Virtual Hard Disk Wizard, click Next.
On the Choose Disk Format page, accept the default option of VHDX format. Нажмите кнопку Далее.
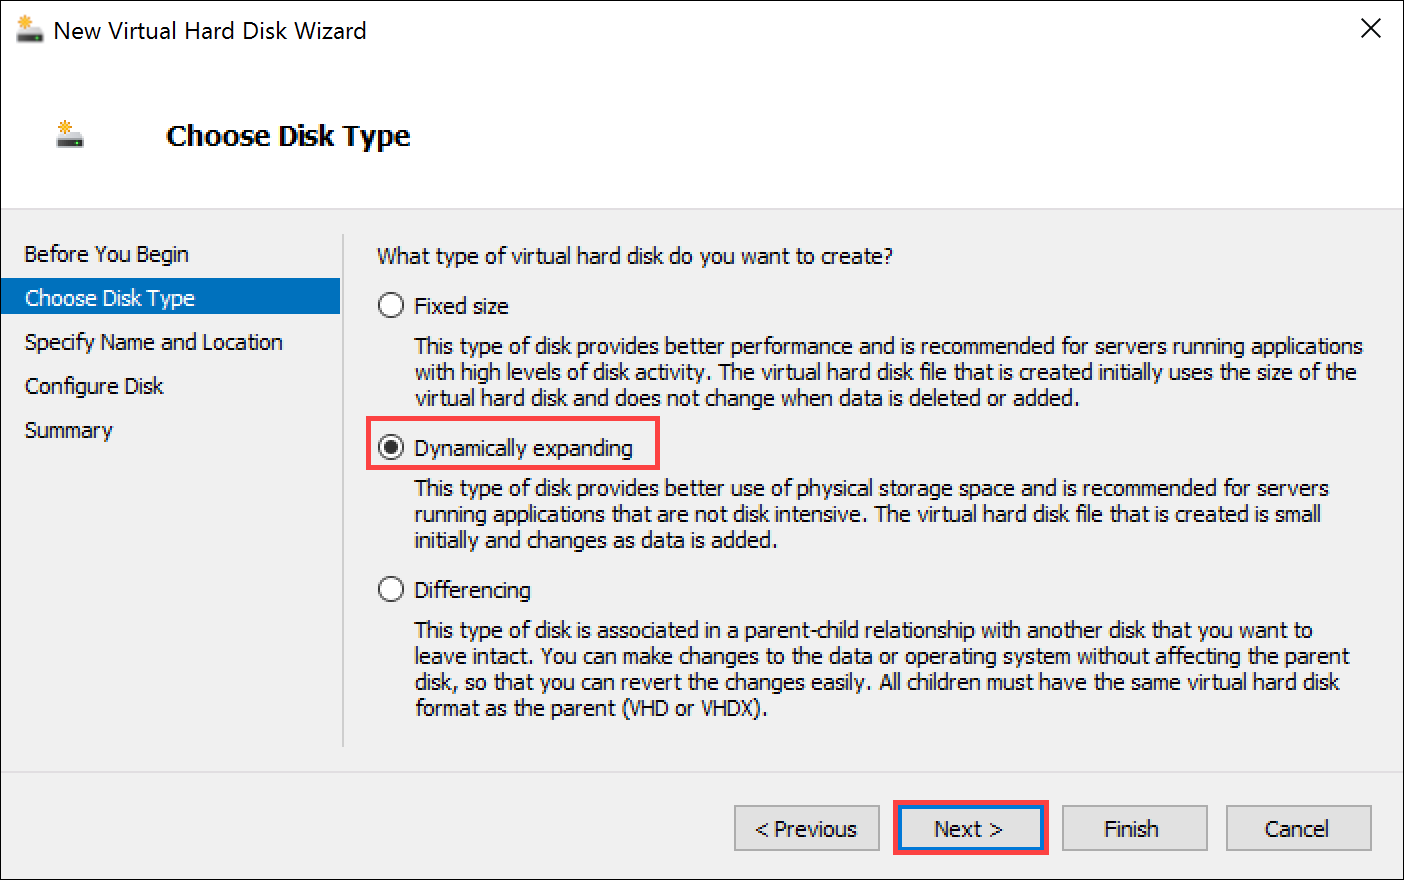
On the Choose Disk Type page, set virtual hard disk type as Dynamically expanding (recommended). Fixed size disk would work but you may need to wait a long time. We recommend that you do not use the Differencing option. Нажмите кнопку Далее.
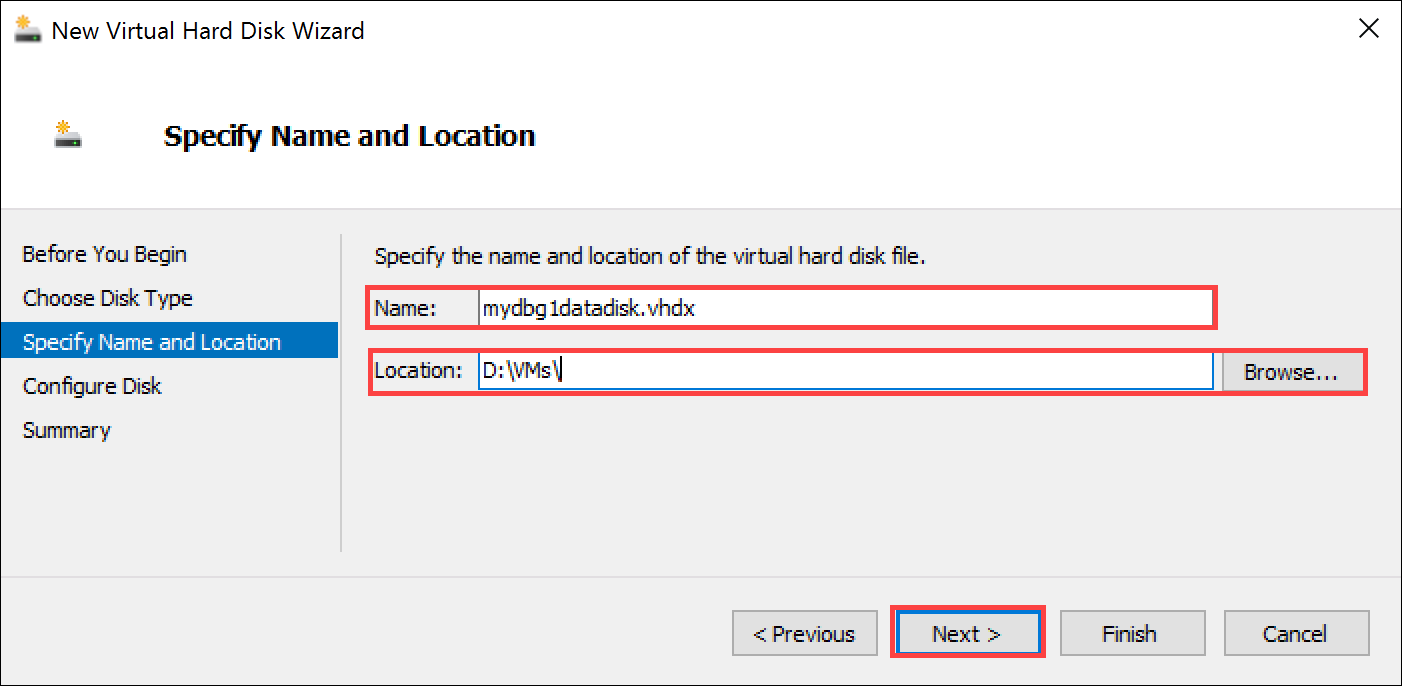
On the Specify Name and Location page, provide a name and location (you can browse to one) for the data disk. Нажмите кнопку Далее.
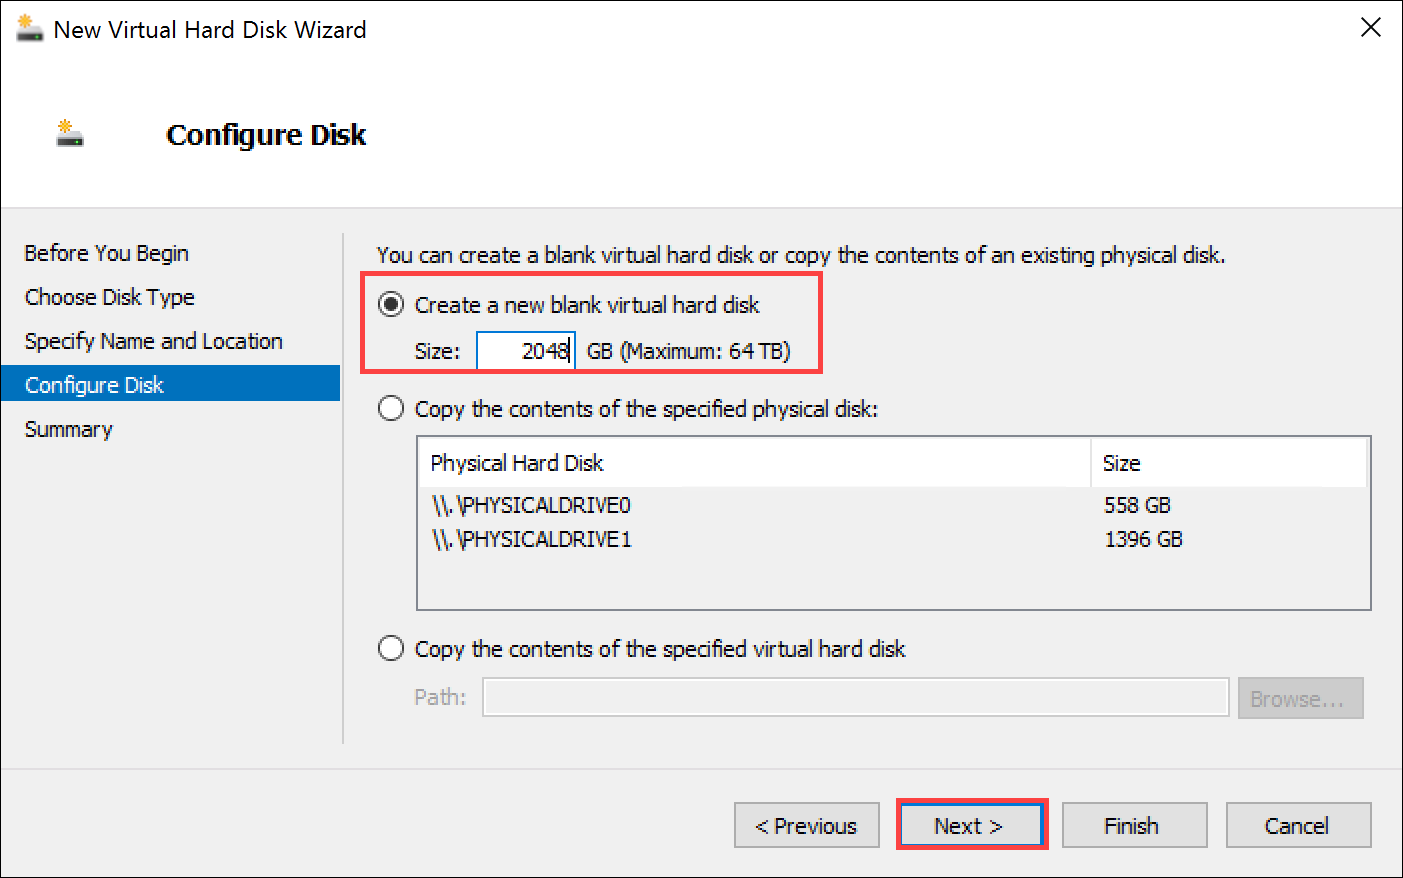
On the Configure Disk page, select the Create a new blank virtual hard disk option, and specify the size as 2 TB (or more).
While 2 TB is the minimum requirement, you can always provision a larger disk. Note that you cannot shrink the disk once it's provisioned. Attempting to shrink the disk results in a loss of all the local data on the device. Expansion of data disk is not supported. Нажмите кнопку Далее.
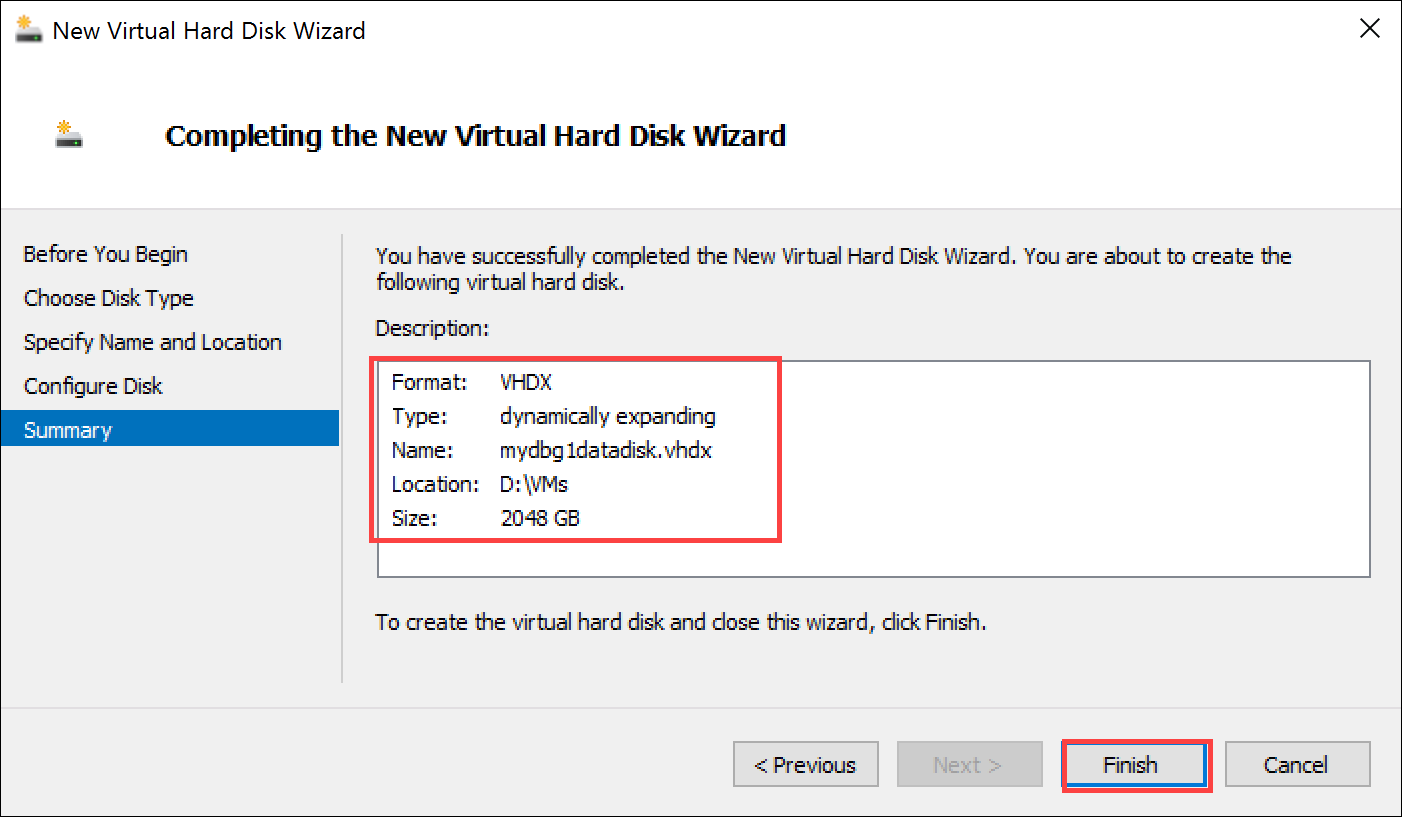
On the Summary page, review the details of your virtual data disk and if satisfied, click Finish to create the disk. The wizard closes and a virtual hard disk is added to your machine.
Return to the Settings page. Click OK to close the Settings page and return to Hyper-V Manager window.
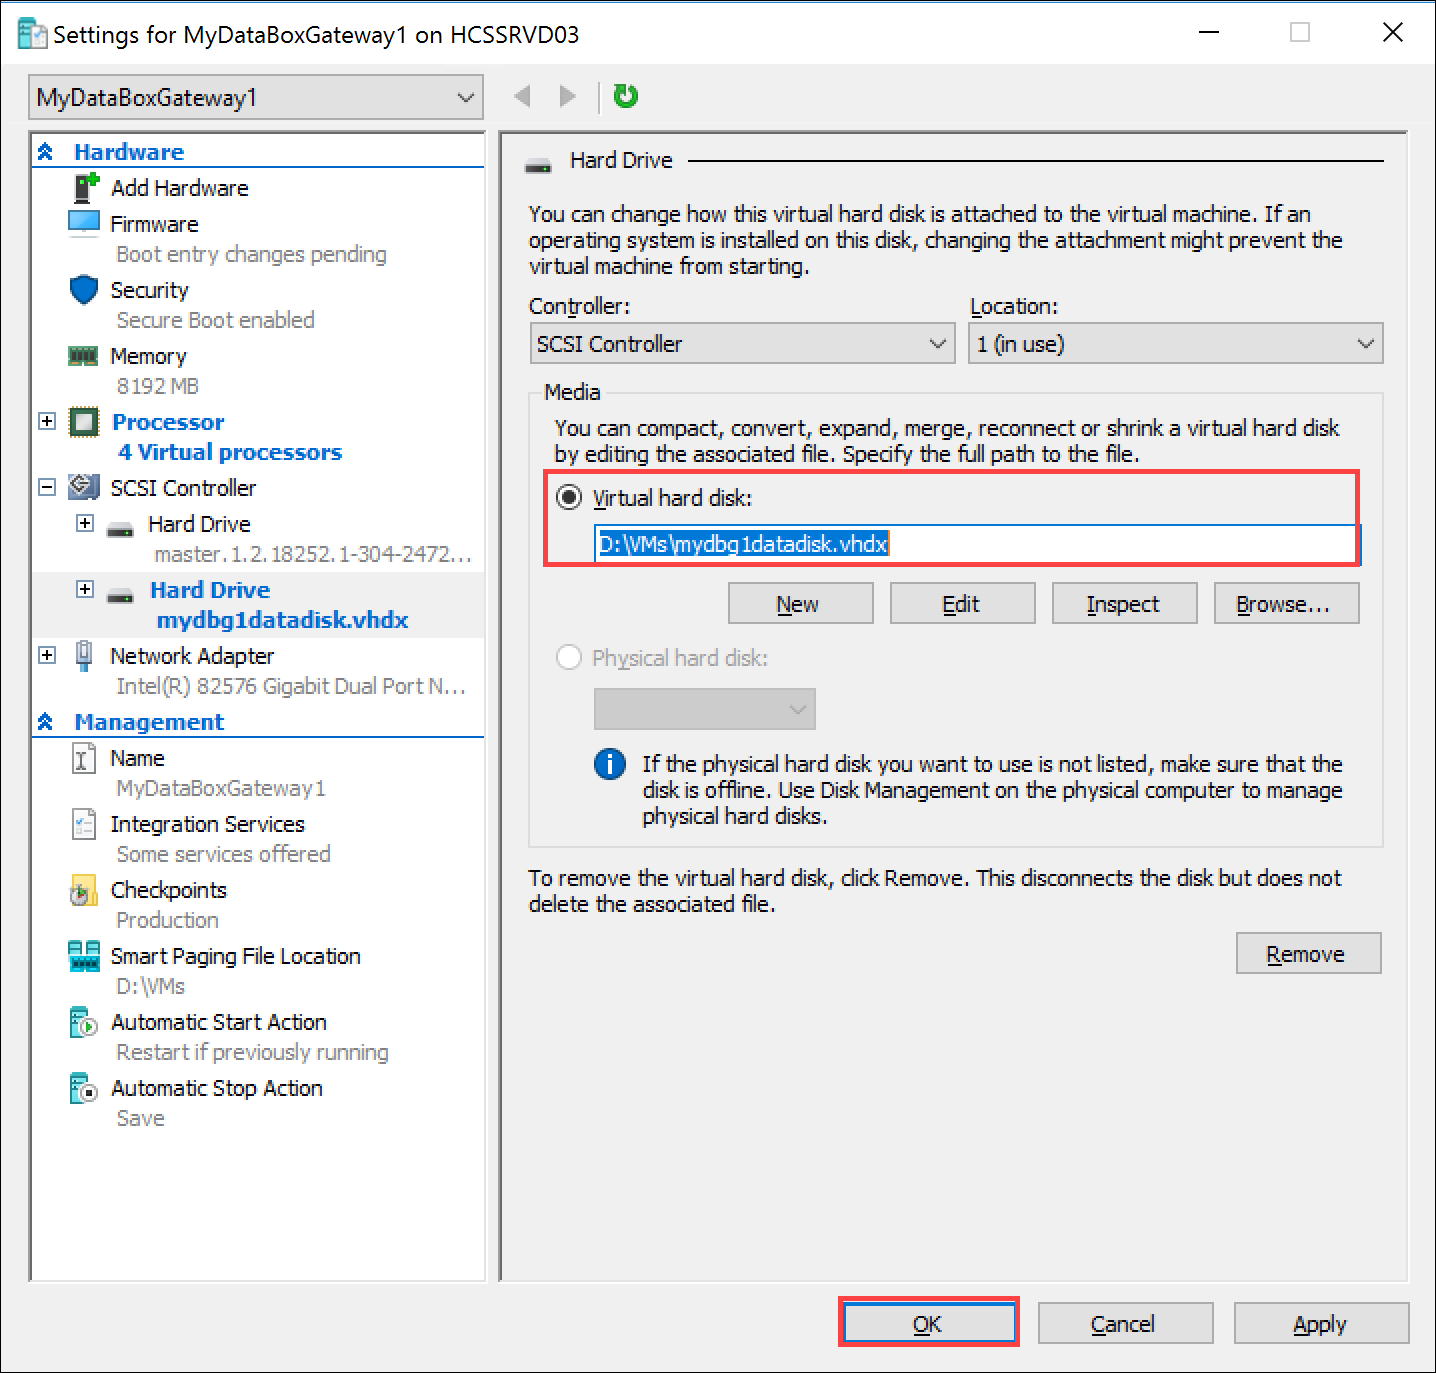
Your virtual machine is now fully configured.
Примечание.
You can't provision a new Data Box Gateway by copying your configured VHD. Each new Data Box Gateway virtual device must be provisioned from a virtual device image for Hyper-V that is downloaded from the Azure portal.
Start the virtual device and get the IP
Perform the following steps to start your virtual device and connect to it.
To start the virtual device
Start the virtual device.

After the device is running, select the device, right click, and select Connect.
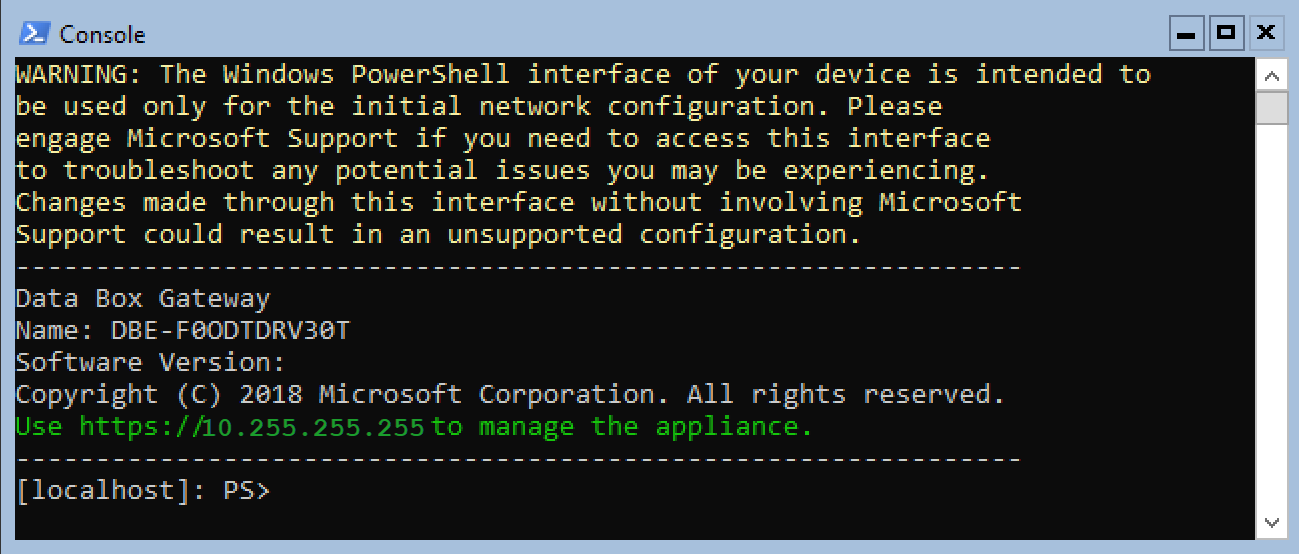
You may have to wait 10-15 minutes for the device to be ready. A status message is displayed on the console to indicate the progress. After the device is ready, go to Action. Press
Ctrl + Alt + Deleteto sign in to the virtual device. The default user is EdgeUser and the default password is Password1.
Steps 5-7 only apply when booting up in a non-DHCP environment. If you are in a DHCP environment, then skip these steps. If you booted up your device in non-DHCP environment, you will see a message to the effect.
To configure the network, use the
Get-HcsIpAddresscommand to list the network interfaces enabled on your virtual device. Если на устройстве включен один сетевой интерфейс, имя по умолчанию, назначенное этому интерфейсу, — этоEthernet.Используйте командлет
Set-HcsIpAddressдля настройки сети. См. следующий пример.Set-HcsIpAddress –Name Ethernet –IpAddress 10.161.22.90 –Netmask 255.255.255.0 –Gateway 10.161.22.1After the initial setup is complete and the device has booted up, you will see the device banner text. Make a note of the IP address and the URL displayed in the banner text to manage the device. Use this IP address to connect to the web UI of your virtual device and complete the local setup and activation.
If your device does not meet the minimum configuration requirements, you see an error in the banner text. Modify the device configuration so that the machine has adequate resources to meet the minimum requirements. You can then restart and connect to the device. Refer to the minimum configuration requirements in Check the host system meets minimum virtual device requirements.
If you face any other error during the initial configuration using the local web UI, refer to the following workflows:
Дальнейшие действия
В этом руководстве вы изучили такие темы о шлюзе Data Box:
- Ensure host meets minimum device requirements
- Provision a virtual device in hypervisor
- Start the virtual device and get the IP address
Advance to the next tutorial to learn how to connect, set up, and activate your virtual device.