Quickstart: Render a model with Unity
This quickstart covers how to run a Unity sample that renders a built-in model remotely, using the Azure Remote Rendering (ARR) service.
We won't go into detail about the ARR API itself or how to set up a new Unity project. Those topics are covered in Tutorial: Viewing remotely rendered models.
In this quickstart you will learn how to:
- Set up your local development environment
- Get and build the ARR Quickstart sample app for Unity
- Render a model in the ARR Quickstart sample app
Prerequisites
To get access to the Azure Remote Rendering service, you first need to create an account.
The following software must be installed:
- Windows SDK 10.0.18362.0 (download)
- The latest version of Visual Studio 2022 (download)
- Visual Studio tools for Mixed Reality. Specifically, the following Workload installations are mandatory:
- Desktop development with C++
- Universal Windows Platform (UWP) development
- Git (download)
- Git LFS plugin (download)
- Unity (see system requirements for supported versions)
Clone the sample app
Open a command prompt (type cmd in the Windows start menu) and change to a directory where you want to store the ARR sample project.
Run the following commands:
mkdir ARR
cd ARR
git clone https://github.com/Azure/azure-remote-rendering
powershell -ExecutionPolicy RemoteSigned -File azure-remote-rendering\Scripts\DownloadUnityPackages.ps1
The last command creates a subdirectory in the ARR directory containing the various sample projects for Azure Remote Rendering.
The quickstart sample app for Unity is found in the subdirectory Unity/Quickstart.
Rendering a model with the Unity sample project
Open the Unity Hub and add the sample project, which is the ARR\azure-remote-rendering\Unity\Quickstart folder. Open the project. If necessary, allow Unity to upgrade the project to your installed version.
The default model we render is a built-in sample model. We will show how to convert a custom model using the ARR conversion service in the next quickstart.
Enter your account info
- In the Unity asset browser, navigate to the Scenes folder and open the Quickstart scene.
- From the Hierarchy, select the RemoteRendering game object.
- In the Inspector, enter your account credentials. If you don't have an account yet, create one.
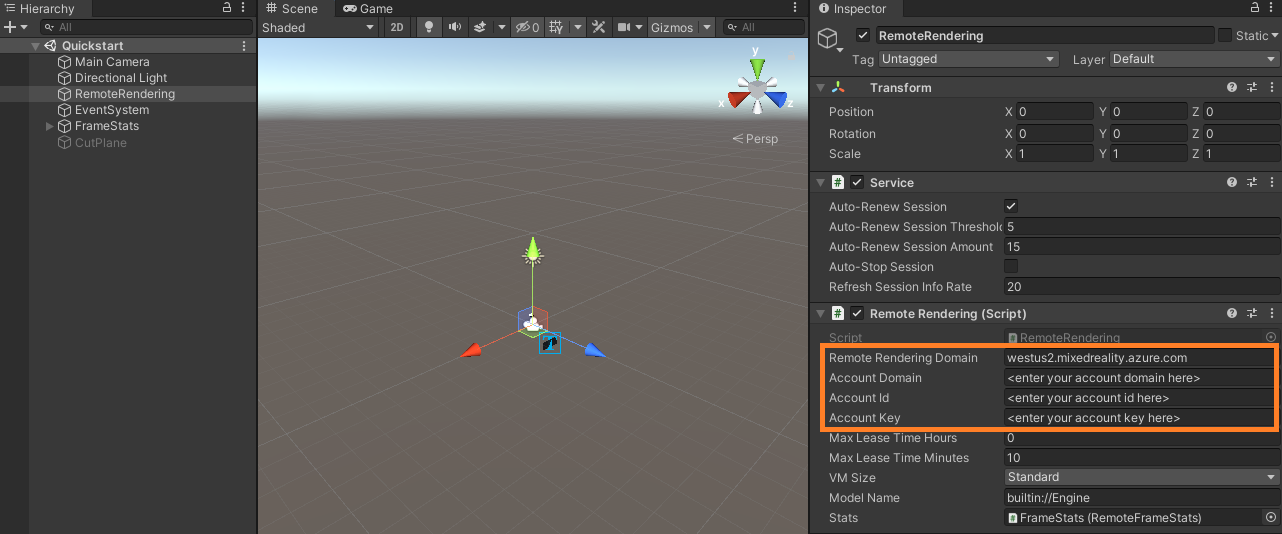
Important
Set RemoteRenderingDomain to <region>.mixedreality.azure.com, where <region> is one of the available regions near you.
Set AccountDomain to account domain as displayed in Azure Portal.
Later we want to deploy this project to a HoloLens and connect to the Remote Rendering service from that device. Since we have no easy way to enter the credentials on the device, the quickstart sample will save the credentials in the Unity scene.
Warning
Make sure to not check the project with your saved credentials into some repository where it would leak secret login information!
Create a session and view the default model
Press Unity's Play button to start the session. You should see an overlay with status text, at the bottom of the viewport in the Game panel. The session will undergo a series of state transitions. In the Starting state, the server is spun up, which takes several minutes. Upon success, it transitions to the Ready state. Now the session enters the Connecting state, where it tries to reach the rendering runtime on that server. When successful, the sample transitions to the Connected state. At this point, it will start downloading the model for rendering. Because of the model's size, the download can take a few more minutes. Then the remotely rendered model will appear.
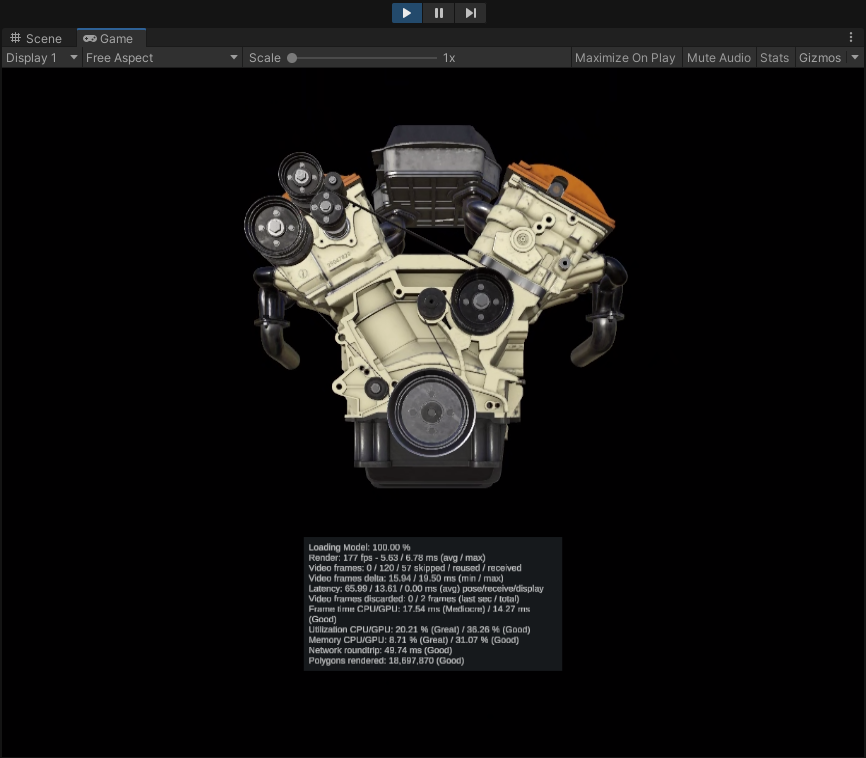
Congratulations! You are now viewing a remotely rendered model!
Inspecting the scene
Once the remote rendering connection is running, the Inspector panel updates with additional status information:
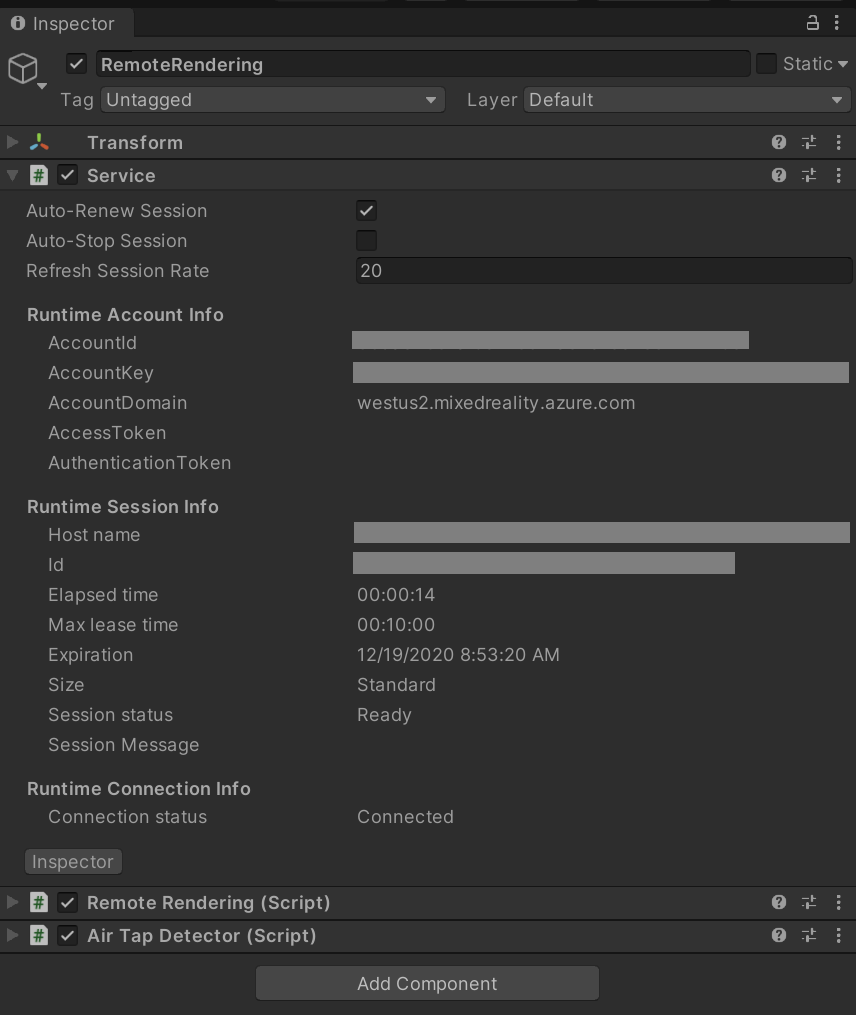
You can now explore the scene graph by selecting the new node and clicking Show children in the Inspector.
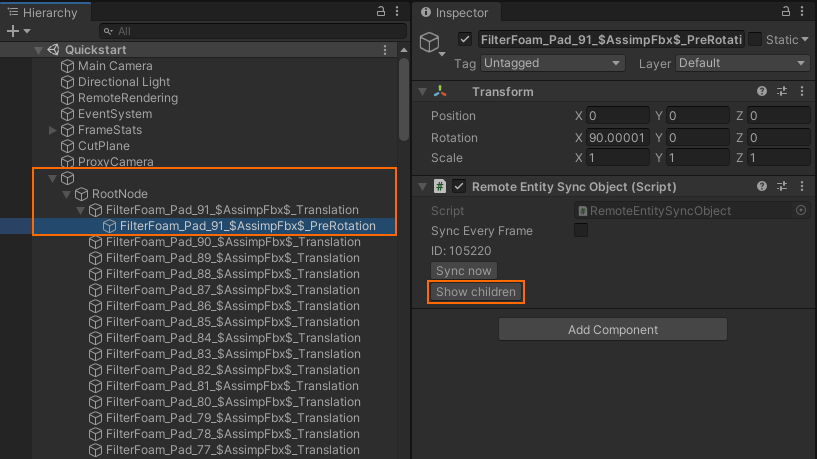
There is a cut plane object in the scene. Try enabling it by checking the box in front of CutPlane under Inspector pane and move around:
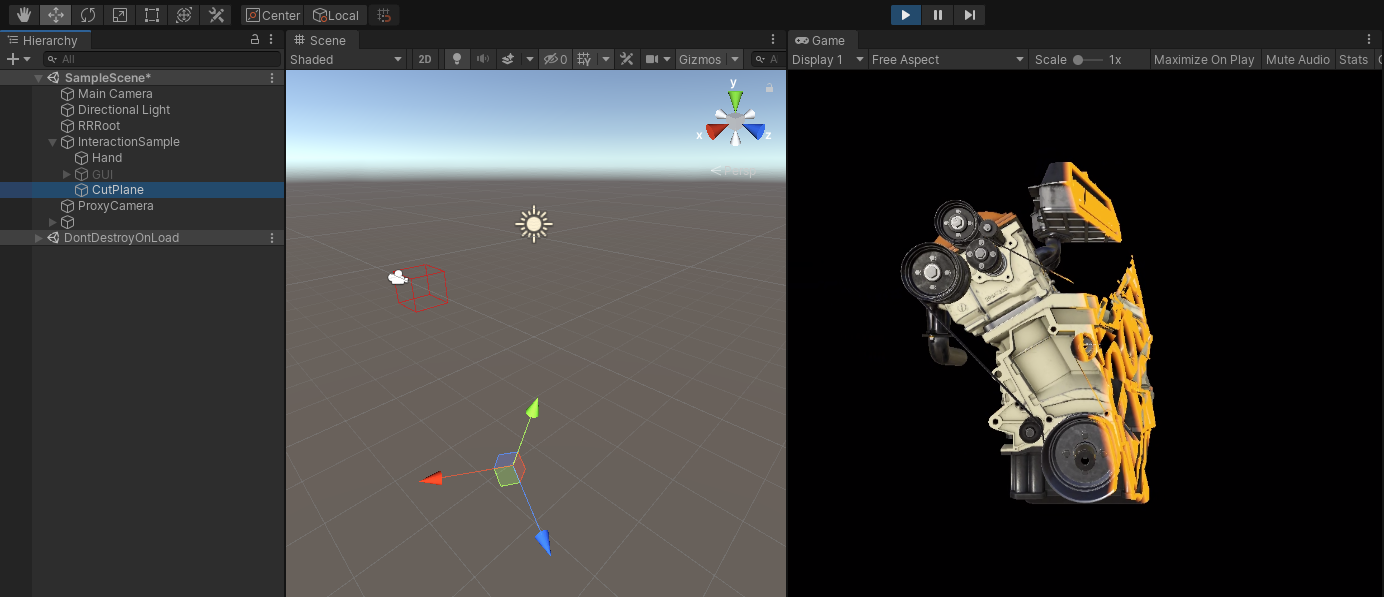
To synchronize transforms, either click Sync now or check the Sync every frame option. For component properties, just changing them is enough.
Next steps
In the next quickstart, we will deploy the sample to a HoloLens to view the remotely rendered model in its original size.
Alternatively, the sample can also be deployed to a desktop PC.