Poznámka
Na prístup k tejto stránke sa vyžaduje oprávnenie. Môžete sa skúsiť prihlásiť alebo zmeniť adresáre.
Na prístup k tejto stránke sa vyžaduje oprávnenie. Môžete skúsiť zmeniť adresáre.
SharePoint as a knowledge source for generative answers works by pairing your agent with a SharePoint URL or SharePoint lists. This option provides the full support of SharePoint in Copilot Studio.
Note
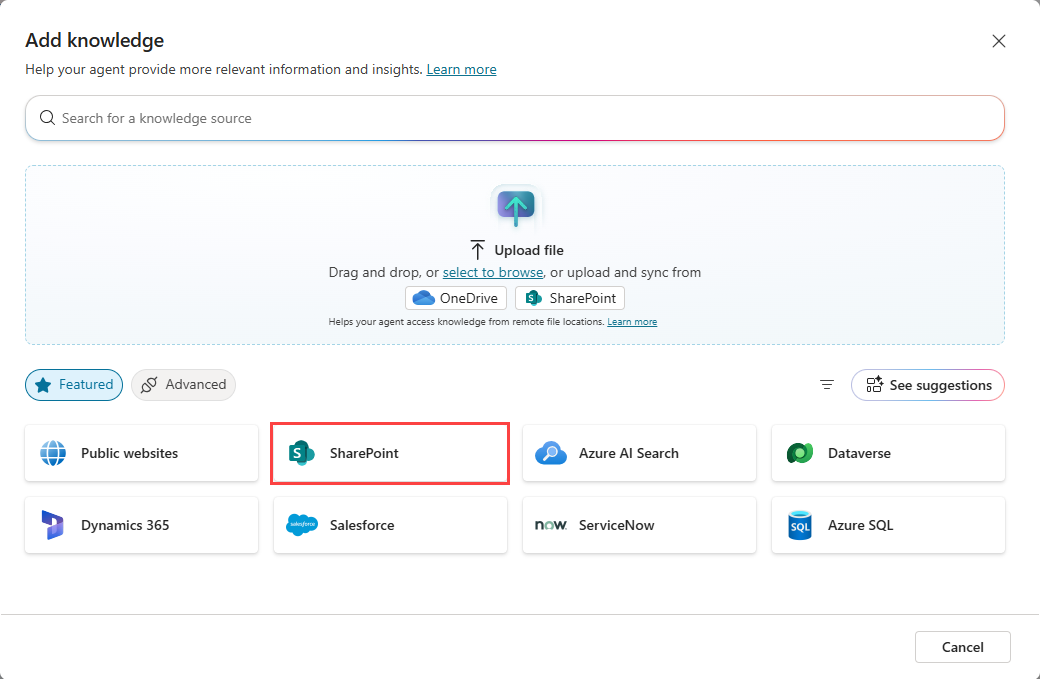
In the Add knowledge dialog, there are two SharePoint options. The SharePoint option in the file upload section is used to upload individual SharePoint files or folders, and enables file synchronization capabilities. This article coveres the SharePoint option that provides the full support of SharePoint in Copilot Studio.
For a list of limits and supported SharePoint functionality, see Copilot Studio web app SharePoint limits.
To add individual SharePoint files or folders, see Add SharePoint files and folders.
Agent responses that use SharePoint as a knowledge source aren't included in conversation transcripts.
When you publish your agent, the calls using generative answers are made on behalf of the user chatting with the agent, using the authentication settings configured in the agent. By default, agents created in Copilot Studio and in Microsoft Teams are configured with the Authenticate with Microsoft authentication option, which works in environments such as Microsoft Teams, Power Apps, and Microsoft 365 Copilot.
Note
It's possible to use generative answers with SharePoint data in Microsoft Teams chats, and not require manual authentication. To use this method for a previously published agent, reconfigure the agent to use Authenticate with Microsoft and then publish it again to Microsoft Teams. It might take a few hours before this change takes effect. If a user is in the middle of a conversation and the change doesn't appear to have taken effect, they can type "start over" in the chat to force the conversation to restart with the latest version of the agent. These changes are now available for Teams 1:1 chats between the user and the agent. They're not yet available for group chats or channel messages.
If you want to use manual authentication for your agent, see Advanced authentication scenarios.
Add SharePoint sites as a knowledge source
When a user asks a question and the agent doesn't have a topic to use for an answer, the agent searches the URL and all subpaths. For example, a URL such as contoso.sharepoint.com/sites also includes subpaths like contoso.sharepoint.com/sites/policies. Generative answers summarize this content into a targeted response.
To add a SharePoint site as a knowledge source, perform the following steps:
Open the agent.
Select Add knowledge from either the Overview or Knowledge pages, or the Properties of a generative answers node.
In the Featured section, select SharePoint.
Provide the SharePoint URL. Separate multiple URLs with manual line breaks (use Shift + Enter).
Add a name and a description. The description should be as detailed as possible, especially if generative AI is enabled, as the description aids generative orchestration.
Select Add to finish adding the knowledge source.

Add SharePoint lists as a knowledge source
SharePoint lists are a popular way to store tabular data and provide quick, easy access to information. Your agent can use these lists as a knowledge source. By adding a SharePoint list as a knowledge source, you create a real-time connection to the source, so the most current data is used for queries and reasoning. Users are authenticated using their SharePoint credentials, which ensures they have permission to access the data before your agent provides a response.
Open the agent.
Select Add knowledge from either the Overview or Knowledge pages, or the Properties of a generative answers node.
In the Featured section, select SharePoint.
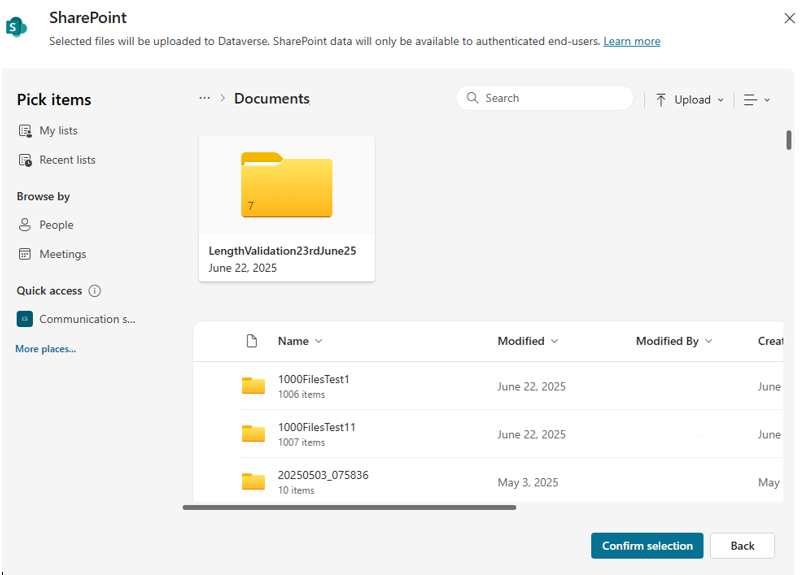
Select Browse items to find your desired list, or enter the URL of a specific SharePoint list.

When you select Browse items, the dialog is automatically populated with My Lists and Recent Lists. My Lists only displays lists created in the SharePoint Lists app. All other lists appear in the Recent Lists. If you don't see a list you need, open SharePoint and access the list, and the list then appears in Recent Lists.
You can select up to 15 lists at a time. Each list is added to the agent's knowledge sources as individual items. To add more lists to the agent, use these steps again and select more lists.
Note
If you want to use a SharePoint list that you have shared access to but isn't displayed in Recent Lists, paste the URL for the list into the URL selection.
After selecting your desired lists, select Confirm selection.
Add a name and a description. The description should be as detailed as possible, especially if generative AI is enabled, as the description aids generative orchestration.
Select Add to finish adding the knowledge source.


Advanced authentication scenarios
By default, Copilot Studio preconfigures agents to authenticate users using Microsoft authentication to access SharePoint sources when they're connecting to an agent through Microsoft Teams, Power Apps, or Microsoft 365 Copilot. However, if you need to manually configure authentication, the following steps are required for generative answers to work with SharePoint data sources.
Important
If Restricted SharePoint Search is enabled, use of SharePoint is blocked.
To authenticate your agent, see Authentication.
For instructions on how to create the needed Microsoft Entra ID application registration, see Configure user authentication with Microsoft Entra ID. When creating this registration you or your admin must specify the
Sites.Read.AllandFiles.Read.Allscopes in the Microsoft Entra ID app registration.Selecting No authentication specifies that your agent doesn't retrieve information from SharePoint.
When you configure authentication, scopes control user access. Specify
Sites.Read.AllandFiles.Read.Allin the scopes field near the existingprofileandopenidvalues in Copilot Studio. These scopes don't give users increased permissions when using the agent, but allow their permissible content from the SharePoint site as configured for generative answers.This configuration only applies to generative answers, and doesn't apply to Power Platform Connectors.