Mesh 101 Tutorial Chapter 2: Prepare the project
Scenes in the project
Open the Mesh101 project in Unity. If you have more than one version of Unity installed, be sure to open the project with
Unity 2022.3.15f1which is required for this tutorial.In the Assets folder, there are two scenes available: Starting Point and Finished Project.

Open the StartingPoint scene.
About the Scenes
StartingPoint: This is the scene you'll do the tutorial in. It contains a pre-built setting that includes the wind turbines and stations you'll be visiting and adding Mesh features to.
FinishedProject: As the title implies, this scene contains an accurate completed version of the tutorial. You can refer to this at any time to confirm that you've completed tutorial steps in the StartingPoint scene correctly. Always save your work in the StartingPoint scene before switching scenes.
Turn object icons off for a clearer view
Many objects appear in a scene with 3D icons displayed by default. This can help you identify the objects, but it can also clutter the view and make objects harder to see.
![]()
Let's turn off 3D icons to make the view more clear.
In the toolbar above the upper right corner of the Scene window, select the Gizmos drop-down.

Slide the 3D icons slider all the way to the left.

This will make it easier to read info dialogs, labels on buttons, and more.

Exploring the StartingPoint scene
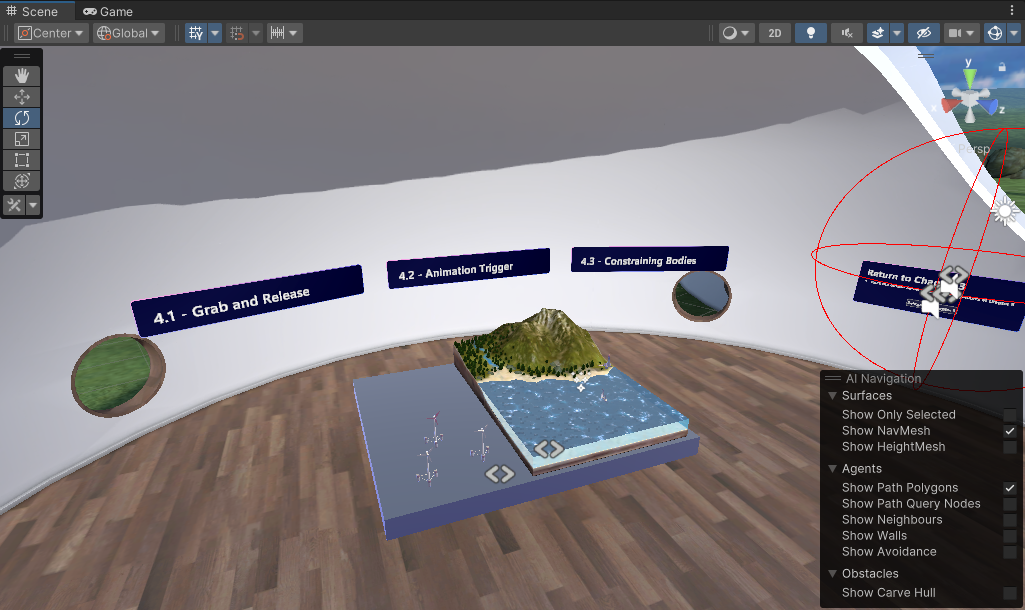
Feel free to move around in the Scene window to get familiar with the scene's contents. If we zoom out a little, we can see that there are a number of wind turbines in our wind farm. Those two white rounded items are called Sphere Terraces.

When viewing the sphere terraces from the front, you can see that each one contains a space inside that you'll soon be walking around in.

You'll be visiting the Sphere Terraces starting in the next chapter---they each contain a series of stations where you'll learn how to implement Mesh features. The first Sphere Terrace (covered in Chapter 3) is where you'll learn about Mesh Visual Scripting ...

... and the other Sphere Terrace, covered in Chapter 4, is where you'll learn about Mesh Interactables and Mesh Physics.
Using Mesh Emulation Mode
When you press the Unity Editor Play button, your project automatically enters Mesh Emulation Mode. This is made possible by the presence of the MeshEmulatorSetup [NoUpload] prefab which you can view in the Hierarchy.
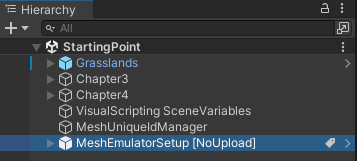
In earlier versions of the tutorial, you needed to add this prefab intentionally when you first entered Play mode. As of mid-May 2024, the prefab comes pre-loaded into the scene.
In Mesh Emulation Mode, you get an approximate preview of what the content will look and feel like when it runs in the Mesh app. The Emulator prefab provides you with a highly stylized avatar controller that has a camera attached, so now when we "play" the project we can have a look around. By default, the Mesh Emulator is set up to give you a single view in the Game window.

A key feature of Mesh Emulation Mode is the ability to run multiple clients within the same process; this allows you to easily get a first impression of a multi-user scenario. In the future, you may want to have two or more views in Mesh Emulator mode. To do this, you can navigate to the Emulator's Mesh Emulator Setup component in the Inspector and then change its Initial Screen Count property to 2 (or more).

For this tutorial, we'll stay with the single view.
- Press the Unity Editor Play button to enter Play mode.
- Use the WASD keys to walk around inside the Sphere Terrace. You can also use the arrow keys or drag the right mouse button to pan in any direction. When you're done experimenting, click the Unity Editor Play button again to exit Play mode.
Check the scale of your GameObjects
The tutorial project uses default Unity scale values: 1 unit = 1 meter.
The MeshEmulatorSetup avatar is the same height as an average human. When
you're creating your own Environment, you can compare its size to any
custom GameObject you add to your project to ensure that those objects
are the size you want.
Add the Mesh Thumbnail Camera
Adding the Mesh Thumbnail Camera provides a thumbnail image that will be
added to your Environment's listing in Mesh on the web and its
selection button in the Mesh app. This comes in handy when you're
selecting Environments in either place because it gives you a visual
reminder of what the Environment looks like.
To add the thumbnail camera to the scene and set its view:
In the Scene window, adjust the view so that it shows what you want to display in the thumbnail image (the Thumbnail Camera's view will be based on the Scene window).
Select the "+" drop-down located below the Hierarchy tab, and then select Mesh Toolkit > Thumbnail Camera.
To see what your thumbnail will look like, view the small MeshThumbnailCamera window which appears in the lower right corner of the Scene window.

Note: If you decide you want a different view for the Thumbnail Camera, the easiest way to achieve this is to delete the Camera, establish the Scene view that you want, and then add the Camera again. You can also adjust the Camera GameObject directly in the Scene window or change its Position and Rotation values in the Inspector prior to uploading your Environment to Mesh.
There are no set rules for how your thumbnail should look---it's totally up to you. For the example below, we chose a close-up front view of a wind turbine.

Next steps
Povratne informacije
Kmalu na voljo: V letu 2024 bomo ukinili storitev Težave v storitvi GitHub kot mehanizem za povratne informacije za vsebino in jo zamenjali z novim sistemom za povratne informacije. Za več informacij si oglejte: https://aka.ms/ContentUserFeedback.
Pošlji in prikaži povratne informacije za