Quickstart: Azure Cosmos DB for Table for .NET
APPLIES TO:
![]() Table
Table
This quickstart shows how to get started with the Azure Cosmos DB for Table from a .NET application. The Azure Cosmos DB for Table is a schemaless data store allowing applications to store structured table data in the cloud. You learn how to create tables, rows, and perform basic tasks within your Azure Cosmos DB resource using the Azure.Data.Tables Package (NuGet).
Note
The example code snippets are available on GitHub as a .NET project.
API for Table reference documentation | Azure.Data.Tables Package (NuGet)
Prerequisites
- An Azure account with an active subscription. Create an account for free.
- GitHub account
- An Azure account with an active subscription. Create an account for free.
- Azure Developer CLI
- Docker Desktop
Setting up
Deploy this project's development container to your environment. Then, use the Azure Developer CLI (azd) to create an Azure Cosmos DB for Table account and deploy a containerized sample application. The sample application uses the client library to manage, create, read, and query sample data.


Important
GitHub accounts include an entitlement of storage and core hours at no cost. For more information, see included storage and core hours for GitHub accounts.
Open a terminal in the root directory of the project.
Authenticate to the Azure Developer CLI using
azd auth login. Follow the steps specified by the tool to authenticate to the CLI using your preferred Azure credentials.azd auth loginUse
azd initto initialize the project.azd initDuring initialization, configure a unique environment name.
Tip
The environment name will also be used as the target resource group name. For this quickstart, consider using
msdocs-cosmos-db.Deploy the Azure Cosmos DB account using
azd up. The Bicep templates also deploy a sample web application.azd upDuring the provisioning process, select your subscription and desired location. Wait for the provisioning process to complete. The process can take approximately five minutes.
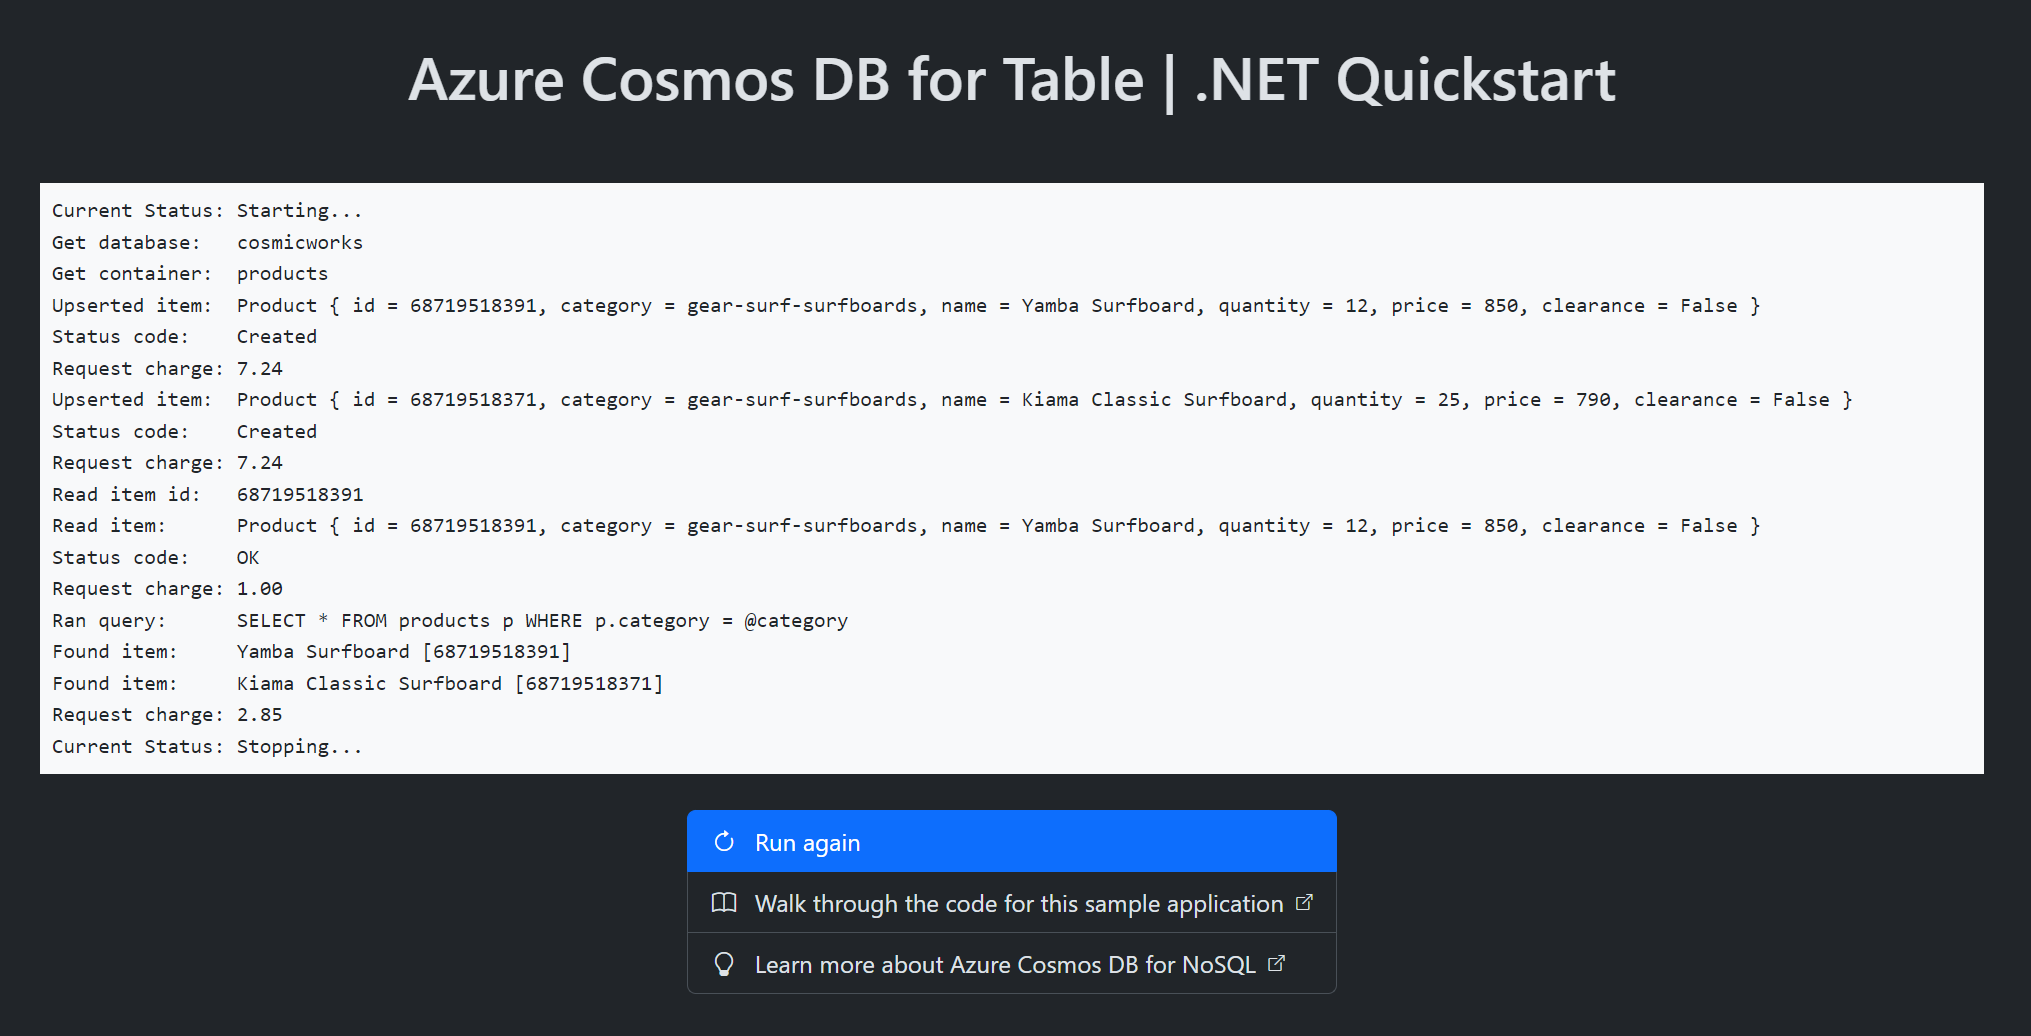
Once the provisioning of your Azure resources is done, a URL to the running web application is included in the output.
Deploying services (azd deploy)

  (✓) Done: Deploying service web
- Endpoint: <https://[container-app-sub-domain].azurecontainerapps.io>

SUCCESS: Your application was provisioned and deployed to Azure in 5 minutes 0 seconds.
Use the URL in the console to navigate to your web application in the browser. Observe the output of the running app.
Install the client library
The client library is available through NuGet, as the Microsoft.Azure.Cosmos package.
Open a terminal and navigate to the
/src/webfolder.cd ./src/webIf not already installed, install the
Azure.Data.Tablespackage usingdotnet add package.dotnet add package Azure.Data.Tables --version 12.*Also, install the
Azure.Identitypackage if not already installed.dotnet add package Azure.Identity --version 1.*Open and review the src/web/Cosmos.Samples.Table.Quickstart.Web.csproj file to validate that the
Azure.Data.TablesandAzure.Identityentries both exist.
Object model
| Name | Description |
|---|---|
| TableServiceClient | This class is the primary client class and is used to manage account-wide metadata or databases. |
| TableClient | This class represents the client for a table within the account. |
Code examples
The sample code in the template uses a table named cosmicworks-products. The table contains details such as name, category, quantity, a unique identifier, and a sale flag for each product.
Authenticate the clients
Application requests to most Azure services must be authorized. Use the DefaultAzureCredential type as the preferred way to implement a passwordless connection between your applications and Azure Cosmos DB for NoSQL. DefaultAzureCredential supports multiple authentication methods and determines which method should be used at runtime.
Important
You can also authorize requests to Azure services using passwords, connection strings, or other credentials directly. However, this approach should be used with caution. Developers must be diligent to never expose these secrets in an unsecure location. Anyone who gains access to the password or secret key is able to authenticate to the database service. DefaultAzureCredential offers improved management and security benefits over the account key to allow passwordless authentication without the risk of storing keys.
This sample creates a new instance of the TableServiceClient and TableClient classes and authenticates using a DefaultAzureCredential instance.
TableServiceClient serviceClient = new(
    endpoint: new Uri(builder.Configuration["AZURE_COSMOS_DB_TABLE_ENDPOINT"]!),
    tokenCredential: new DefaultAzureCredential()
);

TableClient client = serviceClient.GetTableClient(
    tableName: builder.Configuration["AZURE_COSMOS_DB_TABLE_NAME"]!
);
Create an item
The easiest way to create a new item in a table is to create a class that implements the ITableEntity interface. You can then add your own properties to the class to populate columns of data in that table row.
public record Product(
    string name,
    int quantity,
    decimal price,
    bool clearance
) : ITableEntity
{
    public string RowKey { get; set; } = $"{Guid.NewGuid()}";

    public string PartitionKey { get; set; } = String.Empty;

    public ETag ETag { get; set; } = ETag.All;

    public DateTimeOffset? Timestamp { get; set; }
};
Create an item in the collection using the Product class by calling TableClient.AddEntityAsync<T>.
Product entity = new(
    name: "Yamba Surfboard",
    quantity: 12,
    price: 850.00m,
    clearance: false
)
{
    RowKey = "68719518391",
    PartitionKey = "gear-surf-surfboards",
};

Response response = await client.UpsertEntityAsync<Product>(
    entity: entity,
    mode: TableUpdateMode.Replace
);
Get an item
You can retrieve a specific item from a table using the TableClient.GetEntityAsync<T> method. Provide the partitionKey and rowKey as parameters to identify the correct row to perform a quick point read of that item.
Response<Product> response = await client.GetEntityAsync<Product>(
    rowKey: "68719518391",
    partitionKey: "gear-surf-surfboards"
);
Query items
After you insert an item, you can also run a query to get all items that match a specific filter by using the TableClient.Query<T> method. This example filters products by category using Linq syntax, which is a benefit of using typed ITableEntity models like the Product class.
Note
You can also query items using OData syntax. You can see an example of this approach in the Query Data tutorial.
string category = "gear-surf-surfboards";
AsyncPageable<Product> results = client.QueryAsync<Product>(
    product => product.PartitionKey == category
);
Parse the paginated results of the query by looping through each page of results using asynchronous loop to determine if there are any results left at the start of each loop.
List<Product> entities = new();
await foreach (Product product in results)
{
    entities.Add(product);
}
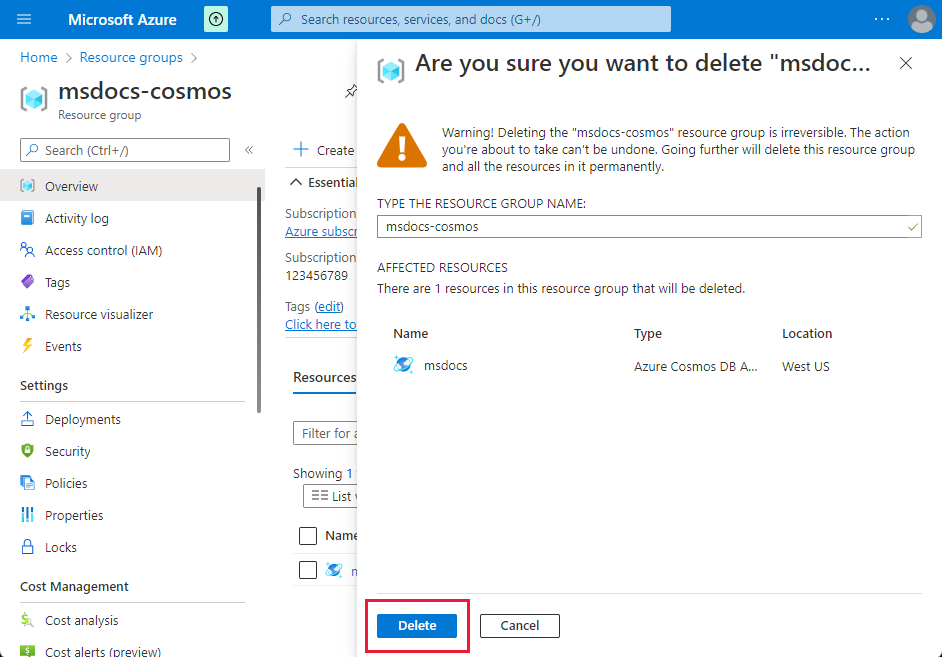
Clean up resources
When you no longer need the Azure Cosmos DB for Table account, you can delete the corresponding resource group.
Use the az group delete command to delete the resource group.
az group delete --name $resourceGroupName