Tutorial: Create tables with T-SQL in a warehouse
Applies to: ✅ Warehouse in Microsoft Fabric
In this tutorial, learn how to create tables in the warehouse with T-SQL.
Note
This tutorial forms part of an end-to-end scenario. In order to complete this tutorial, you must first complete these tutorials:
Create tables
In this task, learn how to create tables in the warehouse with T-SQL.
Ensure that the workspace you created in the first tutorial is open.
Select the Wide World Importers warehouse (from the items listed on the workspace landing page).
On the Home ribbon, select New SQL query.

In the query editor, paste the following code. The code drops the
dimension_citytable (if it exists), and then creates the dimension table. It also drops thefact_saletable (if it exists), and creates the fact table.--Drop the dimension_city table if it already exists. DROP TABLE IF EXISTS [dbo].[dimension_city]; --Create the dimension_city table. CREATE TABLE [dbo].[dimension_city] ( [CityKey] [int] NULL, [WWICityID] [int] NULL, [City] [varchar](8000) NULL, [StateProvince] [varchar](8000) NULL, [Country] [varchar](8000) NULL, [Continent] [varchar](8000) NULL, [SalesTerritory] [varchar](8000) NULL, [Region] [varchar](8000) NULL, [Subregion] [varchar](8000) NULL, [Location] [varchar](8000) NULL, [LatestRecordedPopulation] [bigint] NULL, [ValidFrom] [datetime2](6) NULL, [ValidTo] [datetime2](6) NULL, [LineageKey] [int] NULL ); --Drop the fact_sale table if it already exists. DROP TABLE IF EXISTS [dbo].[fact_sale]; --Create the fact_sale table. CREATE TABLE [dbo].[fact_sale] ( [SaleKey] [bigint] NULL, [CityKey] [int] NULL, [CustomerKey] [int] NULL, [BillToCustomerKey] [int] NULL, [StockItemKey] [int] NULL, [InvoiceDateKey] [datetime2](6) NULL, [DeliveryDateKey] [datetime2](6) NULL, [SalespersonKey] [int] NULL, [WWIInvoiceID] [int] NULL, [Description] [varchar](8000) NULL, [Package] [varchar](8000) NULL, [Quantity] [int] NULL, [UnitPrice] [decimal](18, 2) NULL, [TaxRate] [decimal](18, 3) NULL, [TotalExcludingTax] [decimal](29, 2) NULL, [TaxAmount] [decimal](38, 6) NULL, [Profit] [decimal](18, 2) NULL, [TotalIncludingTax] [decimal](38, 6) NULL, [TotalDryItems] [int] NULL, [TotalChillerItems] [int] NULL, [LineageKey] [int] NULL, [Month] [int] NULL, [Year] [int] NULL, [Quarter] [int] NULL );To execute the query, on the query designer ribbon, select Run.

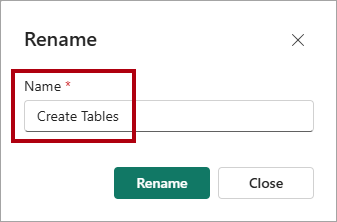
When the script execution completes, to rename the query, right-click on the query tab, and then select Rename.

In the Rename window, in the Name box, replace the default name with
Create Tables.
Select Rename.
If necessary, in the Explorer pane, expand the Schemas folder, the
dboschema, and the Tables folder.Verify that the two new tables are listed. The
dimension_customertable was created in the previous tutorial.