Not
Åtkomst till denna sida kräver auktorisation. Du kan prova att logga in eller byta katalog.
Åtkomst till denna sida kräver auktorisation. Du kan prova att byta katalog.

Diagram över sekvensen i distributionsguiden, inklusive dessa platser, i ordning: Översikt, Planera, Förbereda, Publicera, Övervaka och Optimering. Platsen Publicera är för närvarande markerad.
Distribuera data-API-byggaren snabbt till Azure med bara en konfigurationsfil och ingen anpassad kod. Den här guiden innehåller steg för att köra avbilden för Data API Builder från Docker som en container i Azure Container Instances.
I den här guiden går du igenom stegen för att skapa en konfigurationsfil för Data API Builder, vara värd för filen i Azure Files och montera sedan filen i en container i Azure Container Instances.
Förutsättningar
Ett Azure-konto med en aktiv prenumeration. Skapa ett konto kostnadsfritt.
Data-API-byggarens CLI. Installera CLI.
Azure CLI. Installera Azure CLI.
Befintlig databas som stöds kan adresseras från Azure.
Skapa konfigurationsfilen
Börja med att skapa en DAB-konfigurationsfil (Data API Builder) för att ansluta till din befintliga databas. Den här filen används senare med den slutliga containern.
Skapa en tom katalog på den lokala datorn för att lagra konfigurationsfilen.
Initiera en ny baskonfigurationsfil med .
dab initAnvänd följande inställningar minst vid initiering.Inställning Värde Databastyp Välj en databastyp som stöds. Anslutningssträng @env()Använd funktionen för att refereraDATABASE_CONNECTION_STRINGtill miljövariabeln.dab init --database-type "<database-type>" --connection-string "@env('DATABASE_CONNECTION_STRING')"Viktigt!
Vissa databastyper kräver ytterligare konfigurationsinställningar vid initiering.
Lägg till minst en databasentitet i konfigurationen.
dab addAnvänd kommandot för att konfigurera en entitet. Konfigurera varje entitet för att tillåta alla behörigheter för anonyma användare. Upprepadab addså många gånger du vill för dina entiteter.dab add "<entity-name>" --source "<schema>.<table>" --permissions "anonymous:*"Öppna och granska innehållet i dab-config.json-filen . Du använder den här filen senare i den här guiden.
Konfiguration av värdar i Azure Files
Ladda sedan upp konfigurationsfilen till en filresurs som skapats i Azure Files. Den här filresursen monteras slutligen i den slutliga containern som en volym.
Logga in på Azure-portalen (https://portal.azure.com).
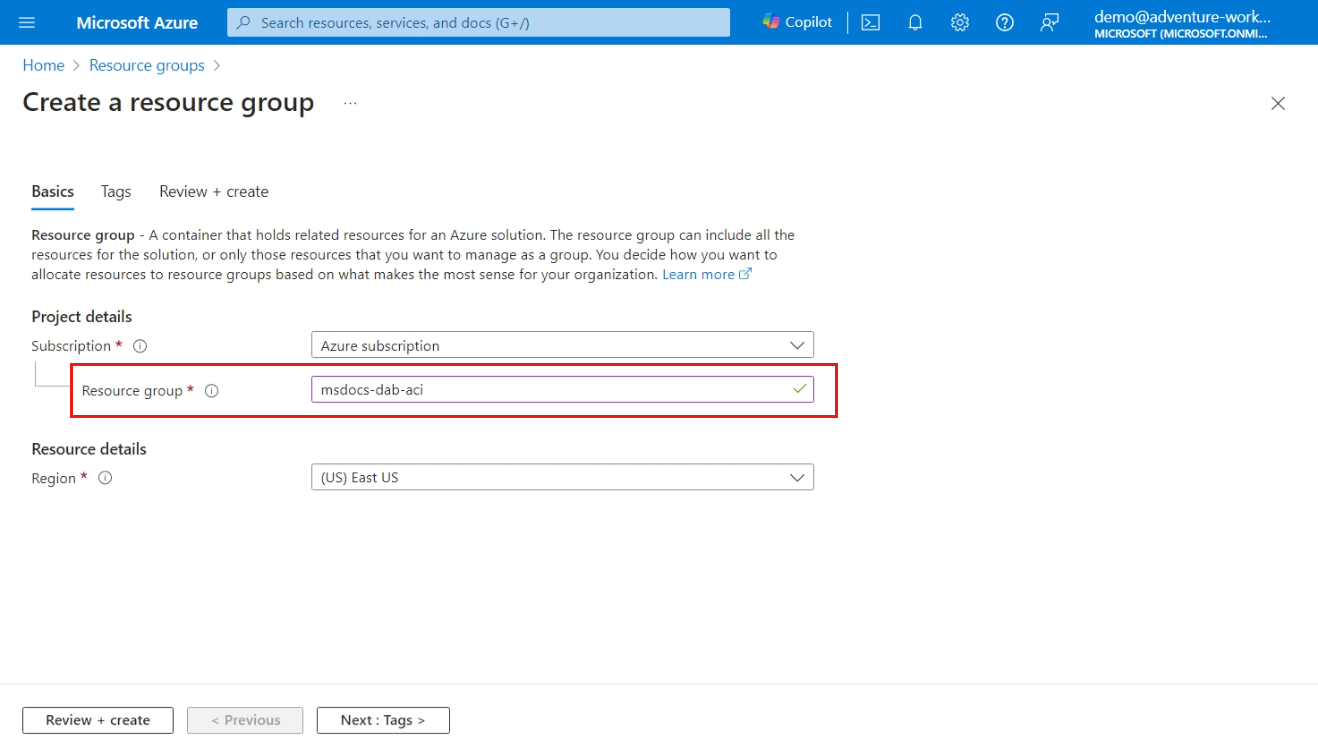
Skapa en ny resursgrupp. Du använder den här resursgruppen för alla nya resurser i den här guiden.
Tips/Råd
Vi rekommenderar att du namnger resursgruppen msdocs-dab-aci. Alla skärmbilder i den här guiden använder det här namnet.
skapa ett Azure Storage-konto Använd de här inställningarna för att konfigurera kontot.
Inställning Värde resursgrupp Välj den resursgrupp som du skapade tidigare Lagringskontonamn Ange ett globalt unikt namn Region Välj en Azure-region Föreställning Välj Standard Redundans Välj Lokalt redundant lagring (LRS) Aktivera åtkomst till lagringskontonyckel Välj Aktiverad 
Gå till det nya lagringskontot i Azure-portalen.
Välj Filresurser i avsnittet Datalagring på resursmenyn. Välj sedan Filresurs i kommandofältet för att skapa en ny resurs i lagringskontot. Använd följande inställningar för att konfigurera den nya fildelningen.
Inställning Värde Namn Ange configÅtkomstnivå Välj Populär Aktivera säkerhetskopiering Välj inte 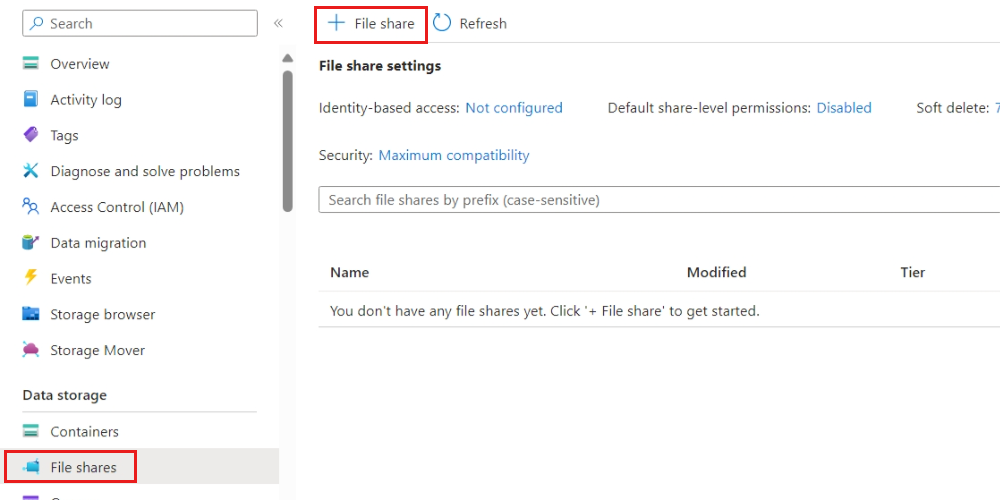
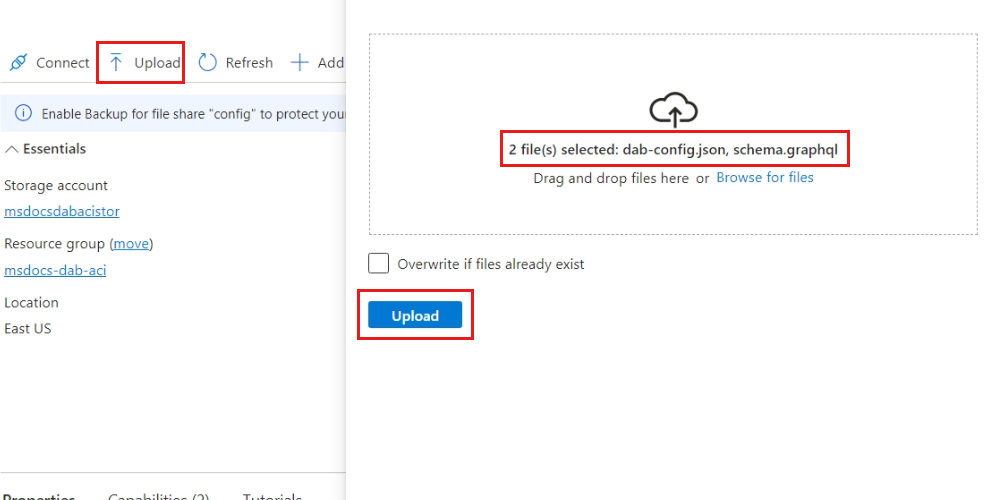
Ladda upp dab-config.json och andra nödvändiga filer till delningen. Använd alternativet Ladda upp i kommandofältet för att öppna dialogrutan Ladda upp filer . Välj båda filerna och välj sedan Ladda upp.
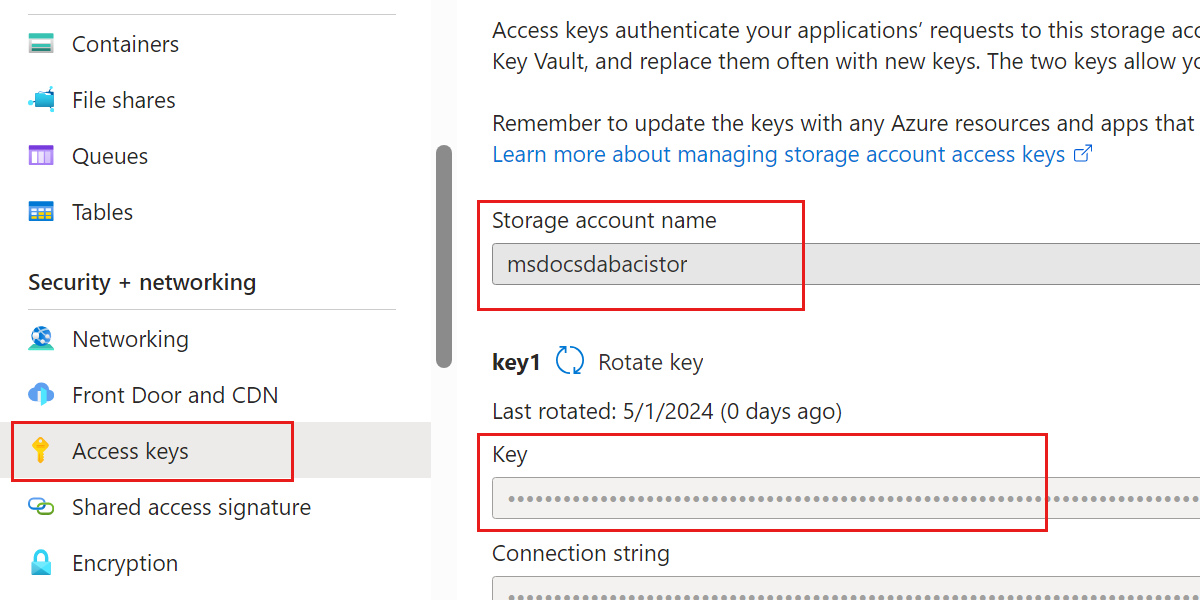
Välj Åtkomstnycklar i avsnittet Säkerhet + nätverk på resursmenyn. Registrera sedan lagringskontots namn och nyckelvärden från den här sidan. Du kommer att använda dessa värden senare i den här guiden.

Skapa bascontainerinstansen
Skapa slutligen containern i Azure med hjälp av Azure Container Instances. Den här containern är värd för Data API Builder-avbildningen med en konfigurationsfil för att ansluta till databasen.
Viktigt!
I dag är det enda sättet att skapa en containerinstans med en monterad volym med Azure CLI.
Skapa en Azure Container Instances-resurs med .
az container createAnvänd de här inställningarna för att konfigurera resursen.Inställning Värde resursgrupp Använd resursgruppen som du skapade tidigare Containernamn Ange ett globalt unikt namn Region Använd samma region som lagringskontot SKU Använd Standard Bildtyp Använd publik Bild Ange mcr.microsoft.com/azure-databases/data-api-builder:latestOS-typ Använda Linux Nätverkstyp Använd publik Nätverksportar Ange 5000DNS-namnetikett Ange en globalt unik etikett Miljövariabler Ange DATABASE_CONNECTION_STRINGoch anslutningssträngen för databasen.az container create \ --resource-group "<resource-group-name>" \ --name "<unique-container-instance-name>" \ --image "mcr.microsoft.com/azure-databases/data-api-builder:latest" \ --location "<region>" \ --sku "Standard" \ --os-type "Linux" \ --ip-address "public" \ --ports "5000" \ --dns-name-label "<unique-dns-label>" \ --environment-variables "DATABASE_CONNECTION_STRING=<database-connection-string>" \ --azure-file-volume-mount-path "/cfg" \ --azure-file-volume-account-name "<storage-account-name>" \ --azure-file-volume-account-key "<storage-account-key>" \ --azure-file-volume-share-name "config" \ --command-line "dotnet Azure.DataApiBuilder.Service.dll --ConfigFileName /cfg/dab-config.json" --Tips/Råd
Vi rekommenderar att du använder en anslutningssträng som inte innehåller auktoriseringsnycklar. Använd i stället hanterade identiteter och rollbaserad åtkomstkontroll för att hantera åtkomst mellan din databas och värd. Mer information finns i Azure-tjänster som använder hanterade identiteter.
Använd
az container showför att fråga det fullständigt kvalificerade domännamnet (FQDN) för din nya containerinstans. Bläddra sedan till containerinstansens webbplats.az container show \ --resource-group "<resource-group-name>" \ --name "<unique-container-instance-name>" \ --query "join('://', ['https', ipAddress.fqdn])" \ --output "tsv"Observera svaret som anger att DAB-containern körs och att statusen är felfri.
{
    "status": "healthy",
    "version": "1.1.7",
    "app-name": "dab_oss_1.1.7"
}
Anmärkning
Versionsnumret och namnet varierar beroende på din aktuella version av Data API Builder. I det här läget kan du inte navigera till några API-slutpunkter. Dessa slutpunkter kommer att vara tillgängliga när du monterar en DAB-konfigurationsfil.
Navigera till
/api/swagger-sökvägen för det aktuella körande programmet. Använd Swagger-användargränssnittet för att utfärda en HTTP GET-begäran för en av dina entiteter.
Rensa resurser
När du inte längre behöver exempelprogrammet eller resurserna tar du bort motsvarande distribution och alla resurser.
Navigera till resursgruppen med hjälp av Azure-portalen.
I kommandofältet väljer du Ta bort.