Different types of pages in the user interface
In Business Central, there are a number of standard page types and user interface items. This unit discusses some of the key pages and items you'll encounter as you use Business Central.
Role Center
The Role Center page is your starting point when you access Business Central. People fulfill different roles in companies, and Business Central includes Role Center pages that are optimized and attuned for such roles.
The Role Center page is based on a role-centric design to give you fast access to the business process and intelligence tools that you need to do your job.
For example, a bookkeeper and a business manager need to have quick access to different information, and they need access to different actions. The different Role Centers of the bookkeeper and the business manager reflects these differences in needs and access. Having separate and customized Role Centers empowers the bookkeeper to quickly monitor payments and approvals, while the business manager can view finance performance charts.
The following image illustrates the accountant Role Center page.

The following image illustrates the business manager Role Center page.

You can check out the various Role Centers by selecting the Settings icon in the top-right corner of the app bar, selecting My Settings, and then selecting a Role Center to explore.
The following sections describe the various elements you'll find on a Role Center page.
App bar
The app bar is at the top of your Role Center and includes the App launcher, the Search for Page (Tell me) icon, Notifications, Settings, and Help.

Navigation bar
The navigation bar is under the app bar and where you will find the name of the company that you are working in and navigation menus.
Navigation menus
Navigation menus are groups of links that provide you with quick access to data and documents of specific functional domains or departments.

Different Role Center pages will have different navigation menus.
List area
In the list area of the Role Center, you will find the users' lists of the most useful entities in their business processes.

For instance, the accountant Role Center provides lists such as the chart of accounts, bank accounts, customers, vendors, incoming documents, purchase invoices, and budgets because these lists are useful shortcuts to relevant data in the accounting process.
Headline area
The headline area displays a series of automatically changing headlines that provide users with up-to-date information and insight into the business and daily work. Typical categories of headlines might include:
The most popular item last week, month, or last three months, and how many items were sold.
The largest sale order last week, month, or last three months.
Who, or what, was the busiest resource, and indicating what were the bookings.
Whether sales increased in the last week, month, or three months, compared to the same period last year.
The biggest sales invoice that we posted last week, month, or last three months, and to which customer that the bill was sent.
Action area
The action area makes the most-used and relevant actions for your role quickly available.

Cues and action tiles
Role Centers provide a diverse set of cues and action tiles. A cue provides a visual representation of aggregated business data, such as the number of open sales invoices or the total sales for the month. Cues are interactive, meaning that you can select the cue to drill down to related data or open another page, run code, and more.
The following image shows an example of cues.

Action tiles promote an action or operation to the user on the Role Center. Action tiles act as links that perform a task or operation, like starting a video, targeting another resource or URL, or running code.

Insights
You can view and configure lists in the insight area of your Role Center. The Role Center account provides two configurable lists: My Accounts and My Vendors.

You can configure these lists in the following way:
Select the list name.
Select Manage list.
You can then delete or insert new lines (accounts or vendors in this Role Center). You can also open the specific record (account or vendor in this Role Center) by selecting Open.

Business Performance
In the Business Performance section of the Role Center, you can switch between charts and setup and help resources.
Charts
You can decide which chart is displayed by selecting Business Performance > Select Chart.


In the Select Chart list, you can see which charts are available and enabled to be displayed in the Business Performance section of your Role Center.
The charts are interactive, meaning that by selecting the chart, you can drill down to the relevant data.
You can switch between the available charts by selecting Next or Previous chart, and you can select the period length for the chart.
Reports and charts
Depending on the Role Center, you can find more reports and charts with various options.
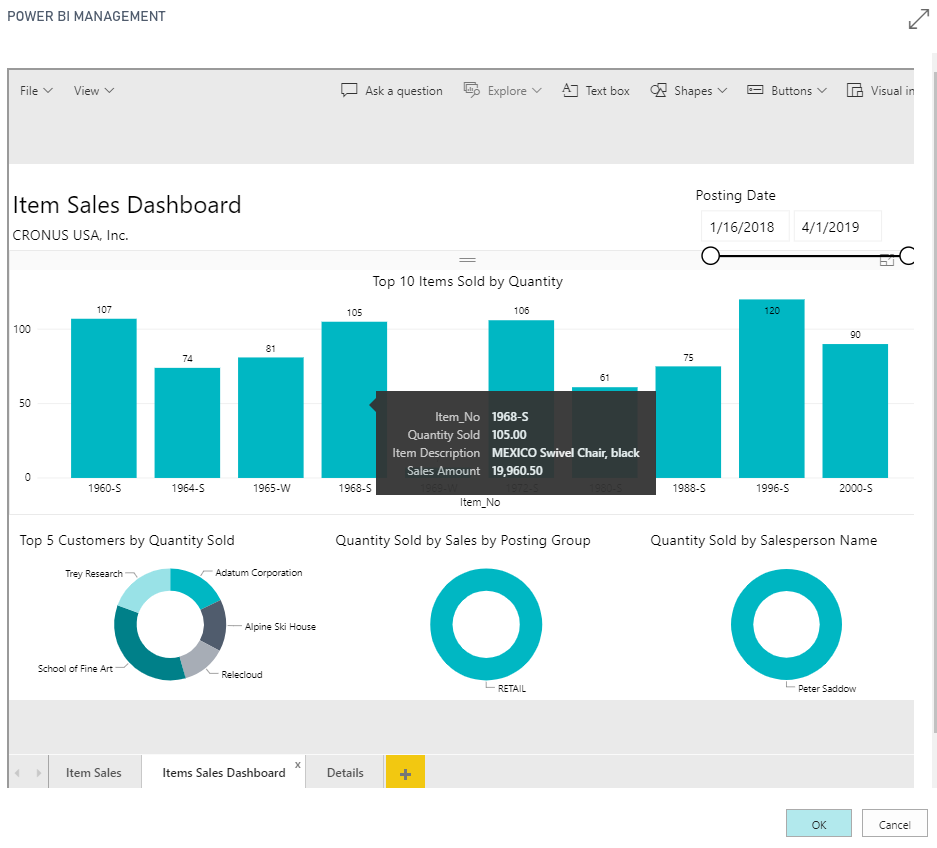
Embedded Power BI reports
You can embed Power BI reports in your Role Center page. Getting insights into your Business Central data is possible with Power BI and the Business Central apps. Power BI retrieves your data and then builds an out-of-the-box dashboard and reports based on that data.
You can build and embed your own reports and dashboards in Power BI based on your Business Central data, or you can use the predefined Power BI apps for Business Central in the App store. To use these apps, you must have a valid account with Dynamics 365 and with Power BI. Power BI apps require permissions to the tables where data is retrieved from, and you need a Power BI Pro license.
Dynamics 365 Business Central publishes the following Power BI apps, which provide detailed dashboards for viewing data:
- Dynamics 365 Business Central - CRM
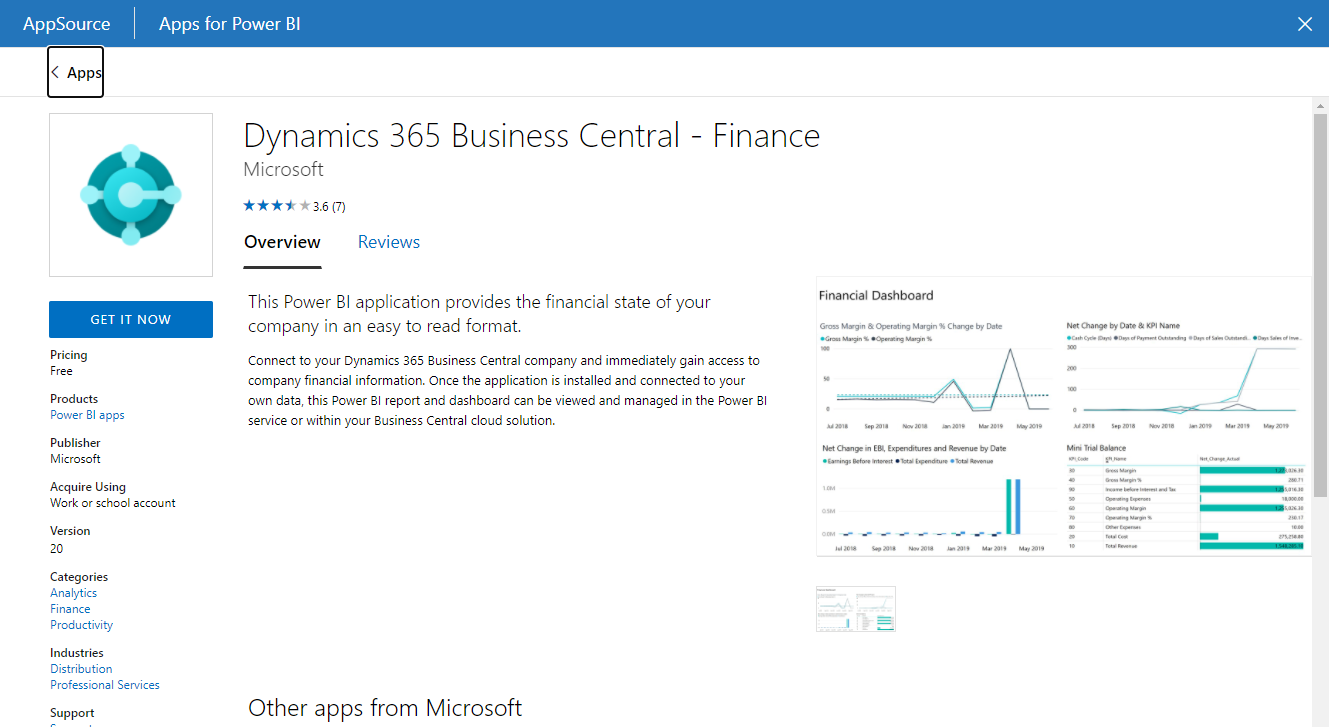
- Dynamics 365 Business Central - Finance
- Dynamics 365 Business Central - Sales
The Power BI apps are preconfigured to work with data from the demonstration company that you get when you sign up for Business Central. When you install the apps in Power BI, and you connect to your own data, some reports might not work because they rely on data that your company doesn't have. In those cases, you can remove that report from your dashboard.
Each Power BI app provides reports that you can drill into:
Select any visual on the dashboard to bring up one of the underlying reports.
Filter the report or add fields that you want to monitor.
Pin this customized view to the dashboard to continue tracking.
You can refresh data manually, and you can set up a refresh schedule.
To embed Power BI reports in your role center, complete the following steps:
Go to powerbi.microsoft.com.
Sign in with your Business Central account.
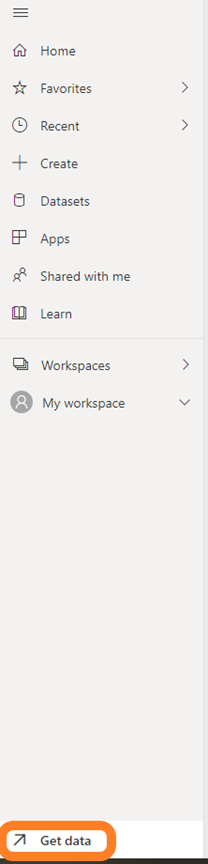
Select Get Data.
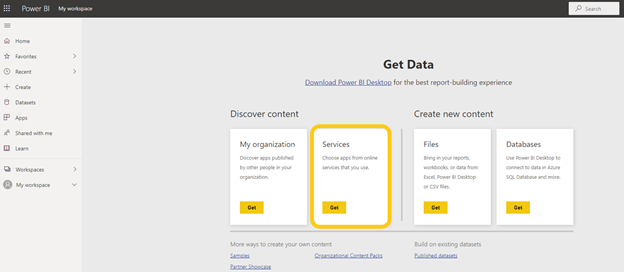
Select Get Services.
Find a Business Central app.
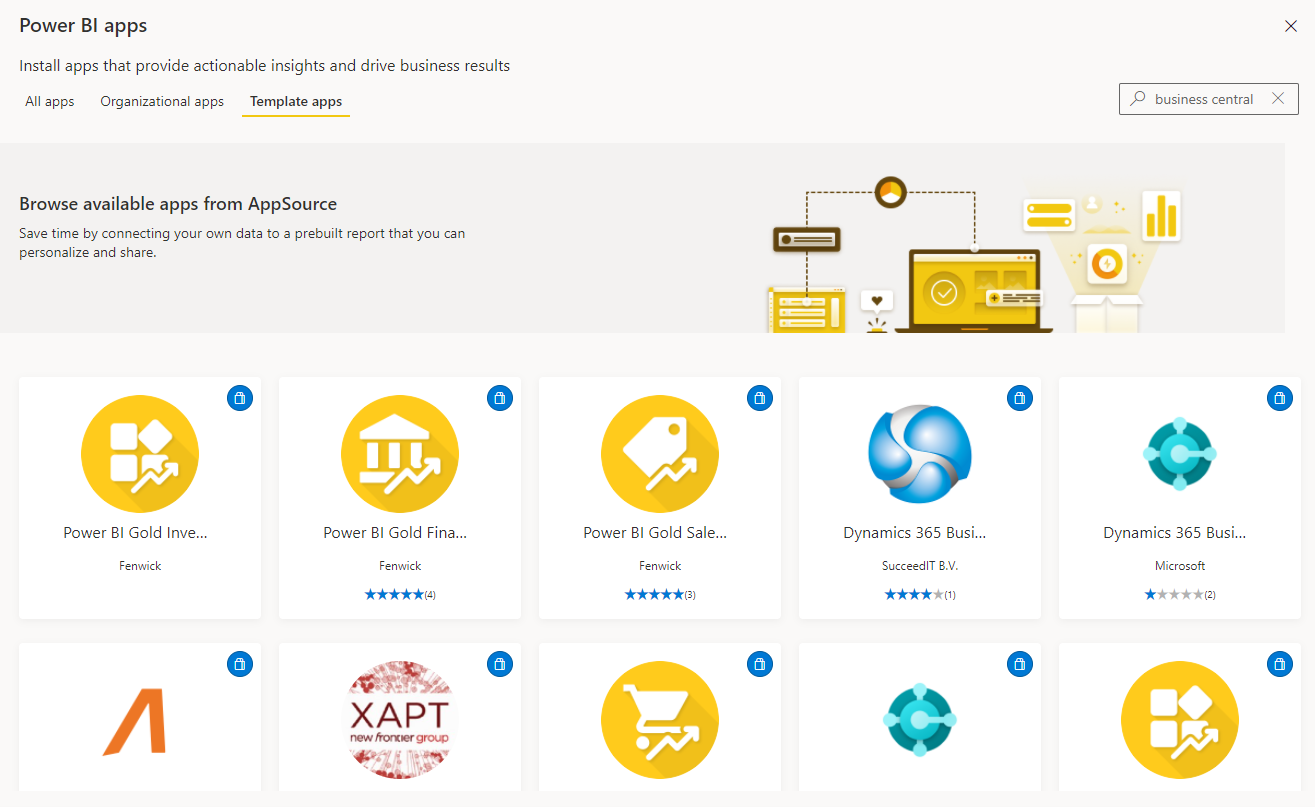
Select an app and install it by selecting Get It Now.
When prompted, enter the name of your company in Business Central. This isn't the display name. The company name can be found on the Companies page within your Business Central instance.
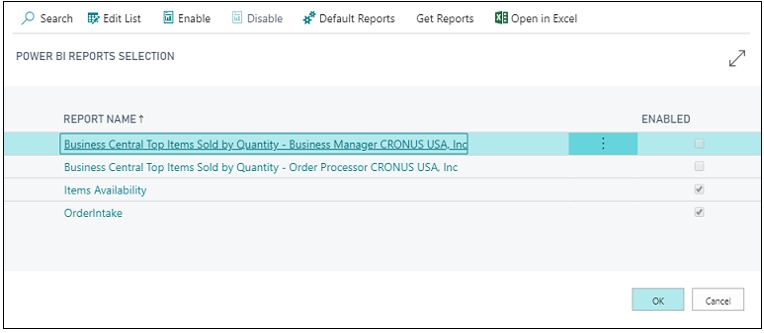
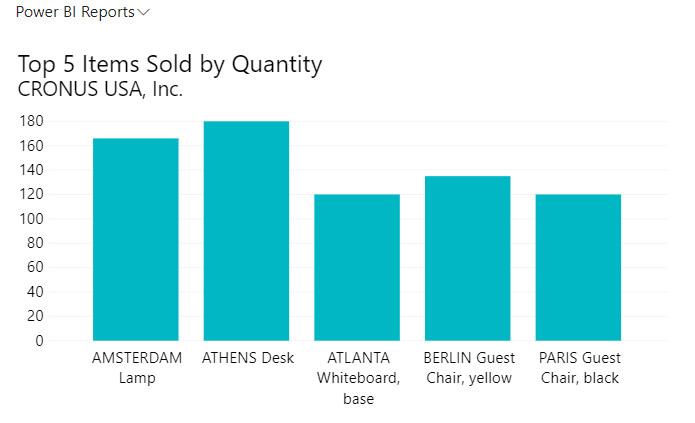
Now, you can select your Power BI reports from your Role Center.
After you are connected, a dashboard, report, and dataset will automatically be loaded into your Power BI workspace. When the content pack installation has completed, the tiles will update with data from your Business Central company.
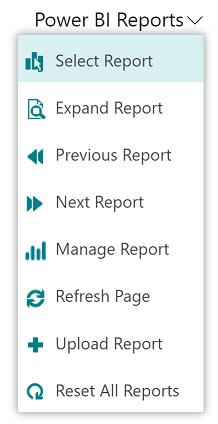


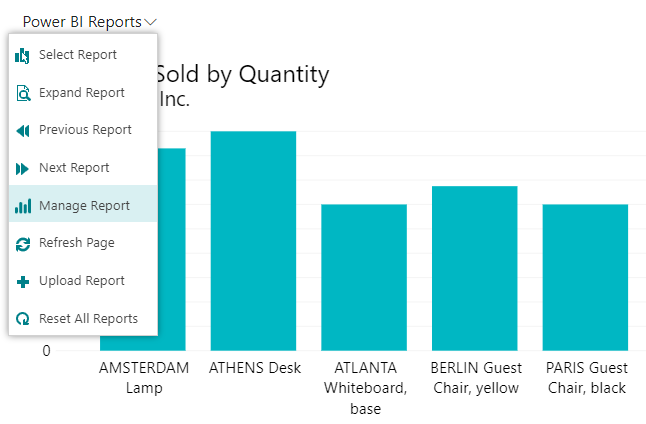
You can expand or manage the Power BI report if you need to also. These options are available on the Power BI Reports menu.
Activate a Role Center
The people in your company who have access to Business Central are all assigned a profile that gives them access to a Role Center.
A Role Center is the entry point and home page for Business Central that gives you quick access to your most important tasks and displays various insights and key performance indicators (KPIs) about your work.
You can activate or change your Role Center in the following way:
Select Settings in the app bar.
Select My Settings.
Select the Open assist edit button on the My Settings page.
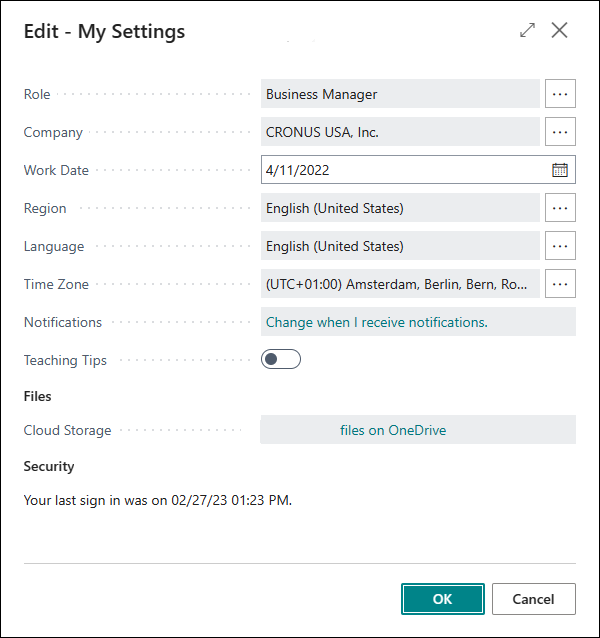
Select the Role Center that you need from the available role centers.
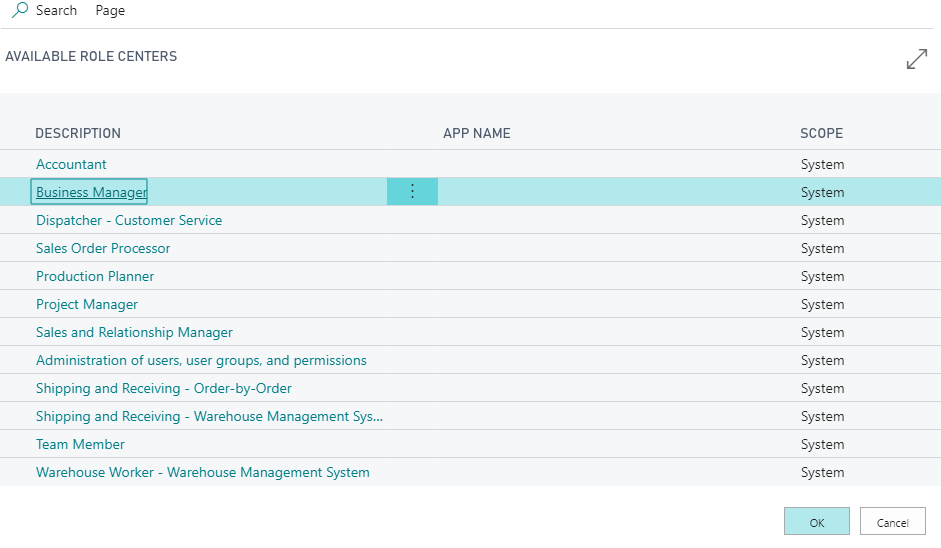
Select OK.


After you refresh the page, your Role Center page of choice will be active.
List page
List pages display lists of customers, vendors, contacts, sales orders, sales invoices, and many more categories. As you find multiple records on one page, pages are typically used to search and filter for information.

Card page
Card pages help you view and edit one record or entity from a table. The card page displays a wider selection of detailed information than a list page. The card page only displays information from one record while a list page displays multiple records.

Work with list and card pages
Watch this video for a discussion of list and card pages.
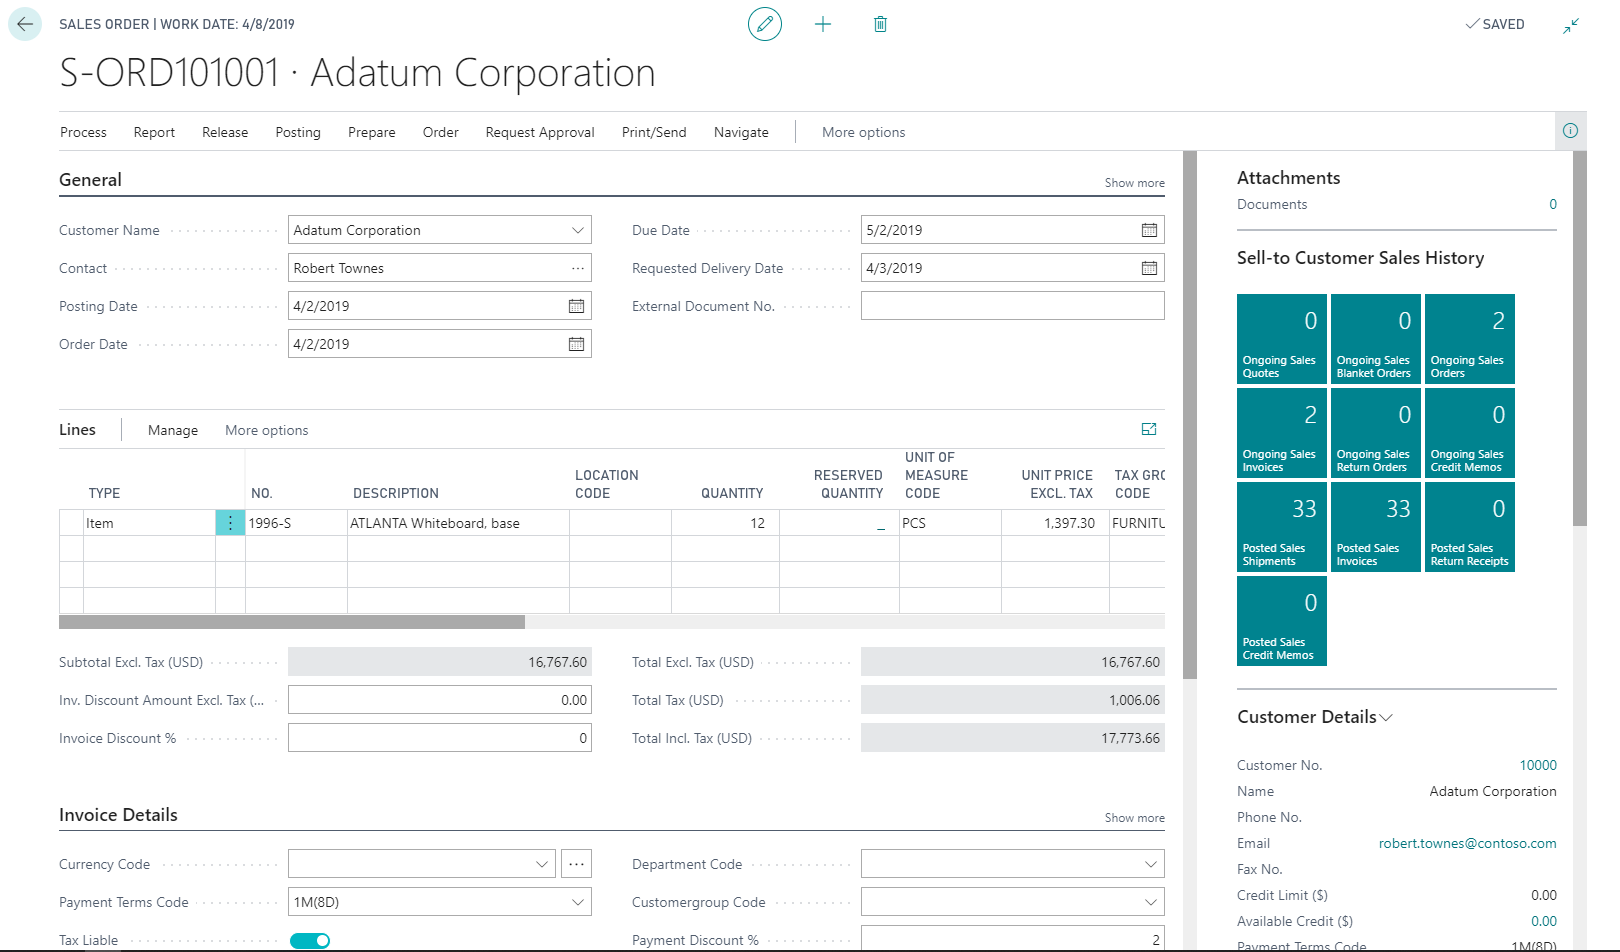
Document page
Document pages focus on user tasks. Examples of document pages in Business Central are Sales Order, Purchase Order, Sales Invoice, Purchase Invoice, Posted Sales Invoice, Posted Purchase Invoice, and many more.
Work with document pages
Watch this video which discusses a document page and how to work with it.