หมายเหตุ
การเข้าถึงหน้านี้ต้องได้รับการอนุญาต คุณสามารถลอง ลงชื่อเข้าใช้หรือเปลี่ยนไดเรกทอรีได้
การเข้าถึงหน้านี้ต้องได้รับการอนุญาต คุณสามารถลองเปลี่ยนไดเรกทอรีได้
This article describes how to back up SQL Server instances in Azure VMs using snapshot backups (preview). It covers the prerequisites, configuration steps for backup policies, database discovery, and backup operations to help you ensure secure data retention and recovery capabilities.
Note
Integration with the Resiliency experience is currently not supported for snapshot backup of SQL Server instances (preview).
Prerequisites
Before you back up a SQL Server instance snapshot, review the following prerequisites:
Identify or create a Recovery Services vault in the same region and subscription as the VM hosting the SQL Server instance.
Verify that the VM has network connectivity established.
Ensure that the SQL Server databases follow the database naming guidelines for Azure Backup.
Ensure that .NET 4.6.2 version or higher is installed on the VM.
Confirm that you don't have any other backup solutions enabled for the database. Disable all other SQL Server backups before you back up the database.
Backup and restore permissions for SQL in Azure VM
The Azure Backup extension on the SQL VM requires permissions to take managed disk snapshots and store them in the user specified resource group defined in the policy. Azure Backup uses a user-assigned managed identity to perform these actions. During restore, Azure Backup uses the target VM’s managed identity to read snapshots from the specified resource group and restore the VM. Azure Backup integrates permission assignment through the built-in Azure Backup Snapshot Contributor role into both backup and restore flows. You can provide the managed identity details while configuring the backup policy and during restore operations.
The following table lists the role and scope of assignment details for the managed identities created during backup and restore operations.
| Managed Identity created | Role | Scope |
|---|---|---|
| Backup MSI (Added in the backup policy by user) | Azure Backup Snapshot Contributor | Source VM resource group, Snapshot resource group (can be different from source VM Resource Group) |
| Restore MSI (Added in restore flow by user; can be different or same as the backup MSI) | Azure Backup Snapshot Contributor | Target VM resource group, Snapshot resource group, Target resource group (where disks are created to attach to target VM) |
Create a backup policy for SQL Server instance in Azure VM (Snapshot backup)
A backup policy defines when backups run and how long data is retained. For snapshot backups, the policy also specifies the frequency and retention for both snapshots and transaction log backups. The backup policy requires a user-assigned managed identity and a resource group to store disk snapshots before Azure Backup moves them to the Recovery Services vault. You can create a new backup policy directly in the vault or create it on the go while configuring backup.
To create a new backup policy directly in the vault before configuring backup, follow these steps:
Go to the Recovery Services vault and select Manage > Backup policies.
On the Backup policies pane, select + Add to create a new policy.
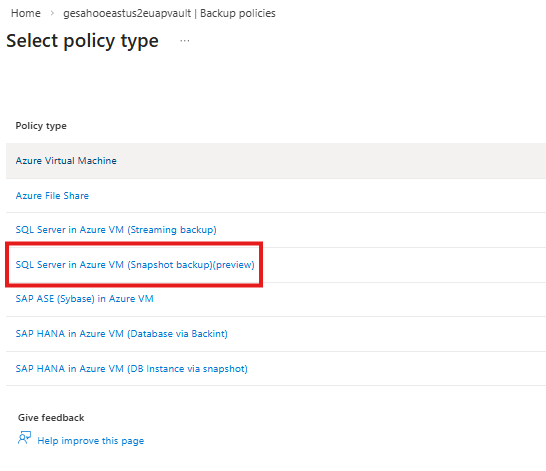
On the Select policy type pane, select Policy type as SQL Server in Azure VM (Snapshot backup) (preview).
For Full Snapshot backup and Log backup, select Edit corresponding to each backup type and enter the backup schedule and retention periods.
Note
You can schedule Full Snapshot backup from every 6 hours to every 24 hours. For Log backup, you can schedule from every 15 mins to 24 hours. Scheduling snapshot Copy only full backups isn’t supported; you can trigger the backup operation only by selecting Backup now after the backup configuration. Learn how to run an on-demand backup.
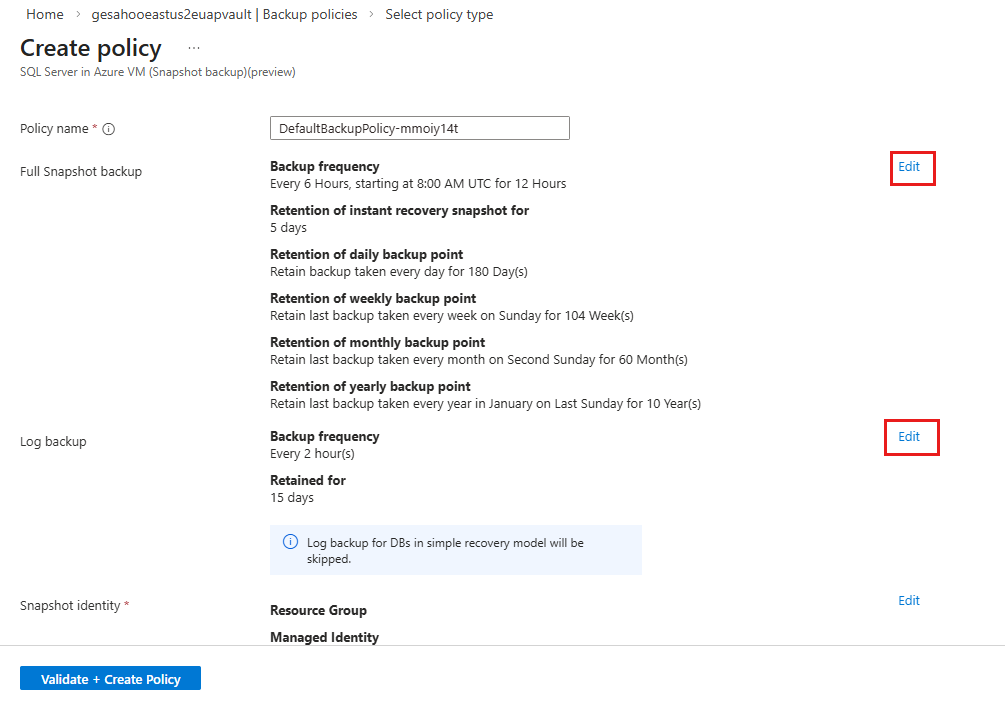
The following table lists the retention ranges for schedule backups:
Backup point Retention period range Instant recovery Snapshot (Ops tier) 1-7 days Daily backup point 7-9999 days Weekly backup point 1-5163 weeks Monthly backup point 1-1188 months Yearly backup point 1-99 years Log backup point 7-35 days To enable Azure Backup to store snapshots in a resource group of your choice, for Snapshot identity, select Edit and provide a snapshot identity.
On the Snapshot Identity pane, specify the Snapshot Resource Group and assign a Managed Identity, and select OK for maintaining an instant recovery point for faster restores.
To create a new managed identity, select Create managed identityLearn how Azure Backup uses managed identities.
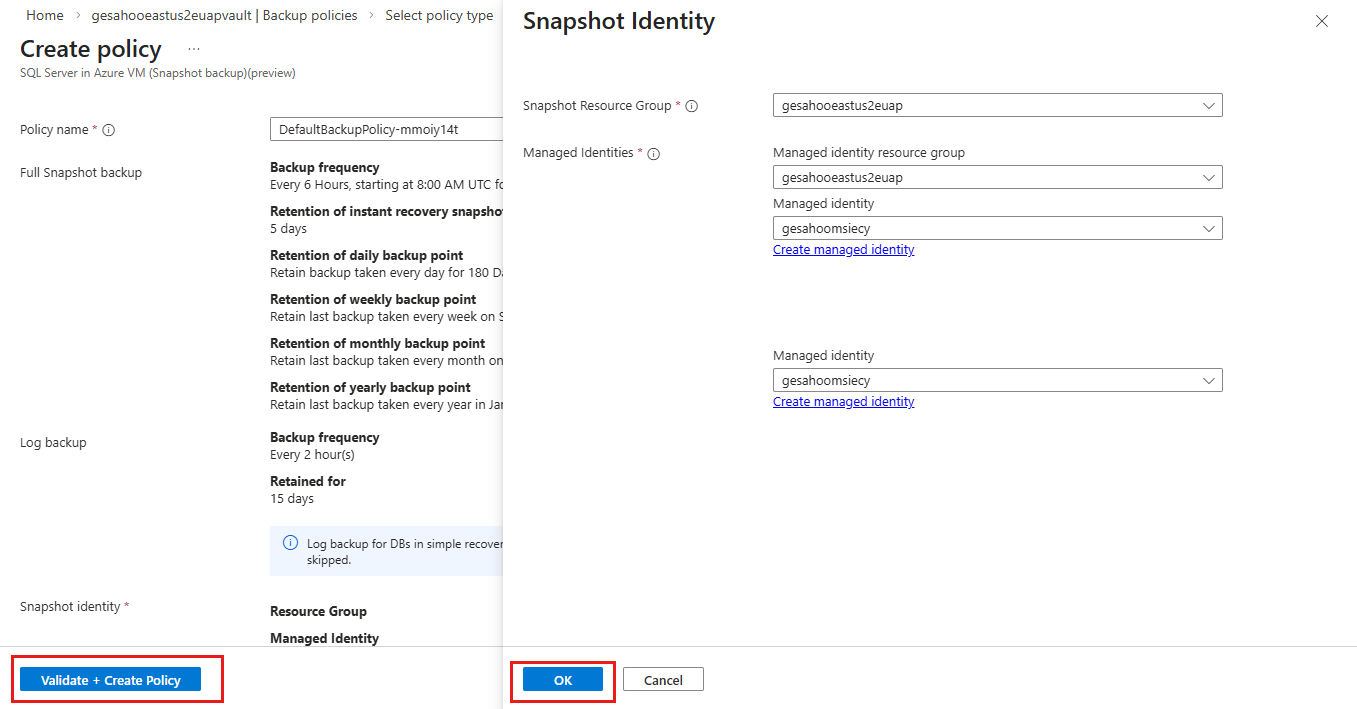
On the Create policy pane, select Validate + Create policy.
Discover unprotected SQL Server instance in a subscription
When you discover SQL Server instance, Azure Backup prepares the virtual machine for workload backup in the background. It registers the VM with the selected vault so that all SQL databases on the VM backup only to that vault, installs the AzureBackupWindowsWorkload extension on the VM, and creates the required service account (NT Service\AzureWLBackupPluginSvc). Azure Backup doesn't install any agent on the SQL databases themselves.
To discover unprotected SQL Server instance in a subscription, follow these steps:
Go to the Recovery Services vault, and select + Backup.
On the Backup Goal pane, for What do you want to backup, select SQL Server in Azure VM (Snapshot backup) (preview).
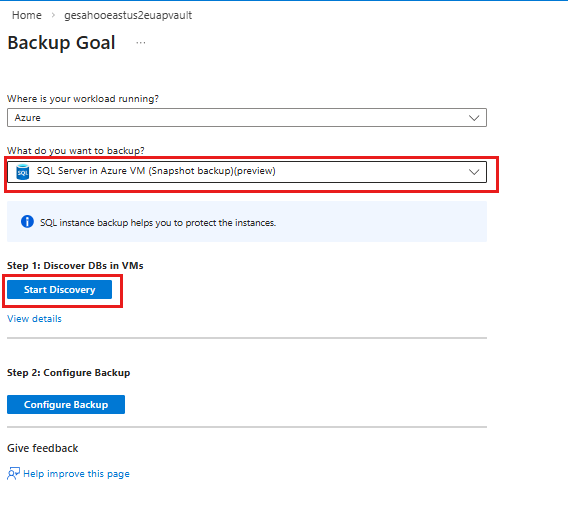
Under the Step 1: Discover DBs in VMs section, select Start Discovery.
On the Select Virtual Machine pane, select the VMs running the SQL server databases, and select Discover DBs.
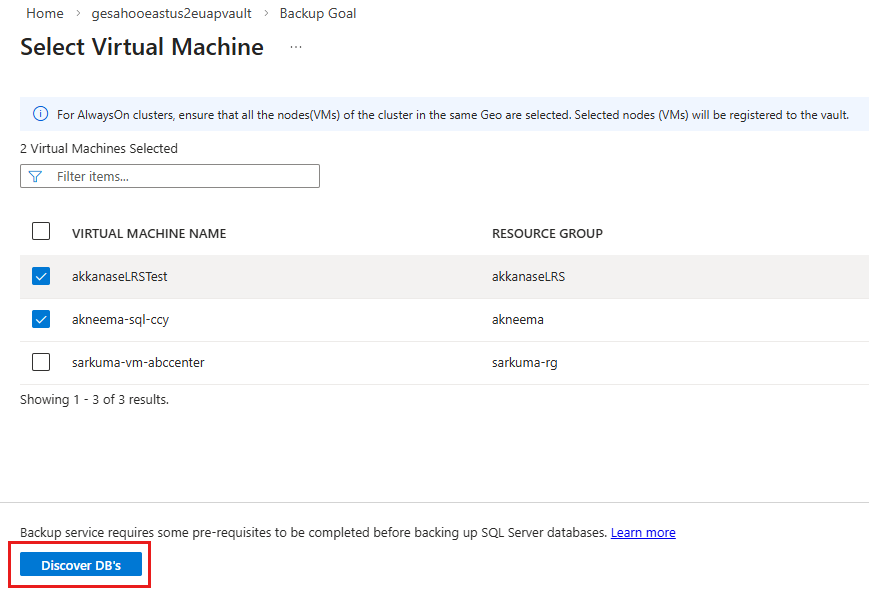
You can track database discovery in the notifications. The time required depends on the number of databases on the VM. When discovery completes, Azure Backup discovers all SQL Server databases on the VM and shows a success message.
Configure backup for the SQL Server instance
When the SQL Server instance discovery is complete, configure backup for the instance by following these steps:
On the Backup Goal pane, under the Step 2: Configure Backup section, select Configure Backup.
On the Configure backup pane, for Backup policy, select an existing snapshot backup policy for the instance.
To create a new backup policy on the go, select Create a new policy. Learn how to create a new backup policy for SQL Server in Azure VM (Snapshot backup).
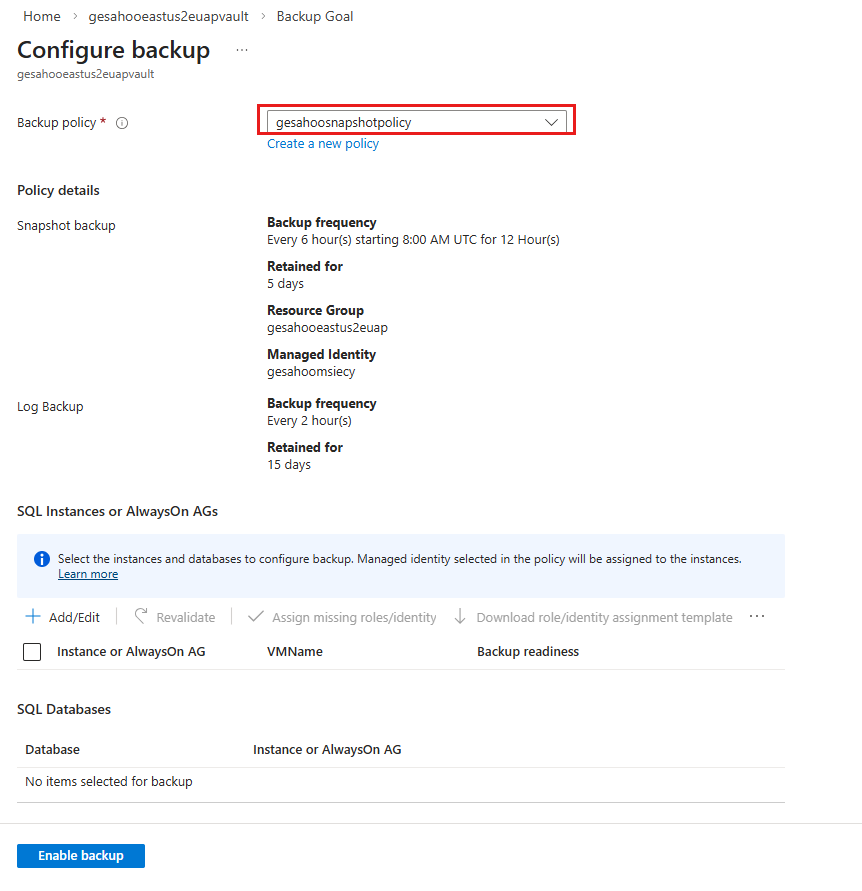
For Snapshot backup, the Resource Group and Managed Identity are automatically added based on the selection in the backup policy.
For SQL Instances or AlwaysOn AGs, select + Add/Edit to add the instance that you want to back up and select the databases within it.
Note
Azure Backup currently supports backup of 12 databases.
When you assign the managed identity for the first time, Backup readiness shows the error Role/identity assignment not done. To complete the role assignment, select Assign missing roles/identity.
After the assignment is completed, Backup readiness shows Success.
If you don't have permission to assign roles, download the identity assignment template and share it with an administrator who has the required access.
Select Enable Backup to finish the backup configuration.
Run an on-demand backup of SQL instance
To run an on-demand backup at the SQL instance level, follow these steps:
Go to the Recovery Services vault and select Protected items > Backup items.
On the Backup items pane, select SQL Server in Azure VM (Snapshot backup) (Preview).
On the Backup Items (SQL Server in Azure VM (Snapshot backup) (Preview)) pane, for the required backup instance, select View details.
On the selected backup instance pane, select Backup now.
On the Backup now pane, select one of the supported Backup type - Snapshot full or Snapshot copy only full.
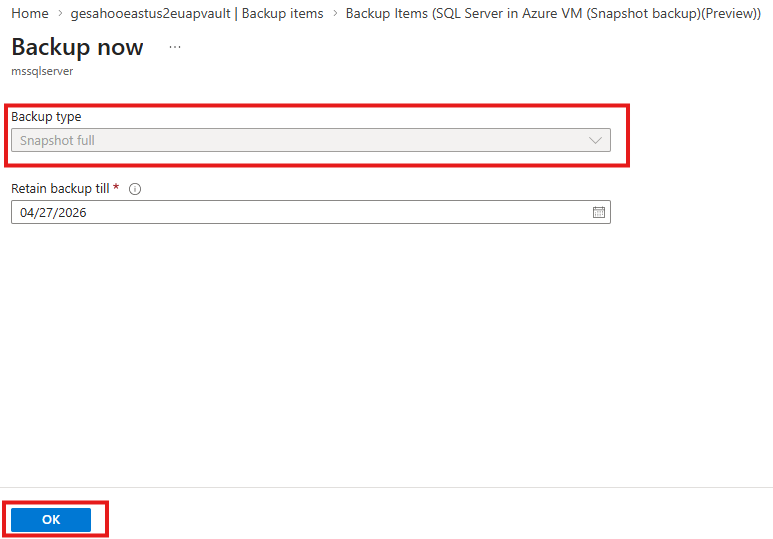
Select OK.
If you need to back up individual SQL databases, Azure Backup supports on-demand, database-level backups for SQL Server instances in Azure VMs. Learn how to trigger on-demand backups at the database level.