Develop U-SQL scripts by using Data Lake Tools for Visual Studio
Important
New Azure Data Lake Analytics accounts can no longer be created unless your subscription has been enabled. If you need your subscription to be enabled contact support and provide your business scenario.
If you are already using Azure Data Lake Analytics, you'll need to create a migration plan to Azure Synapse Analytics for your organization by February 29th, 2024.
Azure Data Lake and Stream Analytics Tools include functionality related to two Azure services, Azure Data Lake Analytics and Azure Stream Analytics. For more information about the Azure Stream Analytics scenarios, see Azure Stream Analytics tools for Visual Studio.
This article describes how to use Visual Studio to create Azure Data Lake Analytics accounts. You can define jobs in U-SQL, and submit jobs to the Data Lake Analytics service. For more information about Data Lake Analytics, see Azure Data Lake Analytics overview.
Important
We recommend you upgrade to Azure Data Lake Tools for Visual Studio version 2.3.3000.4 or later. The previous versions are no longer available for download and are now deprecated.
Check if you are using an earlier version than 2.3.3000.4 of Azure Data Lake Tools for Visual Studio.

If your version is an earlier version of 2.3.3000.4, update your Azure Data Lake Tools for Visual Studio by visiting the download center:
Prerequisites
Visual Studio: All editions except Express are supported.
- Visual Studio 2019
- Visual Studio 2017
- Visual Studio 2015
- Visual Studio 2013
Microsoft Azure SDK for .NET version 2.7.1 or later. Install it by using the Web platform installer.
A Data Lake Analytics account. To create an account, see Get Started with Azure Data Lake Analytics using Azure portal.
Install Azure Data Lake Tools for Visual Studio
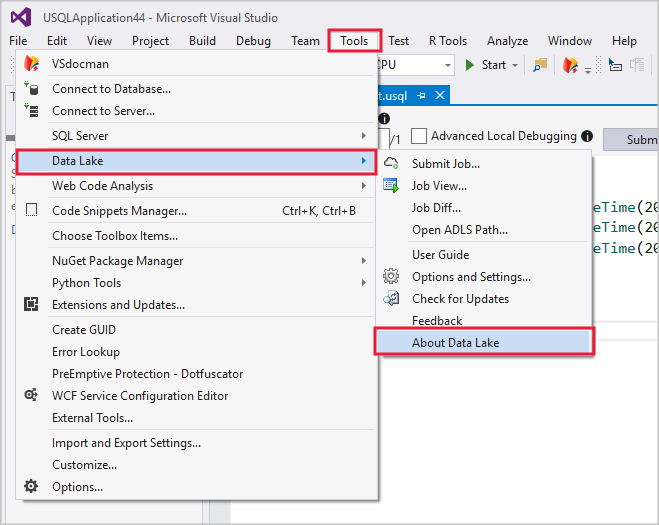
This tutorial requires that Data Lake Tools for Visual Studio is installed. For more information, see Install Data Lake Tools for Visual Studio.
Connect to an Azure Data Lake Analytics account
Open Visual Studio.
Open Data Lake Analytics Explorer by selecting View > Data Lake Analytics Explorer.
Right-click Azure, then select Connect to Microsoft Azure Subscription. In Sign in to your account, follow the instructions.
In Server Explorer, select Azure > Data Lake Analytics. You see a list of your Data Lake Analytics accounts.
Write your first U-SQL script
The following text is a simple U-SQL script. It defines a small dataset and writes that dataset to the default Data Lake Store as a file called /data.csv.
USE DATABASE master;
USE SCHEMA dbo;
@a  =
    SELECT * FROM
        (VALUES
            ("Contoso", 1500.0),
            ("Woodgrove", 2700.0)
        ) AS
              D( customer, amount );
OUTPUT @a
    TO "/data.csv"
    USING Outputters.Csv();
Submit a Data Lake Analytics job
In Visual Studio, select File > New > Project.
Select the U-SQL Project type, and then select Next. In Configure your new project, select Create.
Visual Studio creates a solution that contains a Script.usql file.
Paste the script from Write your first U-SQL script into the Script.usql window.
In Solution Explorer, right-click Script.usql, and select Submit Script.
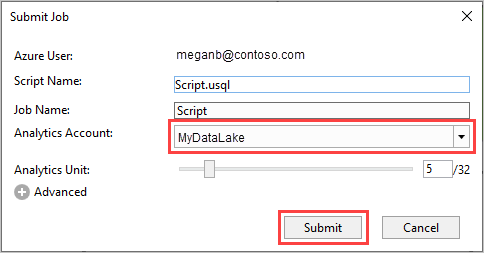
In Submit Job, choose your Data Lake Analytics account and select Submit.

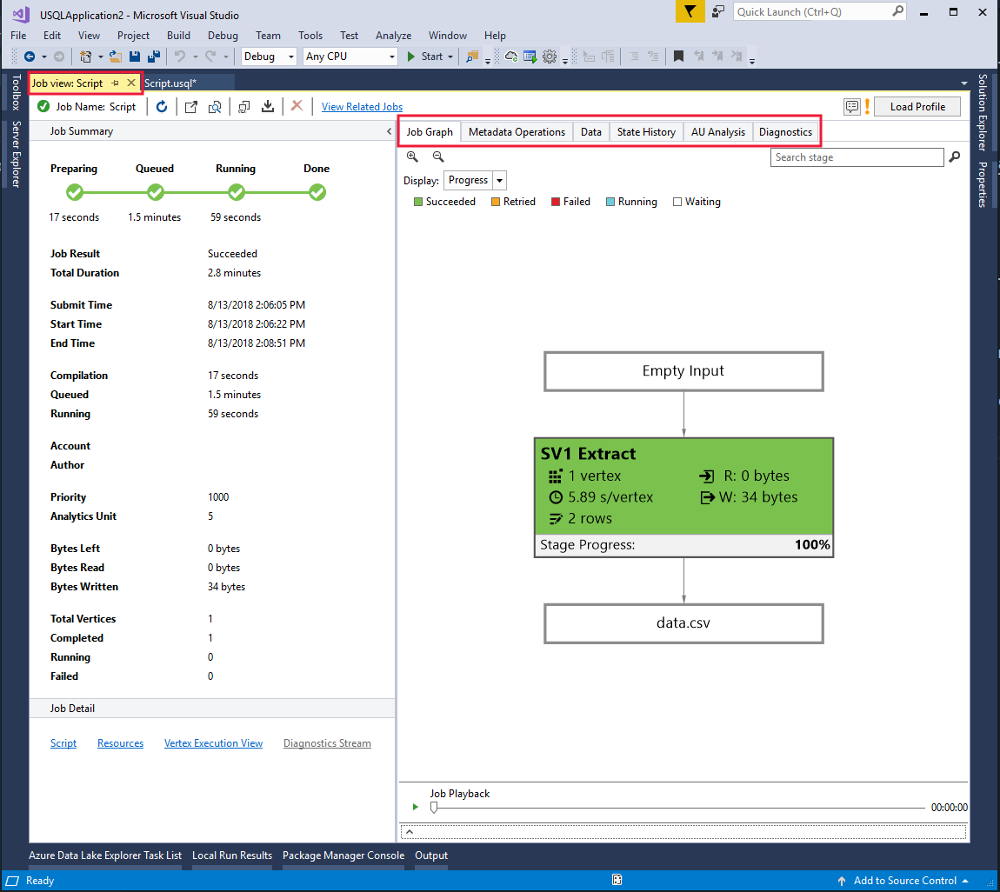
After the job submission, the Job view tab opens to show the job progress.
- Job Summary shows the summary of the job.
- Job Graph visualizes the progress of the job.
- MetaData Operations shows all the actions that were taken on the U-SQL catalog.
- Data shows all the inputs and outputs.
- State History shows the timeline and state details.
- AU Analysis shows how many AUs (analytics units) were used in the job and explore simulations of different AU allocation strategies.
- Diagnostics provides an advanced analysis for job execution and performance optimization.

To see the latest job status and refresh the screen, select Refresh.
Check job status
In Data Lake Analytics Explorer, select Data Lake Analytics.
Expand the Data Lake Analytics account name.
Double-click Jobs.
Select the job that you previously submitted.
See the job output
In Data Lake Analytics Explorer, browse to the job you submitted.
Select the Data tab in your job.
In the Job Outputs tab, select the
"/data.csv"file.