หมายเหตุ
การเข้าถึงหน้านี้ต้องได้รับการอนุญาต คุณสามารถลอง ลงชื่อเข้าใช้หรือเปลี่ยนไดเรกทอรีได้
การเข้าถึงหน้านี้ต้องได้รับการอนุญาต คุณสามารถลองเปลี่ยนไดเรกทอรีได้
นําไปใช้กับ:✅ วิศวกรข้อมูลและวิทยาศาสตร์ข้อมูลใน Microsoft Fabric
เรียนรู้วิธีการส่งชุดงาน Spark โดยใช้ Livy API สําหรับ Fabric Data Engineering Livy API ในขณะนี้ไม่สนับสนุน Azure Service Principal (SPN)
ข้อกำหนดเบื้องต้น
ไคลเอ็นต์ระยะไกล เช่น Visual Studio Code พร้อม Jupyter Notebooks, PySpark และไลบรารีการรับรองความถูกต้องของ Microsoft (MSAL) สําหรับ Python
โทเค็นแอป Microsoft Entra จําเป็นสําหรับการเข้าถึง Fabric Rest API ลงทะเบียนแอปพลิเคชันด้วยแพลตฟอร์มข้อมูลประจำตัวของ Microsoft
ข้อมูลบางอย่างในเลคเฮ้าส์ของคุณ ตัวอย่างนี้ใช้ แท็กซี่ NYC และ Limousine Commission green_tripdata_2022_08 ไฟล์ปาร์เกตที่โหลดไปยังเลคเฮาส์
Livy API กําหนดจุดสิ้นสุดแบบรวมสําหรับการดําเนินการ แทนที่พื้นที่ที่สํารองไว้ {Entra_TenantID}, {Entra_ClientID}, {Fabric_WorkspaceID} และ {Fabric_LakehouseID} ด้วยค่าที่เหมาะสมเมื่อคุณทําตามตัวอย่างในบทความนี้
กําหนดค่ารหัส Visual Studio สําหรับชุด Livy API ของคุณ
เลือก การตั้งค่า เลคเฮ้าส์ใน Fabric Lakehouse ของคุณ

นําทางไปยังส่วน จุด สิ้นสุด Livy
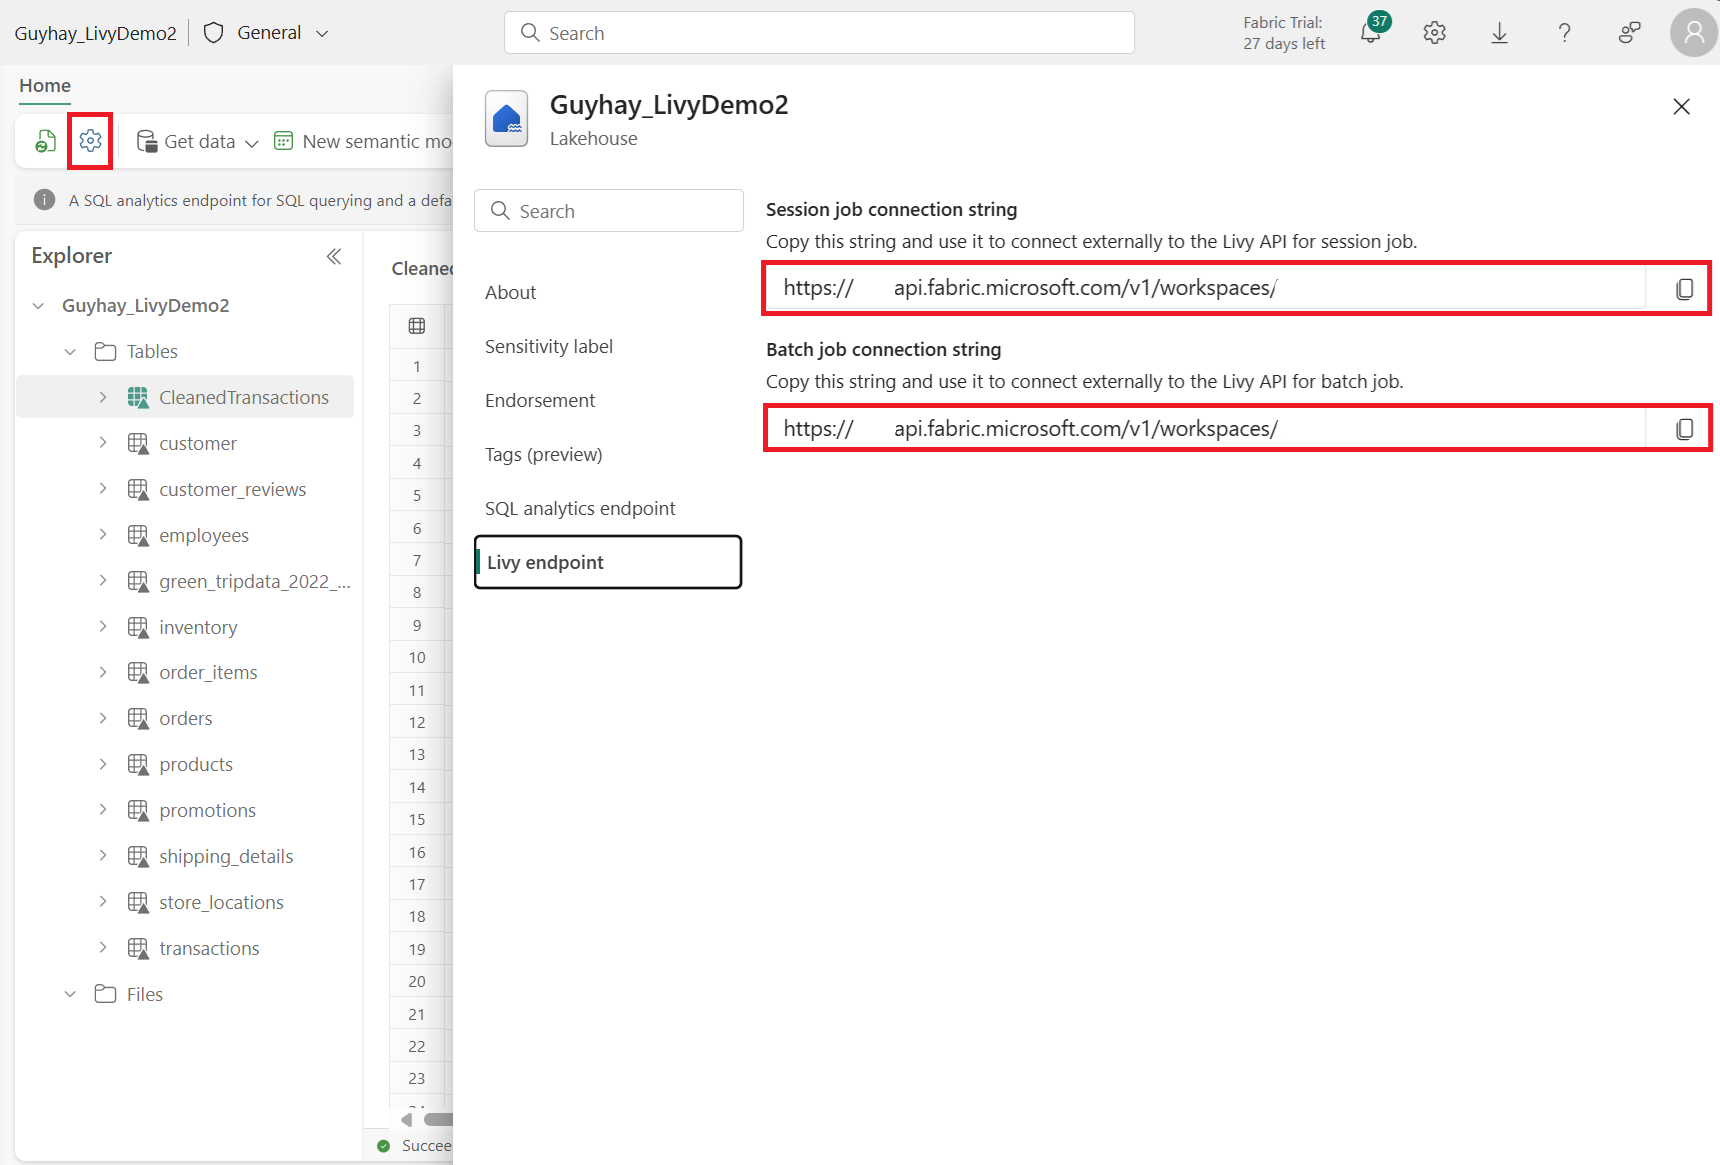
คัดลอกสายอักขระการเชื่อมต่อชุดงาน (กล่องสีแดงที่สองในรูปภาพ) ไปยังรหัสของคุณ
ไปที่ ศูนย์การจัดการ Microsoft Entra และคัดลอกทั้ง ID แอปพลิเคชัน (ไคลเอนต์) และ ID ไดเรกทอรี (ผู้เช่า) ไปยังรหัสของคุณ


สร้างรหัสแบทช์ Spark และอัปโหลดไปยังเลคเฮาส์ของคุณ
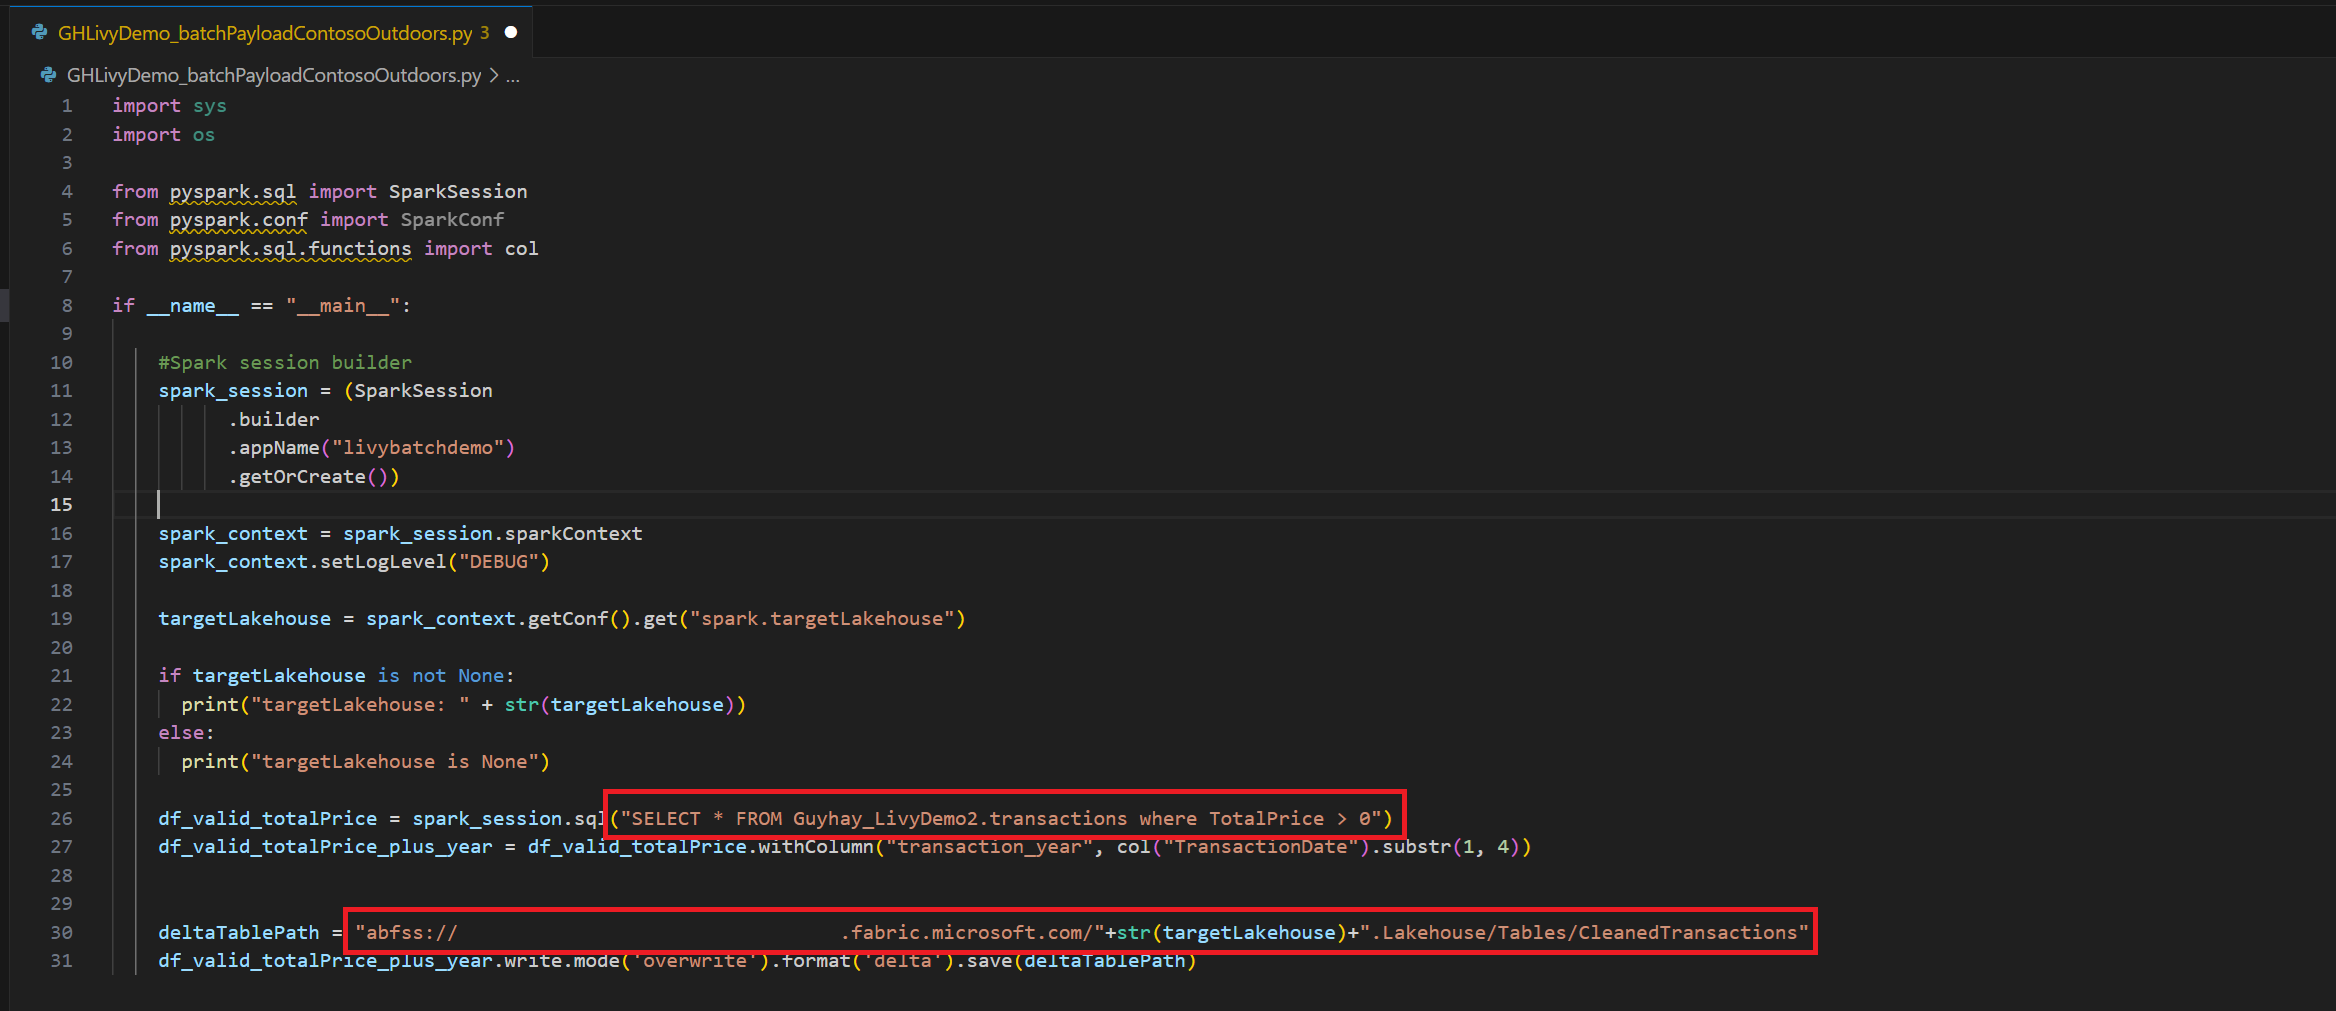
.ipynbสร้างสมุดบันทึกใน Visual Studio Code และแทรกโค้ดต่อไปนี้import sys import os from pyspark.sql import SparkSession from pyspark.conf import SparkConf from pyspark.sql.functions import col if __name__ == "__main__": #Spark session builder spark_session = (SparkSession .builder .appName("batch_demo") .getOrCreate()) spark_context = spark_session.sparkContext spark_context.setLogLevel("DEBUG") tableName = spark_context.getConf().get("spark.targetTable") if tableName is not None: print("tableName: " + str(tableName)) else: print("tableName is None") df_valid_totalPrice = spark_session.sql("SELECT * FROM green_tripdata_2022 where total_amount > 0") df_valid_totalPrice_plus_year = df_valid_totalPrice.withColumn("transaction_year", col("lpep_pickup_datetime").substr(1, 4)) deltaTablePath = f"Tables/{tableName}CleanedTransactions" df_valid_totalPrice_plus_year.write.mode('overwrite').format('delta').save(deltaTablePath)บันทึกไฟล์ Python ภายในเครื่อง ส่วนข้อมูลรหัส Python นี้ประกอบด้วยคําสั่ง Spark สองคําสั่งที่ทํางานบนข้อมูลใน Lakehouse และจําเป็นต้องอัปโหลดไปยังเลคเฮ้าส์ของคุณ คุณต้องมีเส้นทาง ABFS ของเพย์โหลดเพื่ออ้างอิงในชุดงาน Livy API ของคุณใน Visual Studio Code และชื่อตาราง Lakehouse ของคุณในคําสั่ง Select SQL
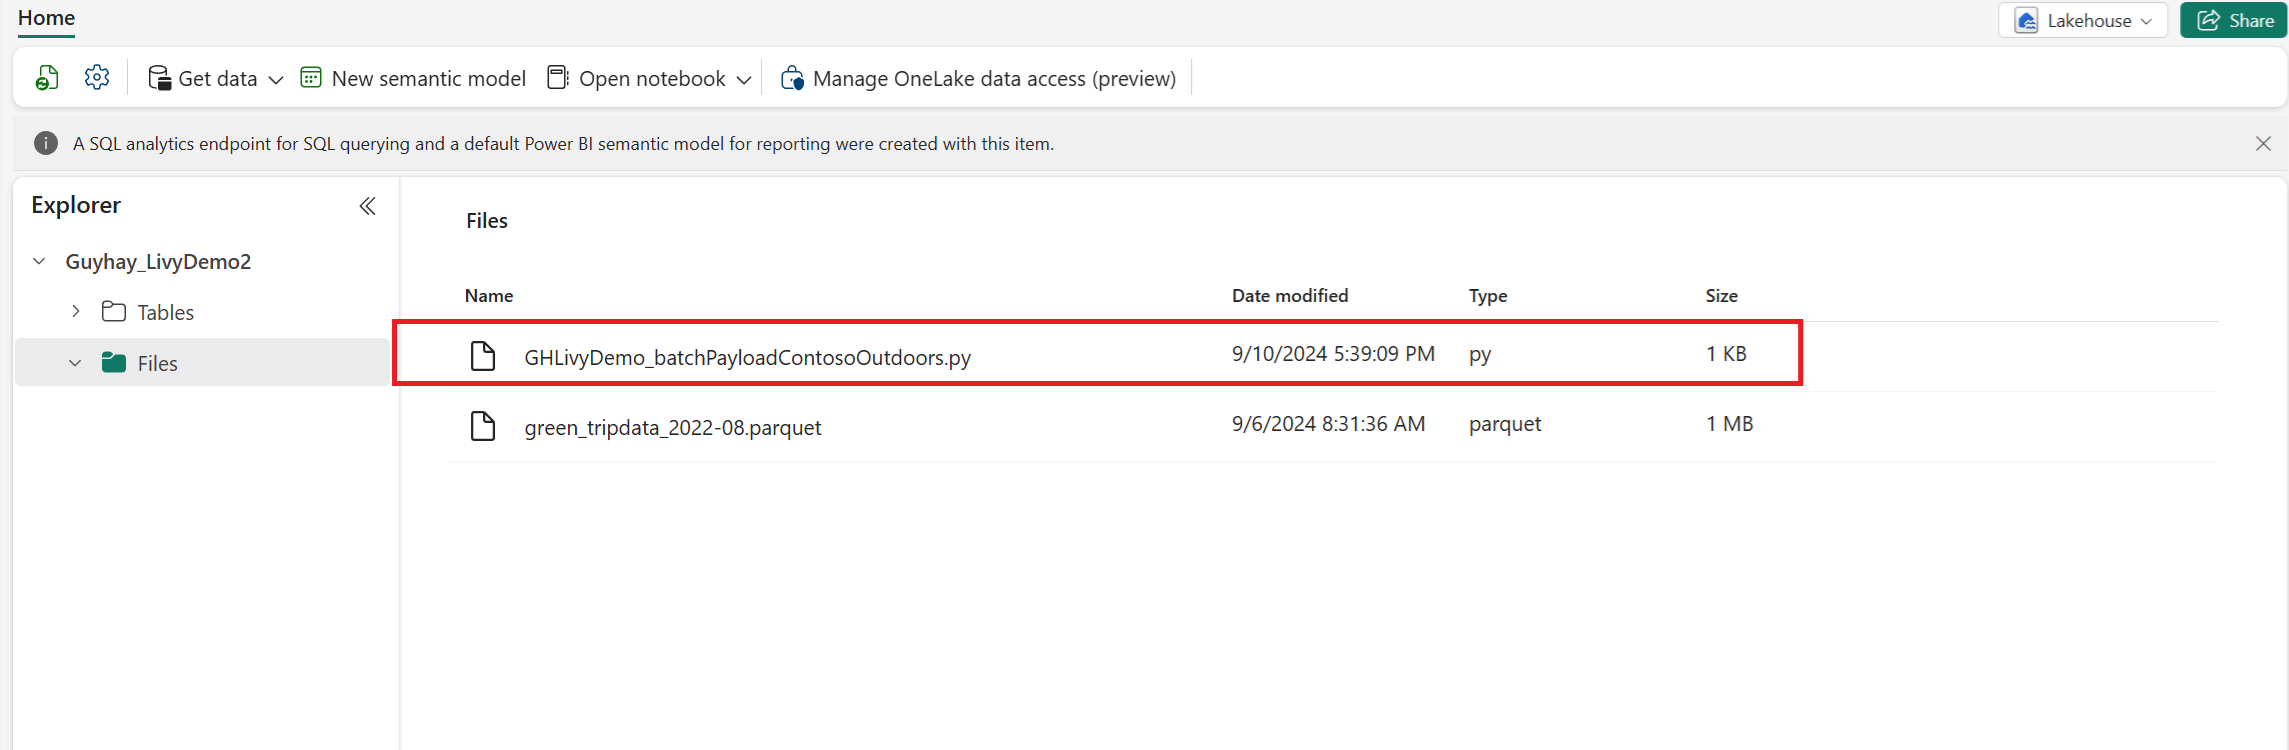
อัปโหลดส่วนข้อมูล Python ไปยังส่วนไฟล์ของเลคเฮ้าส์ของคุณ ในตัวสํารวจ Lakehouse ให้เลือก ไฟล์ จากนั้นเลือก>รับข้อมูล>อัปโหลดไฟล์ เลือกไฟล์ผ่านตัวเลือกไฟล์
หลังจากที่ไฟล์อยู่ในส่วนของไฟล์ของเลคเฮ้าส์ของคุณ คลิกที่สามจุดทางด้านขวาของชื่อไฟล์ส่วนข้อมูลของคุณ และเลือกคุณสมบัติ
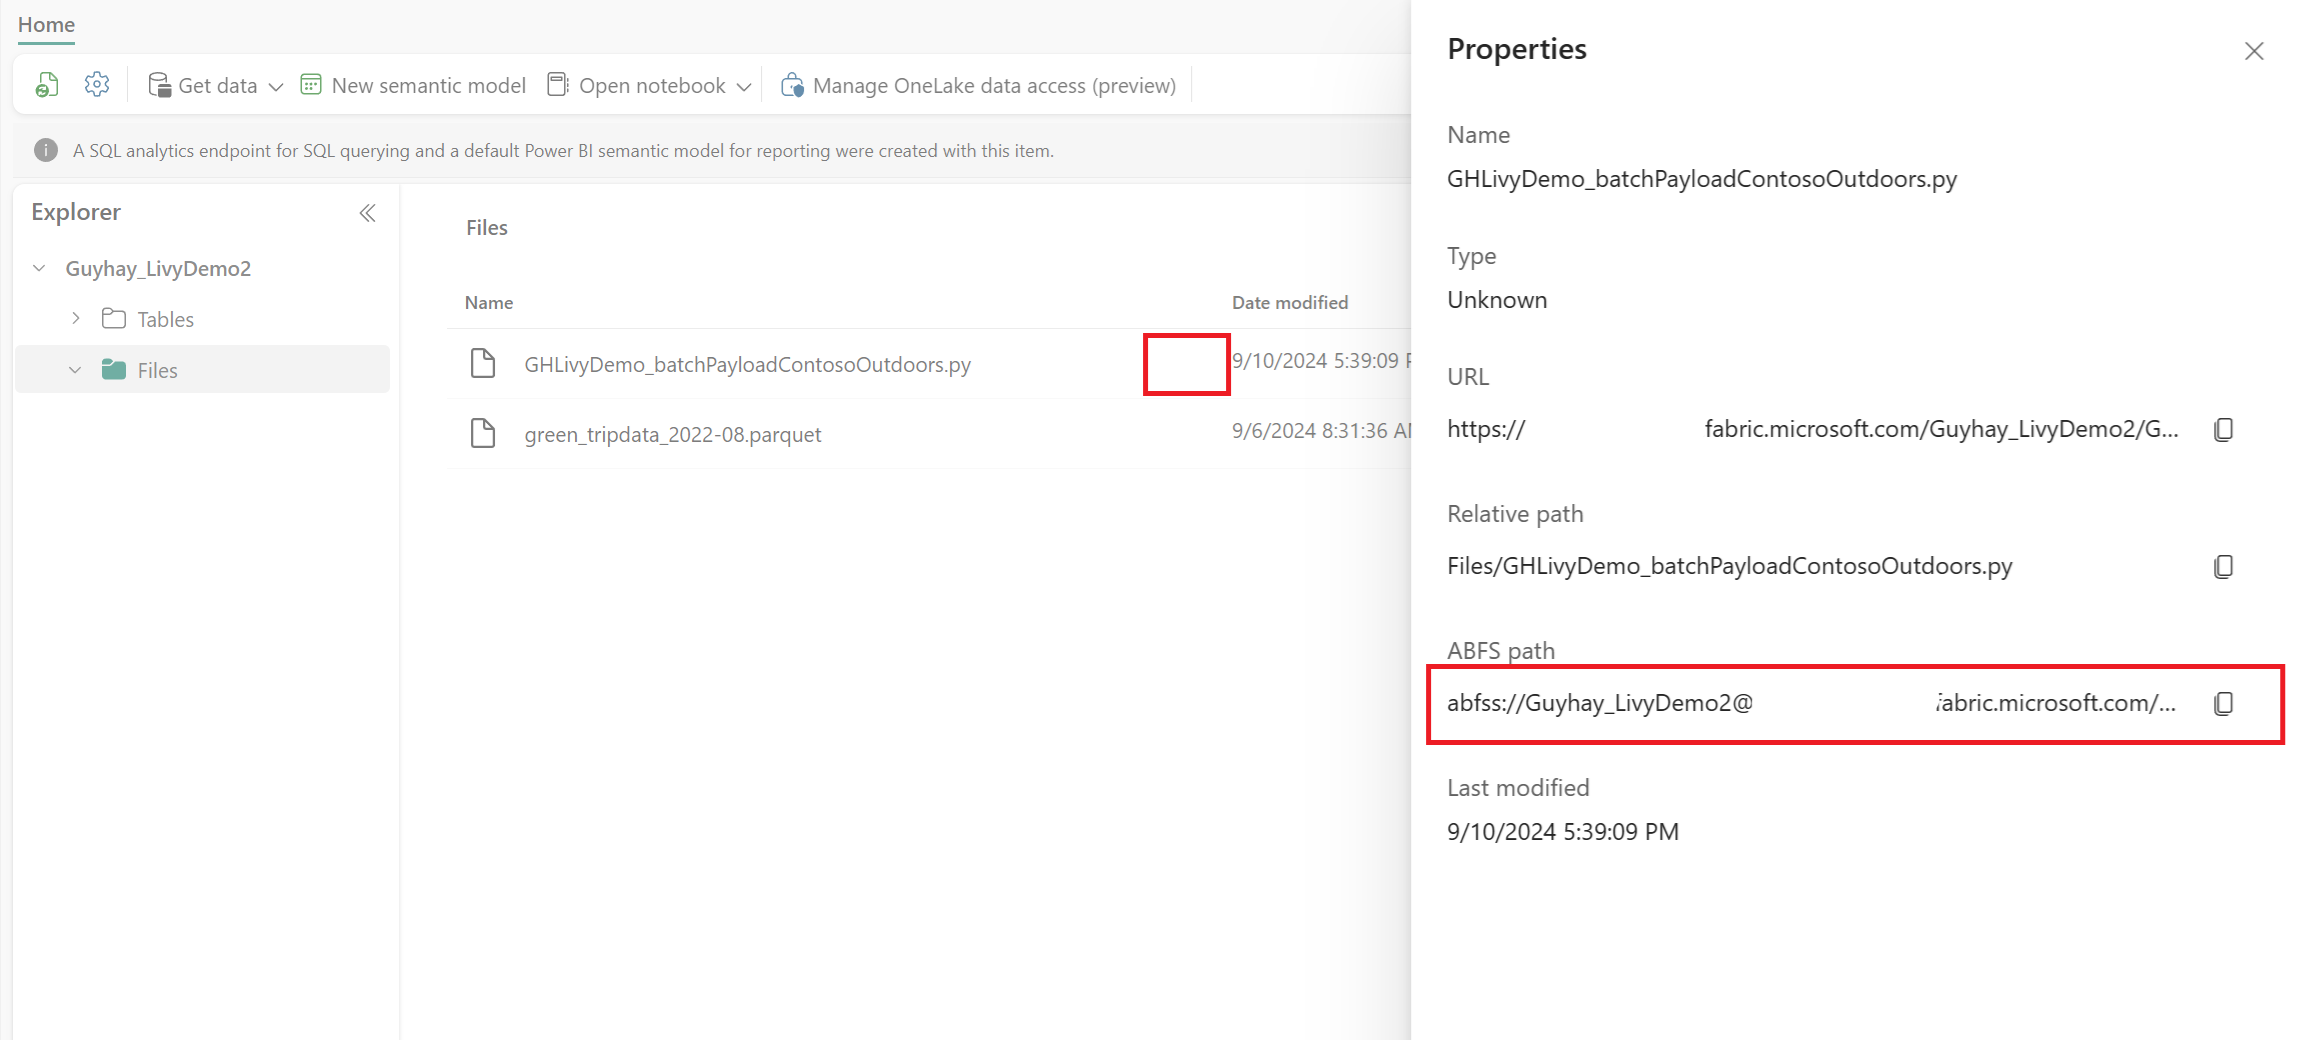
คัดลอกเส้นทาง ABFS นี้ไปยังเซลล์ของสมุดบันทึกของคุณในขั้นตอนที่ 1


รับรองความถูกต้องของเซสชันชุดงาน Livy API Spark โดยใช้โทเค็นผู้ใช้ Microsoft Entra หรือโทเค็น Microsoft Entra SPN
รับรองความถูกต้องของเซสชันชุดงาน Livy API Spark โดยใช้โทเค็น Microsoft Entra SPN
.ipynbสร้างสมุดบันทึกใน Visual Studio Code และแทรกโค้ดต่อไปนี้import sys from msal import ConfidentialClientApplication # Configuration - Replace with your actual values tenant_id = "Entra_TenantID" # Microsoft Entra tenant ID client_id = "Entra_ClientID" # Service Principal Application ID # Certificate paths - Update these paths to your certificate files certificate_path = "PATH_TO_YOUR_CERTIFICATE.pem" # Public certificate file private_key_path = "PATH_TO_YOUR_PRIVATE_KEY.pem" # Private key file certificate_thumbprint = "YOUR_CERTIFICATE_THUMBPRINT" # Certificate thumbprint # OAuth settings audience = "https://analysis.windows.net/powerbi/api/.default" authority = f"https://login.windows.net/{tenant_id}" def get_access_token(client_id, audience, authority, certificate_path, private_key_path, certificate_thumbprint=None): """ Get an app-only access token for a Service Principal using OAuth 2.0 client credentials flow. This function uses certificate-based authentication which is more secure than client secrets. Args: client_id (str): The Service Principal's client ID audience (str): The audience for the token (resource scope) authority (str): The OAuth authority URL certificate_path (str): Path to the certificate file (.pem format) private_key_path (str): Path to the private key file (.pem format) certificate_thumbprint (str): Certificate thumbprint (optional but recommended) Returns: str: The access token for API authentication Raises: Exception: If token acquisition fails """ try: # Read the certificate from PEM file with open(certificate_path, "r", encoding="utf-8") as f: certificate_pem = f.read() # Read the private key from PEM file with open(private_key_path, "r", encoding="utf-8") as f: private_key_pem = f.read() # Create the confidential client application app = ConfidentialClientApplication( client_id=client_id, authority=authority, client_credential={ "private_key": private_key_pem, "thumbprint": certificate_thumbprint, "certificate": certificate_pem } ) # Acquire token using client credentials flow token_response = app.acquire_token_for_client(scopes=[audience]) if "access_token" in token_response: print("Successfully acquired access token") return token_response["access_token"] else: raise Exception(f"Failed to retrieve token: {token_response.get('error_description', 'Unknown error')}") except FileNotFoundError as e: print(f"Certificate file not found: {e}") sys.exit(1) except Exception as e: print(f"Error retrieving token: {e}", file=sys.stderr) sys.exit(1) # Get the access token token = get_access_token(client_id, audience, authority, certificate_path, private_key_path, certificate_thumbprint)เรียกใช้เซลล์สมุดบันทึก คุณจะเห็นโทเค็น Microsoft Entra ถูกส่งคืน


รับรองความถูกต้องของเซสชัน Livy API Spark โดยใช้โทเค็นผู้ใช้ Microsoft Entra
.ipynbสร้างสมุดบันทึกใน Visual Studio Code และแทรกโค้ดต่อไปนี้from msal import PublicClientApplication import requests import time # Configuration - Replace with your actual values tenant_id = "Entra_TenantID" # Microsoft Entra tenant ID client_id = "Entra_ClientID" # Application ID (can be the same as above or different) # Required scopes for Microsoft Fabric API access scopes = [ "https://api.fabric.microsoft.com/Lakehouse.Execute.All", # Execute operations in lakehouses "https://api.fabric.microsoft.com/Lakehouse.Read.All", # Read lakehouse metadata "https://api.fabric.microsoft.com/Item.ReadWrite.All", # Read/write fabric items "https://api.fabric.microsoft.com/Workspace.ReadWrite.All", # Access workspace operations "https://api.fabric.microsoft.com/Code.AccessStorage.All", # Access storage from code "https://api.fabric.microsoft.com/Code.AccessAzureKeyvault.All", # Access Azure Key Vault "https://api.fabric.microsoft.com/Code.AccessAzureDataExplorer.All", # Access Azure Data Explorer "https://api.fabric.microsoft.com/Code.AccessAzureDataLake.All", # Access Azure Data Lake "https://api.fabric.microsoft.com/Code.AccessFabric.All" # General Fabric access ] def get_access_token(tenant_id, client_id, scopes): """ Get an access token using interactive authentication. This method will open a browser window for user authentication. Args: tenant_id (str): The Azure Active Directory tenant ID client_id (str): The application client ID scopes (list): List of required permission scopes Returns: str: The access token, or None if authentication fails """ app = PublicClientApplication( client_id, authority=f"https://login.microsoftonline.com/{tenant_id}" ) print("Opening browser for interactive authentication...") token_response = app.acquire_token_interactive(scopes=scopes) if "access_token" in token_response: print("Successfully authenticated") return token_response["access_token"] else: print(f"Authentication failed: {token_response.get('error_description', 'Unknown error')}") return None # Uncomment the lines below to use interactive authentication token = get_access_token(tenant_id, client_id, scopes) print("Access token acquired via interactive login")เรียกใช้เซลล์ของสมุดบันทึก ป็อปอัพควรปรากฏในเบราว์เซอร์ของคุณ เพื่อให้คุณสามารถเลือกข้อมูลประจําตัวที่จะลงชื่อเข้าใช้ได้
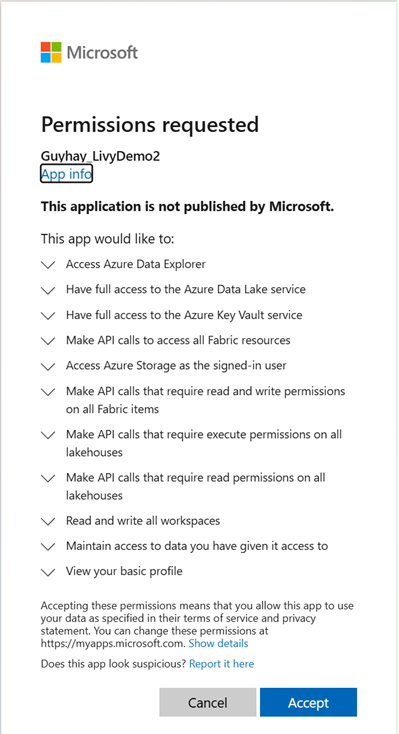
หลังจากที่คุณเลือกข้อมูลประจําตัวที่จะลงชื่อเข้าใช้ คุณต้องอนุมัติสิทธิ์ API การลงทะเบียนแอป Microsoft Entra
ปิดหน้าต่างเบราว์เซอร์หลังจากเสร็จสิ้นการรับรองความถูกต้อง

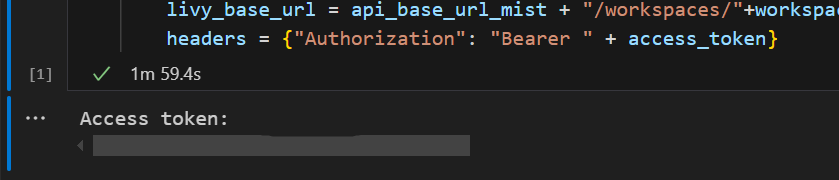
ใน Visual Studio Code คุณควรเห็นโทเค็น Microsoft Entra ที่ส่งกลับมา


ส่งชุดงาน Livy และตรวจสอบชุดงาน
เพิ่มเซลล์สมุดบันทึกอีกเซลล์และแทรกโค้ดนี้
# submit payload to existing batch session

import requests
import time
import json

api_base_url = "https://api.fabric.microsoft.com/v1"  # Base URL for Fabric APIs

# Fabric Resource IDs - Replace with your workspace and lakehouse IDs
workspace_id = "Fabric_WorkspaceID"
lakehouse_id = "Fabric_LakehouseID"

# Construct the Livy Batch API URL
# URL pattern: {base_url}/workspaces/{workspace_id}/lakehouses/{lakehouse_id}/livyApi/versions/{api_version}/batches
livy_base_url = f"{api_base_url}/workspaces/{workspace_id}/lakehouses/{lakehouse_id}/livyApi/versions/2023-12-01/batches"

# Set up authentication headers
headers = {"Authorization": f"Bearer {token}"}

print(f"Livy Batch API URL: {livy_base_url}")

new_table_name = "TABLE_NAME"  # Name for the new table

# Configure the batch job
print("Configuring batch job parameters...")

# Batch job configuration - Modify these values for your use case
payload_data = {
    # Job name - will appear in the Fabric UI
    "name": f"livy_batch_demo_{new_table_name}",

    # Path to your Python file in the lakehouse
    "file": "<ABFSS_PATH_TO_YOUR_PYTHON_FILE>",  # Replace with your Python file path

    # Optional: Spark configuration parameters
    "conf": {
        "spark.targetTable": new_table_name,  # Custom configuration for your application
    },
}

print("Batch Job Configuration:")
print(json.dumps(payload_data, indent=2))

try:
    # Submit the batch job
    print("\nSubmitting batch job...")
    post_batch = requests.post(livy_base_url, headers=headers, json=payload_data)

    if post_batch.status_code == 202:
        batch_info = post_batch.json()
        print("Livy batch job submitted successfully!")
        print(f"Batch Job Info: {json.dumps(batch_info, indent=2)}")

        # Extract batch ID for monitoring
        batch_id = batch_info['id']
        livy_batch_get_url = f"{livy_base_url}/{batch_id}"

        print(f"\nBatch Job ID: {batch_id}")
        print(f"Monitoring URL: {livy_batch_get_url}")

    else:
        print(f"Failed to submit batch job. Status code: {post_batch.status_code}")
        print(f"Response: {post_batch.text}")

except requests.exceptions.RequestException as e:
    print(f"Network error occurred: {e}")
except json.JSONDecodeError as e:
    print(f"JSON decode error: {e}")
    print(f"Response text: {post_batch.text}")
except Exception as e:
    print(f"Unexpected error: {e}")
เรียกใช้เซลล์ของสมุดบันทึก คุณควรเห็นบรรทัดหลายบรรทัดที่พิมพ์เมื่อสร้างและเรียกใช้งานชุด Livy

หากต้องการดูการเปลี่ยนแปลง ให้กลับไปที่เลคเฮาส์ของคุณ

การรวมกับสภาพแวดล้อม Fabric
ตามค่าเริ่มต้น เซสชัน Livy API นี้จะเรียกใช้กับพูลเริ่มต้นสําหรับพื้นที่ทํางาน อีกวิธีหนึ่งคือ คุณสามารถใช้ Fabric Environments สร้าง กําหนดค่า และใช้สภาพแวดล้อมใน Microsoft Fabric เพื่อกําหนดพูล Spark ที่เซสชัน Livy API ใช้สําหรับงาน Spark เหล่านี้ได้ เมื่อต้องการใช้สภาพแวดล้อม Fabric ของคุณ ให้อัปเดตเซลล์สมุดบันทึกก่อนหน้าด้วยการเปลี่ยนแปลงบรรทัดเดียวนี้
payload_data = {
    "name":"livybatchdemo_with"+ newlakehouseName,
    "file":"abfss://YourABFSPathToYourPayload.py",
    "conf": {
        "spark.targetLakehouse": "Fabric_LakehouseID",
        "spark.fabric.environmentDetails" : "{\"id\" : \""EnvironmentID"\"}"  # remove this line to use starter pools instead of an environment, replace "EnvironmentID" with your environment ID
        }
    }
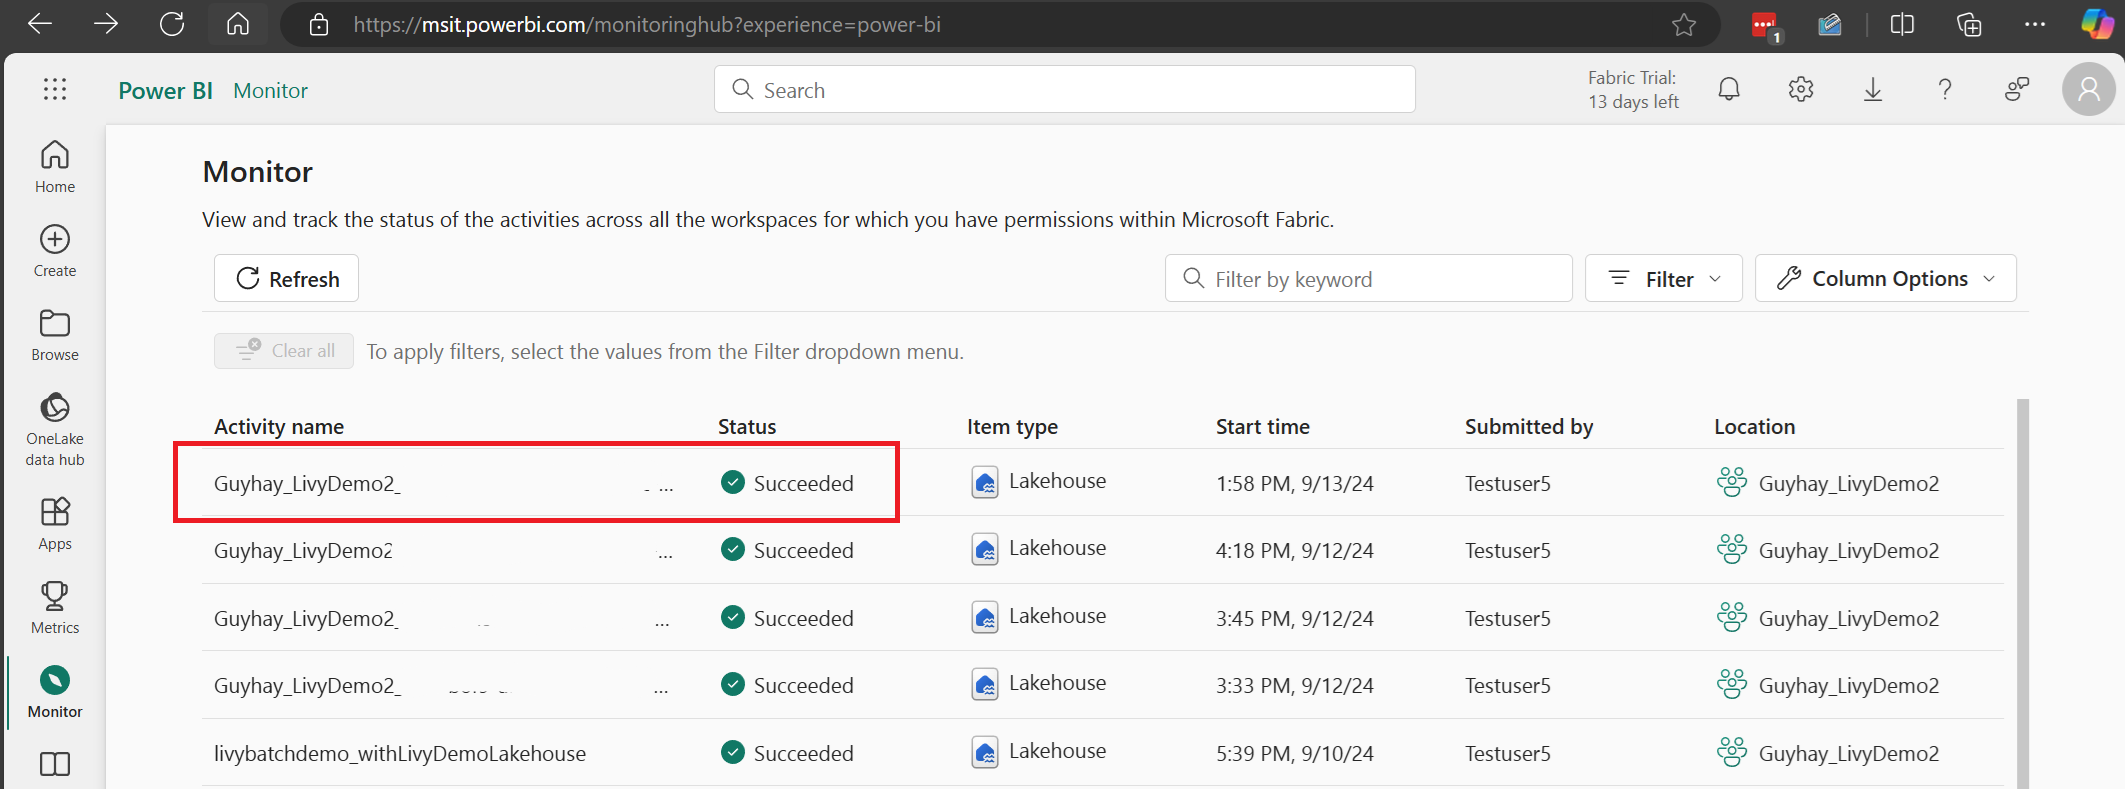
ดูงานของคุณในฮับการตรวจสอบ
คุณสามารถเข้าถึงฮับการตรวจสอบเพื่อดูกิจกรรม Apache Spark ต่าง ๆ ได้โดยการเลือก การตรวจสอบ ในลิงก์การนําทางด้านซ้าย
เมื่อชุดงานเสร็จสมบูรณ์ คุณสามารถดูสถานะเซสชันโดยนําทางไปยัง การตรวจสอบ
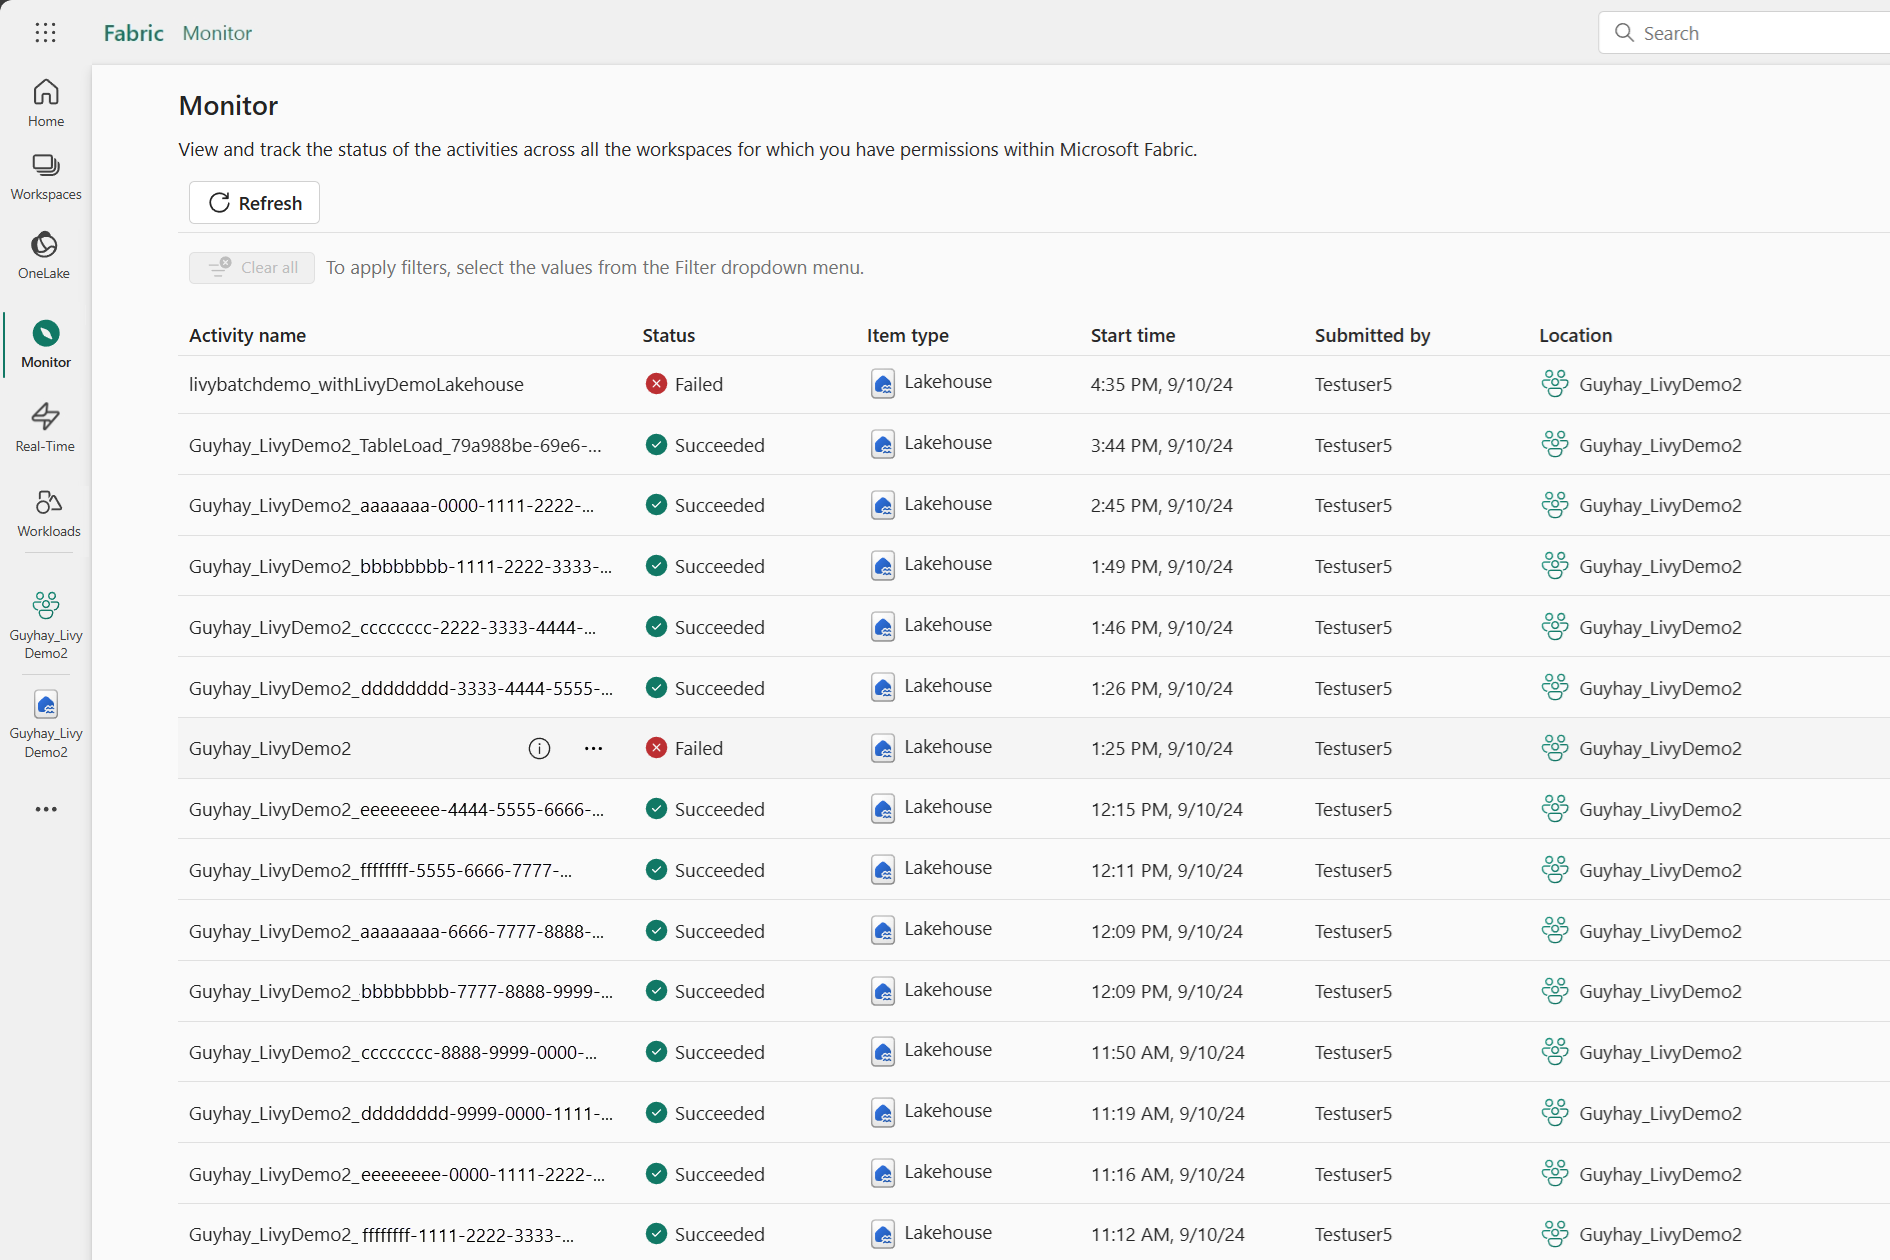
เลือกและเปิดชื่อกิจกรรมล่าสุด
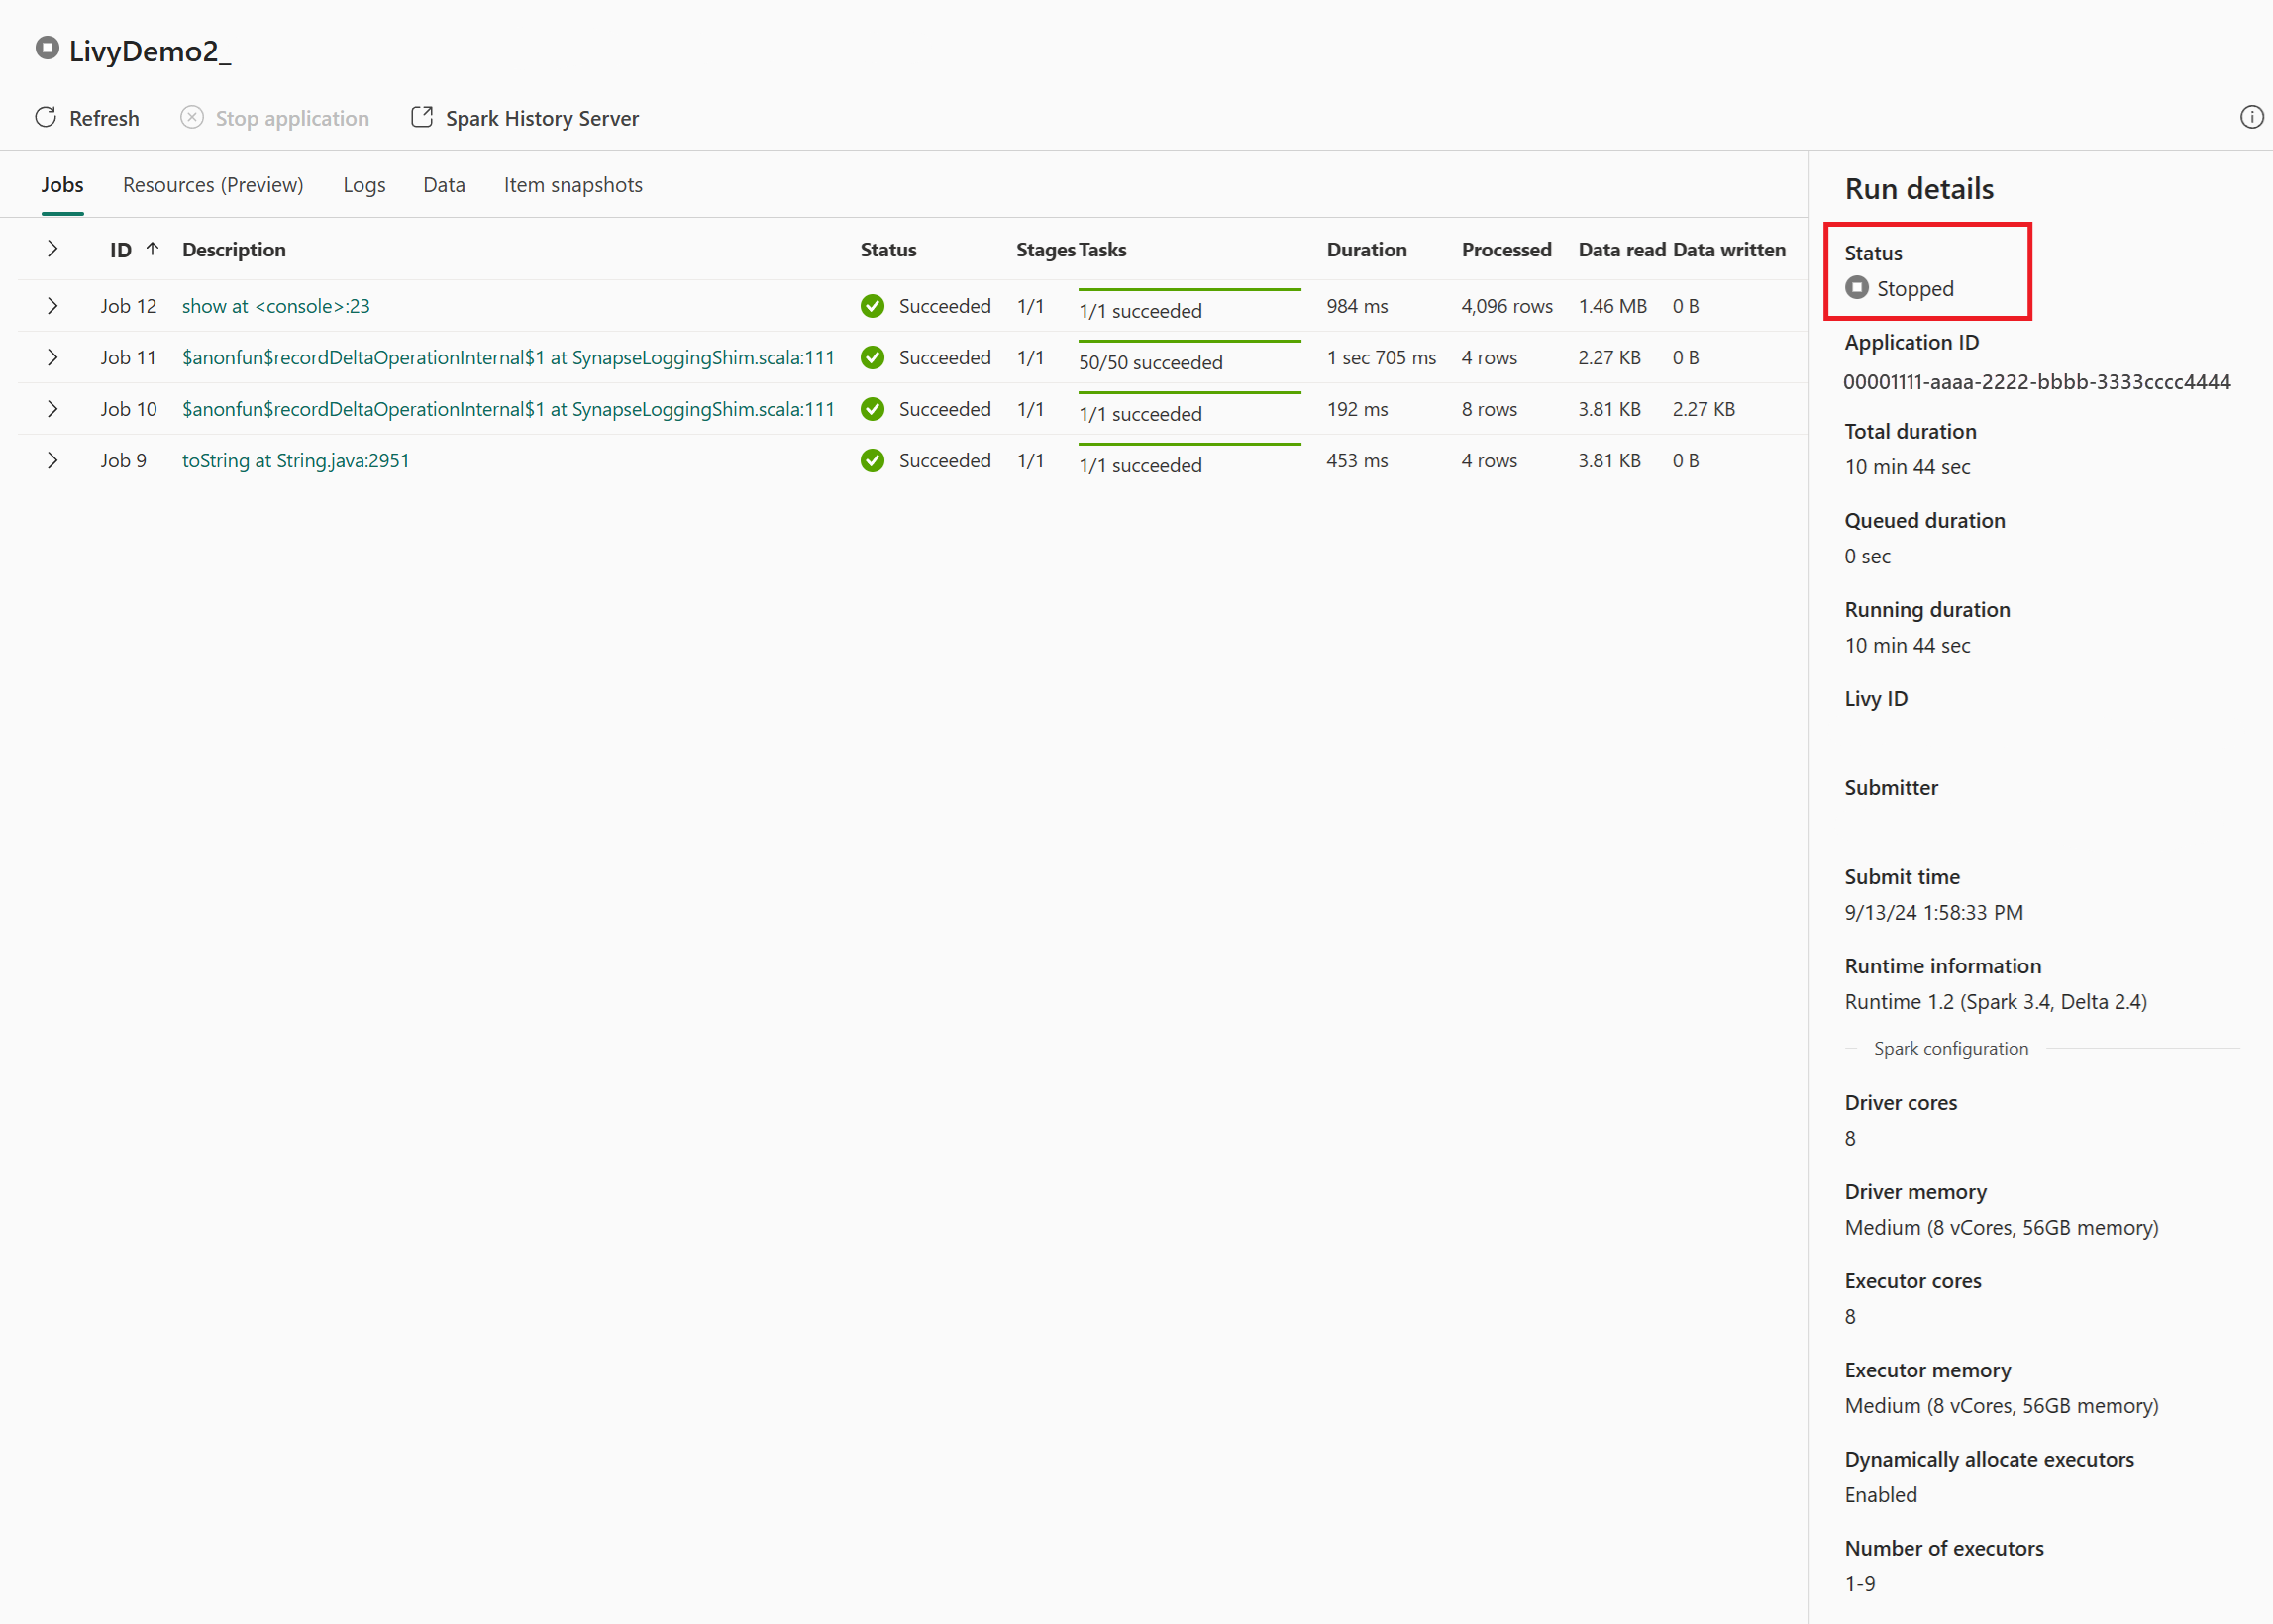
ในกรณีเซสชัน Livy API นี้ คุณสามารถดูการส่งชุดก่อนหน้า ของคุณ เรียกใช้รายละเอียด เวอร์ชัน Spark และการกําหนดค่าของคุณ สังเกตสถานะหยุดที่ด้านบนขวา


ในการสรุปกระบวนการทั้งหมด คุณต้องมีไคลเอ็นต์ระยะไกล เช่น Visual Studio Code โทเค็นแอป Microsoft Entra URL จุดสิ้นสุด Livy API การรับรองความถูกต้องกับเลคเฮ้าส์ของคุณ เพย์โหลด Spark ในเลคเฮ้าส์ของคุณ และในที่สุดเซสชัน Livy API เป็นชุด