Use your model
Learn how to use your Object detection model in Power Apps.
Quick test
After your model completes training, you can view important details about your newly trained model on a details page.

To see your model in action, select Quick test.

Drag and drop or upload an image from your device to test. From the provided sample data, use the files from the Test folder AIBuilder_Lab\Lab Images\ObjectDetection_GreenTea\Test that we didn’t use for training.

You can now view the detected fields that you chose and the associated confidence scores for retrieving the individual fields compared to the trained model.
Publish your model
Your model can't be used until you publish it. If you're satisfied with your model, select Publish to make it available for use.

Use your model in Power Automate
Now that your model is published, you can use your Object detection model in a flow. A special component is available for you to add that analyzes any image and detects objects based on your trained object detection model.
Select Templates.
Search Click a button to recognize and count objects in images using AI Builder.
Select the correct template and then select Continue to confirm the creation of the flow.

The flow is already configured to run manually. Let's see it in action!

Select Save on the top right to test the flow.
Select Test.
Select Manually and then select Test.
Select Import and Select an image from your local device.
Select Run Flow.


After a few seconds, you'll see the flow running. The flow extracts the data. Congratulations! You built an intelligent automation flow. You can then customize the flow to your needs to perform any other action you might want.
Use your model in Power Apps
Now that your model is published, you can use your Object detection model in a canvas app. A special component is available for you to add that analyzes any image and detects objects based on your trained object detection model.
Select Use model.
Select Build intelligent apps to begin the canvas app creation experience.
Within your canvas app, an object detection component is automatically added and linked to your published Object detection model (Object Detection Green Tea in this example). Going forward, you can select Insert > AI Builder to view the list of AI Builder components and then select Object detector to add an object detector component. Make sure that you select the correct model; only published models appear in the drop-down list.

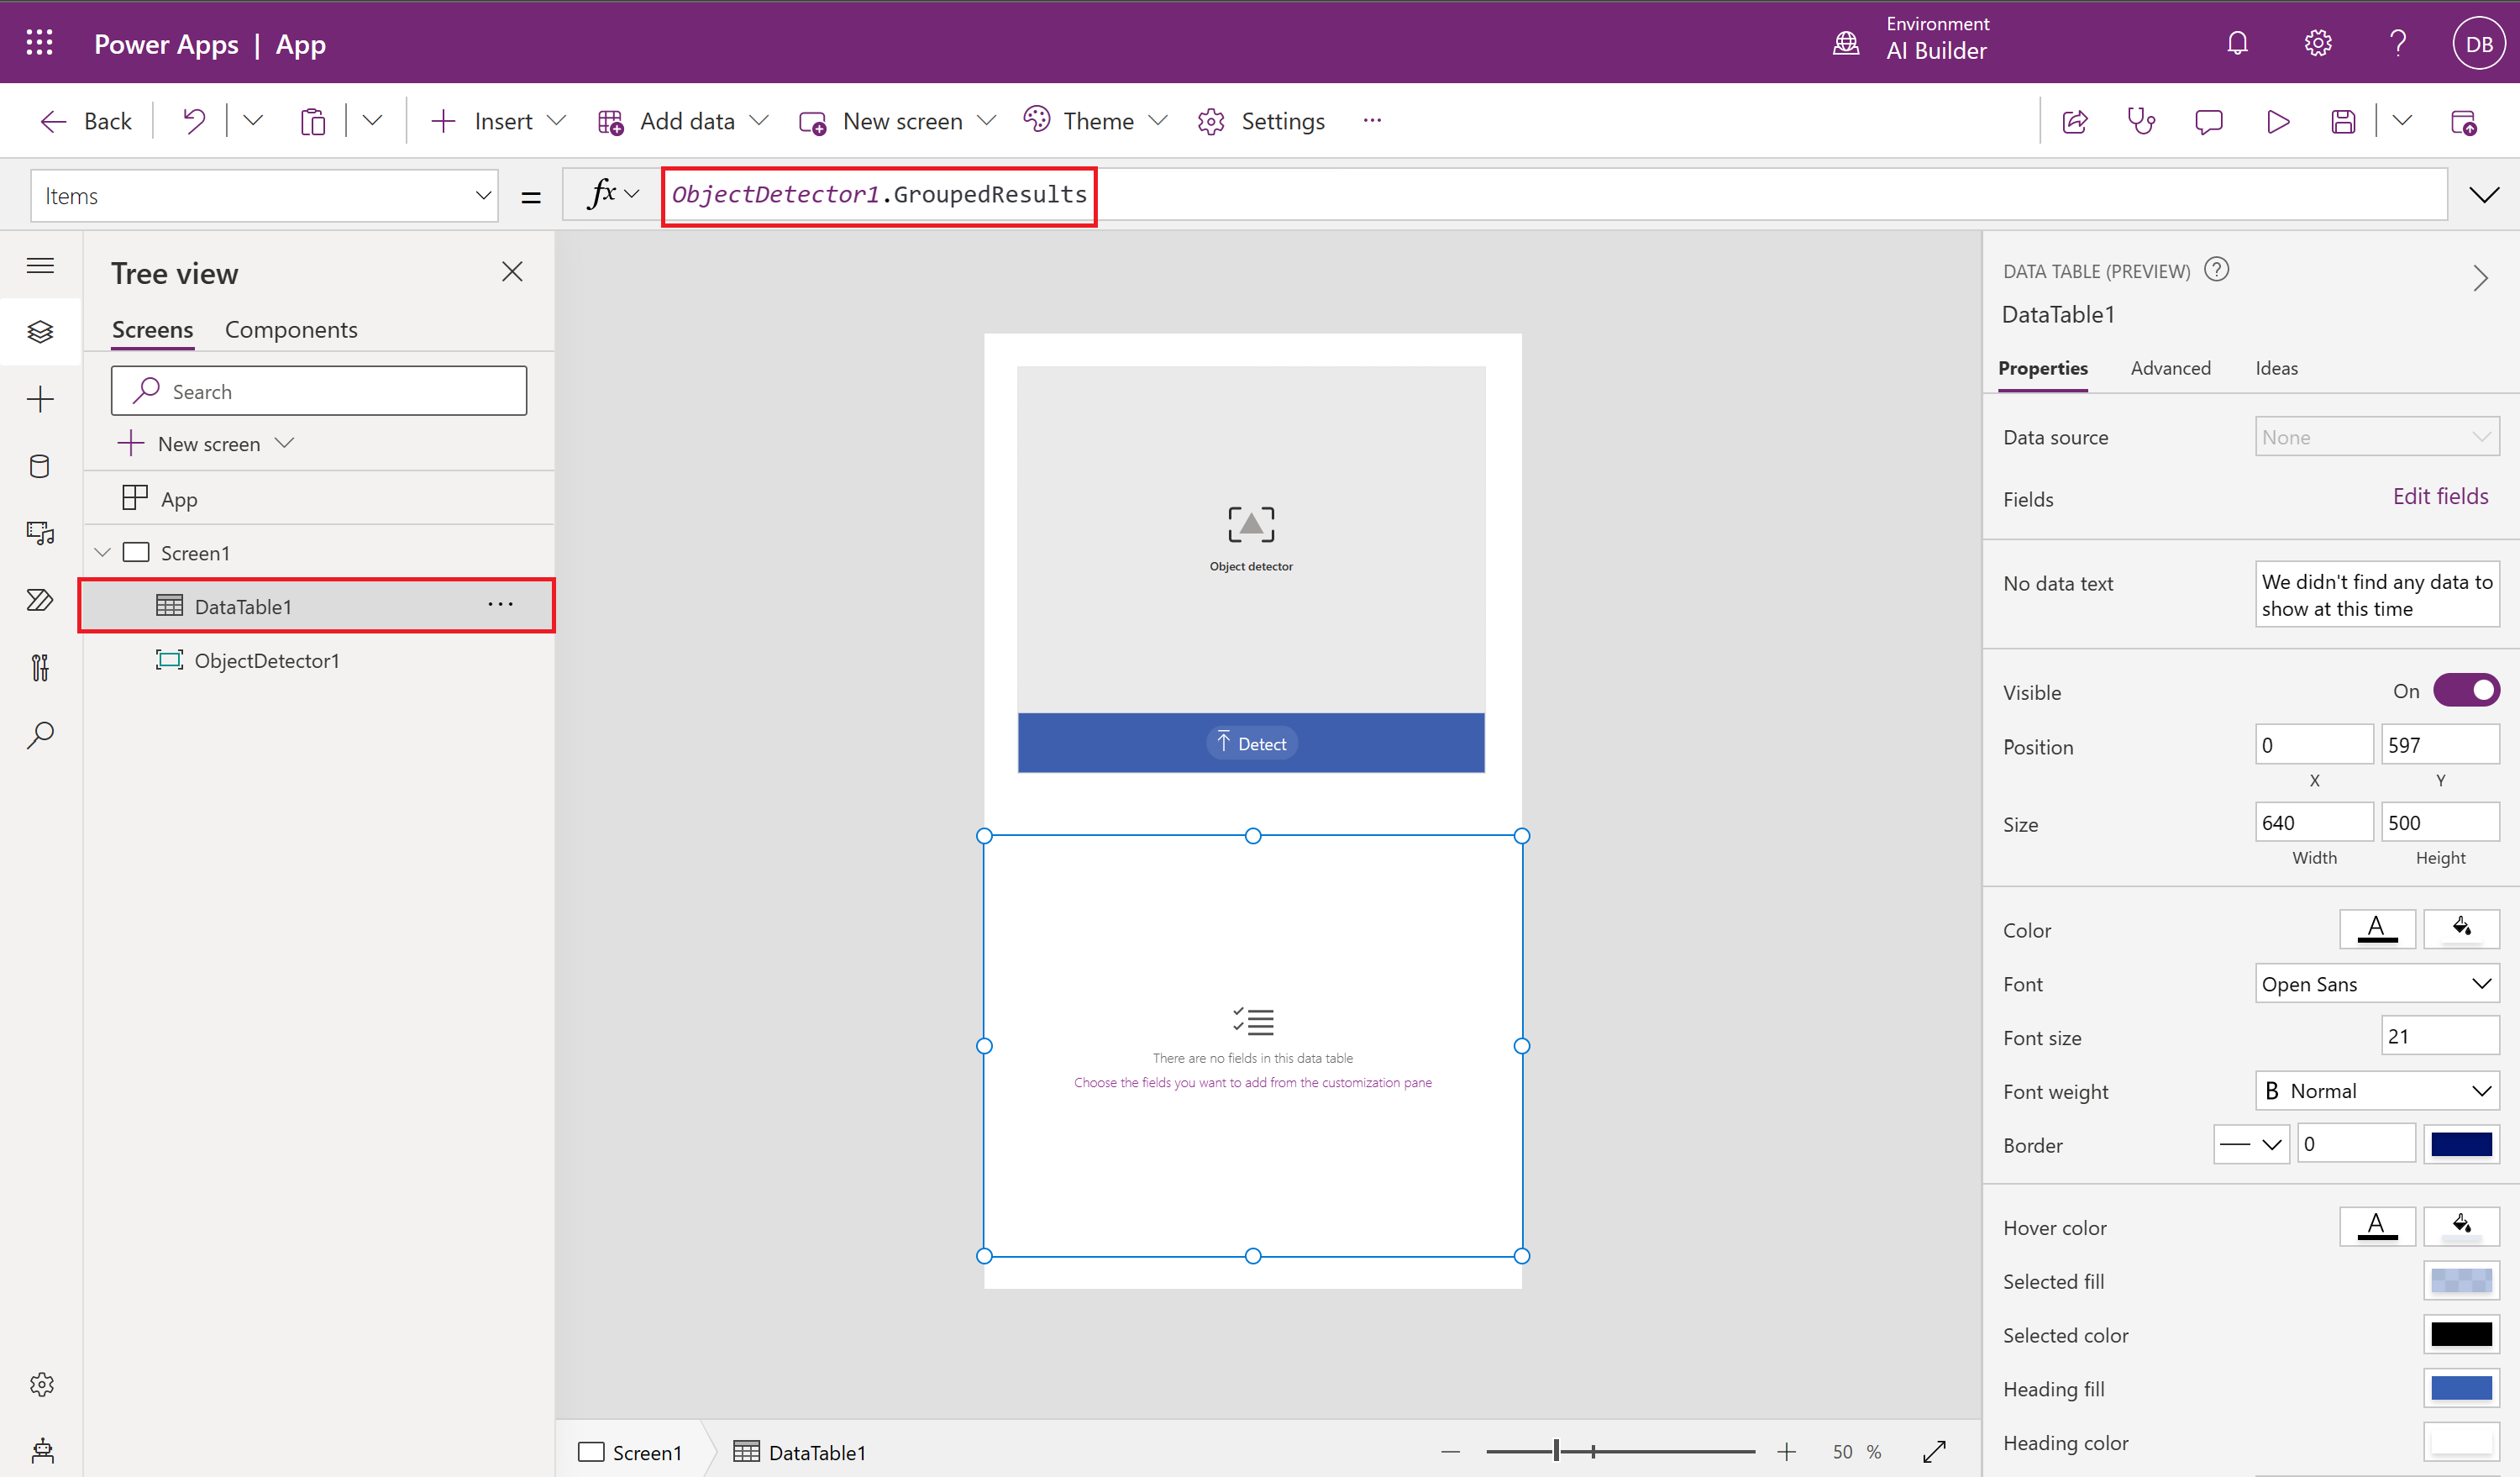
Select Insert and then add a Data table (preview) component.
To bind the Object detector component to one of the data tables, select the Data table DataTable1 component and replace the formula bar value with ObjectDetector1.GroupedResults.
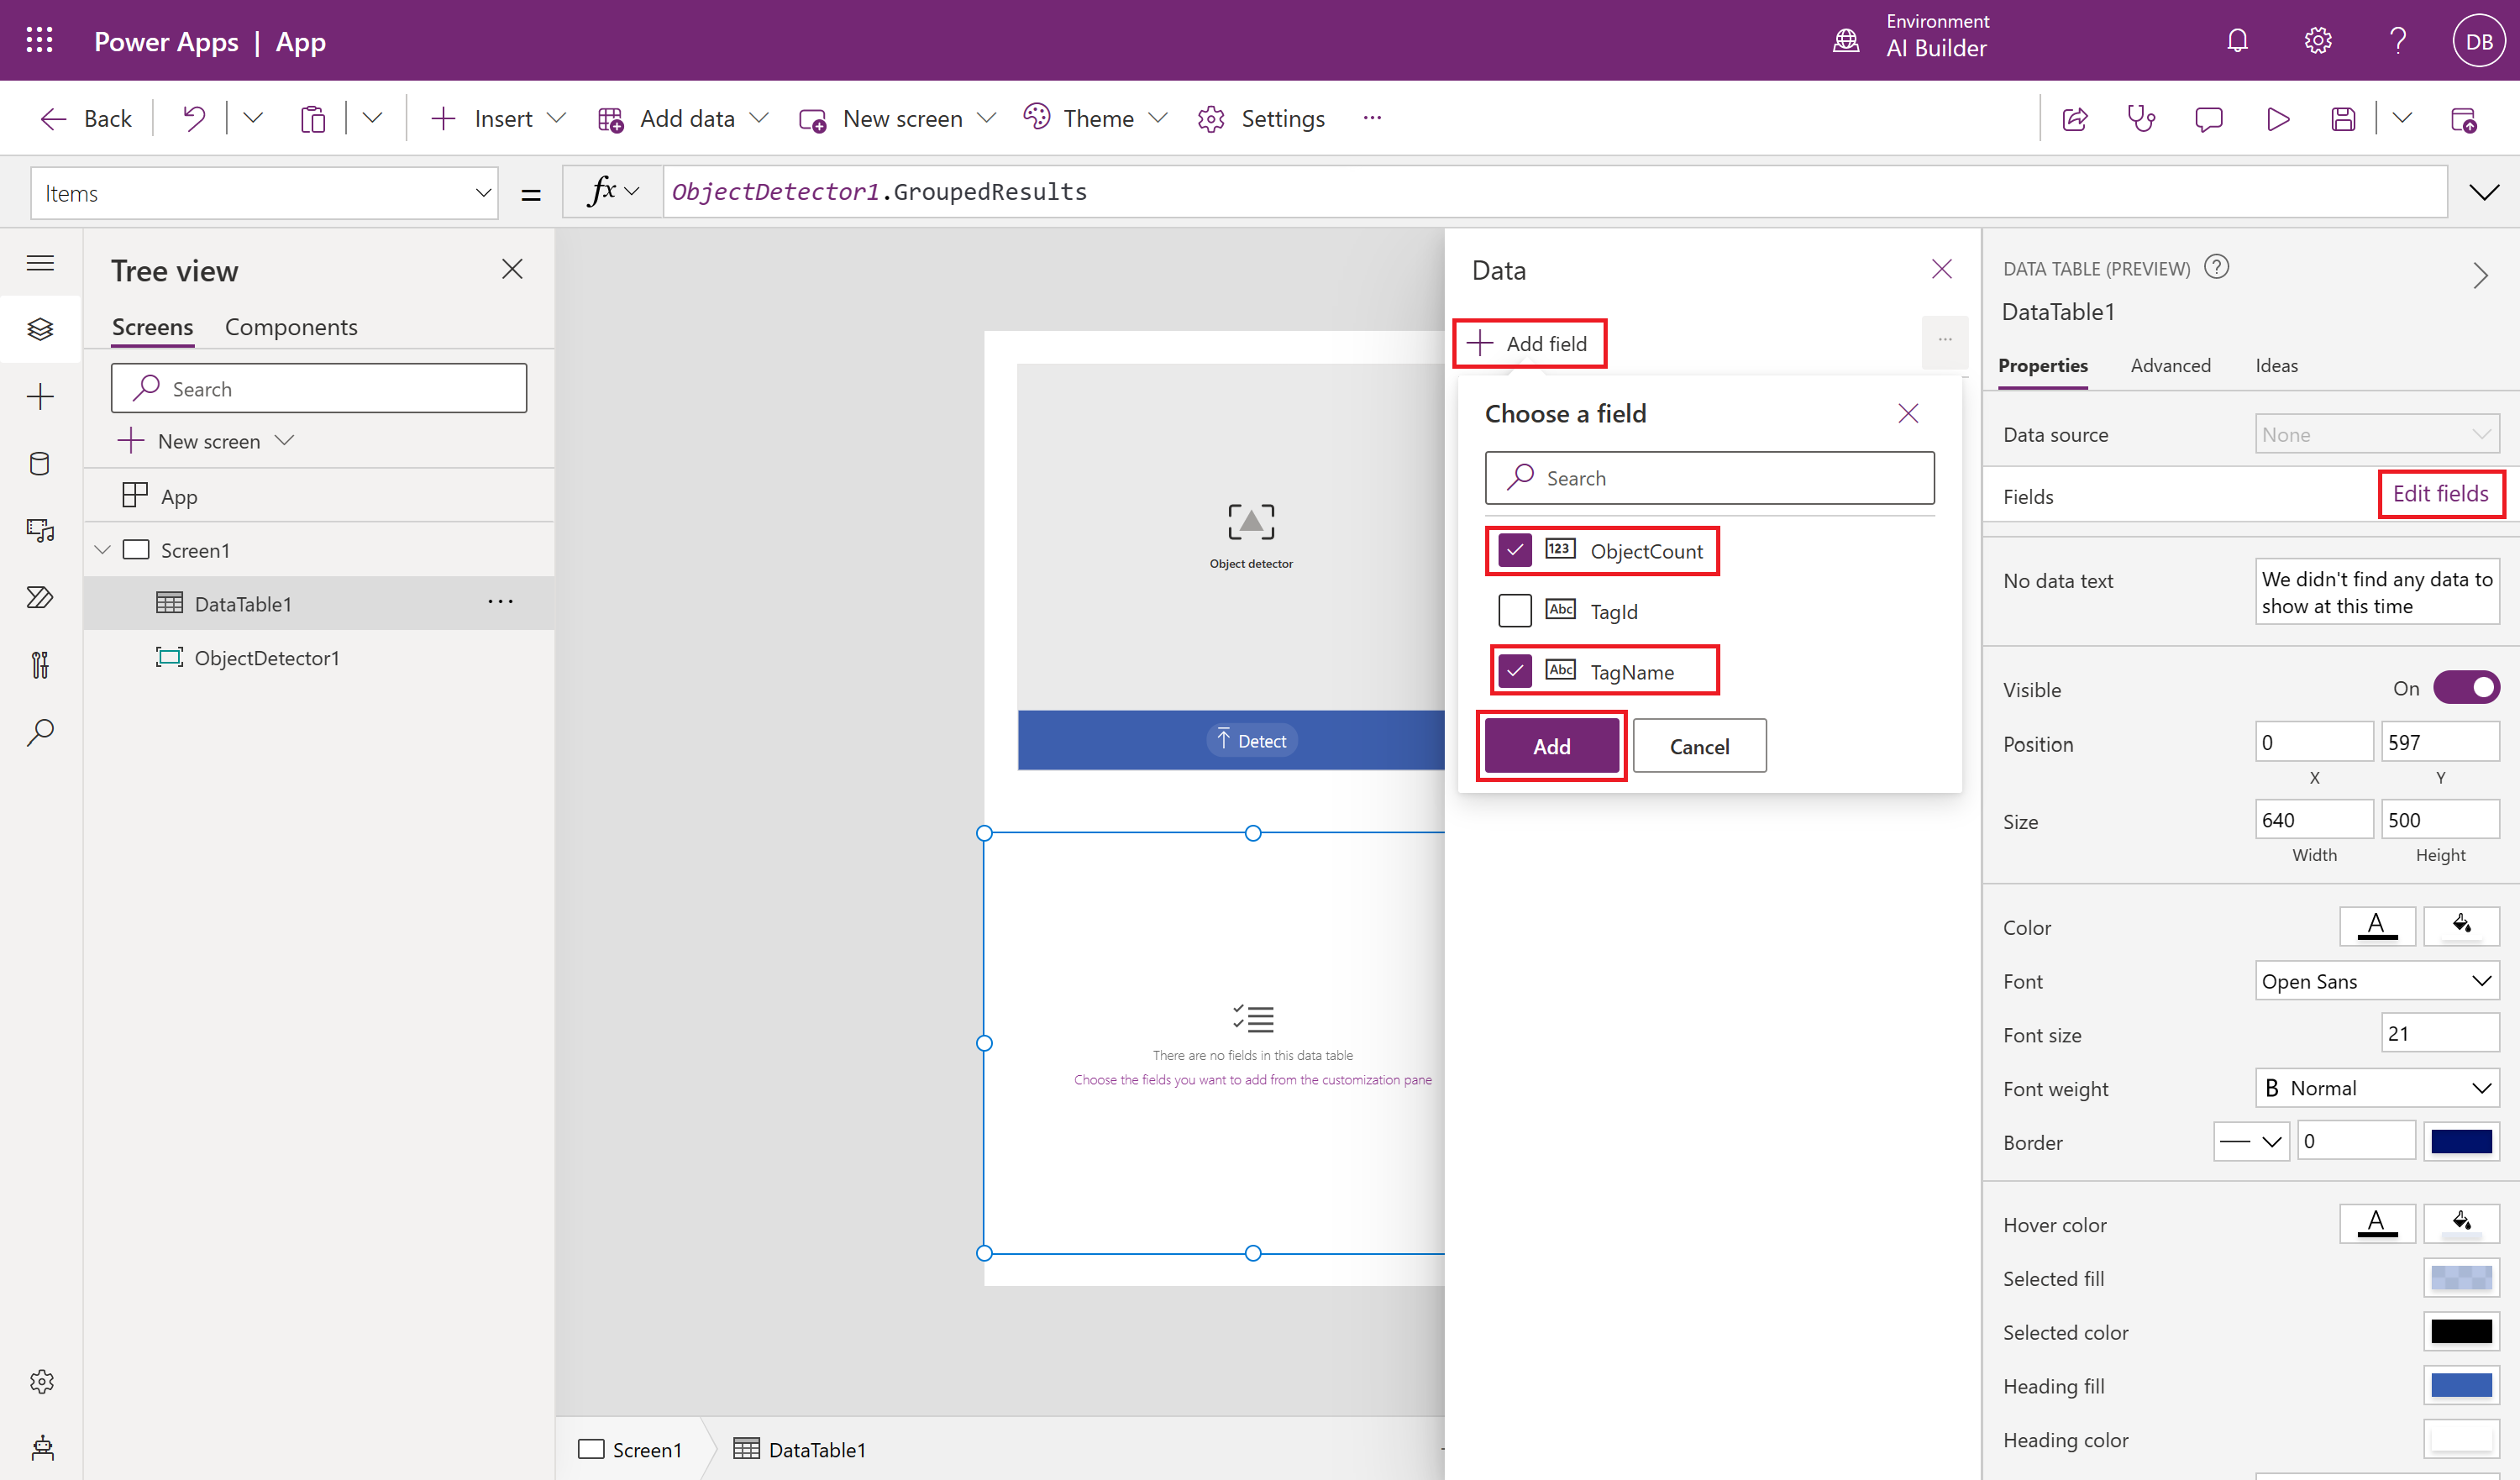
Select Edit Fields, Select Add Field, Select ObjectCount & TagName, and Select Add
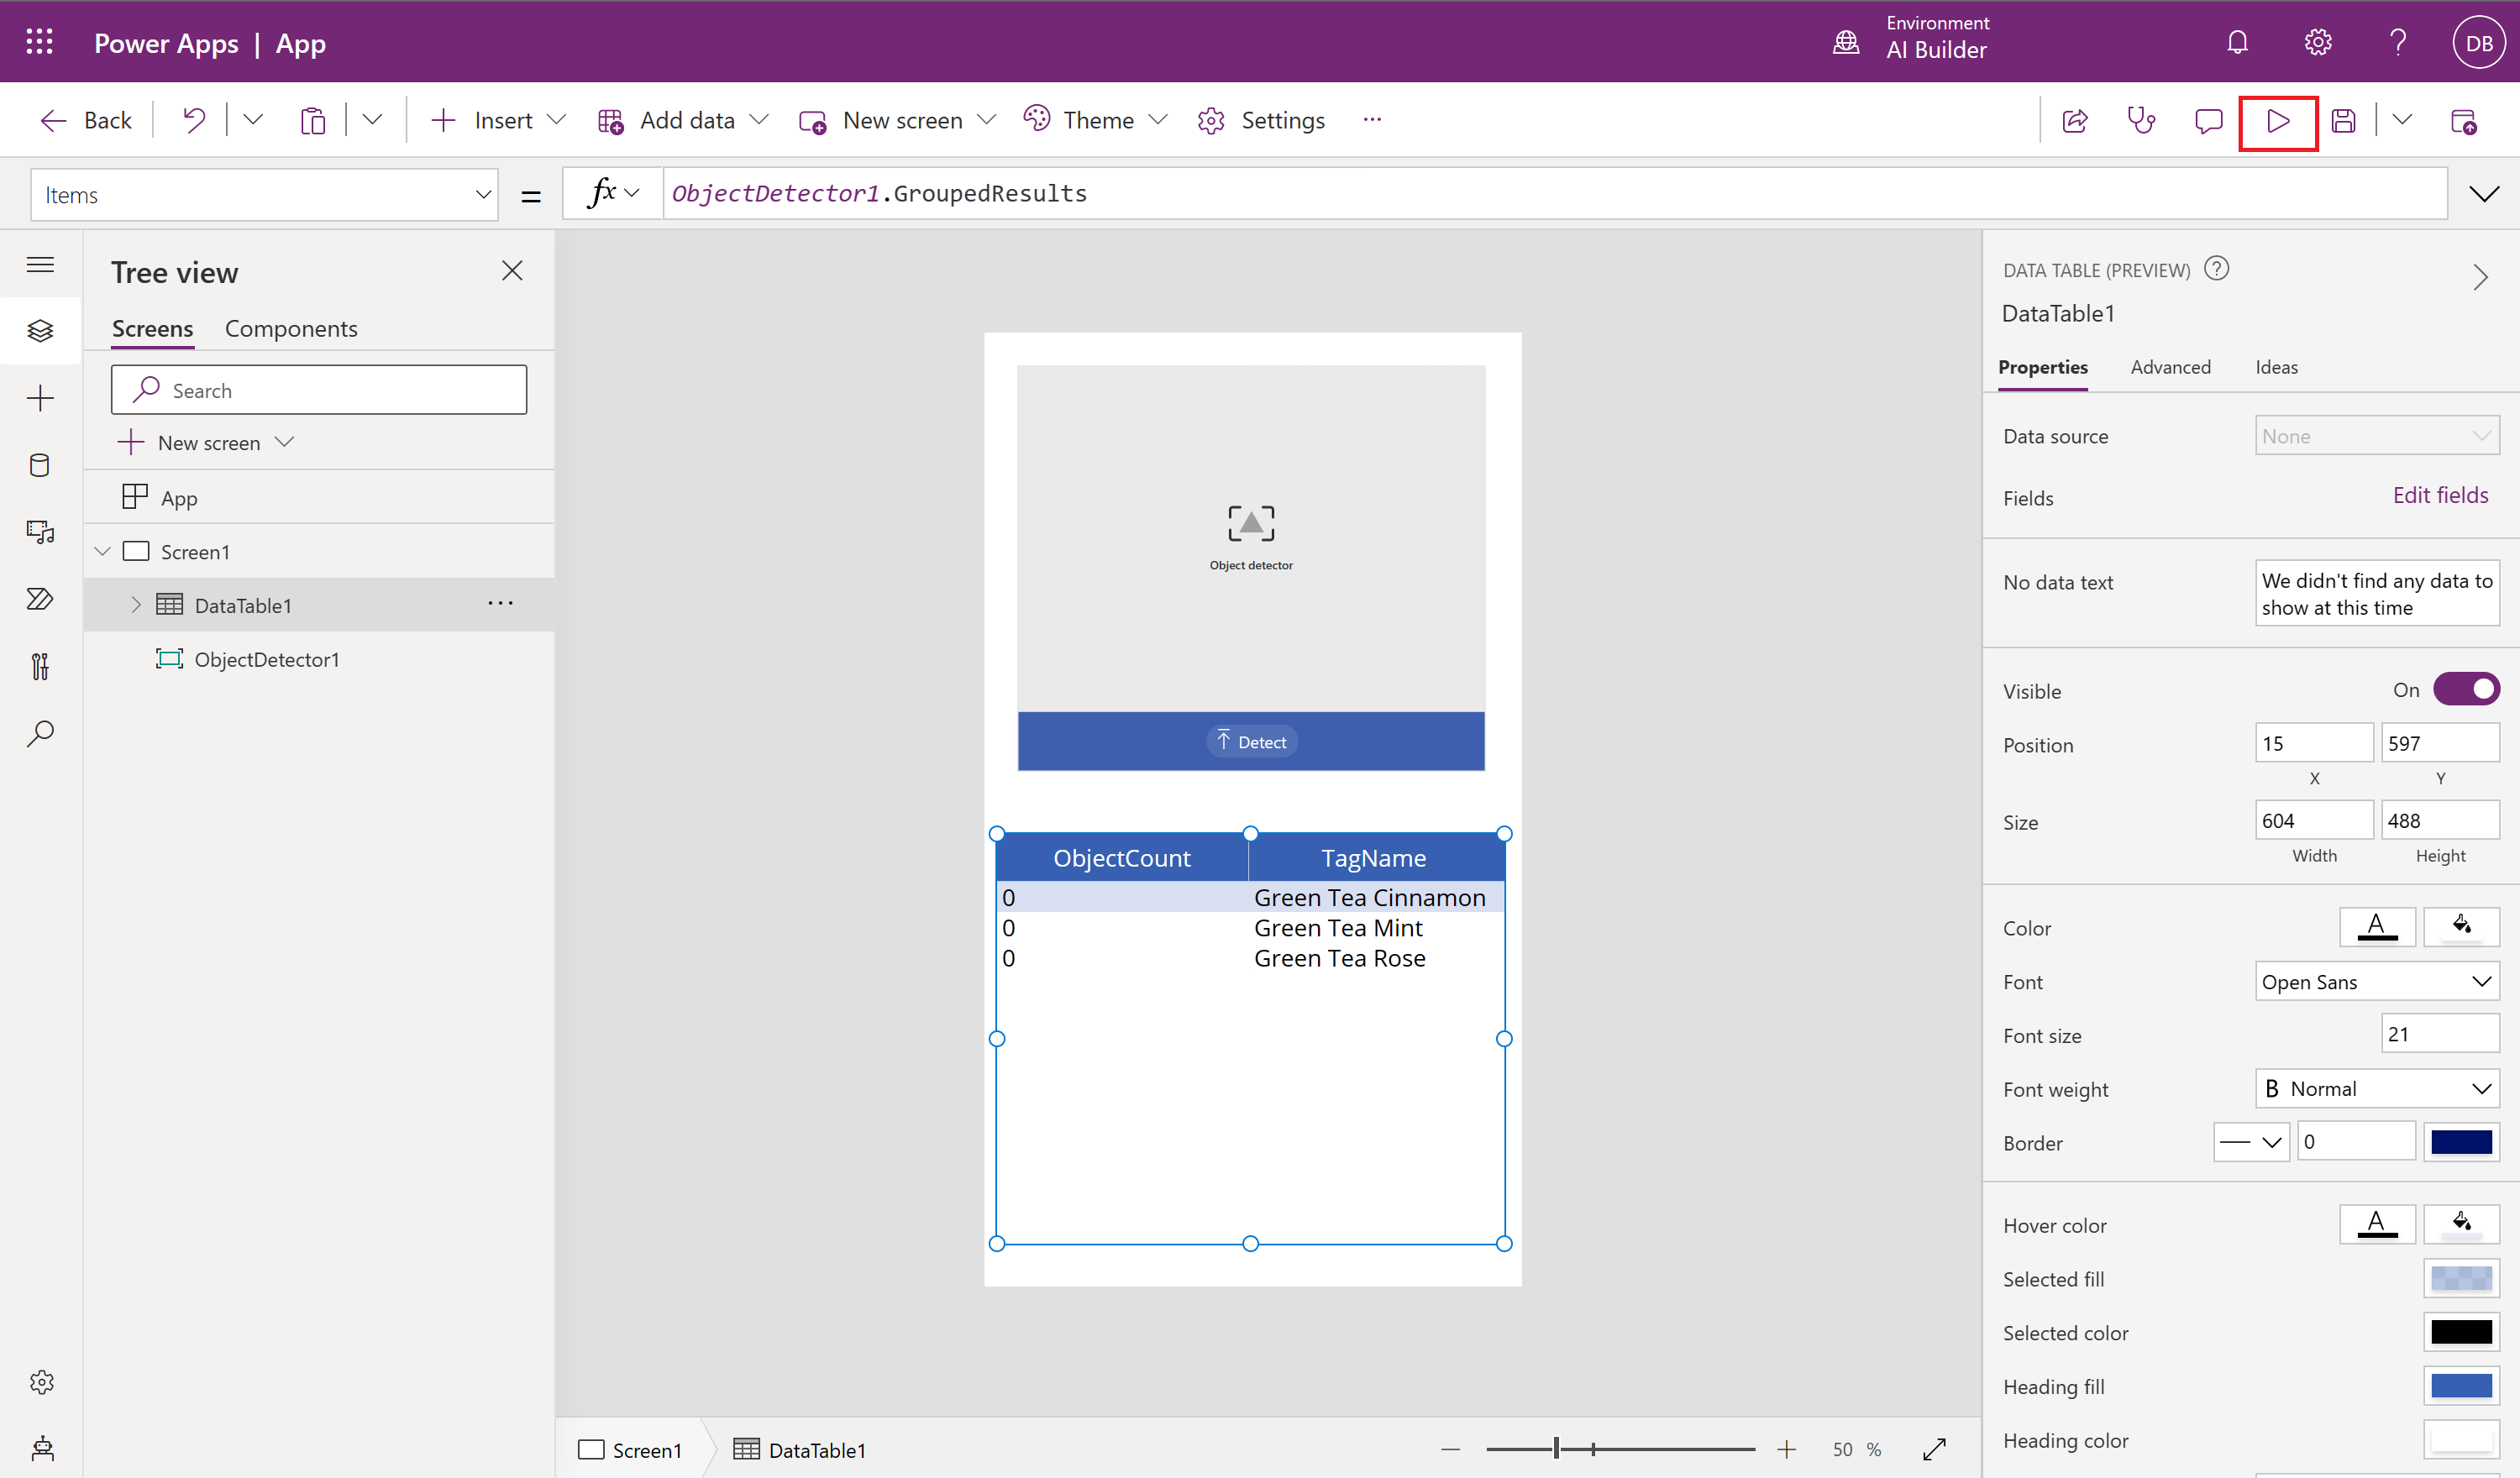
Select Play on the upper right of the Power Apps studio to preview the app.
Select Detect and then select the image from your local device.
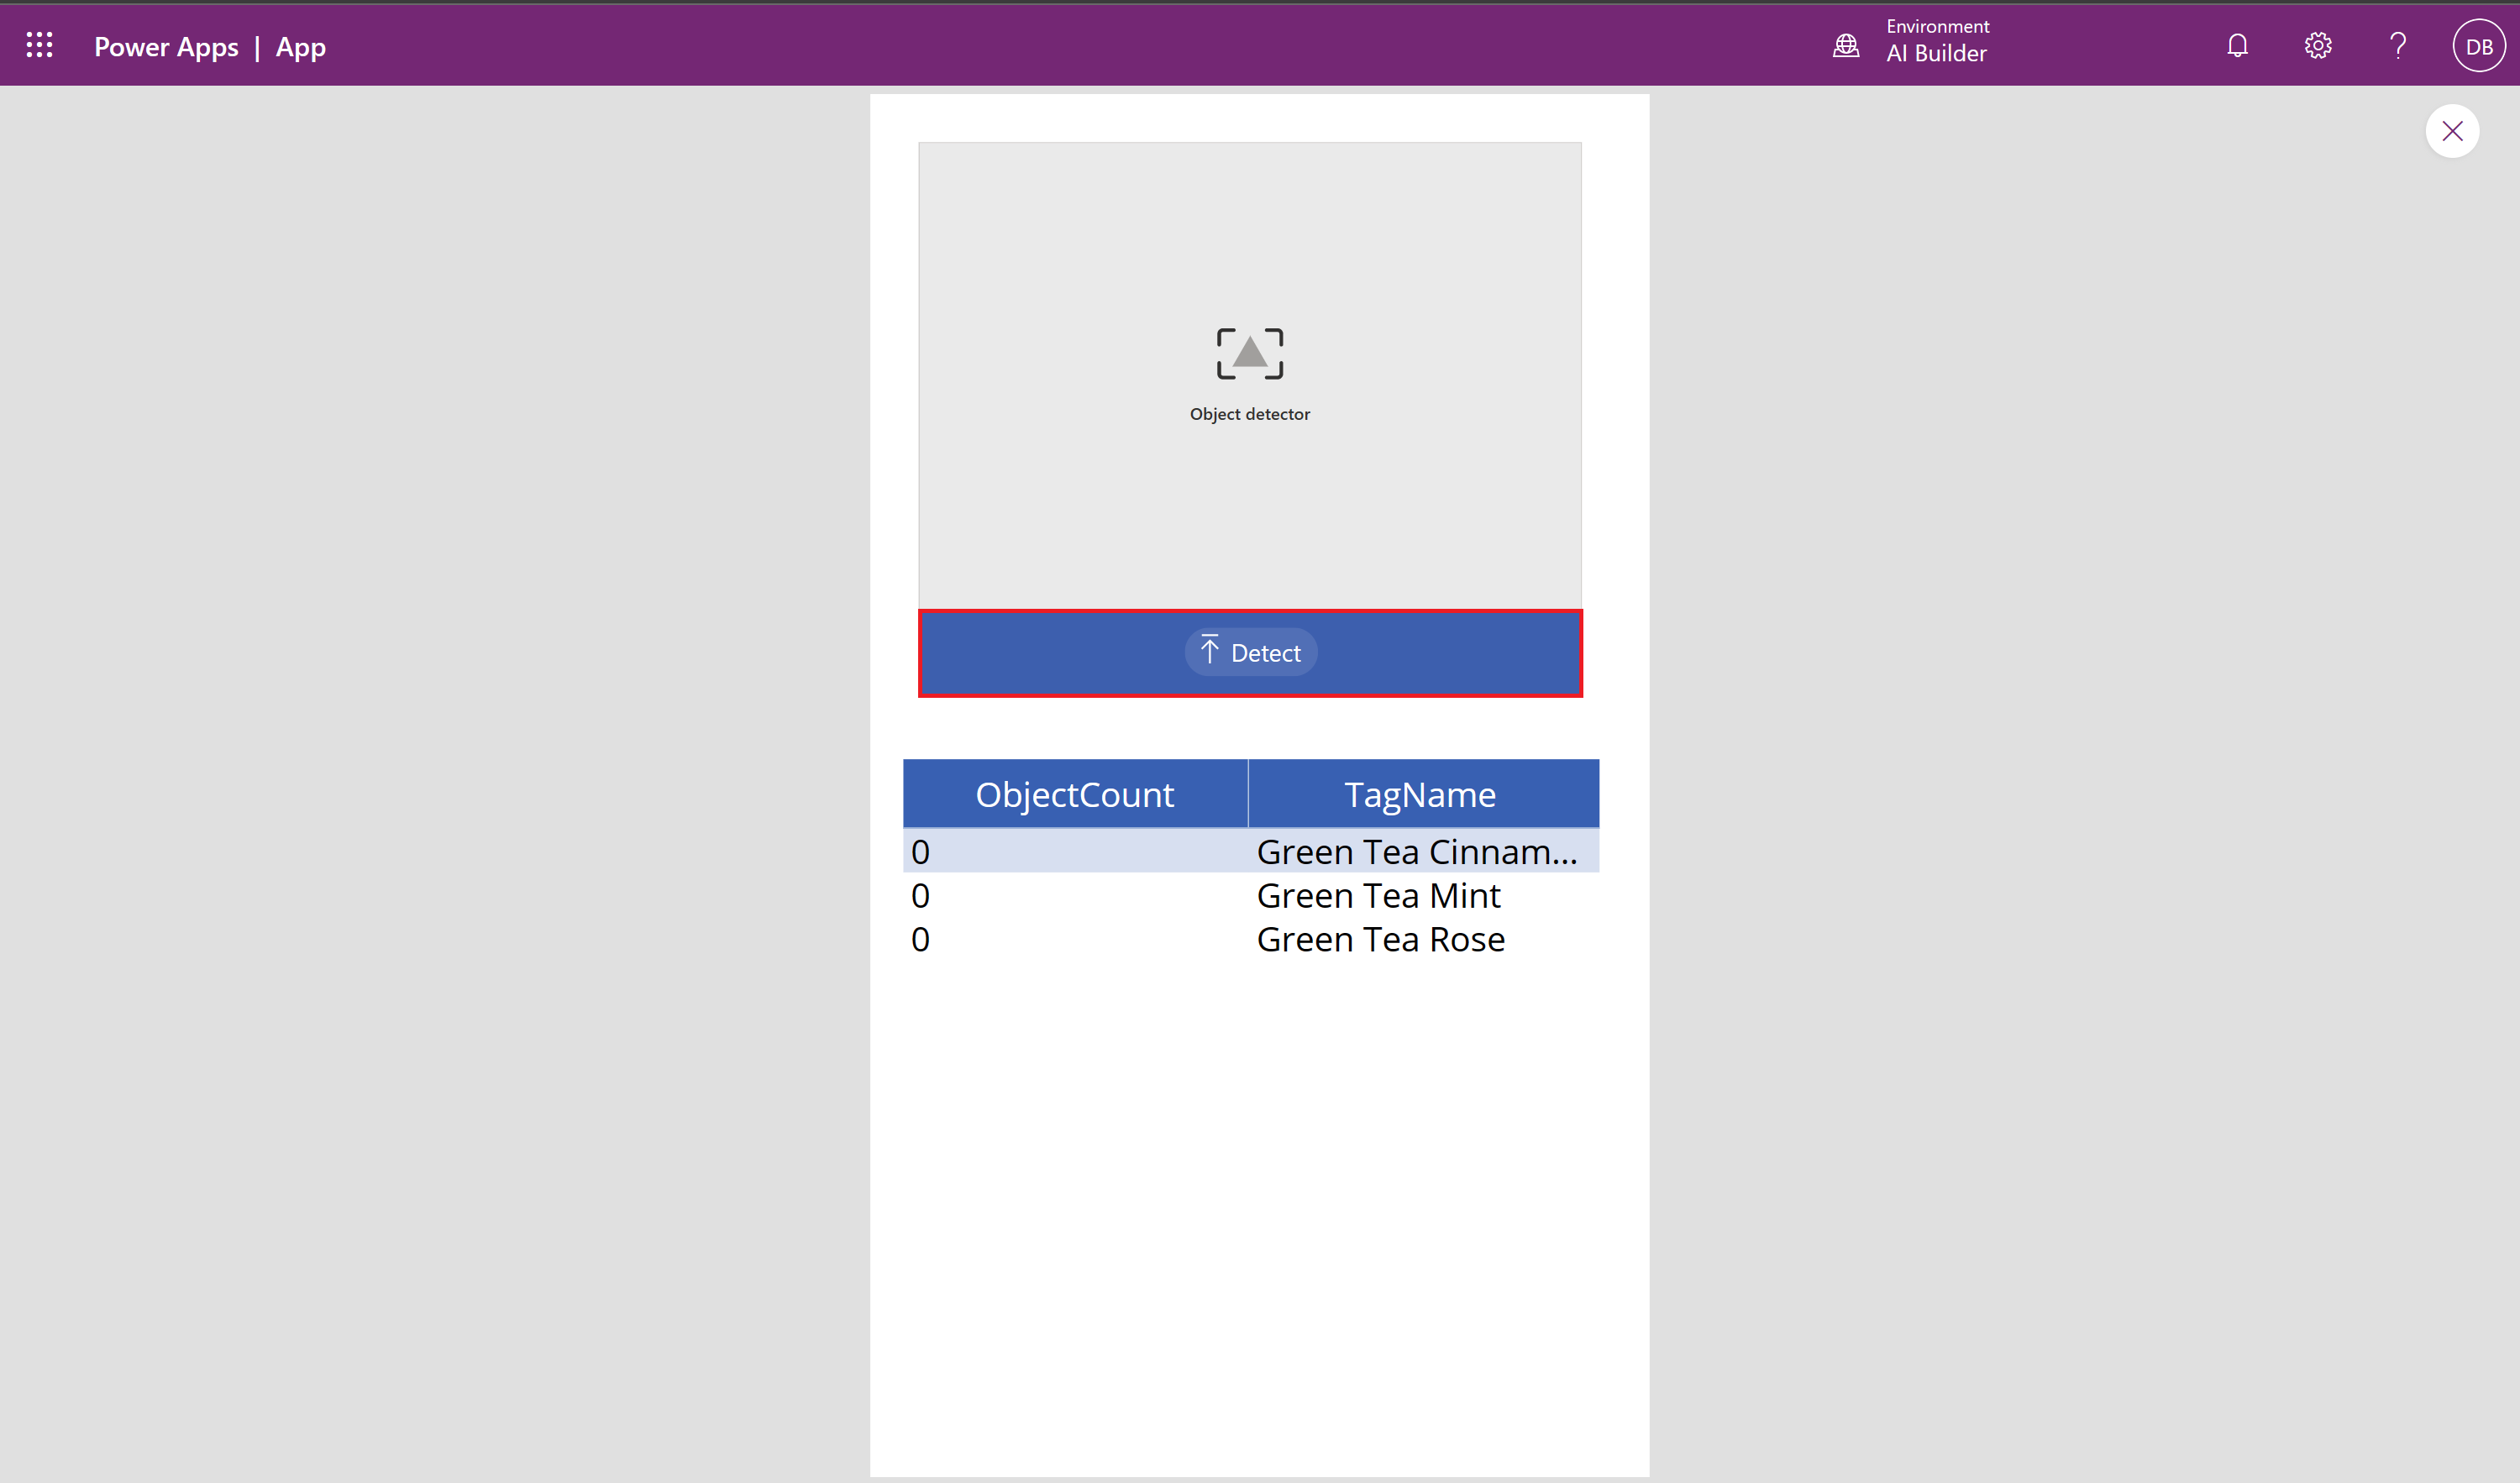


You should be able to examine the count of objects per Tag Name.

Congratulations! You built an intelligent app.