Use Copilot in Power BI Desktop
To use Copilot in Power BI Desktop, you need admin, member, or contributor access to at least a single workspace that is assigned to a paid Fabric capacity (F64 or higher) or Power BI Premium capacity (P1 or higher) that has Copilot enabled.
Note
The Copilot button in Desktop always appears in the ribbon. To be able to use Copilot, you must be signed in and have access to a workspace that is in Premium or Fabric capacity.
When you use Copilot in Power BI Desktop for the first time, you’re asked to pick a Copilot compatible workspace when you select the Copilot button in the ribbon. The workspace you select doesn’t need to be the same as the workspace where you plan to publish your report.
Start Copilot in Power BI Desktop the first time
To use Copilot in Power BI Desktop, you need admin, member, or contributor access to at least a single workspace that is assigned to a paid Fabric capacity (F64 or higher) or Power BI Premium capacity (P1 or higher) that has Copilot enabled.
Note
The Copilot button in Desktop always appears in the ribbon. To be able to use Copilot, you must be signed in and have access to a workspace that is in Premium or Fabric capacity.
When you use Copilot in Power BI Desktop for the first time, you’re asked to pick a Copilot compatible workspace when you select the Copilot button in the ribbon. The workspace you select doesn’t need to be the same as the workspace where you plan to publish your report.
Open a Power BI report and select Copilot in the ribbon. The Copilot pane appears and prompts you to select a workspace.
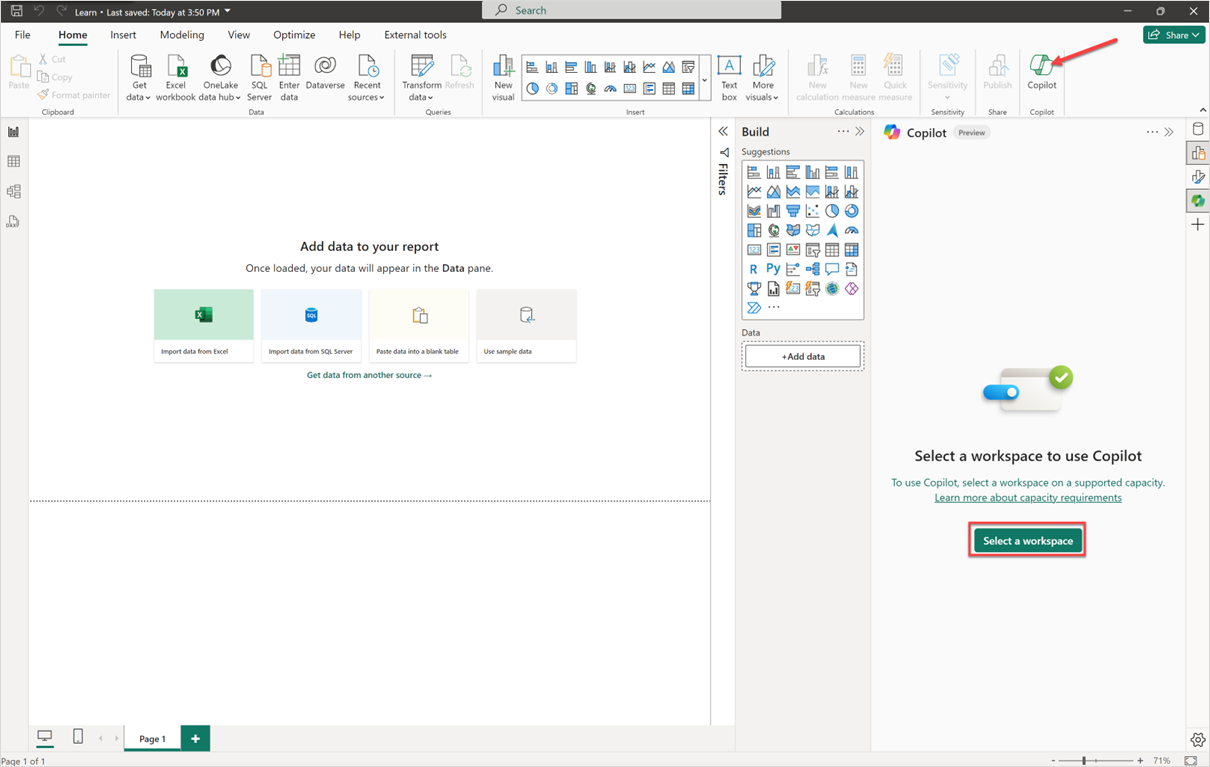
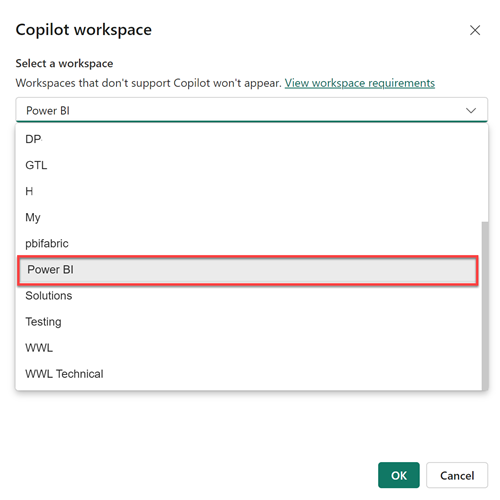
Select the workspace you’d like to associate this report with for Copilot use. Only workspaces that support Copilot appear.
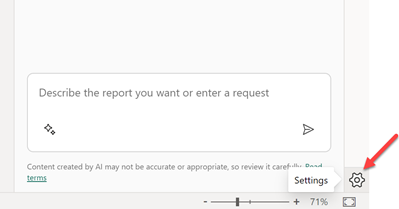
Use the Settings gear in the bottom-right corner of Power BI to switch the associated workspace or check which workspace your report is associated with.
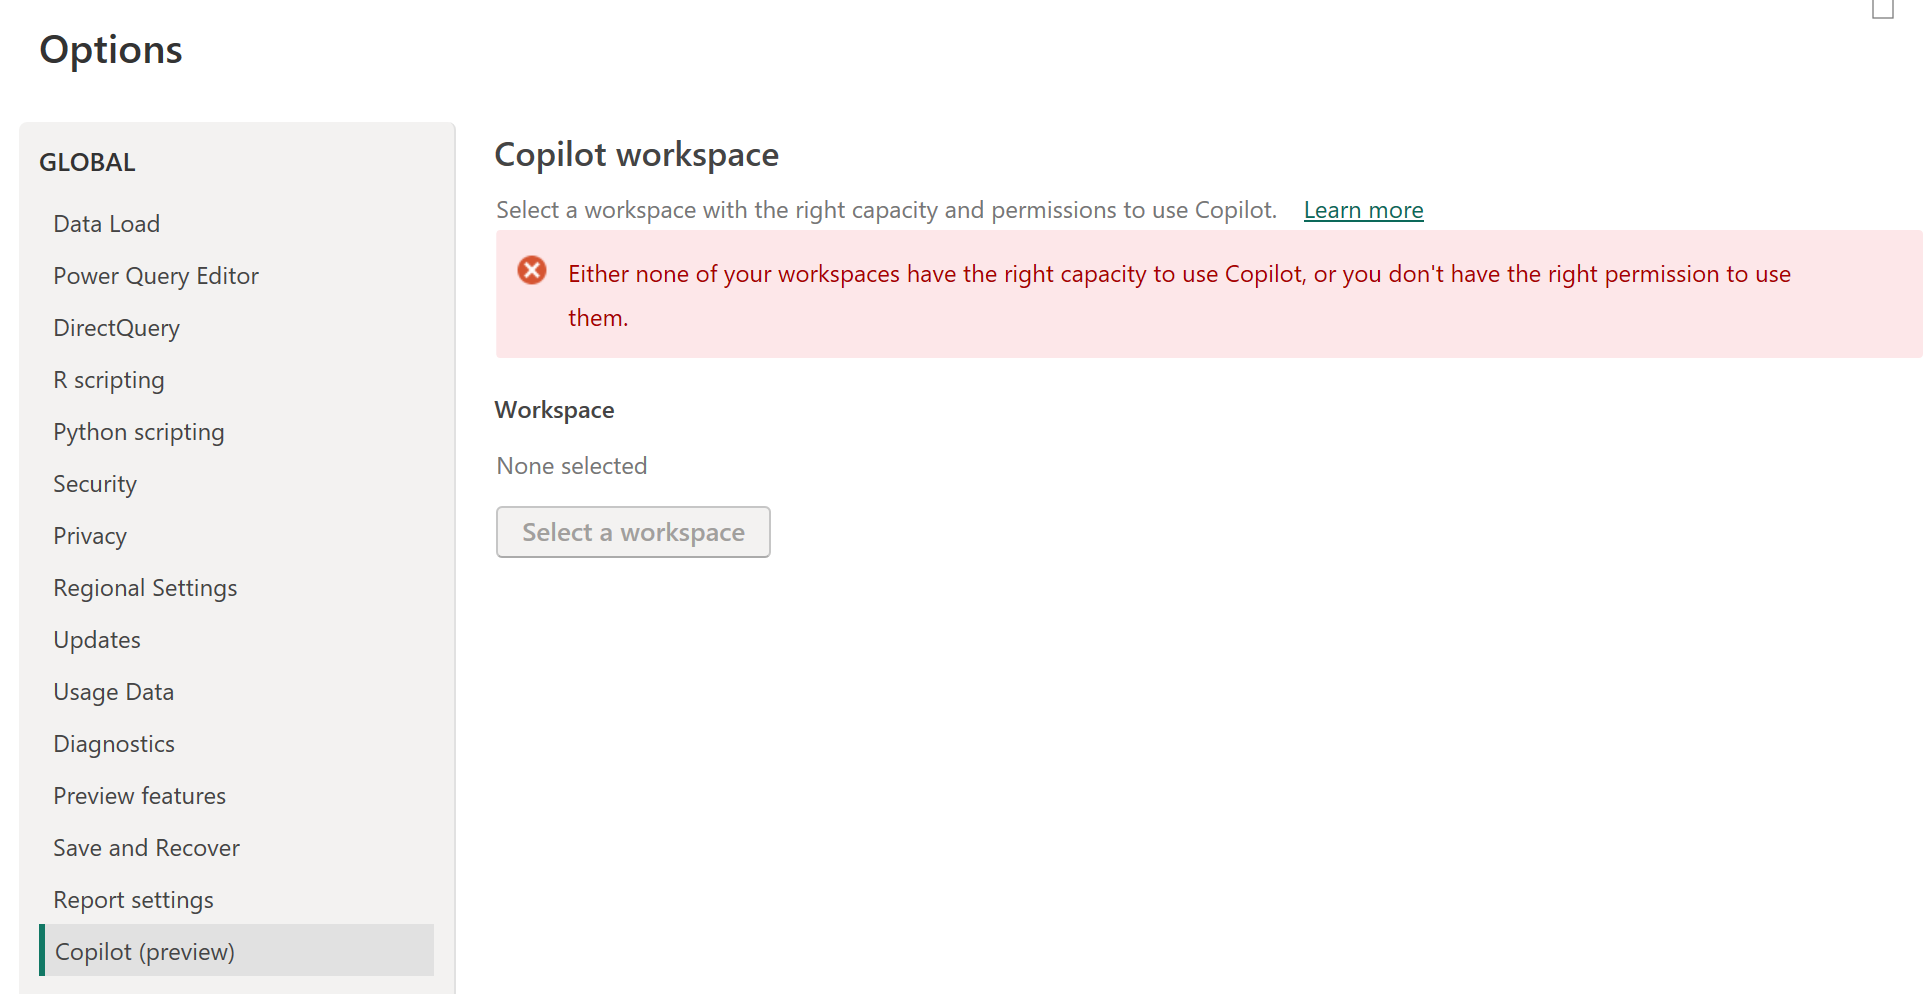
This opens the Options window, where you can navigate to the Copilot (preview) settings to see which workspace you’re currently working with and select a new workspace.
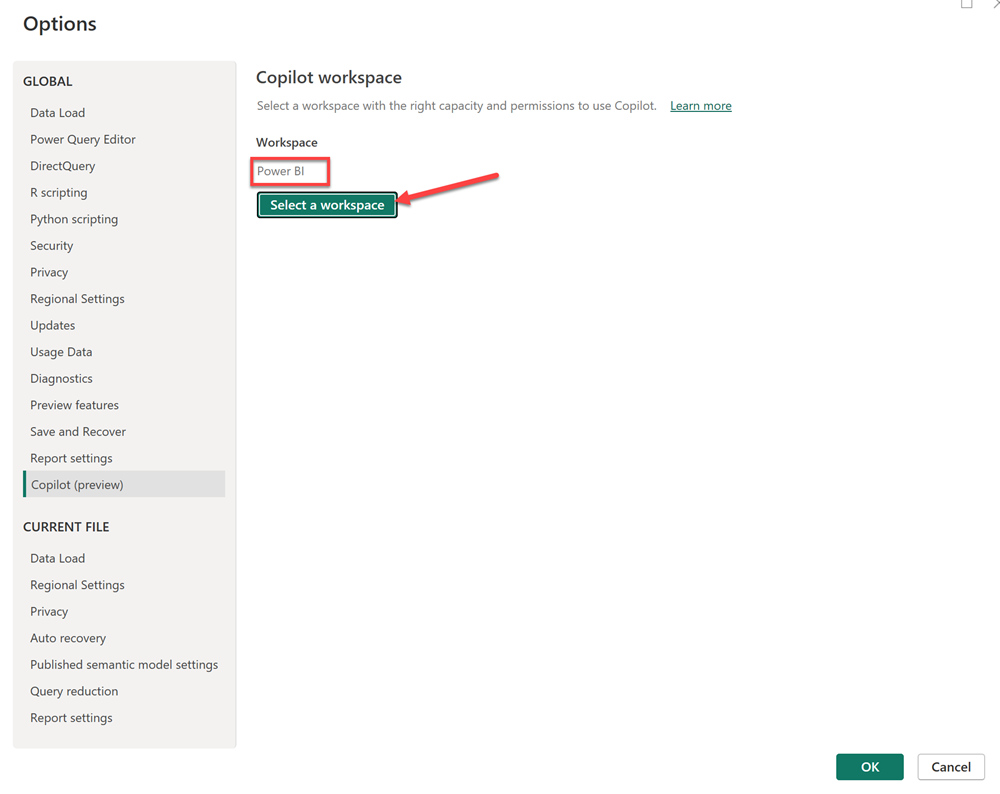
If you don’t have access to any workspaces that are in the correct capacity to use Copilot, you see the following message in the Copilot (preview) settings: Either none of your workspaces have the right capacity to use Copilot, or you don't have the right permission to use them.
Now you're ready to create a report with Copilot in Power BI Desktop.
Open a Power BI report and select Copilot in the ribbon. The Copilot pane appears and prompts you to select a workspace.
Select the workspace you’d like to associate this report with for Copilot use. Only workspaces that support Copilot appear.
Use the Settings gear in the bottom-right corner of Power BI to switch the associated workspace or check which workspace your report is associated with.
This opens the Options window, where you can navigate to the Copilot (preview) settings to see which workspace you’re currently working with and select a new workspace.
If you don’t have access to any workspaces that are in the correct capacity to use Copilot, you see the following message in the Copilot (preview) settings: Either none of your workspaces have the right capacity to use Copilot, or you don't have the right permission to use them.


Send feedback
We always welcome your feedback about our products. Especially during public preview, your feedback helps us improve the product faster.
Related content
- Update your data model to work well with Copilot
- Create a report with Copilot in the Power BI service
- Create a report with Copilot in Power BI Desktop
- Write Copilot prompts for creating report pages in Power BI
- Create a narrative summary visual with Copilot for Power BI
- Write Copilot prompts for creating narrative visuals in Power BI
- Overview of Copilot for Fabric (preview)
- Frequently asked questions about Copilot for Power BI and Fabric
- Privacy, security, and responsible use for Copilot article in the Fabric documentation
- Copilot tenant settings (preview) article in the Fabric documentation
- Enhance Q&A with Copilot for Power BI
Зворотний зв’язок
Очікується незабаром: протягом 2024 року ми будемо припиняти використання механізму реєстрації проблем у GitHub для зворотного зв’язку щодо вмісту й замінювати його новою системою зворотного зв’язку. Докладніше: https://aka.ms/ContentUserFeedback.
Надіслати й переглянути відгук про