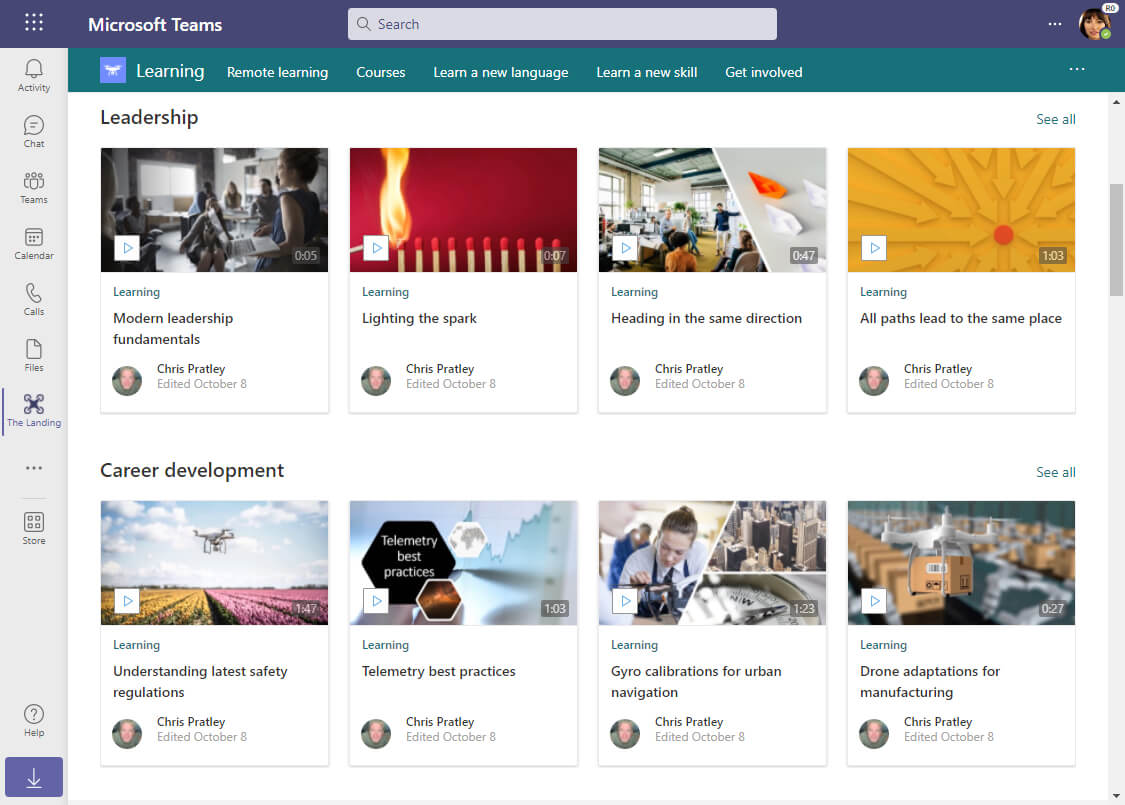
Featuring a set of videos on a page
The basis for Stream (built on SharePoint) is having video files stored in SharePoint, Microsoft Teams, & Yammer with the ability to create destinations that feature video content in your Viva Connections and SharePoint-based intranet. For more background information, see Overview of featuring videos with web parts, pages, sites, & portals.
When you want to display a list of videos on a page, you can use the Highlighted content web part. You'll be able to configure how the list is filtered, sorted, and displayed. Visitors to your page will be able to select a video in the list to watch it. In this article, we talk about how to configure the Highlighted content for videos but you can use these same techniques to surface videos and other content side by side.
The Highlighted content web part has several source, filtering, and sorting options that will allow you to use it in creative ways to build customized video experiences, helping you highlight videos to your viewers. The Highlighted content web part allows you to:
- Group together and display videos based on category, allowing you to create what historically would have been done with video channels
- Pull videos to be displayed from a single site or across multiple libraries, sites, sites associated with a hub site, or across your entire organization
- Pick different sort options to display videos that are trending or newest
- Customize the look of the list of videos with different layout options, including grid, list, carousel, and filmstrip
- Limit the number of videos shown on the page with a way to easily "See all"
Display videos by category
Often with videos you want to organize and display them on a page by category. In the past, you would have likely done this kind of organization with video channels. With Stream (built on SharePoint), the concept of video channels doesn't exist. Instead, you can use folders or metadata in a SharePoint site with the Highlighted content web part.
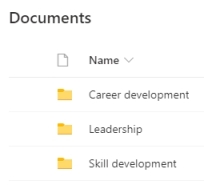
Use folders to group videos by category within a site
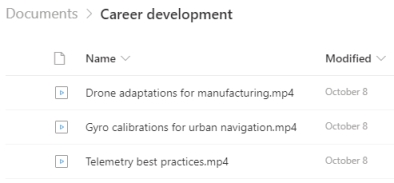
If all your videos are uploaded to a single document library on your SharePoint site, team, or community you can use different folders within that library to correspond to different categories.
Create a few folders in your site's document library, one for each category or area you want to group your videos by
Upload your videos to those different folders
Add the Highlighted content web part to your SharePoint modern page
Select the pencil icon to edit the web part
In the Source dropdown, select "A document library on this site"
In the Document library dropdown, select the document library where your videos are stored
In the Document type dropdown, select Video
In the Filter and sort section, for the Filter dropdown select Column name
In the Column name dropdown, select Path (Lookup)
In the next dropdown, select Contains
In the Enter search value field, enter the name of one of the folders you created to organize your videos by category
In the renaming options, configure the sort order, audience targeting, and layout as needed
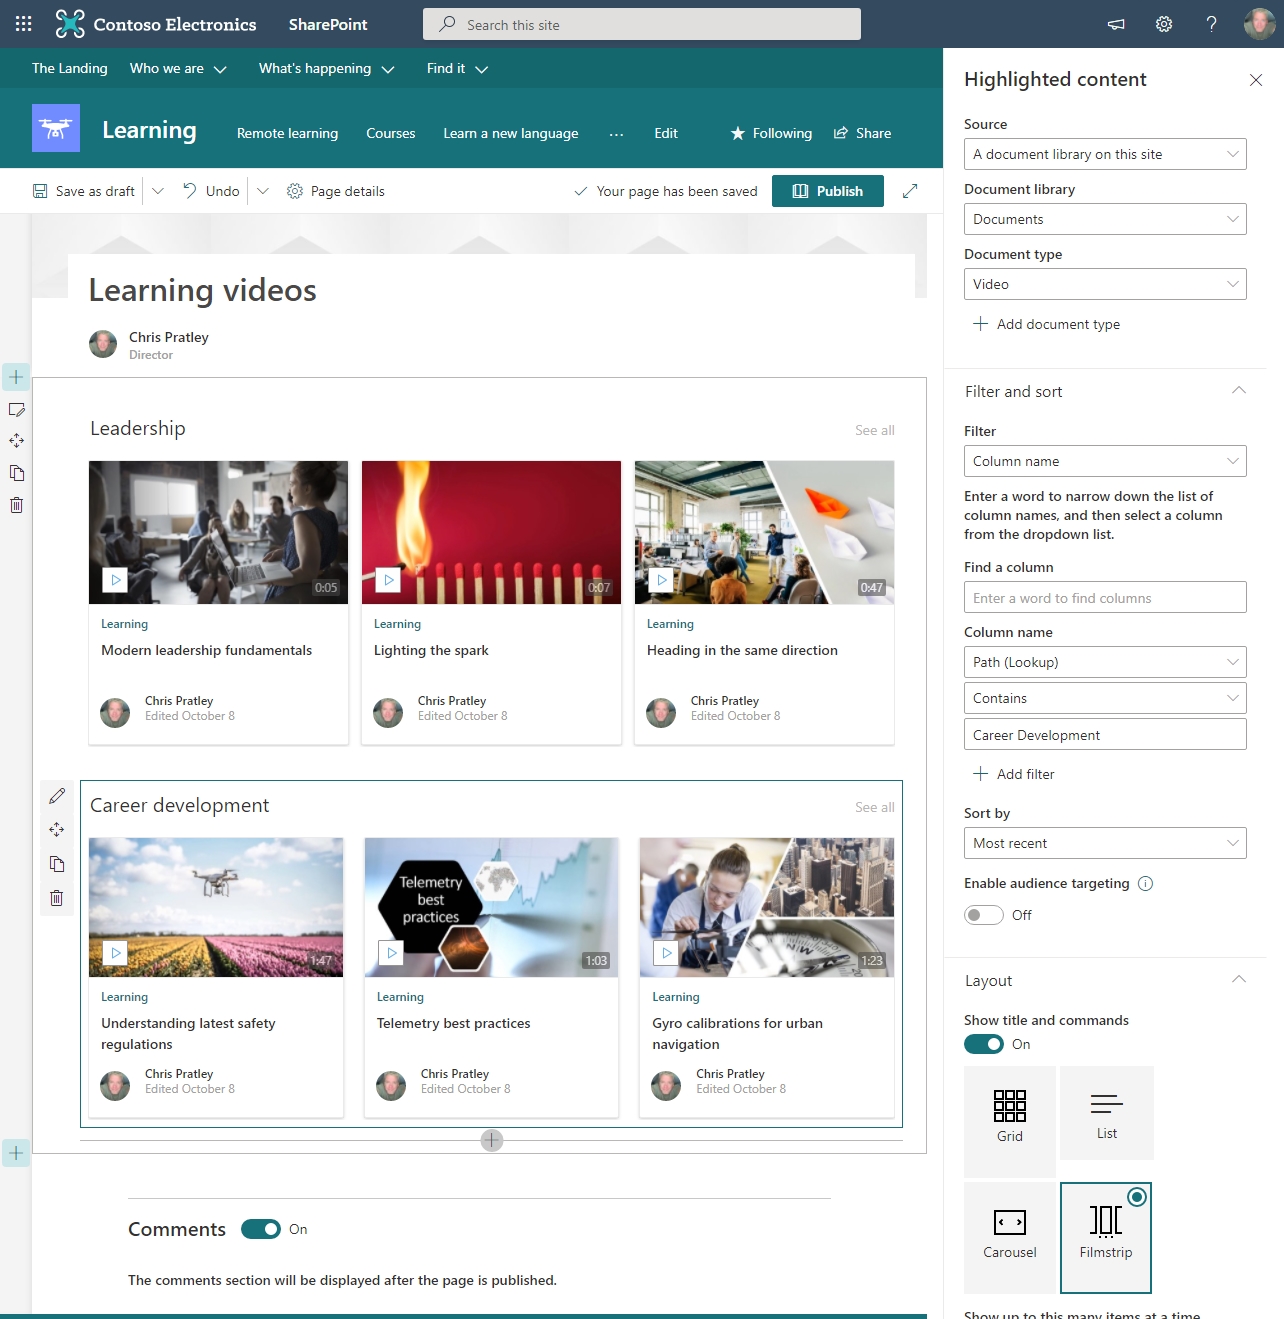
After this configuration, the web part should now be filtered down to only show videos that are in the designated folder. You can add the name of the category above the web part on the page to label the videos in this section. You would then repeat the above steps adding as many Highlighted content web parts to the page as categories/folders you want to feature on the page.
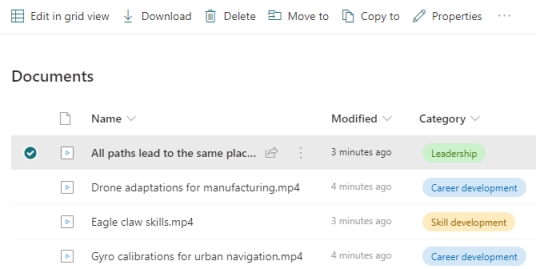
Use a custom metadata column to group videos by category within a site
If all your videos are uploaded to a single document library on your SharePoint site, team, or community you can use a custom choice column on that library to correspond to different categories. By using metadata to group your videos, you can have the same video be in multiple categories at the same time.
In your document library create a new column, pick the type of Choice
Give the column a name like "Category"
Configure the Choices and options for your column as needed, the names of the choices should correspond to your categories you want to group your videos by
If you want videos to be in multiple categories at the same time, in the More options section of the column configuration, set Allow multiple selections to Yes
Upload your videos to your document library
Select one or more videos and select the Properties button to bulk set your column metadata to the desired values to classify your videos by category, or set the info individually via the details pane
Add the Highlighted content web part to your SharePoint modern page
Select the pencil icon to edit the web part
In the Source dropdown, select "A document library on this site"
In the Document library dropdown, select the document library where your videos are stored
In the Document type dropdown, select Video
In the Filter and sort section, for the Filter dropdown select Column name
In the Column name dropdown, select Category (choice) or the name you gave to your column in the steps above
In the next dropdown, select Equals
In the Enter search value field, enter the name of one of the choices you created in the column to organize your videos by category
In the renaming options configure the sort order, audience targeting, and layout as needed
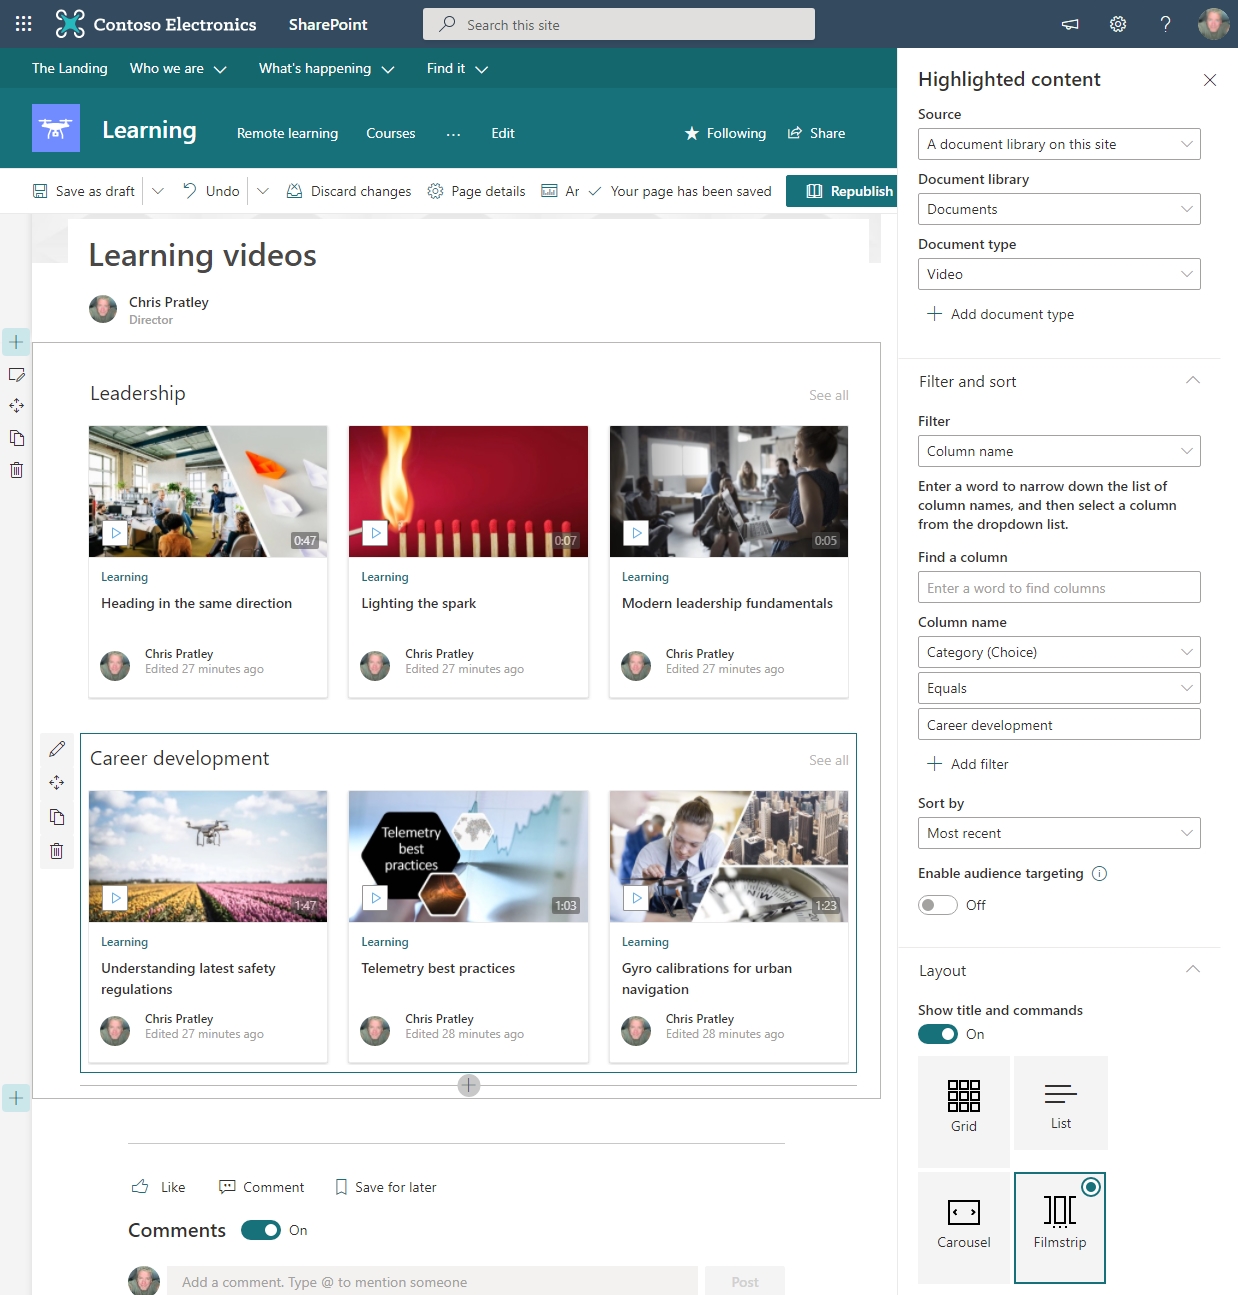
After this configuration, the web part should now be filtered down to only show videos that have the designated column metadata. You can add the name of the category above the web part on the page to label the videos in this section. You would then repeat the above steps adding as many Highlighted content web parts to the page as categories you want to feature on the page.
Use Enterprise Keywords to group videos by category across sites
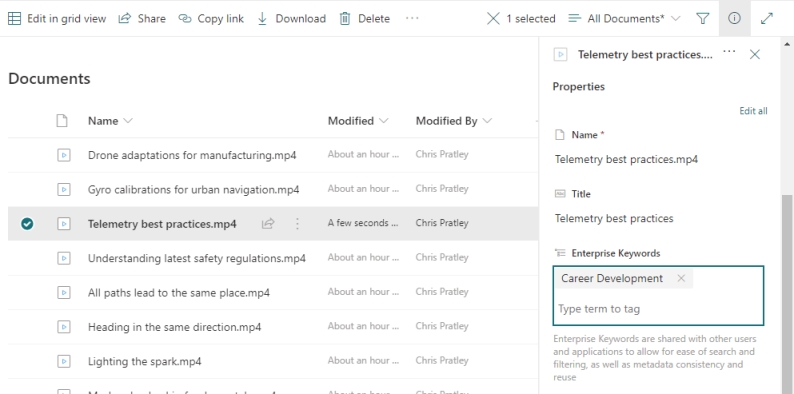
If your videos are uploaded to several sites, teams, or communities, and you want to group them together based on category, no matter where they are stored, one idea is to use Enterprise Keywords. You can add Enterprise Keywords to files in a site for metadata tagging and to develop a system of classifying and organizing content into different categories. The Highlighted content web part can then find your videos across your organization via search and show them based on the categories you want to show. All the content displayed will be security trimmed so users only see the content they have access to.
Enable Enterprise Keywords for each library via Library settings
As you upload videos to keyword enabled site libraries, you can tag your content from the Details pane or by selecting multiple files and setting the keywords in bulk via the Properties button
Add the Highlighted content web part to your SharePoint modern page
Select the pencil icon to edit the web part
In the Source dropdown, select where you want to pull videos from: All sites in the hub, Select sites, or All sites
In the Type dropdown, select Videos
In the Filter and sort section, for the Filter dropdown select Managed property
In the Find a managed property field, type keyword
In the Managed property name dropdown, select owstaxIdTaxKeyword
In the next dropdown, select Contains
In the Enter search value, field enter the name of one of the keywords you want to show videos for
In the renaming options configure the sort order, audience targeting, and layout as needed
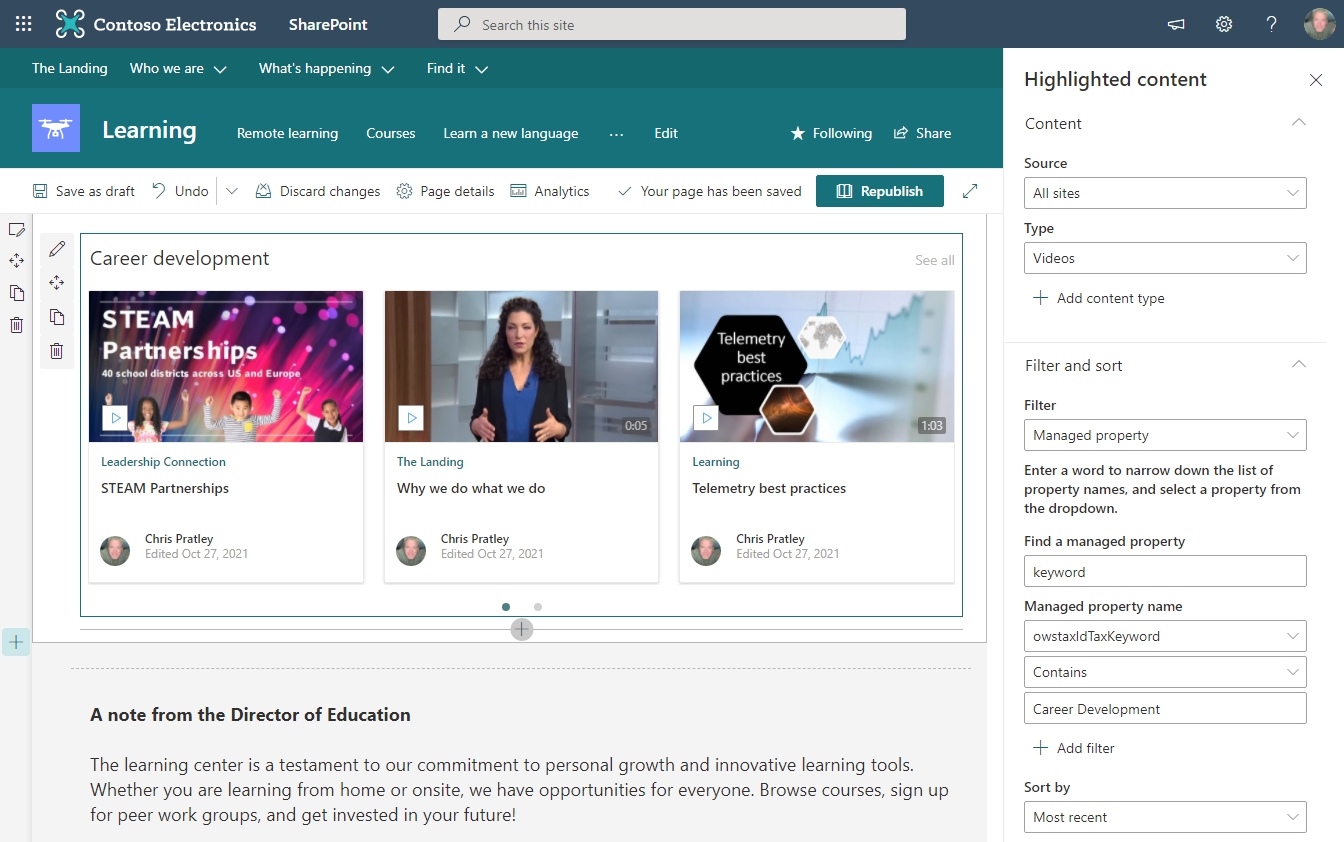
After this configuration, the web part should now be filtered down to only show videos that have the keyword you specified. You can add the name of the category above the web part on the page to label the videos in this section. You would then repeat the above steps adding as many Highlighted content web parts to the page as keyword categories you want to feature on the page.
NOTE: When using the source options for the Highlighted content web part of This site, All sites in the hub, Select sites, or All sites the web part is using a search query to find your content. Since search is used, it means that content will only show up in the web part after it's indexed for search. Indexing for search may take several minutes after a file is uploaded or edited.
Use a content type and metadata to group videos by category across sites
For more advanced use cases, you may want to look into using SharePoint content types and the managed metadata term store. You can configure what metadata is applied to different content types allowing you to use the same metadata across sites. With the same metadata across sites, you can use the Highlighted content web part in even more advanced ways to group videos together and display them across your intranet.
Aggregating videos across your organization
Often you want to aggregate videos across your organization and display them on your internet home page or a specific site that is available to your entire organization. The Highlighted content web part can help in those use cases as well. You can easily highlight the newest or trending videos from across your entire organization, a set of sites, or sites within a hub site. The highlighted content web part will use search to pull the content you want to show. All the content will be security trimmed so users only see the content they have permission to see. You can even enable audience targeting to only show videos that are relevant to specific sets of people.
- Add the Highlighted content web part to your SharePoint modern page
- Select the pencil icon to edit the web part
- In the Source dropdown, select where you want to pull videos from: All sites in the hub, Select sites, or All sites
- In the Type dropdown, select Videos
- In the Sort by dropdown, select Most recent for newly uploaded videos or Trending for videos watched the most in the last several weeks
- In the renaming options, configure them as needed
See also
Overview of featuring videos with web parts, pages, sites, & portals
More information on Stream (on SharePoint)