This tutorial shows you how to start building an ASP.NET Web API, host it on the Azure Web Apps feature of Azure App Service, enable Microsoft Entra ID authentication, and then register the ASP.NET Web API in Power Automate. After the API is registered, you can connect to it and call it from your flow. You can also register and call the API from Power Apps or Azure Logic Apps.
For this tutorial, create a Visual C# ASP.NET web app.
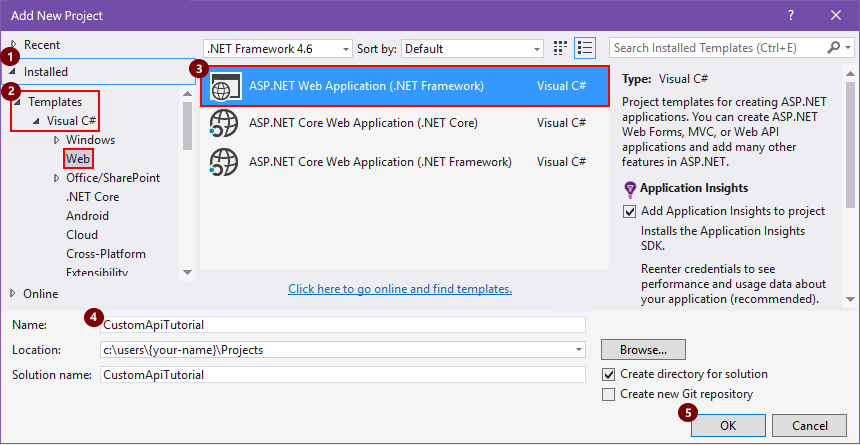
Open Visual Studio, and then select File > New Project.
Expand Installed, go to Templates > Visual C# > Web, and then select ASP.NET Web Application.
Enter a project name, location, and solution name for your app, and then select OK.
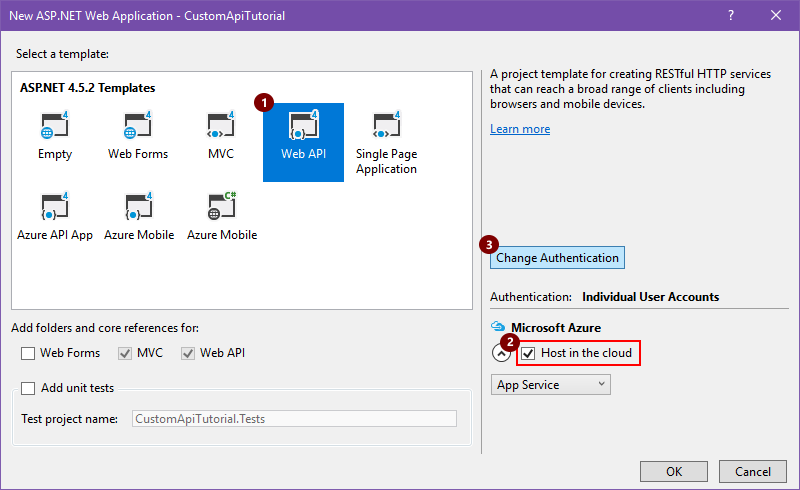
In the New ASP.NET Web Application box, select the Web API template, make sure the Host in the cloud checkbox is selected, and then select Change Authentication.
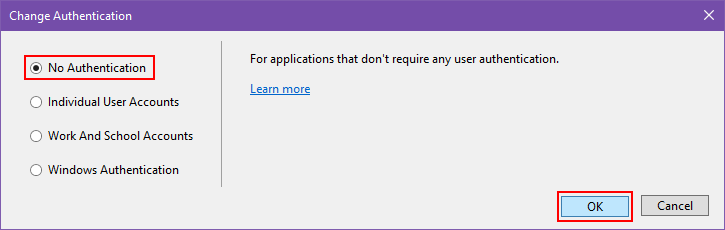
Select No Authentication, and then select OK. You can set up authentication later.
When the New ASP.NET Web Application box reappears, select OK.
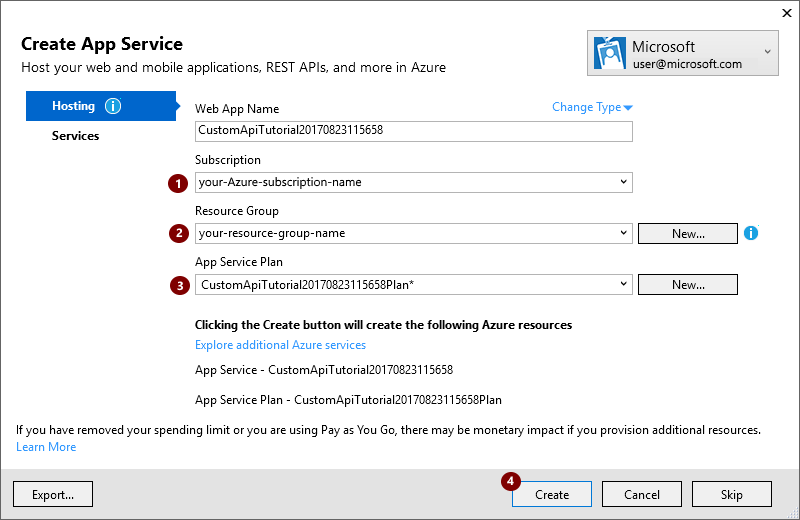
In the Create App Service box, review the hosting settings described in the following table, make the changes you want, and then select Create.
Your Azure work or school account, or your personal Microsoft account
your-user-account
Select your user account.
Web App Name
custom-web-api-app-name or the default name
Enter the name for your Web API app, which is used in your app's URL, for example: http://web-api-app-name.
Subscription
Azure-subscription-name
Select the Azure subscription that you want to use.
Resource Group
Azure-resource-group-name
Select an existing Azure resource group, or—if you haven't already—create a resource group.
Note: An Azure resource group organizes Azure resources in your Azure subscription.
App Service Plan
App-Service-plan-name
Select an existing App Service plan, or—if you haven't already—create a plan.
If you create an App Service Plan, specify the following.
Setting
Suggested value
Description
Location
deployment-region
Select the region for deploying your app.
Size
App-Service-plan-size
Select your plan size, which determines the cost and computing resource capacity for your service plan.
To set up any other resources required by your app, select Explore additional Azure services.
Setting
Suggested value
Description
Resource Type
Azure-resource-type
Select and set up any additional resources required by your app.
After Visual Studio deploys your project, build the code for your app.
Create an OpenAPI (swagger) file that describes your Web API
To connect your Web API app to Power Automate, Power Apps, or Logic Apps, you need an OpenAPI (formerly Swagger) file that describes your API's operations. You can write your own OpenAPI definition for your API with the Swagger online editor, but this tutorial uses an open-source tool named Swashbuckle.
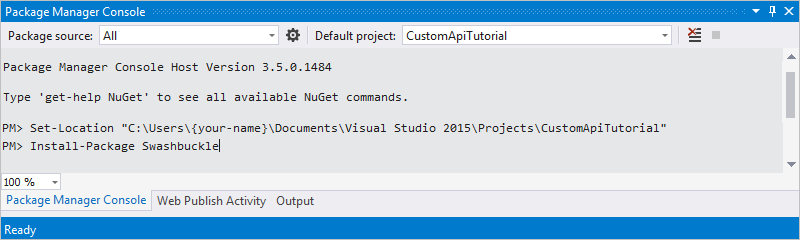
If you haven't already, install the Swashbuckle Nuget package in your Visual Studio project:
In the Package Manager Console, go to your app's project directory if you're not there already (run Set-Location "project-path"), and run this PowerShell cmdlet:
Install-Package Swashbuckle
Mẹo
If you run your app after installing Swashbuckle, Swashbuckle generates an OpenAPI file at this URL:
Swashbuckle also generates a user interface at this URL:
http://{your-web-api-app-root-URL}/swagger
When you're ready, publish your Web API app to Azure. To publish from Visual Studio, right-click your web project in Solution Explorer, select Publish, and follow the prompts.
Quan trọng
If an OpenAPI document contains duplicate operation IDs, it will be invalid. The sample C# template repeats the operation ID, Values_Get.
If you used the sample C# template, you can fix this problem by changing one operation ID instance to Value_Get, and republishing.
Get the OpenAPI document by browsing to this location:
You can also download a sample OpenAPI document from this tutorial. Make sure that you remove the comments, which start with //, before you use the document.
Save the content as a JSON file. Depending on your browser, you might have to copy and paste the text into an empty text file.
First Microsoft Entra ID application: Securing the Web API
The first Microsoft Entra ID application is used to secure the Web API. Name it webAPI. You can enable Microsoft Entra ID authentication on your web API by following these steps with the following values:
Copy the application ID, because you need it later.
Second Microsoft Entra ID application: Securing the custom connector and delegated access
The second Microsoft Entra ID application is used to secure the custom connector registration and acquire delegated access to the Web API protected by the first application. Name this one webAPI-customAPI .
Add permissions to have delegated access to Web API.
Copy the application ID, because you need it later.
Generate a client key and copy it, because you need it later.
Add authentication to your Azure web app
Sign in to the Azure portal, and then find the web app that you deployed in the first section.
Select Settings, and then select Authentication / Authorization.
Turn on App Service Authentication and then select Azure Active Directory. On the next blade, select Express.
Select Select Existing AD App, and then select the webAPI Microsoft Entra ID application you created earlier.
You should now be able to use Microsoft Entra ID to authenticate your web app.
Add the custom connector to Power Automate
Modify your OpenAPI to add the securityDefintions object and Microsoft Entra ID authentication used for the web app. The section of your OpenAPI with the host property should look like this:
JavaScript
// File header should be above here..."host": "<your-root-url>",
"schemes": [
"https"//Make sure this is https!
],
"securityDefinitions": {
"Microsoft Entra ID": {
"type": "oauth2",
"flow": "accessCode",
"authorizationUrl": "https://login.windows.net/common/oauth2/authorize",
"tokenUrl" : "https://login.windows.net/common/oauth2/token",
"scopes": {}
}
},
// The rest of the OpenAPI follows...
We greatly appreciate feedback on issues with our connector platform, or new feature ideas. To provide feedback, go to Submit issues or get help with connectors and select your feedback type.