作者 :Erik Reitan
本教程系列将介绍如何使用 ASP.NET 4.5 和 Microsoft Visual Studio Express 2013 for Web 生成 ASP.NET Web Forms应用程序。 本教程系列随附了包含 C# 源代码的Visual Studio 2013项目。
本教程介绍如何更新 Wingtip Toys 示例应用程序以添加自定义角色并使用 ASP.NET 标识。 它还介绍了如何实现管理页面,具有自定义角色的用户可从该页中添加和删除网站中的产品。
ASP.NET Identity 是用于生成 ASP.NET Web 应用程序的成员资格系统,在 ASP.NET 4.5 中可用。 ASP.NET 标识用于Visual Studio 2013 Web Forms项目模板,以及 ASP.NET MVC、ASP.NET Web API和 ASP.NET 单页应用程序的模板。 在开始使用空的 Web 应用程序时,还可以专门使用 NuGet 安装 ASP.NET 标识系统。 但是,在本教程系列中,将使用 Web Forms projecttemplate,其中包括 ASP.NET 标识系统。 ASP.NET Identity 可以轻松地将特定于用户的配置文件数据与应用程序数据集成。 此外,ASP.NET 标识允许你为应用程序中的用户配置文件选择持久模型。 可以将数据存储在SQL Server数据库或其他数据存储中,包括 NoSQL 数据存储(如 Windows Azure 存储表)。
本教程基于 Wingtip Toys 教程系列中上一篇标题为“使用 PayPal 结帐和付款”的教程。
学习内容:
- 如何使用代码将自定义角色和用户添加到应用程序。
- 如何限制对管理文件夹和页面的访问。
- 如何为属于自定义角色的用户提供导航。
- 如何使用模型绑定使用产品类别填充 DropDownList 控件。
- 如何使用 FileUpload 控件将文件上传到 Web 应用程序。
- 如何使用验证控件来实现输入验证。
- 如何从应用程序添加和删除产品。
以下功能包含在教程中:
- ASP.NET 标识
- 配置和授权
- 模型绑定
- 不显眼的验证
ASP.NET Web Forms提供成员资格功能。 通过使用默认模板,你具有内置的成员身份功能,可以在应用程序运行时立即使用这些功能。 本教程介绍如何使用 ASP.NET Identity 添加自定义角色并将用户分配到该角色。 你将了解如何限制对管理文件夹的访问。 你将向管理文件夹添加一个页面,该页面允许具有自定义角色的用户添加和删除产品,并在添加产品后预览产品。
添加自定义角色
使用 ASP.NET Identity,可以添加自定义角色,并使用代码将用户分配到该角色。
在“解决方案资源管理器”中,右键单击“逻辑”文件夹并创建新类。
将新类命名为 RoleActions.cs。
修改代码,使其如下所示:
using System;
using System.Collections.Generic;
using System.Linq;
using System.Web;

namespace WingtipToys.Logic
{
    internal class RoleActions
    {
    }
}
在 解决方案资源管理器 中,打开 Global.asax.cs 文件。
通过添加以黄色突出显示的代码来修改 Global.asax.cs 文件,使其如下所示:
using System;
using System.Collections.Generic;
using System.Linq;
using System.Web;
using System.Web.Optimization;
using System.Web.Routing;
using System.Web.Security;
using System.Web.SessionState;
using System.Data.Entity;
using WingtipToys.Models;
using WingtipToys.Logic;

namespace WingtipToys
{
    public class Global : HttpApplication
    {
        void Application_Start(object sender, EventArgs e)
        {
          // Code that runs on application startup
          RouteConfig.RegisterRoutes(RouteTable.Routes);
          BundleConfig.RegisterBundles(BundleTable.Bundles);

          // Initialize the product database.
          Database.SetInitializer(new ProductDatabaseInitializer());

          // Create the custom role and user.
          RoleActions roleActions = new RoleActions();
          roleActions.AddUserAndRole();
        }
    }
}
请注意,
AddUserAndRole将为红色且带下划线。 双击 AddUserAndRole 代码。
突出显示的方法开头的字母“A”将加下划线。将鼠标悬停在字母“A”上,然后单击允许为方法生成方法存根的
AddUserAndRoleUI。
单击标题为:
Generate method stub for "AddUserAndRole" in "WingtipToys.Logic.RoleActions"打开 Logic 文件夹中的 RoleActions.cs 文件。
方法AddUserAndRole已添加到类文件。通过删除
NotImplementedException并添加以黄色突出显示的代码来修改 RoleActions.cs 文件,使其如下所示:using System; using System.Collections.Generic; using System.Configuration; using System.Linq; using System.Web; using WingtipToys.Models; using Microsoft.AspNet.Identity; using Microsoft.AspNet.Identity.EntityFramework; namespace WingtipToys.Logic { internal class RoleActions { internal void AddUserAndRole() { // Access the application context and create result variables. Models.ApplicationDbContext context = new ApplicationDbContext(); IdentityResult IdRoleResult; IdentityResult IdUserResult; // Create a RoleStore object by using the ApplicationDbContext object. // The RoleStore is only allowed to contain IdentityRole objects. var roleStore = new RoleStore<IdentityRole>(context); // Create a RoleManager object that is only allowed to contain IdentityRole objects. // When creating the RoleManager object, you pass in (as a parameter) a new RoleStore object. var roleMgr = new RoleManager<IdentityRole>(roleStore); // Then, you create the "canEdit" role if it doesn't already exist. if (!roleMgr.RoleExists("canEdit")) { IdRoleResult = roleMgr.Create(new IdentityRole { Name = "canEdit" }); } // Create a UserManager object based on the UserStore object and the ApplicationDbContext // object. Note that you can create new objects and use them as parameters in // a single line of code, rather than using multiple lines of code, as you did // for the RoleManager object. var userMgr = new UserManager<ApplicationUser>(new UserStore<ApplicationUser>(context)); var appUser = new ApplicationUser { UserName = "canEditUser@wingtiptoys.com", Email = "canEditUser@wingtiptoys.com" }; IdUserResult = userMgr.Create(appUser, ConfigurationManager.AppSettings["AppUserPasswordKey"]); // If the new "canEdit" user was successfully created, // add the "canEdit" user to the "canEdit" role. if (!userMgr.IsInRole(userMgr.FindByEmail("canEditUser@wingtiptoys.com").Id, "canEdit")) { IdUserResult = userMgr.AddToRole(userMgr.FindByEmail("canEditUser@wingtiptoys.com").Id, "canEdit"); } } } }
上述代码首先为成员资格数据库建立数据库上下文。 成员资格数据库也以 .mdf 文件的形式存储在 App_Data 文件夹中。 第一个用户登录到此 Web 应用程序后,你将能够查看此数据库。
注意
如果希望将成员资格数据与产品数据一起存储,可以考虑使用与在上述代码中存储产品数据时所用的同一 DbContext 。
内部关键字 (keyword) 是类型 ((如类) )和类型成员 ((如方法或属性) )的访问修饰符。 内部类型或成员只能在同一程序集 (.dll 文件) 中包含的文件中访问。 生成应用程序时,将创建一个程序集文件 (.dll) ,其中包含运行应用程序时执行的代码。
RoleStore提供角色管理的对象基于数据库上下文创建。
注意
请注意, RoleStore 创建对象时,它使用泛型 IdentityRole 类型。 这意味着 RoleStore 仅允许 包含 IdentityRole 对象。 此外,使用泛型可以更好地处理内存中的资源。
接下来, RoleManager 基于 RoleStore 刚刚创建的对象创建 对象。
RoleManager对象公开与角色相关的 API,该 API 可用于自动将更改保存到 RoleStore。
RoleManager仅允许包含 IdentityRole 对象,因为代码使用<IdentityRole>泛型类型。
调用 RoleExists 方法以确定成员身份数据库中是否存在“canEdit”角色。 如果不是,请创建角色。
UserManager创建 对象似乎比 RoleManager 控件更复杂,但几乎相同。 它只编码在一行而不是几行上。 此处,要传递的参数将实例化为括号中包含的新对象。
接下来,通过创建新 ApplicationUser 对象来创建“canEditUser”用户。 然后,如果成功创建用户,则将该用户添加到新角色。
注意
错误处理将在本教程系列后面的“ASP.NET 错误处理”教程中更新。
下次应用程序启动时,将添加名为“canEditUser”的用户作为应用程序名为“canEdit”的角色。 在本教程的后面部分,你将以“canEditUser”用户身份登录,以显示将在本教程中添加的其他功能。 有关 ASP.NET 标识的 API 详细信息,请参阅 Microsoft.AspNet.Identity 命名空间。 有关初始化 ASP.NET 标识系统的其他详细信息,请参阅 AspnetIdentitySample。
限制对管理页的访问
Wingtip Toys 示例应用程序允许匿名用户和登录用户查看和购买产品。 但是,具有自定义“canEdit”角色的登录用户可以访问受限页面,以便添加和删除产品。
添加管理文件夹和页面
接下来,将为属于 Wingtip Toys 示例应用程序的自定义角色的“canEditUser”用户创建名为 管理员 的文件夹。
- 在解决方案资源管理器中右键单击 Wingtip Toys) (项目名称,然后选择“添加 ->新建文件夹”。
- 将新文件夹命名为管理员。
- 右键单击管理员文件夹,然后选择“添加 ->新建项”。
随即出现“添加新项”对话框。 - 选择左侧的 “Visual C#->Web 模板”组。 从中间列表中选择“ 带母版页的 Web 窗体”,将其命名为 AdminPage.aspx, 然后选择“ 添加”。
- 选择 Site.Master 文件作为母版页,然后选择 “确定”。
添加Web.config文件
通过将Web.config文件添加到管理员文件夹,可以限制对文件夹中包含的页面的访问。
右键单击管理员文件夹,然后选择“添加 ->新建项”。
随即出现“添加新项”对话框。从 Visual C# Web 模板列表中,从中间列表中选择“ Web 配置文件”,接受 默认名称“Web.config”, 然后选择“ 添加”。
将 Web.config 文件中的现有 XML 内容替换为以下内容:
<?xml version="1.0"?>
<configuration>
  <system.web>
    <authorization>
      <allow roles="canEdit"/>
      <deny users="*"/>
    </authorization>
  </system.web>
</configuration>
保存 Web.config 文件。 Web.config 文件指定只有属于应用程序的“canEdit”角色的用户才能访问包含在 管理员 文件夹中的页面。
包括自定义角色导航
若要使自定义“canEdit”角色的用户能够导航到应用程序的管理部分,必须添加指向 Site.Master 页的链接。 只有属于“canEdit”角色的用户才能查看管理员链接并访问管理部分。
在“解决方案资源管理器”中,找到并打开“Site.Master”页。
若要为“canEdit”角色的用户创建链接,请将以黄色突出显示的标记添加到以下无序列表
<ul>元素,以便列表如下所示:<ul class="nav navbar-nav"> <li><a runat="server" id="adminLink" visible="false" href="~/Admin/AdminPage">Admin</a></li> <li><a runat="server" href="~/">Home</a></li> <li><a runat="server" href="~/About">About</a></li> <li><a runat="server" href="~/Contact">Contact</a></li> <li><a runat="server" href="~/ProductList">Products</a></li> <li><a runat="server" href="~/ShoppingCart" ID="cartCount"> </a></li> </ul>打开 Site.Master.cs 文件。 通过将以黄色
Page_Load突出显示的代码添加到处理程序,使管理员链接仅对“canEditUser”用户可见。 处理程序Page_Load将如下所示:protected void Page_Load(object sender, EventArgs e) { if (HttpContext.Current.User.IsInRole("canEdit")) { adminLink.Visible = true; } }
加载页面时,代码会检查登录用户是否具有“canEdit”角色。 如果用户属于“canEdit”角色,则包含 AdminPage.aspx 页面链接的 span 元素 (,因此范围) 内的链接可见。
启用产品管理
到目前为止,你已创建“canEdit”角色,并添加了“canEditUser”用户、管理文件夹和管理页。 你已设置管理文件夹和页面的访问权限,并为应用程序添加了“canEdit”角色用户的导航链接。 接下来,将标记添加到 AdminPage.aspx 页,并将代码添加到 AdminPage.aspx.cs 代码隐藏文件,使具有“canEdit”角色的用户能够添加和删除产品。
在 解决方案资源管理器 中,从 管理员 文件夹中打开 AdminPage.aspx 文件。
将现有标记替换为以下内容:
<%@ Page Title="" Language="C#" MasterPageFile="~/Site.Master" AutoEventWireup="true" CodeBehind="AdminPage.aspx.cs" Inherits="WingtipToys.Admin.AdminPage" %>
<asp:Content ID="Content1" ContentPlaceHolderID="MainContent" runat="server">
    <h1>Administration</h1>
    <hr />
    <h3>Add Product:</h3>
    <table>
        <tr>
            <td><asp:Label ID="LabelAddCategory" runat="server">Category:</asp:Label></td>
            <td>
                <asp:DropDownList ID="DropDownAddCategory" runat="server"
                    ItemType="WingtipToys.Models.Category"
                    SelectMethod="GetCategories" DataTextField="CategoryName"
                    DataValueField="CategoryID" >
                </asp:DropDownList>
            </td>
        </tr>
        <tr>
            <td><asp:Label ID="LabelAddName" runat="server">Name:</asp:Label></td>
            <td>
                <asp:TextBox ID="AddProductName" runat="server"></asp:TextBox>
                <asp:RequiredFieldValidator ID="RequiredFieldValidator1" runat="server" Text="* Product name required." ControlToValidate="AddProductName" SetFocusOnError="true" Display="Dynamic"></asp:RequiredFieldValidator>
            </td>
        </tr>
        <tr>
            <td><asp:Label ID="LabelAddDescription" runat="server">Description:</asp:Label></td>
            <td>
                <asp:TextBox ID="AddProductDescription" runat="server"></asp:TextBox>
                <asp:RequiredFieldValidator ID="RequiredFieldValidator2" runat="server" Text="* Description required." ControlToValidate="AddProductDescription" SetFocusOnError="true" Display="Dynamic"></asp:RequiredFieldValidator>
            </td>
        </tr>
        <tr>
            <td><asp:Label ID="LabelAddPrice" runat="server">Price:</asp:Label></td>
            <td>
                <asp:TextBox ID="AddProductPrice" runat="server"></asp:TextBox>
                <asp:RequiredFieldValidator ID="RequiredFieldValidator3" runat="server" Text="* Price required." ControlToValidate="AddProductPrice" SetFocusOnError="true" Display="Dynamic"></asp:RequiredFieldValidator>
                <asp:RegularExpressionValidator ID="RegularExpressionValidator1" runat="server" Text="* Must be a valid price without $." ControlToValidate="AddProductPrice" SetFocusOnError="True" Display="Dynamic" ValidationExpression="^[0-9]*(\.)?[0-9]?[0-9]?$"></asp:RegularExpressionValidator>
            </td>
        </tr>
        <tr>
            <td><asp:Label ID="LabelAddImageFile" runat="server">Image File:</asp:Label></td>
            <td>
                <asp:FileUpload ID="ProductImage" runat="server" />
                <asp:RequiredFieldValidator ID="RequiredFieldValidator4" runat="server" Text="* Image path required." ControlToValidate="ProductImage" SetFocusOnError="true" Display="Dynamic"></asp:RequiredFieldValidator>
            </td>
        </tr>
    </table>
    <p></p>
    <p></p>
    <asp:Button ID="AddProductButton" runat="server" Text="Add Product" OnClick="AddProductButton_Click"  CausesValidation="true"/>
    <asp:Label ID="LabelAddStatus" runat="server" Text=""></asp:Label>
    <p></p>
    <h3>Remove Product:</h3>
    <table>
        <tr>
            <td><asp:Label ID="LabelRemoveProduct" runat="server">Product:</asp:Label></td>
            <td><asp:DropDownList ID="DropDownRemoveProduct" runat="server" ItemType="WingtipToys.Models.Product"
                    SelectMethod="GetProducts" AppendDataBoundItems="true"
                    DataTextField="ProductName" DataValueField="ProductID" >
                </asp:DropDownList>
            </td>
        </tr>
    </table>
    <p></p>
    <asp:Button ID="RemoveProductButton" runat="server" Text="Remove Product" OnClick="RemoveProductButton_Click" CausesValidation="false"/>
    <asp:Label ID="LabelRemoveStatus" runat="server" Text=""></asp:Label>
</asp:Content>
接下来,右键单击 AdminPage.aspx 并单击“查看代码”,打开 AdminPage.aspx.cs 代码隐藏文件。
将 AdminPage.aspx.cs 代码隐藏文件中的现有代码替换为以下代码:
using System;
using System.Collections.Generic;
using System.Linq;
using System.Web;
using System.Web.UI;
using System.Web.UI.WebControls;
using WingtipToys.Models;
using WingtipToys.Logic;

namespace WingtipToys.Admin
{
  public partial class AdminPage : System.Web.UI.Page
  {
    protected void Page_Load(object sender, EventArgs e)
    {
      string productAction = Request.QueryString["ProductAction"];
      if (productAction == "add")
      {
        LabelAddStatus.Text = "Product added!";
      }

      if (productAction == "remove")
      {
        LabelRemoveStatus.Text = "Product removed!";
      }
    }

    protected void AddProductButton_Click(object sender, EventArgs e)
    {
      Boolean fileOK = false;
      String path = Server.MapPath("~/Catalog/Images/");
      if (ProductImage.HasFile)
      {
        String fileExtension = System.IO.Path.GetExtension(ProductImage.FileName).ToLower();
        String[] allowedExtensions = { ".gif", ".png", ".jpeg", ".jpg" };
        for (int i = 0; i < allowedExtensions.Length; i++)
        {
          if (fileExtension == allowedExtensions[i])
          {
            fileOK = true;
          }
        }
      }

      if (fileOK)
      {
        try
        {
          // Save to Images folder.
          ProductImage.PostedFile.SaveAs(path + ProductImage.FileName);
          // Save to Images/Thumbs folder.
          ProductImage.PostedFile.SaveAs(path + "Thumbs/" + ProductImage.FileName);
        }
        catch (Exception ex)
        {
          LabelAddStatus.Text = ex.Message;
        }

        // Add product data to DB.
        AddProducts products = new AddProducts();
        bool addSuccess = products.AddProduct(AddProductName.Text, AddProductDescription.Text,
            AddProductPrice.Text, DropDownAddCategory.SelectedValue, ProductImage.FileName);
        if (addSuccess)
        {
          // Reload the page.
          string pageUrl = Request.Url.AbsoluteUri.Substring(0, Request.Url.AbsoluteUri.Count() - Request.Url.Query.Count());
          Response.Redirect(pageUrl + "?ProductAction=add");
        }
        else
        {
          LabelAddStatus.Text = "Unable to add new product to database.";
        }
      }
      else
      {
        LabelAddStatus.Text = "Unable to accept file type.";
      }
    }

    public IQueryable GetCategories()
    {
      var _db = new WingtipToys.Models.ProductContext();
      IQueryable query = _db.Categories;
      return query;
    }

    public IQueryable GetProducts()
    {
      var _db = new WingtipToys.Models.ProductContext();
      IQueryable query = _db.Products;
      return query;
    }

    protected void RemoveProductButton_Click(object sender, EventArgs e)
    {
      using (var _db = new WingtipToys.Models.ProductContext())
      {
        int productId = Convert.ToInt16(DropDownRemoveProduct.SelectedValue);
        var myItem = (from c in _db.Products where c.ProductID == productId select c).FirstOrDefault();
        if (myItem != null)
        {
          _db.Products.Remove(myItem);
          _db.SaveChanges();

          // Reload the page.
          string pageUrl = Request.Url.AbsoluteUri.Substring(0, Request.Url.AbsoluteUri.Count() - Request.Url.Query.Count());
          Response.Redirect(pageUrl + "?ProductAction=remove");
        }
        else
        {
          LabelRemoveStatus.Text = "Unable to locate product.";
        }
      }
    }
  }
}
在为 AdminPage.aspx.cs 代码隐藏文件输入的代码中,名为 的 AddProducts 类执行将产品添加到数据库的实际工作。 此类尚不存在,因此请立即创建它。
在“解决方案资源管理器”中,右键单击“逻辑”文件夹,然后选择“添加”->“新建项”。
随即出现“添加新项”对话框。选择左侧的 “Visual C# ->Code 模板”组。 然后,从中间列表中选择“ 类”,并将其命名为 AddProducts.cs。
将显示新的类文件。将现有代码替换为以下代码:
using System;
using System.Collections.Generic;
using System.Linq;
using System.Web;
using WingtipToys.Models;

namespace WingtipToys.Logic
{
    public class AddProducts
    {
        public bool AddProduct(string ProductName, string ProductDesc, string ProductPrice, string ProductCategory, string ProductImagePath)
        {
            var myProduct = new Product();
            myProduct.ProductName = ProductName;
            myProduct.Description = ProductDesc;
            myProduct.UnitPrice = Convert.ToDouble(ProductPrice);
            myProduct.ImagePath = ProductImagePath;
            myProduct.CategoryID = Convert.ToInt32(ProductCategory);

            using (ProductContext _db = new ProductContext())
            {
                // Add product to DB.
                _db.Products.Add(myProduct);
                _db.SaveChanges();
            }
            // Success.
            return true;
        }
    }
}
AdminPage.aspx 页允许属于“canEdit”角色的用户添加和删除产品。 添加新产品时,将验证有关该产品的详细信息,然后输入到数据库中。 新产品立即可供 Web 应用程序的所有用户使用。
不显眼的验证
用户在 AdminPage.aspx 页上提供的产品详细信息使用验证控件 (RequiredFieldValidator 和 RegularExpressionValidator) 进行验证。 这些控件会自动使用不显眼的验证。 不显眼的验证允许验证控件将 JavaScript 用于客户端验证逻辑,这意味着页面不需要访问服务器即可进行验证。 默认情况下,基于以下配置设置, Web.config 文件中包含不显眼的验证:
<add key="ValidationSettings:UnobtrusiveValidationMode" value="WebForms" />
“正则表达式”
AdminPage.aspx 页面上的产品价格是使用 RegularExpressionValidator 控件验证的。 此控件验证关联输入控件 (“AddProductPrice”TextBox) 的值是否与正则表达式指定的模式匹配。 正则表达式是一种模式匹配表示法,可用于快速查找和匹配特定字符模式。
RegularExpressionValidator 控件包含名为 ValidationExpression 的属性,该属性包含用于验证价格输入的正则表达式,如下所示:
<asp:RegularExpressionValidator
    ID="RegularExpressionValidator1" runat="server"
    Text="* Must be a valid price without $." ControlToValidate="AddProductPrice"
    SetFocusOnError="True" Display="Dynamic"
    ValidationExpression="^[0-9]*(\.)?[0-9]?[0-9]?$">
</asp:RegularExpressionValidator>
FileUpload 控件
除了输入和验证控件外,还向 AdminPage.aspx 页添加了 FileUpload 控件。 此控件提供上传文件的功能。 在这种情况下,只允许上传图像文件。 在代码隐藏文件中 (AdminPage.aspx.cs) 中,单击 时 AddProductButton ,代码会检查 HasFileFileUpload 控件的 属性。 如果控件具有文件,并且允许基于文件扩展名) (文件类型,则图像将保存到应用程序的 Images 文件夹和 Images/Thumbs 文件夹中。
模型绑定
本系列教程的前面部分使用了模型绑定来填充 ListView 控件、 FormsView 控件、 GridView 控件和 DetailView 控件。 在本教程中,将使用模型绑定使用产品类别列表填充 DropDownList 控件。
添加到 AdminPage.aspx 文件的标记包含名为 的 DropDownAddCategoryDropDownList 控件:
<asp:DropDownList ID="DropDownAddCategory" runat="server"
        ItemType="WingtipToys.Models.Category"
        SelectMethod="GetCategories" DataTextField="CategoryName"
        DataValueField="CategoryID" >
    </asp:DropDownList>
使用模型绑定通过设置 ItemType 属性和 SelectMethod 属性来填充此 DropDownList。 属性 ItemType 指定在填充控件时使用 WingtipToys.Models.Category 类型。 你在本系列教程的开头通过创建 Category 类 (定义此类型,如下所示) 。 类Category位于 Category.cs 文件的 Models 文件夹中。
public class Category
{
    [ScaffoldColumn(false)]
    public int CategoryID { get; set; }

    [Required, StringLength(100), Display(Name = "Name")]
    public string CategoryName { get; set; }

    [Display(Name = "Product Description")]
    public string Description { get; set; }

    public virtual ICollection<Product> Products { get; set; }
}
SelectMethod
DropDownList 控件的 属性指定使用GetCategories方法 (下面所示) ,该方法包含在代码隐藏文件 (AdminPage.aspx.cs) 中。
public IQueryable GetCategories()
{
  var _db = new WingtipToys.Models.ProductContext();
  IQueryable query = _db.Categories;
  return query;
}
此方法指定 IQueryable 接口用于针对 Category 类型计算查询。 返回的值用于填充页面标记中的 DropDownList (AdminPage.aspx) 。
列表中每个项显示的文本是通过设置 DataTextField 属性指定的。 特性DataTextField使用CategoryNameCategory上面所示的类 () 显示 DropDownList 控件中的每个类别。 在 DropDownList 控件中选择项时传递的实际值基于 DataValueField 属性。 属性 DataValueField 设置为 , CategoryID 如上) 所示的 Category 类 (定义。
应用程序的工作原理
当属于“canEdit”角色的用户首次导航到页面时,DropDownAddCategory将按上文所述填充 DropDownList 控件。
DropDownRemoveProduct
DropDownList 控件还填充了使用相同方法的产品。 属于“canEdit”角色的用户选择类别类型,并添加产品详细信息 (名称、 说明、 价格和 图像文件) 。 当属于“canEdit”角色的用户单击“ 添加产品 ”按钮时 AddProductButton_Click ,将触发事件处理程序。
AddProductButton_Click位于代码隐藏文件中的事件处理程序 (AdminPage.aspx.cs) 检查图像文件,以确保它与允许的文件类型 (.gif、 .png、.jpeg 或 .jpg) 匹配。 然后,图像文件将保存到 Wingtip Toys 示例应用程序的文件夹中。 接下来,将新产品添加到数据库。 若要完成添加新产品,将创建 类的新实例 AddProducts 并命名产品。 类 AddProducts 具有一个名为 AddProduct的方法,products 对象调用此方法以将产品添加到数据库。
// Add product data to DB.
AddProducts products = new AddProducts();
bool addSuccess = products.AddProduct(AddProductName.Text, AddProductDescription.Text,
    AddProductPrice.Text, DropDownAddCategory.SelectedValue, ProductImage.FileName);
如果代码成功将新产品添加到数据库,则会使用查询字符串值 ProductAction=add重新加载页面。
Response.Redirect(pageUrl + "?ProductAction=add");
重新加载页面时,查询字符串将包含在 URL 中。 通过重新加载页面,属于“canEdit”角色的用户可以立即在 AdminPage.aspx 页上的 DropDownList 控件中查看更新。 此外,通过包含 URL 的查询字符串,页面可以向属于“canEdit”角色的用户显示成功消息。
重新加载 AdminPage.aspx 页面时, Page_Load 将调用 事件。
protected void Page_Load(object sender, EventArgs e)
{
    string productAction = Request.QueryString["ProductAction"];
    if (productAction == "add")
    {
        LabelAddStatus.Text = "Product added!";
    }

    if (productAction == "remove")
    {
        LabelRemoveStatus.Text = "Product removed!";
    }
}
事件处理程序 Page_Load 检查查询字符串值,并确定是否显示成功消息。
运行应用程序
现在可以运行应用程序,了解如何在购物车中添加、删除和更新项目。 购物车总计将反映购物车中所有项的总成本。
在解决方案资源管理器中,按 F5 运行 Wingtip Toys 示例应用程序。
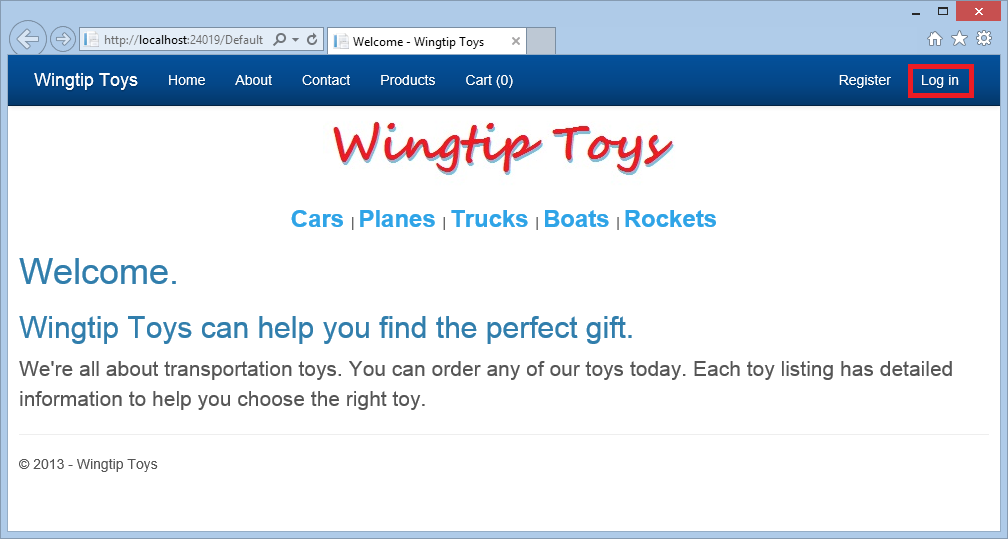
浏览器将打开并显示 Default.aspx 页。单击页面顶部的 “登录 ”链接。
将显示 Login.aspx 页。
输入用户名和密码。
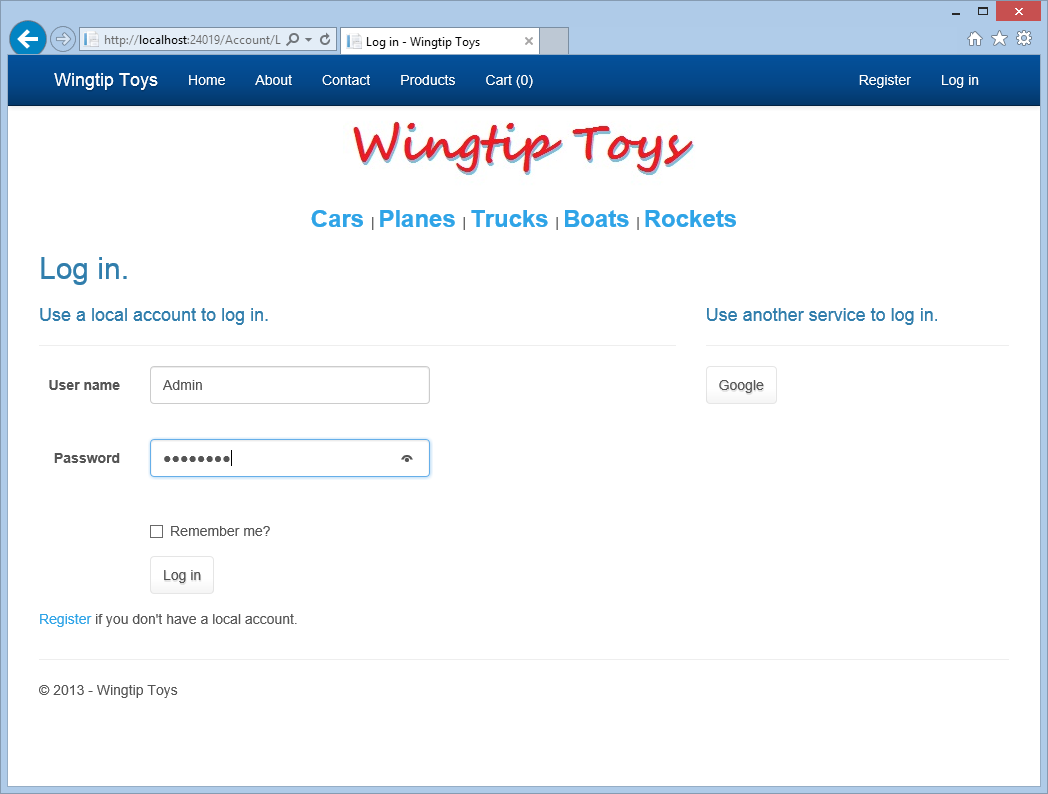
单击页面底部附近的 “登录 ”按钮。
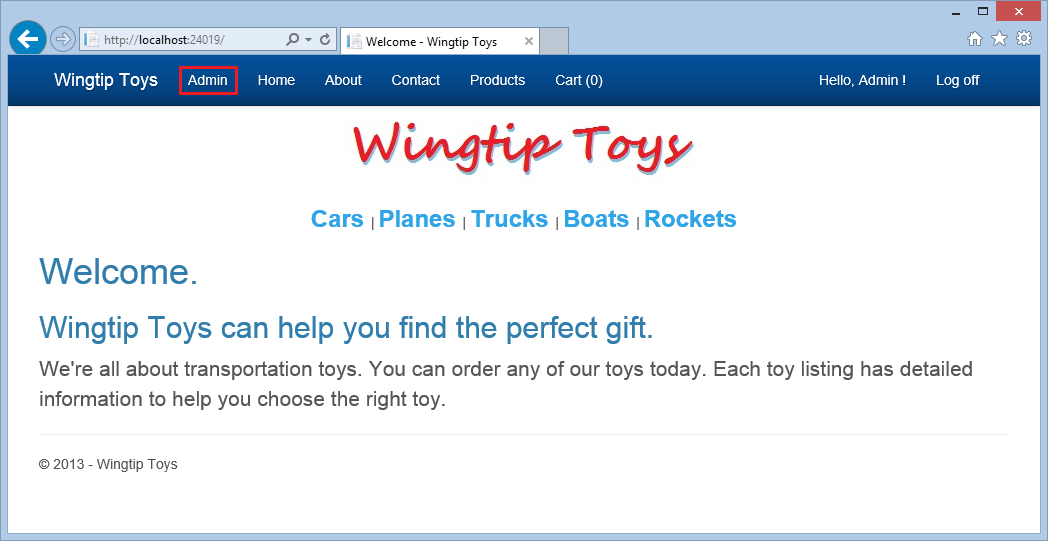
在下一页的顶部,选择管理员链接以导航到 AdminPage.aspx 页。
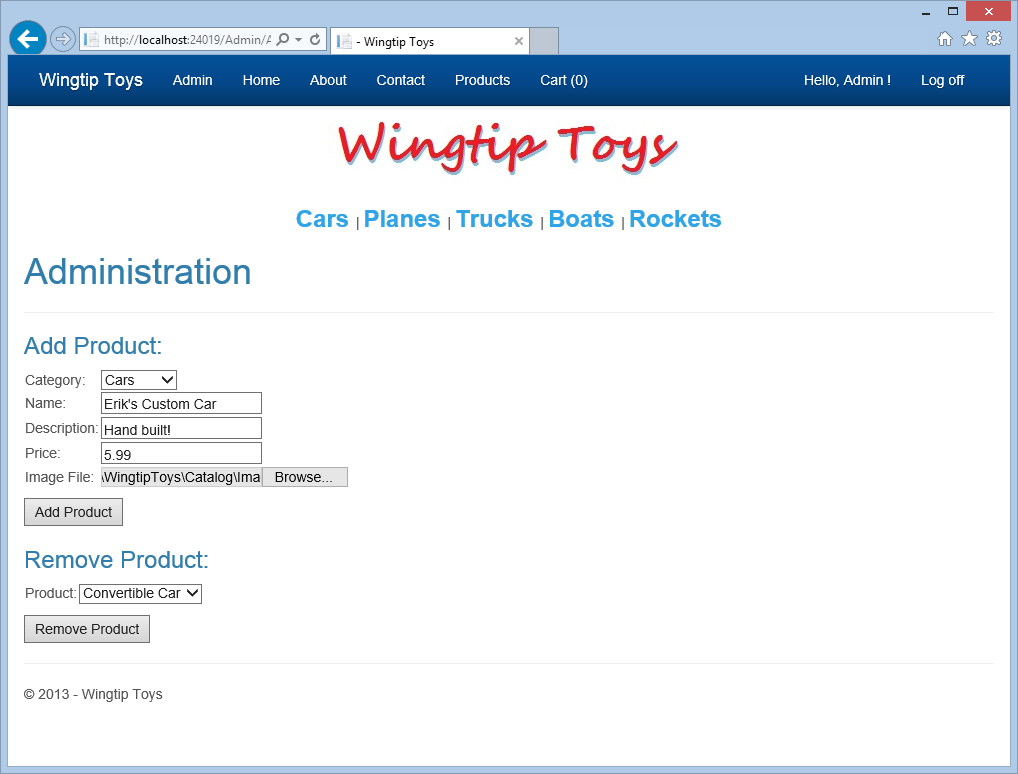
若要测试输入验证,请单击“ 添加产品 ”按钮,而不添加任何产品详细信息。
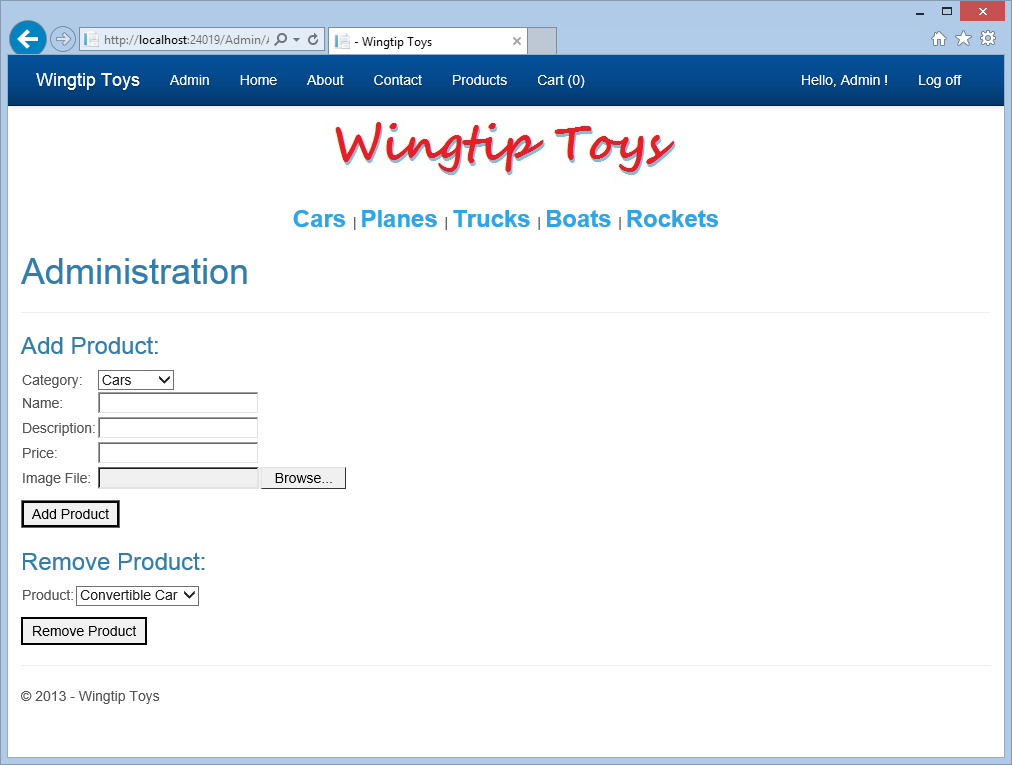
请注意,将显示必填字段消息。
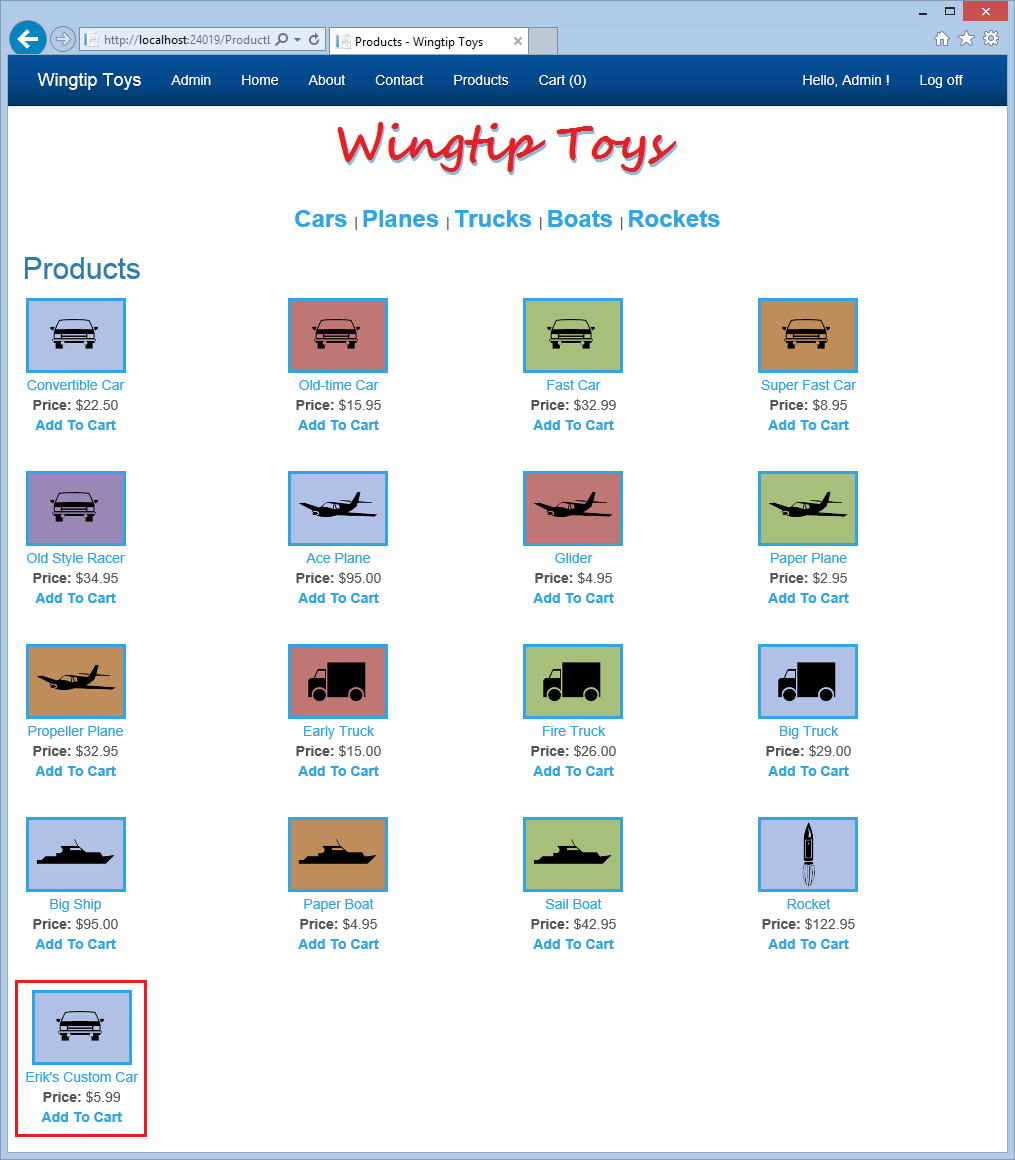
添加新产品的详细信息,然后单击“ 添加产品 ”按钮。
从顶部导航菜单中选择“ 产品 ”,查看添加的新产品。
单击管理员链接以返回到管理页。
在页面的 “删除产品 ”部分,选择在 DropDownListBox 中添加的新产品。
单击 “删除产品 ”按钮,从应用程序中删除新产品。
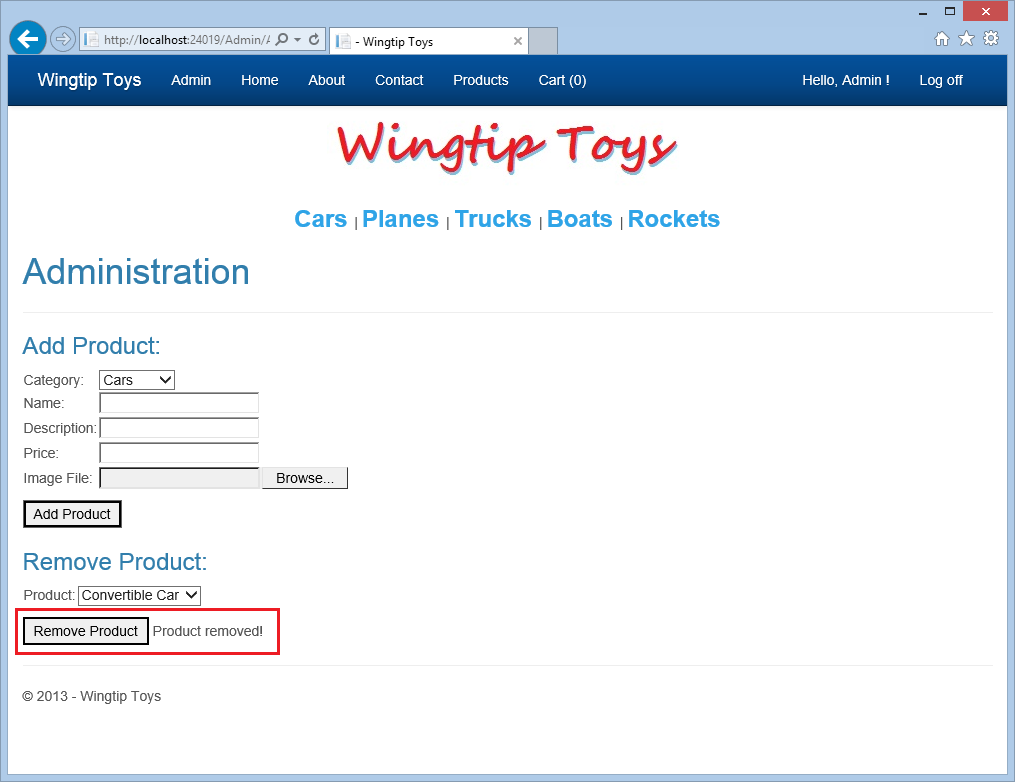
从顶部导航菜单中选择“ 产品 ”以确认产品已被删除。
单击“ 注销 ”以存在管理模式。
请注意,顶部导航窗格不再显示管理员菜单项。
总结
在本教程中,你添加了一个自定义角色和一个属于自定义角色的用户,限制了对管理文件夹和页面的访问,并为属于自定义角色的用户提供了导航。 你使用模型绑定在 DropDownList 控件中填充了数据。 你实现了 FileUpload 控件和验证控件。 此外,你已了解如何在数据库中添加和删除产品。 在下一教程中,你将了解如何实现 ASP.NET 路由。
其他资源
Web.config - authorization 元素
ASP.NET 标识
将具有成员身份、OAuth 和SQL 数据库的安全 ASP.NET Web Forms应用部署到 Azure 网站
Microsoft Azure - 免费试用版