你当前正在访问 Microsoft Azure Global Edition 技术文档网站。 如果需要访问由世纪互联运营的 Microsoft Azure 中国技术文档网站,请访问 https://docs.azure.cn。
教程:使用通知中心向 Xamarin.Android 应用发送推送通知
概述
注意
有关 Firebase Cloud Messaging 弃用和迁移步骤的信息,请参阅 Google Firebase Cloud Messaging 迁移。
本教程说明如何使用 Azure 通知中心将推送通知发送到 Xamarin.Android 应用程序。 创建一个空白 Xamarin.Android 应用,以便使用 Firebase Cloud Messaging (FCM) 接收推送通知。 使用通知中心将推送通知广播到运行应用的所有设备。 NotificationHubs 应用示例中提供了完成的代码。
在本教程中,我们将执行以下步骤:
- 创建 Firebase 项目并启用 Firebase Cloud Messaging
- 创建通知中心
- 创建 Xamarin.Android 应用并将其连接到通知中心
- 从 Azure 门户发送测试通知
先决条件
- Azure 订阅。 如果还没有 Azure 订阅,可以在开始前创建一个免费 Azure 帐户。
- 基于 Windows 的 Visual Studio with Xamarin 或基于 OS X 的 Visual Studio for Mac。
- 有效的 Google 帐户
创建 Firebase 项目并启用 Firebase Cloud Messaging
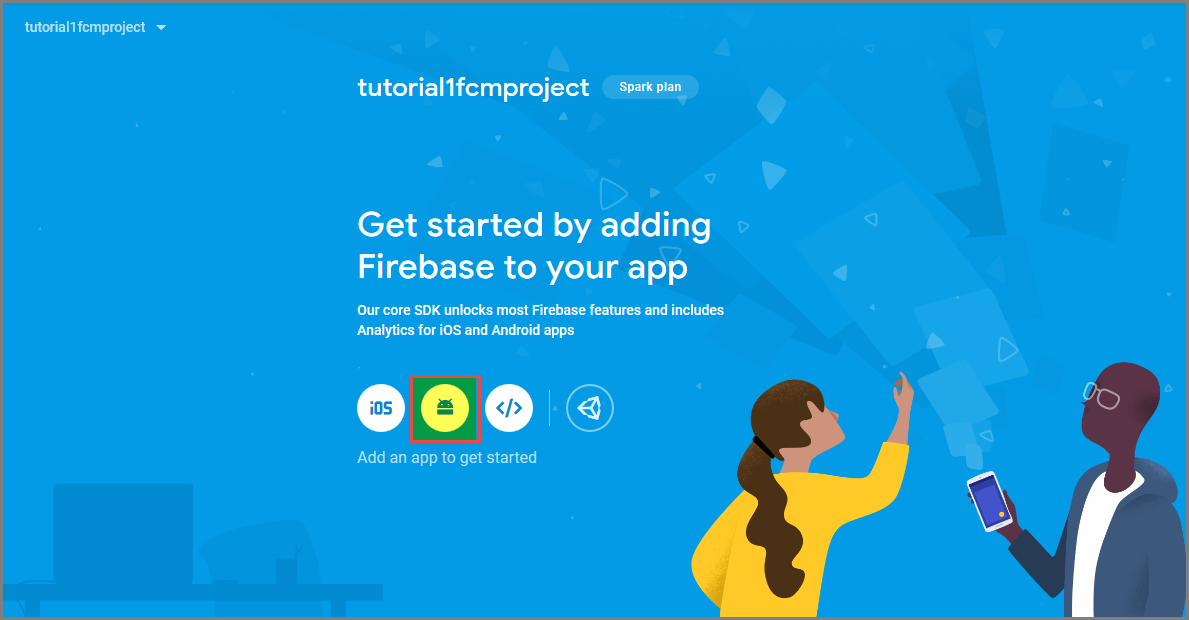
登录到 Firebase 控制台。 如果还没有 Firebase 项目,创建一个新项目。
创建项目后,选择“向 Android 应用添加 Firebase”。
在“将 Firebase 添加到 Android 应用”页上,执行以下步骤:
对于“Android 包名称”,请输入包的名称。 例如:
tutorials.tutoria1.xamarinfcmapp。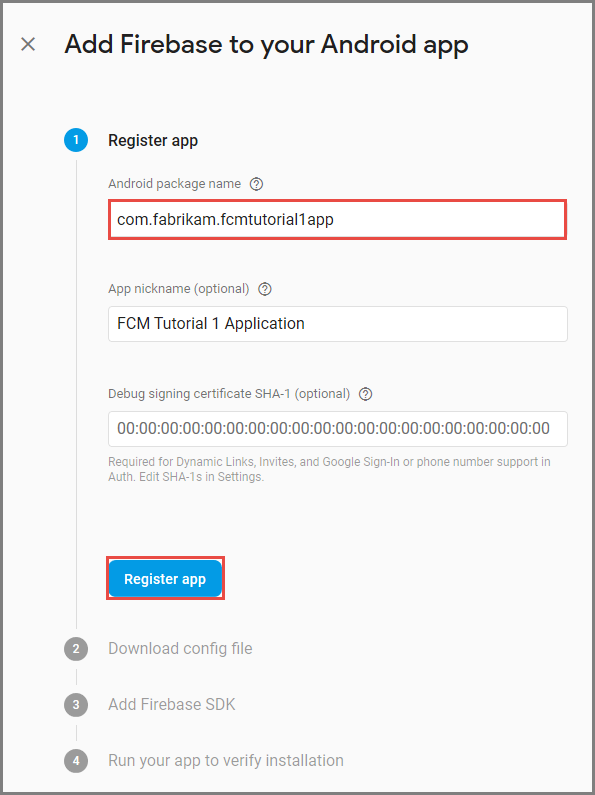
选择“注册应用”。
选择“下载 google-services.json”。 然后将文件保存到项目的文件夹中,然后选择“下一步”。 如果尚未创建 Visual Studio 项目,则可以在创建项目后执行此步骤。
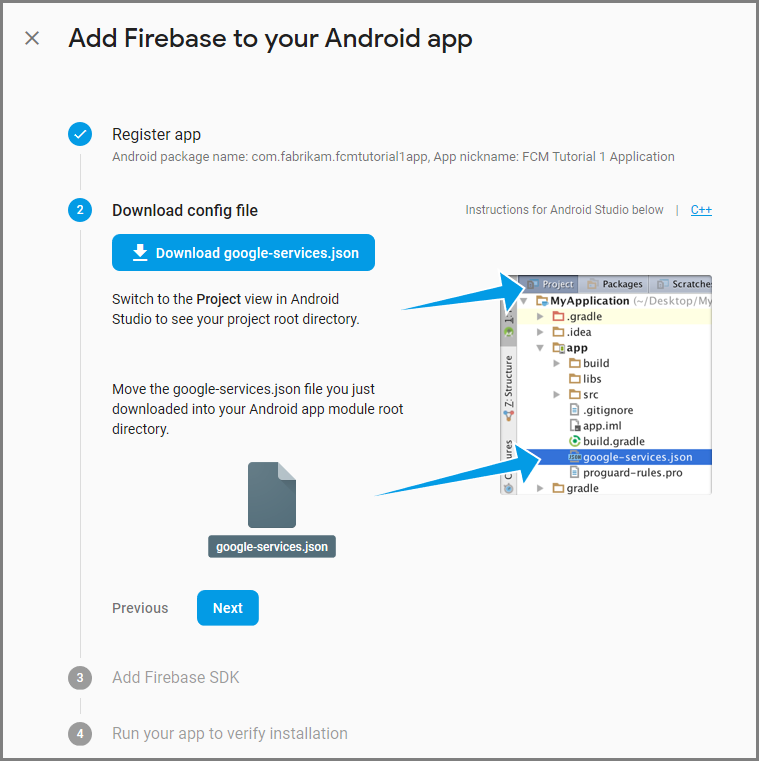
选择下一步。
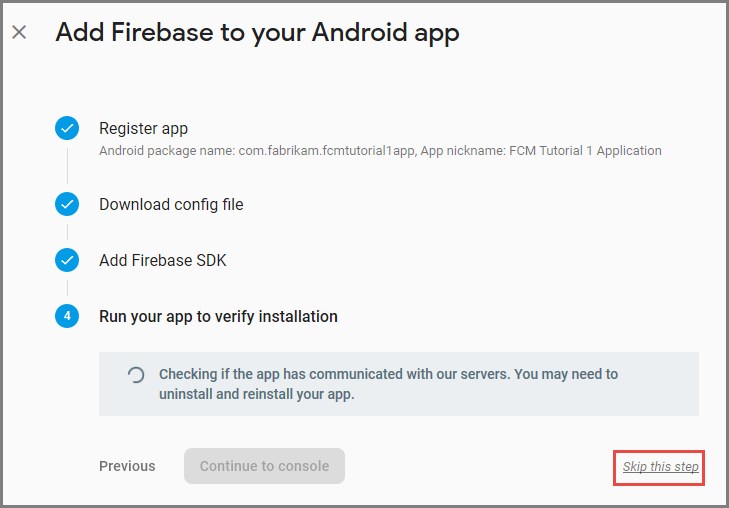
选择“跳过此步骤”。
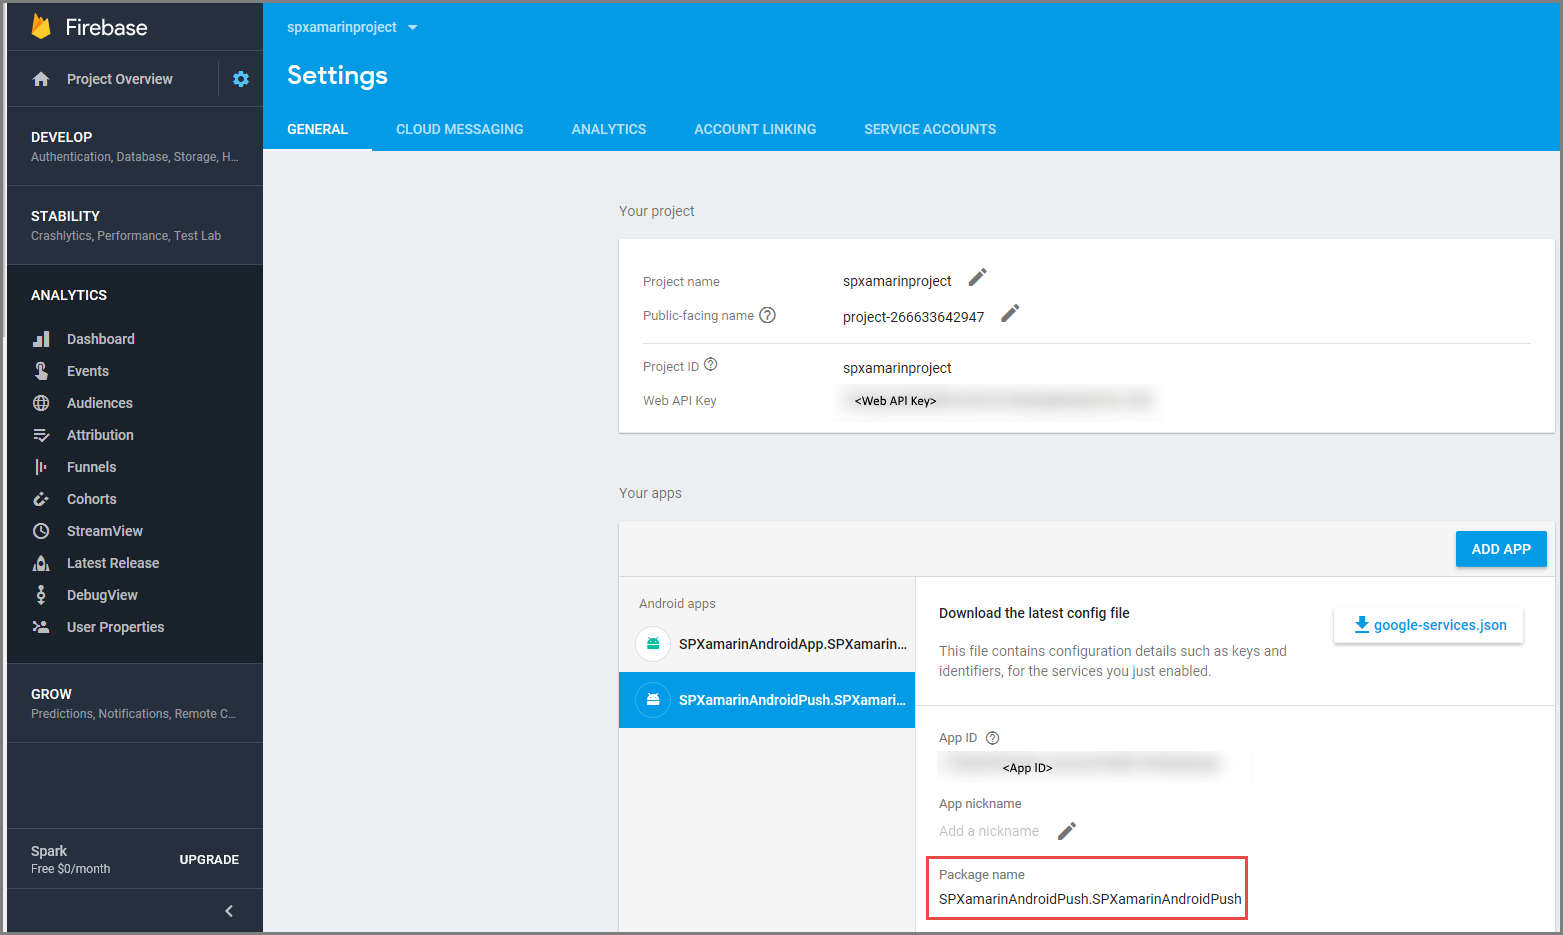
在 Firebase 控制台中,选择与项目相对应的齿轮图标。 然后,选择“项目设置”。
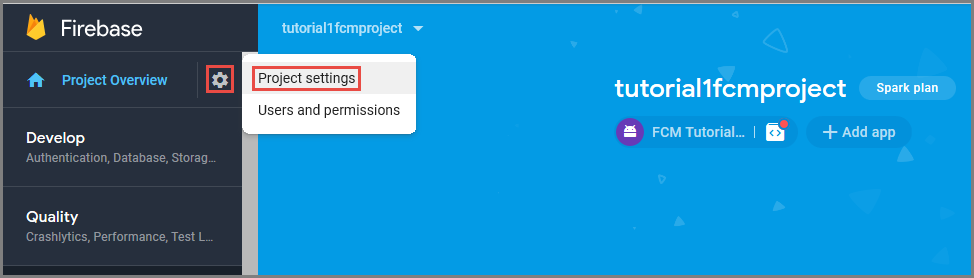
如果尚未下载 google-services.json 文件,可以在此页上进行下载。

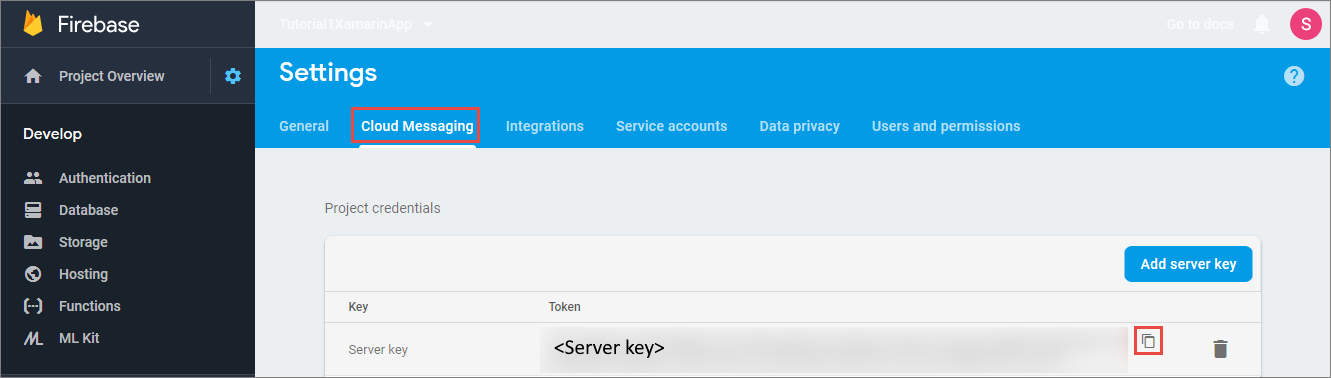
切换到顶部的“Cloud Messaging”选项卡。 复制并保存服务器密钥以供将来使用。 你将使用此值来配置通知中心。
创建通知中心
登录 Azure 门户。
在左侧菜单中,选择“所有服务” 。
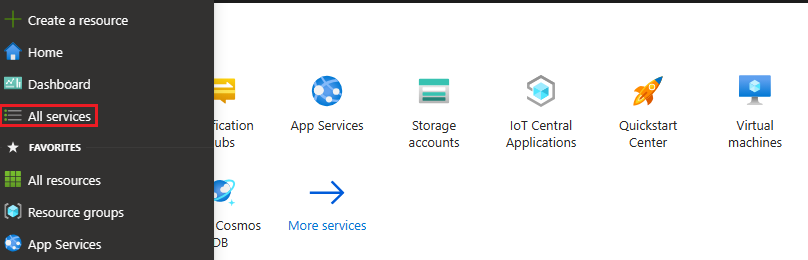
在“筛选器服务”文本框中键入“通知中心”。 选择服务名称旁边的星形图标,以便将服务添加到左侧菜单上的“收藏夹”部分。 选择“通知中心”。

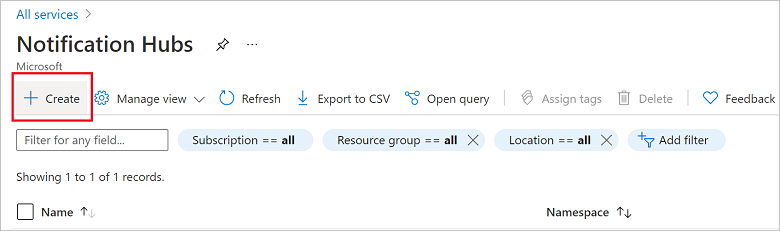
在“通知中心”页面上,在工具栏上选择“创建”。
在“通知中心”页面上的“基本信息”选项卡中,执行以下步骤:
在“订阅”中,选择要使用的 Azure 订阅的名称,然后选择现有资源组或创建新资源组。
在“命名空间详细信息”中为新命名空间输入唯一名称。
命名空间包含一个或多个通知中心,因此请在“通知中心详细信息”中键入中心的名称。
从“位置”下拉列表框中选择值。 此值指定要在其中创建通知中心的位置。
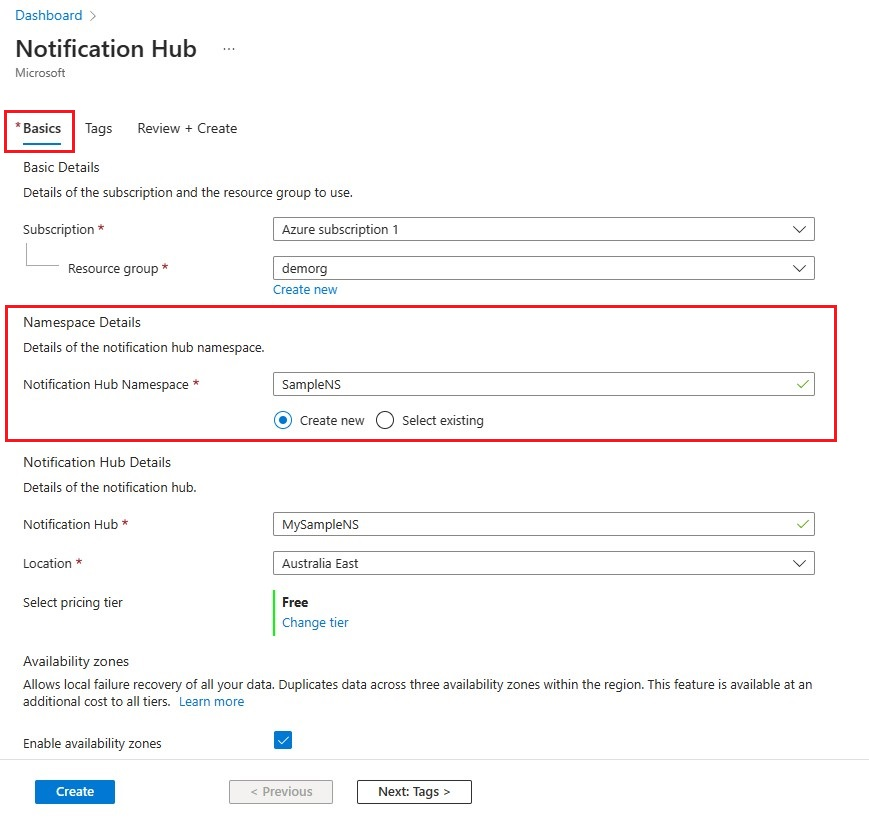
查看“可用性区域”选项。 如果选择了具有可用性区域的区域,则默认会选中该复选框。 可用性区域是一项付费功能,因此会向你的层级添加额外费用。
选择“灾难恢复”选项:“无”、“配对恢复区域”或“灵活恢复区域”。 如果选择“配对恢复区域”,则会显示故障转移区域。 如果选择“灵活恢复区域”,请使用下拉列表从恢复区域列表中选择。

选择创建。
部署完成后,选择“转到资源”。


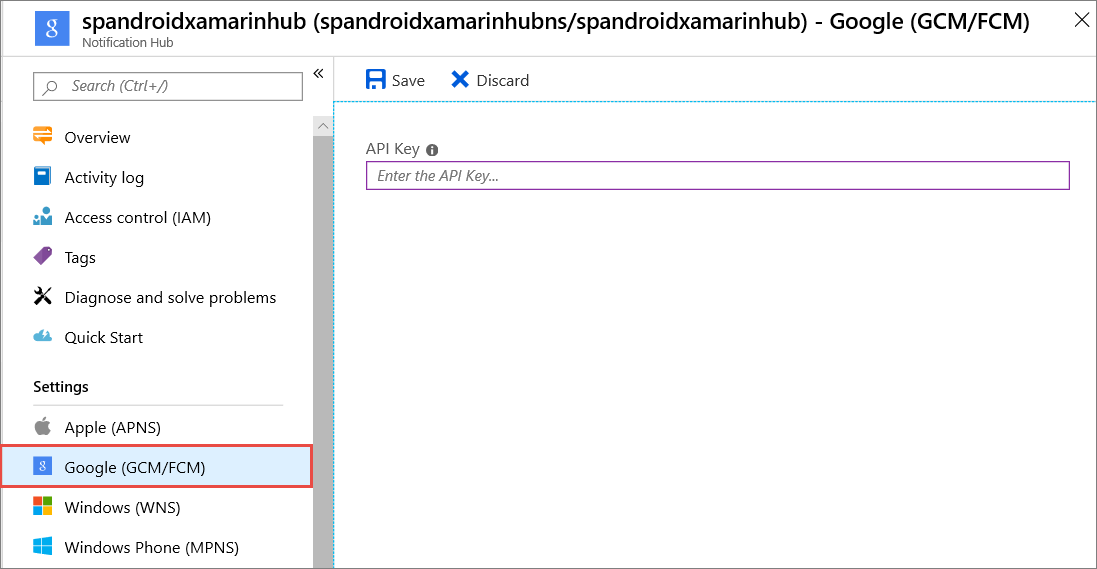
配置通知中心的 GCM/FCM 设置
在左侧菜单的“设置”部分中选择“Google (GCM/FCM)”。
输入先前从 Google Firebase Console 记下的服务器密钥。
在工具栏上选择“保存”。
通知中心已配置为使用 FCM,并且你有连接字符串,既可用于注册应用以接收通知,又可用于发送推送通知。
创建 Xamarin.Android 应用并将其连接到通知中心
创建 Visual Studio 项目并添加 NuGet 包
注意
本教程中介绍的步骤适用于 Visual Studio 2017。
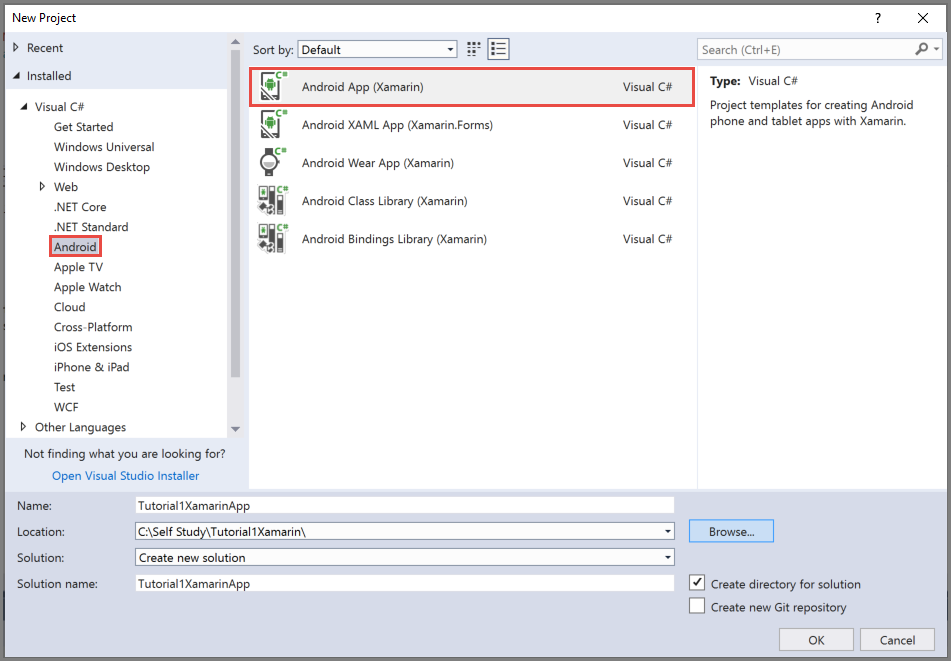
在 Visual Studio 中打开“文件”菜单,选择“新建”,然后选择“项目”。 在“新建项目”窗口中执行以下步骤:
展开“已安装”、“Visual C#”,然后单击“Android”。
从列表中选择“Android 应用(Xamarin)”。
输入项目的名称。
选择项目的位置。
选择“确定”
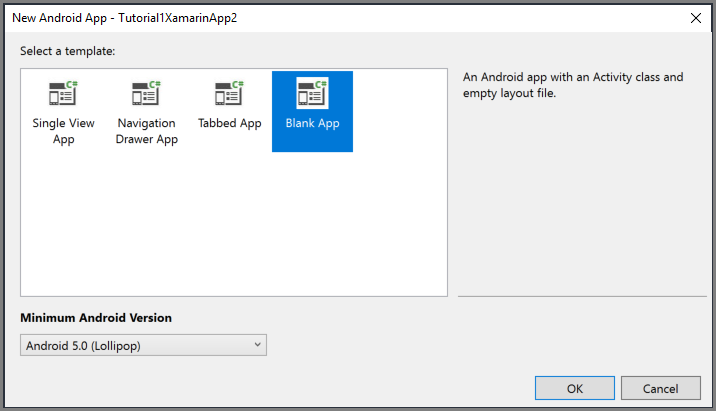
在“新建 Android 应用”对话框中,选择“空白应用”,然后选择“确定”。
在“解决方案资源管理器”窗口中展开“属性”,然后单击“AndroidManifest.xml”。 更新包名,使之与你在 Google Firebase Console 中将 Firebase Cloud Messaging 添加到项目时输入的包名匹配。
按照以下步骤将项目的目标 Android 版本设置为“Android 10.0”:
- 右键单击项目,并选择“属性”。
- 对于“使用 Android 版本进行编译:(目标框架)”字段,选择“Android 10.0”。
- 在消息框中选择“是”以继续更改目标框架。
按照以下步骤将所需的 NuGet 包添加到项目中:
右键单击项目,然后选择“管理 NuGet 包...”。
切换到“已安装”选项卡,选择 Xamarin.Android.Support.Design,并在右窗格中选择“更新”以将程序包更新到最新版本。
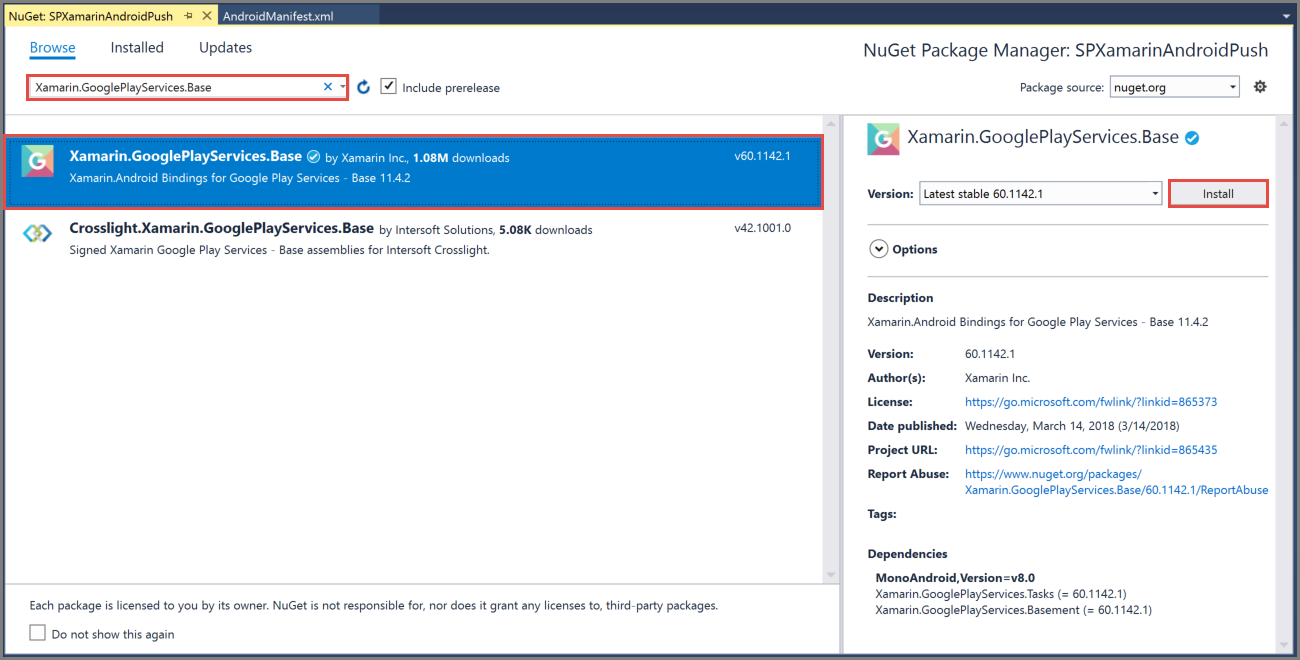
切换到“浏览”选项卡。搜索 Xamarin.GooglePlayServices.Base。 在结果列表中选择 Xamarin.GooglePlayServices.Base。 然后,选择“安装”。
在“NuGet 包管理器”窗口中,搜索“Xamarin.Firebase.Messaging” 。 在结果列表中选择 Xamarin.Firebase.Messaging。 然后,选择“安装”。
现在,请搜索 Xamarin.Azure.NotificationHubs.Android。 在结果列表中选择 Xamarin.Azure.NotificationHubs.Android。 然后,选择“安装”。
添加 Google Services JSON 文件
将从 Google Firebase Console 下载的
google-services.json文件复制到项目文件夹。将
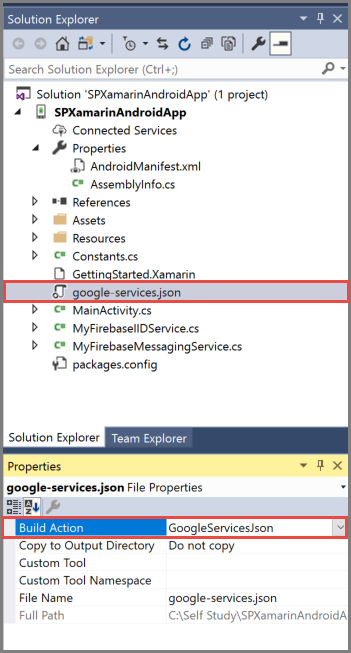
google-services.json添加到项目。在“解决方案资源管理器”窗口中选择
google-services.json。在“属性”窗格中,将“生成操作”设置为“GoogleServicesJson”。 如果看不到 GoogleServicesJson,请在关闭 Visual Studio 后将其重新启动,重新打开项目,然后重试。
在项目中设置通知中心
注册到 Firebase Cloud Messaging
如果要从 Google Cloud Messaging 迁移到 Firebase,则项目的
AndroidManifest.xml文件可能包含过期的 GCM 配置,这可能会导致通知重复。 编辑文件,并删除<application>部分中的以下行(如果存在):<receiver android:name="com.google.firebase.iid.FirebaseInstanceIdInternalReceiver" android:exported="false" /> <receiver android:name="com.google.firebase.iid.FirebaseInstanceIdReceiver" android:exported="true" android:permission="com.google.android.c2dm.permission.SEND"> <intent-filter> <action android:name="com.google.android.c2dm.intent.RECEIVE" /> <action android:name="com.google.android.c2dm.intent.REGISTRATION" /> <category android:name="${applicationId}" /> </intent-filter> </receiver>将以下语句添加到 application 元素之前。
<uses-permission android:name="android.permission.INTERNET" />
<uses-permission android:name="com.google.android.c2dm.permission.RECEIVE" />
<uses-permission android:name="android.permission.WAKE_LOCK" />
<uses-permission android:name="android.permission.GET_ACCOUNTS"/>
收集有关 Android 应用和通知中心的以下信息:
在“解决方案资源管理器”窗口中右键单击你的项目,选择“添加”,然后选择“类”。
为 Xamarin 项目创建
Constants.cs类,并在该类中定义以下常量值。 将占位符替换成自己的值。public static class Constants { public const string ListenConnectionString = "<Listen connection string>"; public const string NotificationHubName = "<hub name>"; }将以下 using 语句添加到
MainActivity.cs:using WindowsAzure.Messaging.NotificationHubs;将以下属性添加到 MainActivity 类:
internal static readonly string CHANNEL_ID = "my_notification_channel";在
MainActivity.cs中将以下代码添加到base.OnCreate(savedInstanceState)后面的OnCreate:// Listen for push notifications NotificationHub.SetListener(new AzureListener()); // Start the SDK NotificationHub.Start(this.Application, HubName, ConnectionString);向项目添加名为
AzureListener的类。将以下 using 语句添加到
AzureListener.cs。using Android.Content; using WindowsAzure.Messaging.NotificationHubs;将以下内容添加到类声明上方,让类从
Java.Lang.Object继承并实现INotificationListener:public class AzureListener : Java.Lang.Object, INotificationListener将以下代码添加到
AzureListener类中,以处理收到的消息。public void OnPushNotificationReceived(Context context, INotificationMessage message) { var intent = new Intent(this, typeof(MainActivity)); intent.AddFlags(ActivityFlags.ClearTop); var pendingIntent = PendingIntent.GetActivity(this, 0, intent, PendingIntentFlags.OneShot); var notificationBuilder = new NotificationCompat.Builder(this, MainActivity.CHANNEL_ID); notificationBuilder.SetContentTitle(message.Title) .SetSmallIcon(Resource.Drawable.ic_launcher) .SetContentText(message.Body) .SetAutoCancel(true) .SetShowWhen(false) .SetContentIntent(pendingIntent); var notificationManager = NotificationManager.FromContext(this); notificationManager.Notify(0, notificationBuilder.Build()); }生成项目。
在设备或加载的模拟器上运行应用
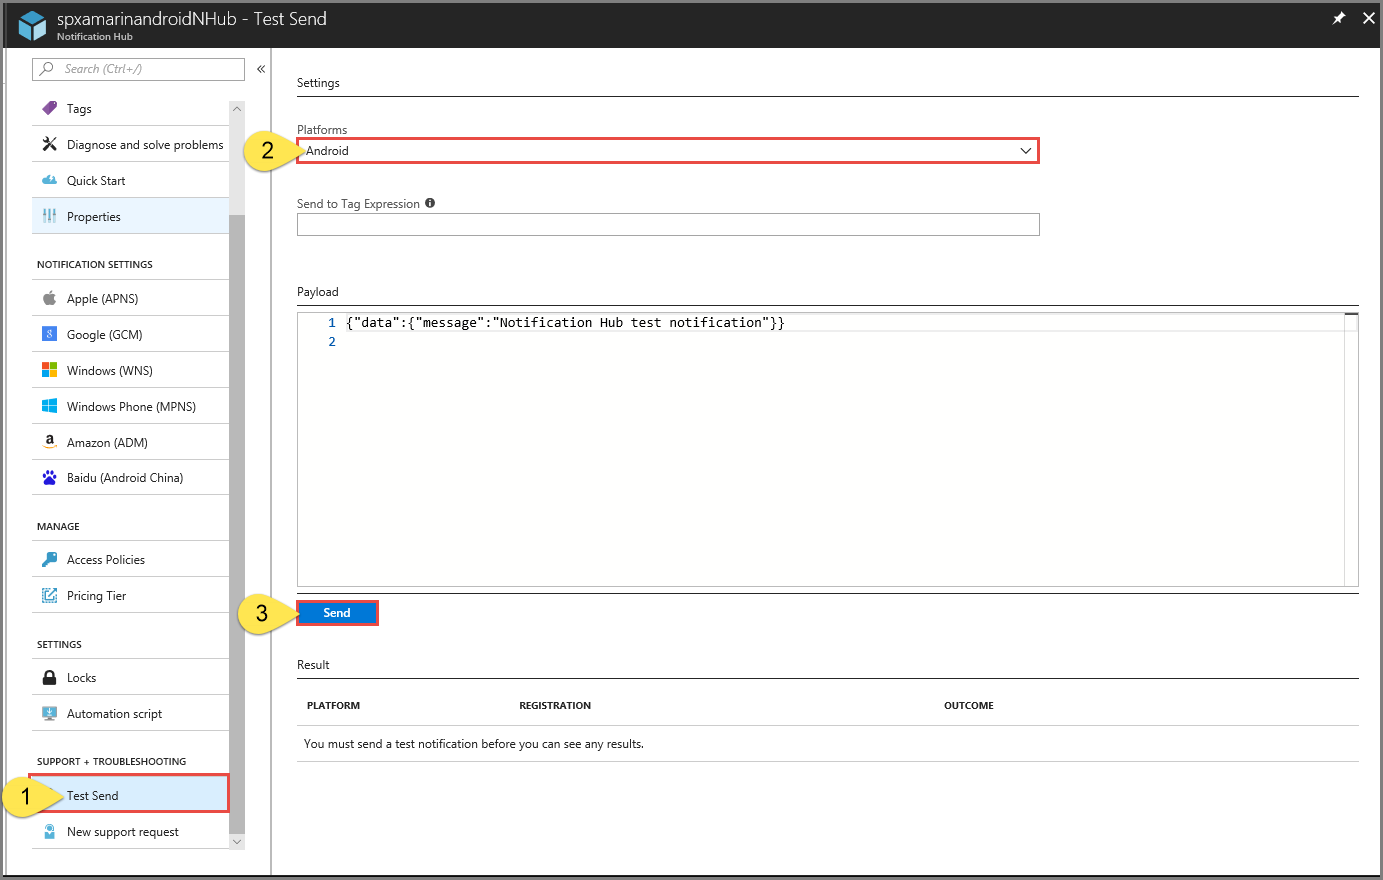
从 Azure 门户发送测试通知
可以在 Azure 门户中使用“测试性发送”选项,在应用中测试通知的发送。 它会向设备发送测试性的推送通知。
通常,推送通知是在移动服务或 ASP.NET 等后端服务中通过兼容库发送的。 如果后端没有可用库,也可使用 REST API 直接发送通知消息。
后续步骤
本教程介绍了如何将广播通知发送到所有注册到后端的 Android 设备。 若要了解如何向特定的 Android 设备推送通知,请转到以下教程: