将 Microsoft Copilot Studio 智能体克隆到本地后,可以使用 Microsoft Visual Studio Code 的文本编辑功能来编辑其组件。 Copilot Studio 扩展提供 IntelliSense、验证和 YAML 语言支持,帮助高效且不易出错地进行编辑。
智能体文件结构
理解文件结构是高效编辑的关键。
my-agent/
├── actions                   # Connectors
│   ├── DevOpsAction.mcs.yml
│   └── GetItems.mcs.yml
├── knowledge/files                # Knowledge sources
│   ├── source1.yaml
│   └── source2.yaml
├── topics/                   # Conversation topics
│   ├── greeting.mcs.yaml
│   ├── help.mcs.yaml
│   └── escalate.mcs.yaml
├── workflows/                    # Agent tools and actions
│   └── GetDevOpsItems
│       ├── metadata.yaml
│       └── workflow.json
│   └── GetMeetings
│       ├── metadata.yaml
│       └── workflow.json
├── trigger/                 # Event triggers
│   └── welcometrigger.mcs.yaml
├── agent.mcs.yaml                # Main agent definition
├── icon.png                      # Icon used for the agent, visible in test panel and in supported channels
├── settings.mcs.yml              # Configuration settings for the agent
└── connectioreferences.mcs.yml   # Connection References used by Connectors and other actions
编辑主要智能体配置
IntelliSense 功能
在输入时会显示建议,并高亮显示无效值。 这些建议会根据你所在的节点层级而变化。
- 使用
Ctrl+Space可根据节点层级获取建议。 - 使用
Ctrl+F在整个智能体中搜索变量名称和其他信息,以便快速更新
查看问题
你可以在 Visual Studio Code 的问题窗格中查看文件的问题。 另外,当你打开文件时,可以看到红色下划线标出问题。
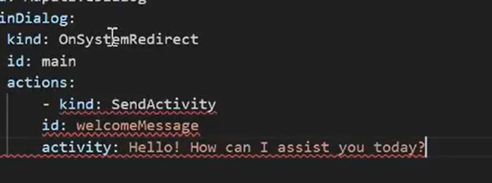
问题窗格
使用
Ctrl+Shift+M打开问题窗格(或转到视图>问题)。查看所有错误和警告。
选择任意问题即可跳转到对应位置。
处理更改
当更改被创建并保存时,Visual Studio 会以不同颜色显示,方便你识别。
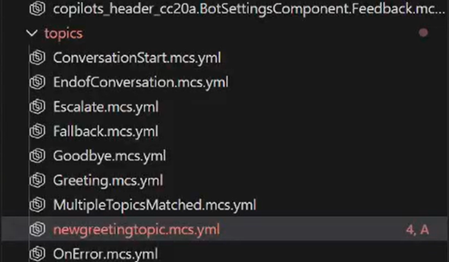
编辑智能体组件
主题
主题定义对话流和对话。 它们属于 AdaptiveDialog 类型。
你可以使用 GitHub Copilot 或其他智能体来帮助构建新组件,或者如果你愿意,也可以自己编写主题。
主题文件结构
以下是一个简单的问候主题示例:
# This is the name of the topic that will appear in the 'topics' list in Copilot Studio

kind: AdaptiveDialog
beginDialog:
  kind: OnConversationStart
  id: main
  actions:
    - kind: SendActivity
      id: sendMessage_M0LuhV
      activity:
        text:
          - Hello, I'm {System.Bot.Name}. How can I help?
        speak:
          - Hello and thank you for calling {System.Bot.Name}.
高级主题功能
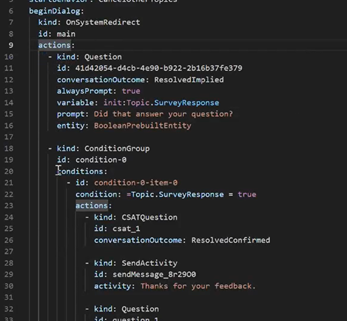
你可以在主题中使用其他组件,例如:
实体:
- kind: Question id: question_1 alwaysPrompt: true variable: init:Topic.Continue prompt: Can I help with anything else? entity: BooleanPrebuiltEntity变量:
actions: - kind: Question id: 41d42054-d4cb-4e90-b922-2b16b37fe379 conversationOutcome: ResolvedImplied alwaysPrompt: true variable: init:Topic.SurveyResponse prompt: Did that answer your question? entity: BooleanPrebuiltEntity条件(使用 Power Fx):
            - kind: ConditionGroup
              id: condition-1
              conditions:
                - id: condition-1-item-0
                  condition: =Topic.Continue = true
                  actions:
                    - kind: SendActivity
                      id: sendMessage_4eOE6h
                      activity: Go ahead. I'm listening.
其他节点,例如 HTTP 节点
自适应卡
工具
工具定义智能体可执行的操作。 你可以在 Copilot Studio 智能体界面的工具区看到它们。
工具可能包括:
- 提示
- 工作流(Power Automate 流)
- CUA 工具
- 自定义连接器
- REST API
- MCP 连接器
工具在扩展中显示于智能体的 /actions 文件夹下,但也可能出现在带有额外元数据的其他文件夹中。 例如,工作流和触发器有自己的文件夹和 JSON。
编辑触发器
触发器定义主题或操作何时被激活。 你可以把它们设置为日程、事件或条件类型。 触发器通常指代一个工作流。
kind: ExternalTriggerConfiguration
externalTriggerSource:
  kind: WorkflowExternalTrigger
管理远程知识文件
如果您使用 Copilot Studio 的上传功能上传文档,这些文档可以通过点击远程知识文件窗口中的名称进行下载。 文档不会自动下载,必须在窗口中选择下载。 下载成功时您会看到通知。
如果您想上传新文件,可以将它们放在智能体定义中的 knowledge/files 文件夹中。 当你应用这些更改时,它们会通过智能体内容上传功能进行上传。

最佳实践
命名约定
文件:
- 使用 kebab-case:
create-ticket.tool.yaml - 描述性命名:
product-pricing-faq.yaml而非faq.yaml - 使用类型后缀:
.topic.yaml、.tool.yaml、.trigger.yaml
ID 和变量:
- 使用驼峰大小写:
userOrderNumber、productDetails - 描述性命名:
checkPaymentStatus而非check1 - 避免缩写:用
customerEmail而非custEmail
注释
为了解释复杂的逻辑,请添加注释:
nodes:
  # Check if user is within business hours and eligible for live support
  # Business hours: 9 AM - 5 PM EST, Monday-Friday
  # Eligibility: Premium tier customers only
  - id: check-live-support-availability
    type: condition
后续步骤
现在你已经了解了编辑操作:
- 了解同步。