在本教程的上一部分,你学习了如何以 ONNX 格式生成和导出 ML.NET 模型。 有了该模型后,即可将其嵌入到 Windows 应用程序中,并通过调用 WinML API 在本地在设备上运行它。
完成后,你将拥有一个工作的图像分类器 WinML UWP 应用(C#)。
关于示例应用
使用模型,我们将创建一个可以对食物图像进行分类的应用。 它允许你从本地设备中选择一个图像,并通过你在 上一部分中生成的和训练的本地存储分类 ONNX 模型对其进行处理。 返回的标记显示在图像旁边,以及分类的置信度概率。
如果到目前为止一直在学习本教程,则应已具备应用开发所需的先决条件。 如果需要刷新,请参阅 本教程的第一部分。
注释
如果想要下载完整的示例代码,可以克隆 解决方案文件。 克隆存储库,导航到此示例,然后使用 Visual Studio 打开 classifierMLNETModel.sln 该文件。 然后,可以跳到[启动应用程序](#Launch 应用程序)步骤。
创建 WinML UWP (C#)
下面,我们将演示如何从头开始创建应用和 WinML 代码。 你将了解如何:
- 加载机器学习模型。
- 以所需格式加载图像。
- 绑定模型的输入和输出。
- 评估模型并显示有意义的结果。
你还将使用基本 XAML 创建一个简单的 GUI,以便可以测试图像分类器。
创建应用
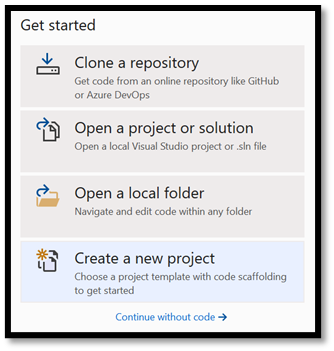
- 打开 Visual Studio 并选择
create a new project。
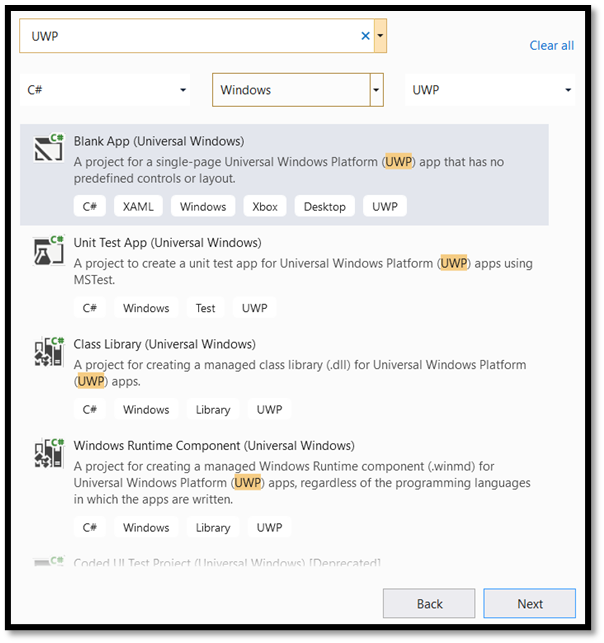
- 在搜索栏中,键入
UWP并选择Blank APP (Universal Windows。 这将为没有预定义控件或布局的单页通用 Windows 平台(UWP)应用打开新的 C# 项目。 选择Next以打开项目的配置窗口。
- 在配置窗口中:
- 为项目选择一个名称。 在这里,我们使用 classifierMLNETModel。
- 选择项目的位置。
- 如果使用 VS 2019,请确保
Place solution and project in the same directory未选中。 - 如果使用 VS 2017,请确保
Create directory for solution已选中。
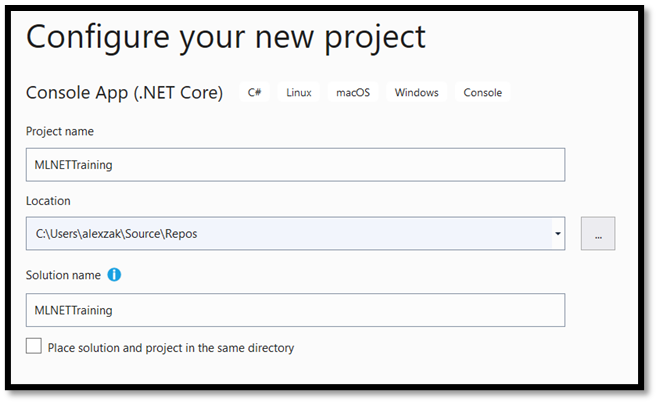
按键 create 创建项目。 可能会弹出最低目标版本窗口。 请确保最低版本设置为 Windows 10 内部版本 17763 或更高版本。
若要创建应用并使用 WinML 应用部署模型,需要满足以下条件:
- 创建项目后,导航到项目文件夹,打开 assets 文件夹 [....\classifierMLNETModel\Assets],然后将文件复制到
bestModel.onnx此位置。
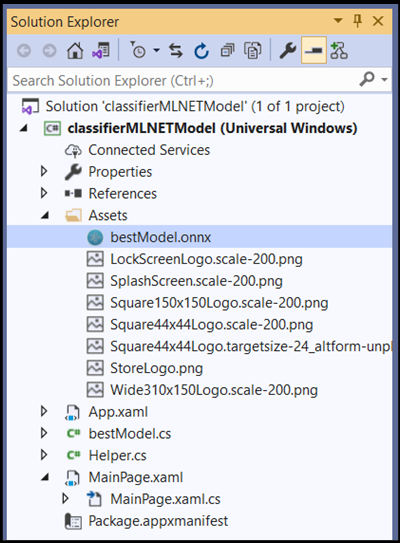
浏览项目解决方案
让我们探讨你的项目解决方案。
Visual Studio 在解决方案资源管理器中自动创建了多个 cs-code 文件。
MainPage.xaml 包含 GUI 的 XAML 代码,并 MainPage.xaml.cs 包含应用程序代码。 如果你以前创建过 UWP 应用程序,那么你对这些文件应该会非常熟悉。
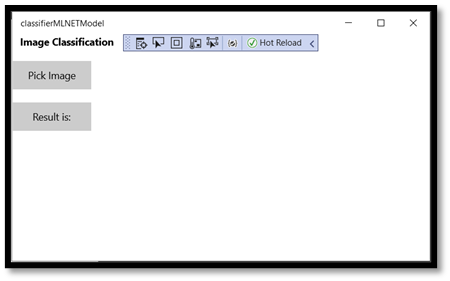
创建应用程序 GUI
首先,让我们为应用创建一个简单的 GUI。
双击该
MainPage.xaml文件。 在空白应用中,应用的 GUI 的 XAML 模板为空,因此我们需要添加一些 UI 功能。将以下代码
MainPage.xaml替换为以下内容。
<Page
    x:Class="classifierMLNETModel.MainPage"
    xmlns="http://schemas.microsoft.com/winfx/2006/xaml/presentation"
    xmlns:x="http://schemas.microsoft.com/winfx/2006/xaml"
    xmlns:local="using:classifierMLNETModel"
    xmlns:d="http://schemas.microsoft.com/expression/blend/2008"
    xmlns:mc="http://schemas.openxmlformats.org/markup-compatibility/2006"
    mc:Ignorable="d"
    Background="{ThemeResource ApplicationPageBackgroundThemeBrush}">

       <Grid Background="{ThemeResource ApplicationPageBackgroundThemeBrush}">


        <StackPanel Margin="1,0,-1,0">
            <TextBlock x:Name="Menu"
                       FontWeight="Bold"
                       TextWrapping="Wrap"
                       Margin="10,0,0,0"
                       Text="Image Classification"/>
            <TextBlock Name="space" />
            <Button Name="recognizeButton"
                    Content="Pick Image"
                    Click="OpenFileButton_Click"
                    Width="110"
                    Height="40"
                    IsEnabled="True"
                    HorizontalAlignment="Left"/>
            <TextBlock Name="space3" />
            <Button Name="Output"
                    Content="Result is:"
                    Width="110"
                    Height="40"
                    IsEnabled="True"
                    HorizontalAlignment="Left"
                    VerticalAlignment="Top">
            </Button>
            <!--Dispaly the Result-->
            <TextBlock Name="displayOutput"
                       FontWeight="Bold"
                       TextWrapping="Wrap"
                       Margin="25,0,0,0"
                       Text="" Width="1471" />
            <TextBlock Name="space2" />
            <!--Image preview -->
            <Image Name="UIPreviewImage" Stretch="Uniform" MaxWidth="300" MaxHeight="300"/>
        </StackPanel>
    </Grid>
</Page>
使用 Windows 机器学习代码生成器将模型添加到项目
Windows 机器学习代码生成器或 mlgen 是一个 Visual Studio 扩展,可帮助你开始在 UWP 应用中使用 WinML API。 将训练的 ONNX 文件添加到 UWP 项目中时,它会生成模板代码。
Windows 机器学习的代码生成器 mlgen 会创建一个接口(用于 C#、C++/WinRT 和 C++/CX),其中包含为你调用 Windows ML API 的包装类。 这使你可以轻松地加载、绑定和评估项目中的模型。 在本教程中,我们将使用它来处理其中许多函数。
代码生成器适用于 Visual Studio 2017 及更高版本。 请注意,在 Windows 10 版本 1903 及更高版本中,mlgen 不再包含在 Windows 10 SDK 中,因此必须下载并安装扩展。 如果从简介开始就一直参加本教程,则已完成扩展的下载,否则,应下载适用于 VS 2019 或 VS 2017 的扩展。
注释
若要了解有关 mlgen 的详细信息,请参阅 mlgen 文档
如果尚未安装,请安装 mlgen。
右键单击
AssetsVisual Studio 解决方案资源管理器中的文件夹,然后选择Add > Existing Item。导航到其中
ImageClassifierAppUWP [….\ImageClassifierAppUWP\Assets]的资产文件夹,找到以前在那里复制的 ONNX 模型,然后选择add。将 ONNX 模型(名称:“分类器”)添加到 VS 中解决方案资源管理器中的资产文件夹后,项目现在应有两个新文件:
-
bestModel.onnx- 这是您的 ONNX 格式模型。 -
bestModel.cs– 自动生成的 WinML 代码文件。
- 若要确保在编译应用程序时生成模型,请选择文件
bestModel.onnx并选择Properties。 对于Build Action,请选择Content。
现在,让我们浏览文件中新生成的代码 bestModel.cs 。
生成的代码包括三个类:
-
bestModelModel:此类包括两种模型实例化和模型评估方法。 它将帮助我们创建机器学习模型表示形式、在系统默认设备上创建会话、将特定输入和输出绑定到模型,以及异步评估模型。 -
bestModelInput:此类初始化模型预期的输入类型。 模型输入取决于输入数据的模型要求。 -
bestModelOutput:这个类负责初始化模型将在输出阶段使用的数据类型。 模型输出取决于模型定义的方式。
现在,你将使用这些类来加载、绑定和评估项目中的模型。
张量转换
为了更轻松地进行张量化处理,请将输入的 TensorFloat 类更改为 ImageFeatureValue。
- 在
bestModel.cs文件中进行以下更改:
代码:
public sealed class bestModelInput
    {
        public TensorFloat input; // shape(-1,3,32,32)
    }
将变为:
public sealed class bestModelInput
    {
        public ImageFeatureValue input; // shape(-1,3,32,32)
    }
加载模型和输入
加载模型
双击
MainPage.xaml.cs代码文件以打开应用程序代码。将“using”语句替换为以下内容,以获取对所需的所有 API 的访问权限。
// Specify all the using statements which give us the access to all the APIs that you'll need
using System;
using System.Threading.Tasks;
using Windows.AI.MachineLearning;
using Windows.Graphics.Imaging;
using Windows.Media;
using Windows.Storage;
using Windows.Storage.Pickers;
using Windows.Storage.Streams;
using Windows.UI.Xaml;
using Windows.UI.Xaml.Controls;
using Windows.UI.Xaml.Media.Imaging;
- 在
MainPage类中使用 using 语句后,在命名空间classifierMLNETModel下添加以下变量声明。
		// All the required fields declaration
		private bestModelModel modelGen;
		private bestModelInput image = new bestModelInput();
		private bestModelOutput results;
		private StorageFile selectedStorageFile;
		private string label = "";
		private float probability = 0;
		private Helper helper = new Helper();

		public enum Labels
		{
			desert,
			soup,
			vegetable_fruit,
		}
现在,你将实现该方法 LoadModel 。 该方法将访问 ONNX 模型并将其存储在内存中。 然后,将使用 CreateFromStreamAsync 该方法将模型实例化为对象 LearningModel 。 该 LearningModel 类表示经过训练的机器学习模型。 实例化后, LearningModel 是用于与 Windows ML 交互的初始对象。
若要加载模型,可以在类中使用多个静态方法 LearningModel 。 在这种情况下,你将使用 CreateFromStreamAsync 该方法。
该方法 CreateFromStreamAsync 是使用 mlgen 自动创建的,因此无需实现此方法。 可以通过双击由 mlgen 生成的 bestModel.cs 文件来查看该方法。
若要了解有关课堂的详细信息 LearningModel ,请查看 LearningModel 类文档。
若要了解有关加载模型的其他方法的详细信息,请查看 加载模型文档
- 让我们定义主方法。
// The main page to initialize and execute the model.
public MainPage()
{
	this.InitializeComponent();
	loadModel();
}
- 将方法的
loadModel实现添加到MainPage.xaml.cs类中的MainPage代码文件中。
private async Task loadModel()
{
// Get an access the ONNX model and save it in memory.
	StorageFile modelFile = await StorageFile.GetFileFromApplicationUriAsync(new Uri($"ms-appx:///Assets/bestModel.onnx"));
// Instantiate the model.
	modelGen = await bestModelModel.CreateFromStreamAsync(modelFile);
}
加载图像
- 我们需要定义一个 click 事件来启动模型执行的四个方法调用序列 - 转换、绑定和计算、输出提取和显示结果。 将以下方法添加到
MainPage.xaml.cs类中的MainPage代码文件中。
        // Waiting for a click event to select a file
        private async void OpenFileButton_Click(object sender, RoutedEventArgs e)
        {
            if (!await getImage())
            {
                return;
            }
            // After the click event happened and an input selected, begin the model execution.
            // Bind the model input
            await imageBind();
            // Model evaluation
            await evaluate();
            // Extract the results
            extractResult();
            // Display the results
            await displayResult();
        }
- 现在,你将实现该方法
getImage()。 此方法将选择输入图像文件并将其保存在内存中。 将以下方法添加到MainPage.xaml.cs类中的MainPage代码文件中。
        // A method to select an input image file
        private async Task<bool> getImage()
        {
            try
            {
                // Trigger file picker to select an image file
                FileOpenPicker fileOpenPicker = new FileOpenPicker();
                fileOpenPicker.SuggestedStartLocation = PickerLocationId.PicturesLibrary;
                fileOpenPicker.FileTypeFilter.Add(".jpg");
                fileOpenPicker.FileTypeFilter.Add(".png");
                fileOpenPicker.ViewMode = PickerViewMode.Thumbnail;
                selectedStorageFile = await fileOpenPicker.PickSingleFileAsync();
                if (selectedStorageFile == null)
                {
                    return false;
                }
            }
            catch (Exception)
            {
                return false;
            }
            return true;
        }
接下来,你将实现图像 Bind() 方法,以获取位图 BGRA8 格式的文件表示。 但首先,你将创建帮助程序类来调整图像大小。
- 若要创建帮助程序文件,请右键单击解决方案名称 (
ClassifierPyTorch),然后选择Add a new item。 在打开的窗口中,选择Class,然后为其指定一个名称。 此处我们将其命名为Helper。
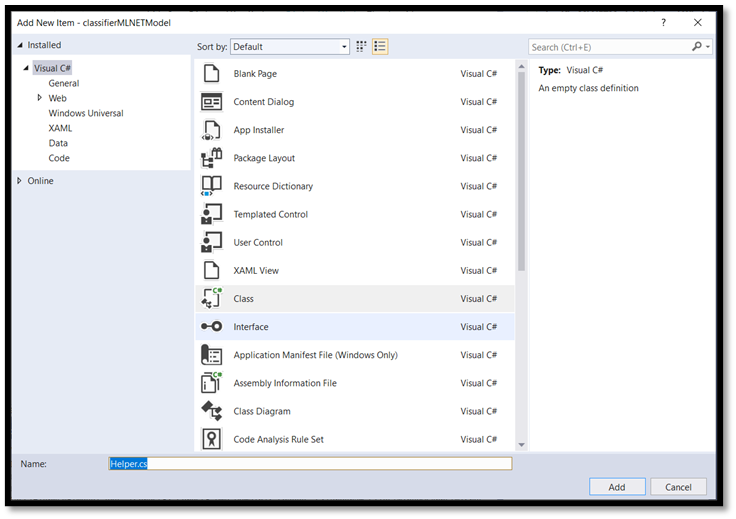
- 你的项目中将出现一个新的类文件。 打开此类,并添加以下代码:
using System;
using System.Threading.Tasks;
using Windows.Graphics.Imaging;
using Windows.Media;

namespace classifierPyTorch
{
    public class Helper
    {
        private const int SIZE = 32;
        VideoFrame cropped_vf = null;

        public async Task<VideoFrame> CropAndDisplayInputImageAsync(VideoFrame inputVideoFrame)
        {
            bool useDX = inputVideoFrame.SoftwareBitmap == null;

            BitmapBounds cropBounds = new BitmapBounds();
            uint h = SIZE;
            uint w = SIZE;
            var frameHeight = useDX ? inputVideoFrame.Direct3DSurface.Description.Height : inputVideoFrame.SoftwareBitmap.PixelHeight;
            var frameWidth = useDX ? inputVideoFrame.Direct3DSurface.Description.Width : inputVideoFrame.SoftwareBitmap.PixelWidth;

            var requiredAR = ((float)SIZE / SIZE);
            w = Math.Min((uint)(requiredAR * frameHeight), (uint)frameWidth);
            h = Math.Min((uint)(frameWidth / requiredAR), (uint)frameHeight);
            cropBounds.X = (uint)((frameWidth - w) / 2);
            cropBounds.Y = 0;
            cropBounds.Width = w;
            cropBounds.Height = h;

            cropped_vf = new VideoFrame(BitmapPixelFormat.Bgra8, SIZE, SIZE, BitmapAlphaMode.Ignore);

            await inputVideoFrame.CopyToAsync(cropped_vf, cropBounds, null);
            return cropped_vf;
        }
    }
}
现在,让我们将图像转换为适当的格式。
bestModelInput 类初始化模型预期的输入类型。 在本例中,我们将代码配置为预计 ImageFeatureValue。
ImageFeatureValue 类描述用于传递到模型的图像的属性。 若要创建一个ImageFeatureValue,请使用CreateFromVideoFrame方法。 有关这种情况和这些类和方法工作原理的更具体的详细信息,请参阅 ImageFeatureValue 类文档。
注释
在本教程中,我们使用 ImageFeatureValue 类,而不是张量。 如果 Window ML 不支持模型的颜色格式,则不能使用此选项。 有关如何使用图像转换和张量化的示例,请参阅自定义张量化示例。
- 将方法的
convert()实现添加到MainPage.xaml.csMainPage 类中的代码文件中。 convert 方法将获取 BGRA8 格式的输入文件表示。
// A method to convert and bind the input image.
        private async Task imageBind()
        {
            UIPreviewImage.Source = null;
            try
            {
                SoftwareBitmap softwareBitmap;
                using (IRandomAccessStream stream = await selectedStorageFile.OpenAsync(FileAccessMode.Read))
                {
                    // Create the decoder from the stream
                    BitmapDecoder decoder = await BitmapDecoder.CreateAsync(stream);
                    // Get the SoftwareBitmap representation of the file in BGRA8 format
                    softwareBitmap = await decoder.GetSoftwareBitmapAsync();
                    softwareBitmap = SoftwareBitmap.Convert(softwareBitmap, BitmapPixelFormat.Bgra8, BitmapAlphaMode.Premultiplied);
                }
                // Display the image
                SoftwareBitmapSource imageSource = new SoftwareBitmapSource();
                await imageSource.SetBitmapAsync(softwareBitmap);
                UIPreviewImage.Source = imageSource;

				// Encapsulate the image within a VideoFrame to be bound and evaluated
            	VideoFrame inputImage = VideoFrame.CreateWithSoftwareBitmap(softwareBitmap);
              	// Resize the image size to 224x224
              	inputImage=await helper.CropAndDisplayInputImageAsync(inputImage);
              	// Bind the model input with image
              	ImageFeatureValue imageTensor = ImageFeatureValue.CreateFromVideoFrame(inputImage);
				image.input1 = imageTensor;

				// Encapsulate the image within a VideoFrame to be bound and evaluated
				VideoFrame inputImage = VideoFrame.CreateWithSoftwareBitmap(softwareBitmap);
				// Bind the input image
				ImageFeatureValue imageTensor = ImageFeatureValue.CreateFromVideoFrame(inputImage);
				image.modelInput = imageTensor;

            }
            catch (Exception e)
            {
            }
        }
绑定并评估模型
接下来,将基于模型创建会话,绑定会话的输入和输出,并评估模型。
创建用于绑定模型的会话:
若要创建会话,请使用该 LearningModelSession 类。 此类用于评估机器学习模型,并将该模型绑定到一个设备上,然后运行和评估该模型。 创建会话以在计算机上的特定设备上执行模型时,可以选择设备。 默认设备是 CPU。
注释
若要详细了解如何选择设备,请查看 “创建会话 ”文档。
绑定模型输入和输出:
若要绑定输入和输出,请使用 LearningModelBinding 该类。 机器学习模型具有输入和输出功能,用于将信息传入和传出模型。 请注意,Windows ML API 必须支持所需的功能。
LearningModelBinding 类被应用于 LearningModelSession 上,以将值绑定到命名的输入和输出特征。
绑定的实现由 mlgen 自动生成,因此无需处理它。 绑定是通过调用 LearningModelBinding 类的预定义方法来实现的。 在本例中 Bind ,它使用该方法将值绑定到命名功能类型。
评估模型:
创建会话以将模型和边界值绑定到模型的输入和输出后,可以评估模型的输入并获取其预测。 若要运行模型执行,应在 LearningModelSession 上调用任何预定义的评估方法。 在本例中,我们将使用该方法 EvaluateAsync 。
与此方法 CreateFromStreamAsync类似, EvaluateAsync 该方法也是由 WinML 代码生成器自动生成的,因此无需实现此方法。 可以在 bestModel.cs 文件中查看此方法。
该方法 EvaluateAsync 将使用绑定中已绑定的功能值异步评估机器学习模型。 它将创建一个会话,使用 LearningModelSession 绑定输入,使用 LearningModelBinding 绑定输出,执行模型评估,并使用 LearningModelEvaluationResult 类获取模型的输出特征。
注释
若要了解运行模型的其他评估方法,请查看 LearningModelSession 类文档,检查哪些方法可以在 LearningModelSession 上实现。
- 将以下方法添加到
MainPage.xaml.csMainPage 类中的代码文件中,以创建会话、绑定和评估模型。
        // A method to evaluate the model
        private async Task evaluate()
        {
            results = await modelGen.EvaluateAsync(image);
        }
提取并显示结果
现在需要提取模型输出并显示正确的结果,这将通过 extractResult 和 displayResult 方法来实现。 需要找出返回正确标签的最高概率。
- 将
extractResult方法添加到MainPage.xaml.cs类内的MainPage代码文件中。
        // A method to extract output from the model
        private void extractResult()
        {
            // Retrieve the results of evaluation
            var mResult = results.modelOutput as TensorFloat;
            // convert the result to vector format
            var resultVector = mResult.GetAsVectorView();

            probability = 0;
            int index = 0;
            // find the maximum probability
            for(int i=0; i<resultVector.Count; i++)
            {
                var elementProbability=resultVector[i];
                if (elementProbability > probability)
                {
                    index = i;
                }
            }
            label = ((Labels)index).ToString();
        }
- 将
displayResult方法添加到MainPage.xaml.cs类内的MainPage代码文件中。
        private async Task displayResult()
        {
            displayOutput.Text = label;
        }
就是这样! 你已成功创建了包含基本 GUI 的 Windows 机器学习应用,以测试我们的分类模型。 下一步是启动应用程序并在 Windows 设备上本地运行它。
启动应用程序
完成应用程序接口、添加模型并生成 Windows ML 代码后,便可以测试应用程序了!
启用开发人员模式并从 Visual Studio 测试应用程序。 确保顶部工具栏中的下拉菜单设置为 Debug。 将解决方案平台更改为 x64(如果设备是 64 位的)或 x86(如果设备是 32 位的)以在你的本地计算机上运行该项目。
若要测试我们的应用程序,让我们使用下面这张汤的图片。 让我们看看应用如何对图像的内容进行分类。
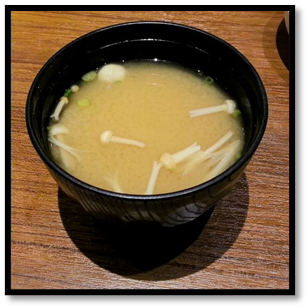
将此映像保存到本地设备上以测试应用。 如果需要,将图像格式更改为
.jpg。 还可以从本地设备以.jpg或.png格式添加任何其他相关图像。要运行项目,请选择工具栏上的
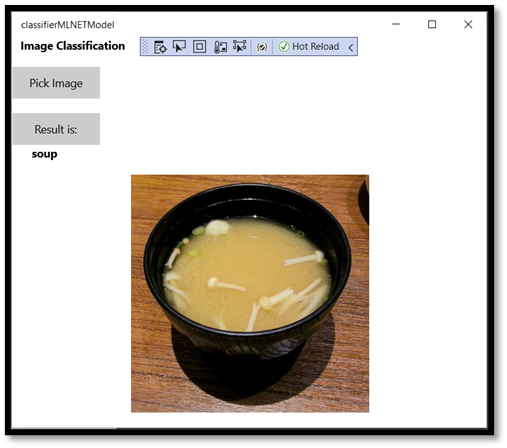
Start Debugging按钮,或按F5。应用程序启动时,按
Pick Image并选择本地设备中的映像。
结果将立即在屏幕上显示。 如你所看到的,我们的 Windows ML 应用已成功将图像分类为汤。
概要
你刚刚创建了第一个 Windows 机器学习应用,从模型创建到成功执行。
其他资源
若要详细了解本教程中提到的主题,请访问以下资源:
- Windows ML 工具:了解更多工具,例如 Windows ML 仪表板、 WinMLRunner 和 mglen Windows ML 代码生成器。
- ONNX 模型:详细了解 ONNX 格式。
- Windows ML 性能和内存:详细了解如何使用 Windows ML 管理应用性能。
- Windows 机器学习 API 参考:详细了解 Windows ML API 的三个方面。