透過 Azure 入口網站在 Azure Stack Edge Pro GPU 裝置上部署 VM
適用於: Azure Stack Edge Pro - GPUAzure Stack Edge Pro 2Azure Stack Edge Pro RAzure Stack Edge Mini R
您可以使用 Azure 入口網站、範本和 Azure PowerShell Cmdlet,以及透過 Azure CLI 或 Python 指令碼,在 Azure Stack Edge Pro GPU 裝置上建立和管理虛擬機器 (VM)。 本文說明如何使用 Azure 入口網站,在 Azure Stack Edge Pro GPU 裝置上建立和管理 VM。
重要
對於從雲端管理在裝置上部署的 VM 和映像的使用者,您必須為其啟用多重要素驗證。 如果使用者未啟用多重要素驗證,雲端作業將會失敗。 如需啟用多重要素驗證的步驟,請參閱啟用 Microsoft Entra 多重要素驗證。
VM 部署工作流程
部署工作流程的整體摘要如下:
在 Azure Stack Edge 裝置上啟用計算的網路介面。 此步驟會在指定的網路介面上建立虛擬交換器。
從 Azure 入口網站啟用 VM 的雲端管理。
使用 Azure 儲存體總管將 VHD 上傳至 Azure 儲存體帳戶。
使用上傳的 VHD 將 VHD 下載到裝置,並從 VHD 建立 VM 映像。
使用在先前步驟中建立的資源:
- 您所建立的 VM 映像。
- 與已啟用計算程序的網路介面相關聯的虛擬交換器。
- 與虛擬交換器相關聯的子網路。
然後,建立或指定下列內嵌資源:
- VM 名稱;選擇支援的 VM 大小、VM 的登入認證。
- 建立新的資料磁碟或連結現有的資料磁碟。
- 設定 VM 的靜態或動態 IP。 如果您要提供靜態 IP,請從已啟用計算之網路介面的子網路範圍中選擇可用 IP。
使用上述資源建立 VM。
必要條件
開始透過 Azure 入口網站在裝置上建立和管理 VM 之前,請確定:
您已完成 Azure Stack Edge Pro GPU 裝置上的網路設定,如步驟 1:設定 Azure Stack Edge Pro GPU 裝置所述。
您已啟用可用於計算的網路介面。 此網路介面 IP 用來建立 VM 部署的虛擬交換器。 在裝置的本機 UI 中,移至 [計算]。 選取您將用來建立虛擬交換器的網路介面。
重要
您只能針對計算程序設定一個連接埠。
在網路介面上啟用計算。 Azure Stack Edge Pro GPU 會建立和管理對應至該網路介面的虛擬交換器。
您有權存取將用來為您要建立的 VM 建立 VM 映像的 Windows 或 Linux VHD。
部署 VM
請依照下列步驟,在 Azure Stack Edge Pro GPU 裝置上建立 VM。
新增 VM 映像
將 VHD 上傳至 Azure 儲存體帳戶。 請依照使用儲存體總管進行上傳中的步驟操作。
如需準備 VHD 的相關資訊,請參閱從 Windows VHD 準備一般化映像。
在 Azure 入口網站中,移至裝置的 Azure Stack Edge 資源。 然後,移至 [Edge 服務]>[虛擬機器]。
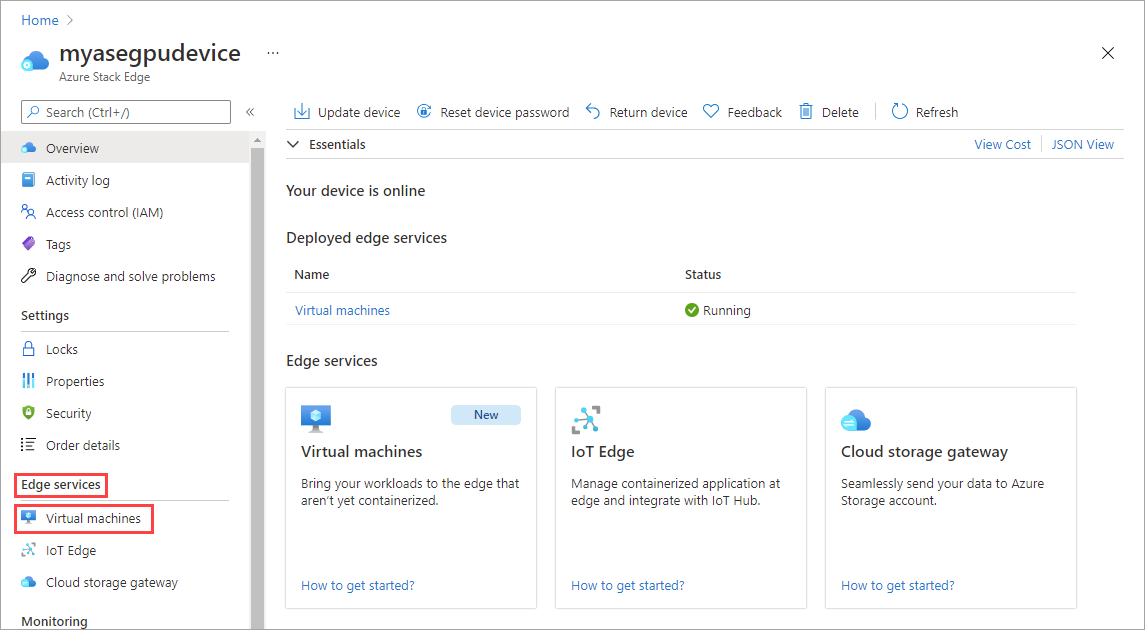
移至 [概觀] 頁面。 選取 [啟用] 以啟用虛擬機器雲端管理。
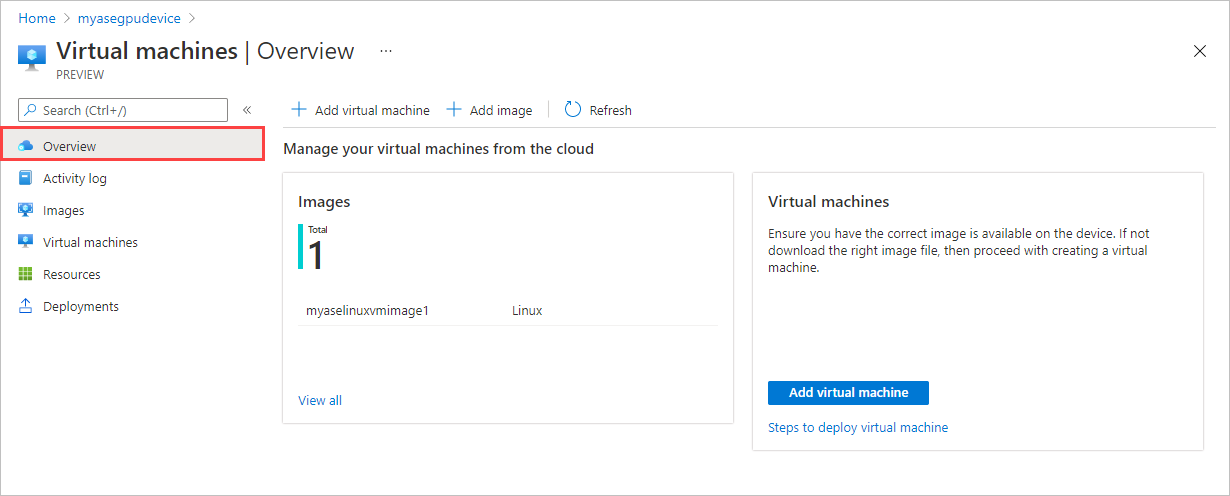
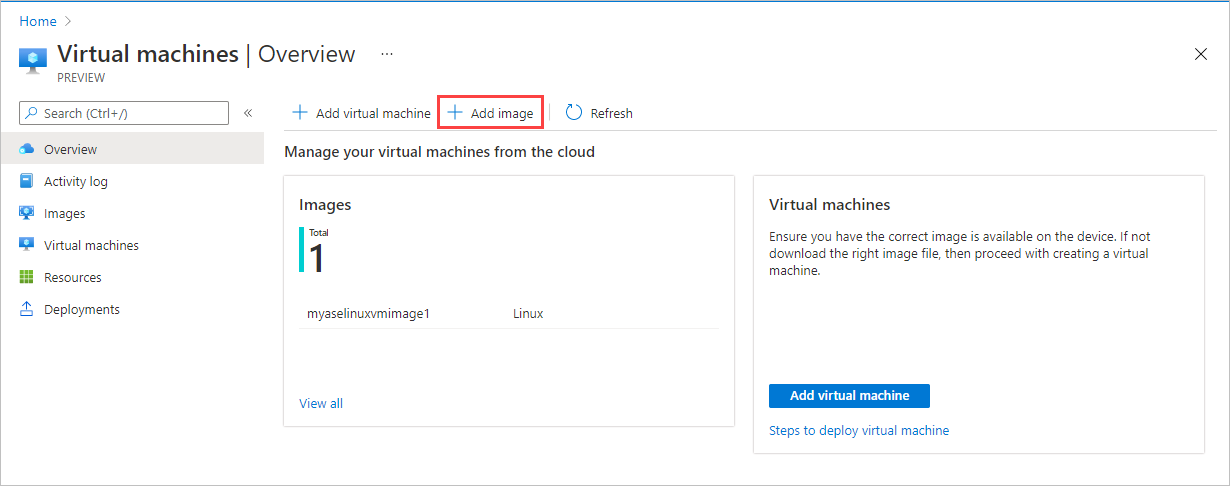
第一個步驟是新增 VM 映像。 您已在先前的步驟中將 VHD 上傳至儲存體帳戶中。 您將使用此 VHD 來建立 VM 映像。
選取 [+ 新增映像] 以從儲存體帳戶下載 VHD,並將其新增至裝置。 下載程序需要幾分鐘的時間,具體取決於 VHD 的大小和下載可用的網際網路頻寬。
在 [新增映像] 窗格上,輸入下列欄位。 然後選取 [新增]。
欄位 描述 從儲存體 Blob 下載 瀏覽至儲存體 Blob 在您上傳 VHD 的儲存體帳戶中所在的位置。 下載至 自動設定為要部署 VM 的目前裝置。 Edge 資源群組 選取要新增映像的資源群組。 將映像另存為 您要從上傳至儲存體帳戶的 VHD 建立的 VM 映像名稱。 OS 類型 選擇 Windows 或 Linux,作為您將用來建立 VM 映像的 VHD 作業系統。 VM 世代 選擇 Gen 1 或 Gen 2,作為您將用來建立 VM 的映像世代。 針對第 2 代 VM,預設會啟用安全開機。 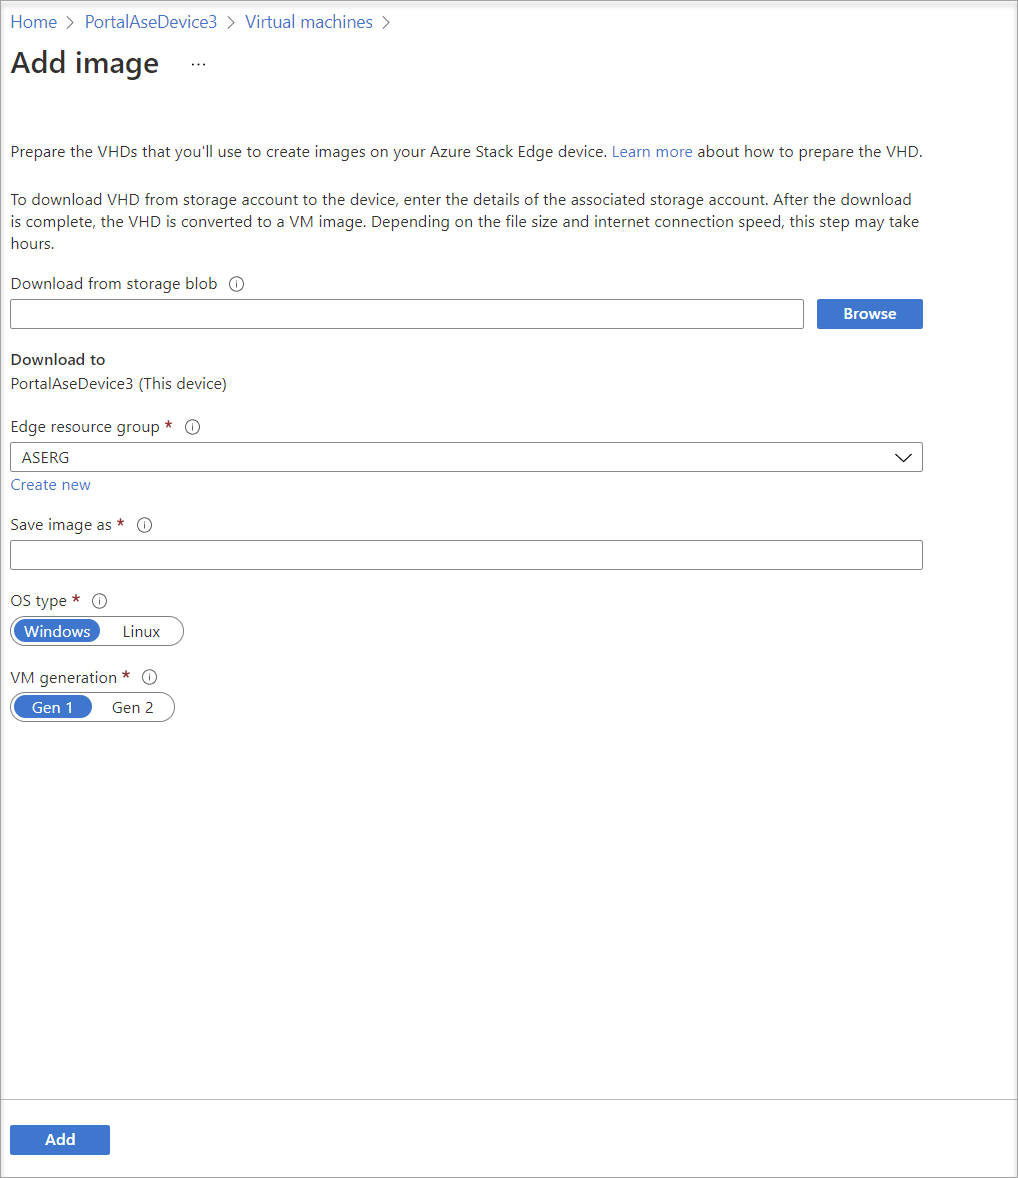
系統會下載 VHD,並建立 VM 映像。 映像建立需要幾分鐘才能完成。 您會看到 VM 映像順利完成的通知。

VM 映像成功建立後,會新增至 [映像] 窗格上的映像清單。
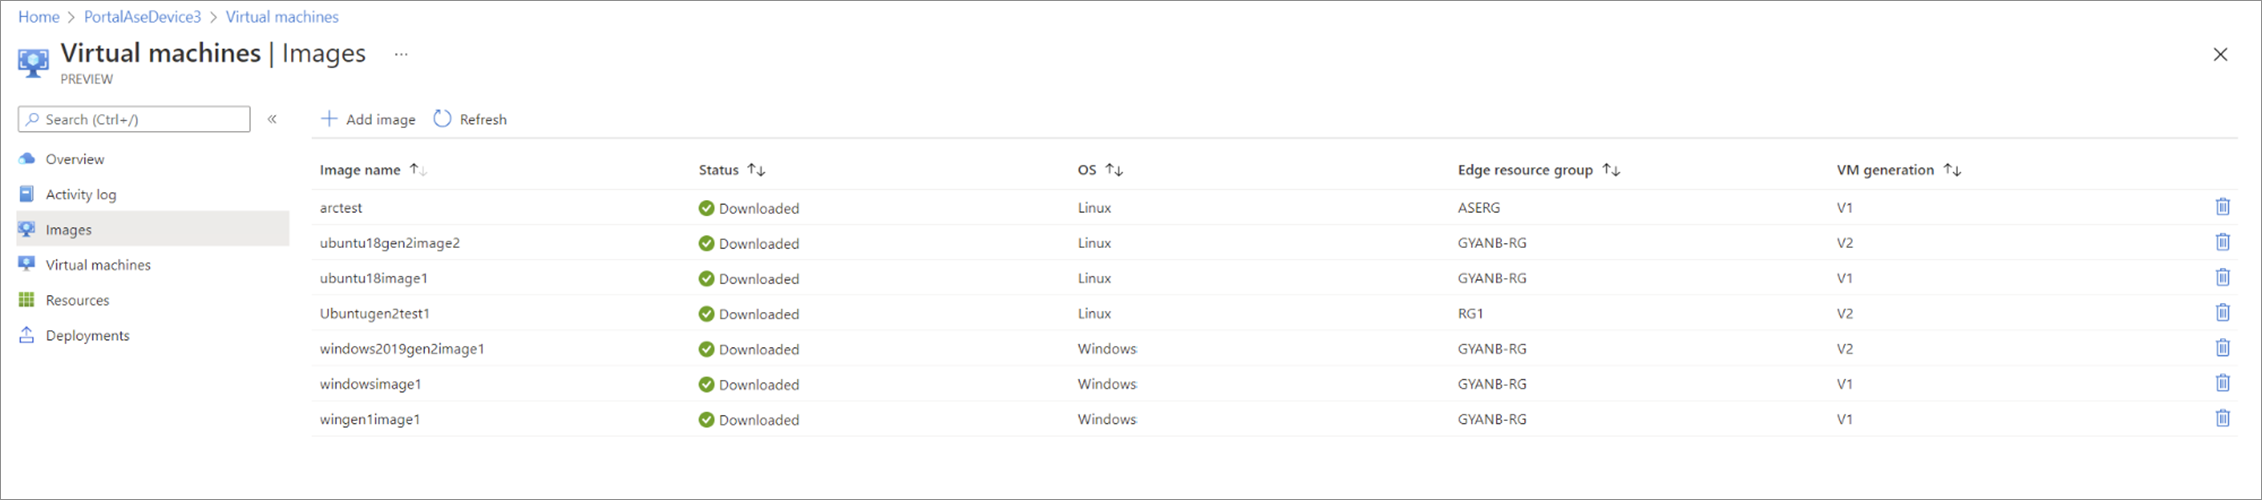
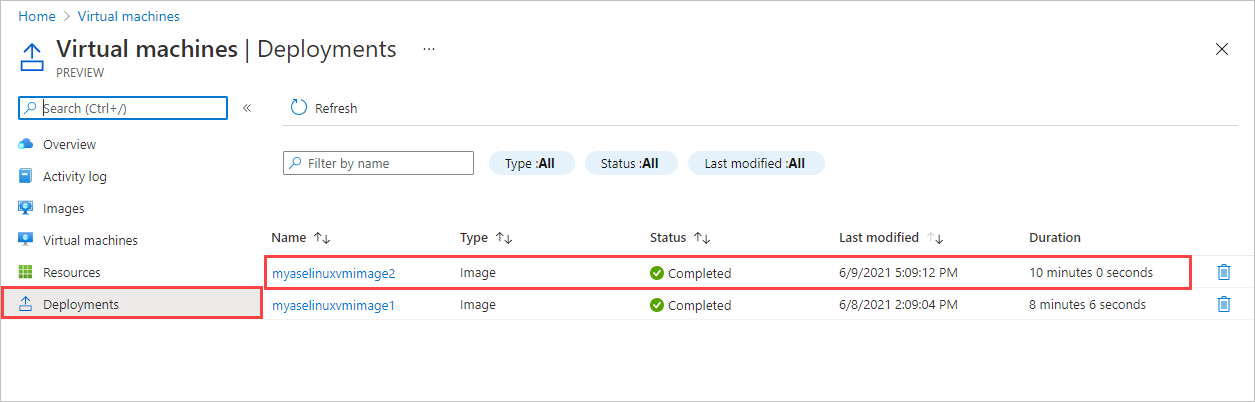
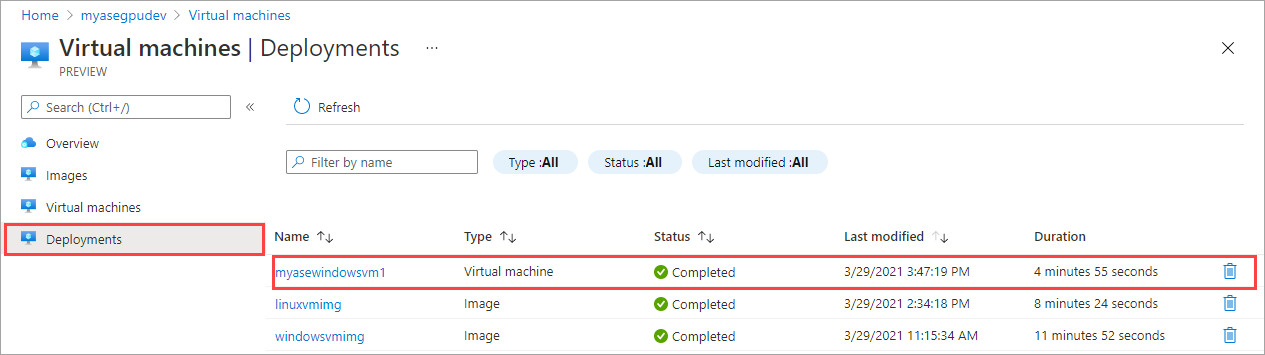
[部署] 窗格會更新以指出部署的狀態。
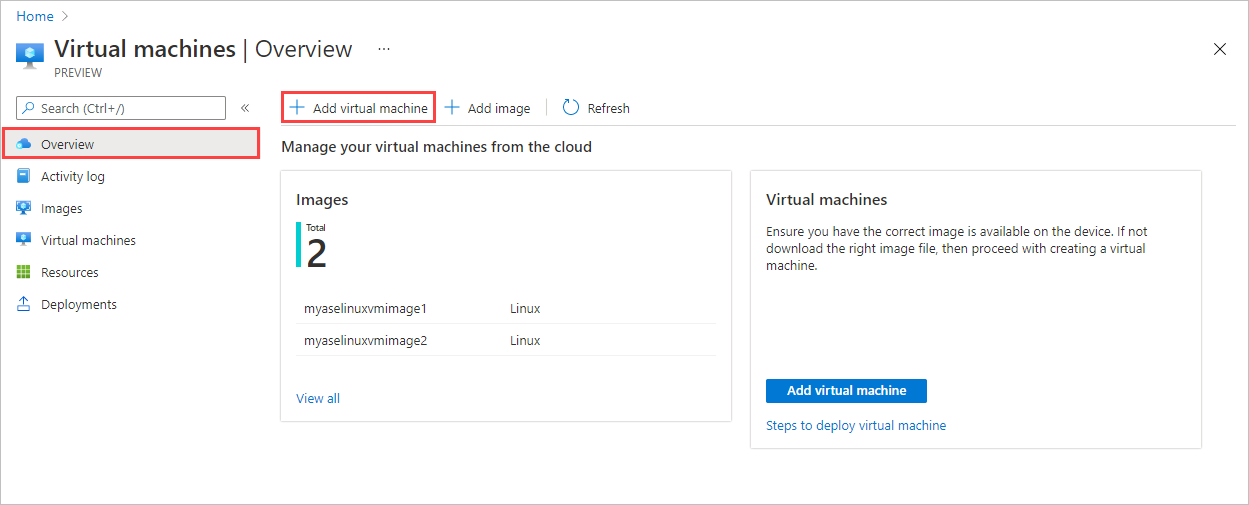
新增的映像也會顯示在 [概觀] 頁面上。

新增 VM
請依照下列步驟,在建立 VM 映像後建立 VM。
在 [虛擬機器] 的 [概觀] 頁面上,選取[+ 新增虛擬機器]。
在 [基本] 索引標籤上,輸入下列參數。
參數 描述 虛擬機器名稱 輸入新虛擬機器的名稱。 Edge 資源群組 為與 VM 相關聯的所有資源建立新的資源群組。 映像 選取裝置上可用的 VM 映像。 大小 選擇支援的 VM 大小。
針對 GPU VM,選取 NCasT4-v3 系列的 VM 大小。使用者名稱 使用管理員的預設使用者名稱 azureuser 登入 VM。 驗證類型 選擇 SSH 公開金鑰或使用者定義的密碼。 SSH 公開金鑰 在選取 [SSH 公開金鑰] 驗證類型時顯示。 貼上 SSH 公開金鑰。 密碼 在選取 [密碼] 驗證類型時顯示。 輸入登入 VM 的密碼。 密碼長度至少必須有 12 個字元,而且符合定義的複雜度需求。 確認密碼 再次輸入密碼。 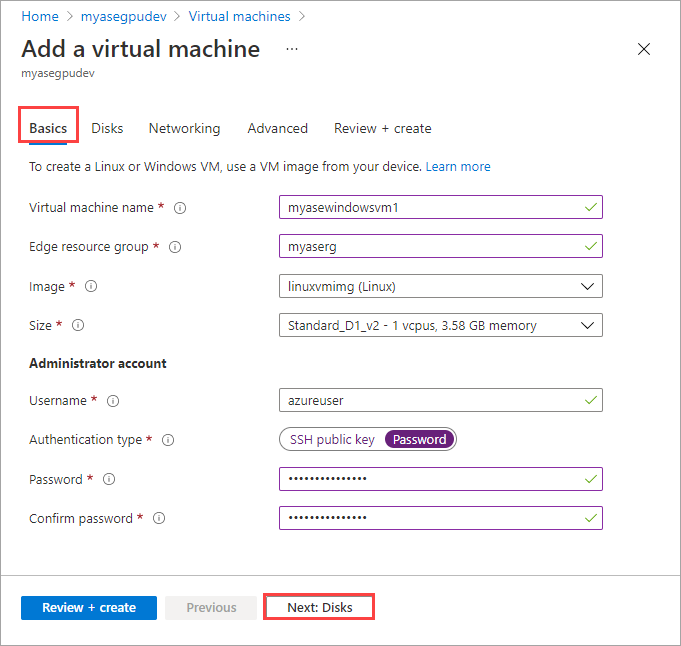
完成時,選取 [下一步: 磁碟]。
在 [磁碟] 索引標籤上,您會將磁碟連結至 VM。
您可以選擇 [建立並連結新磁碟] 或 [連結現有的磁碟]。
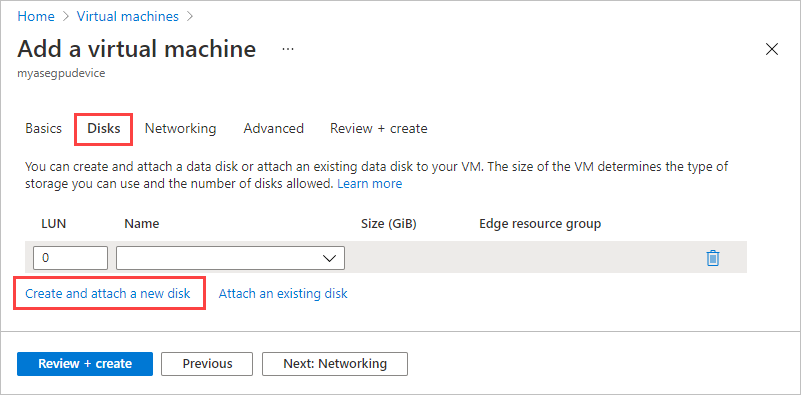
選取 [建立並連結新磁碟]。 在 [建立新磁碟] 窗格上,提供磁碟的名稱和大小 (GiB)。
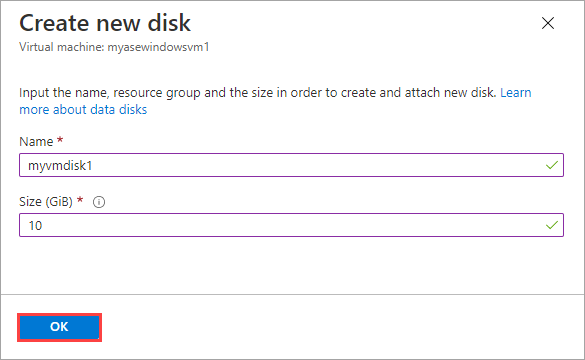
重複上述程序以新增更多磁碟。 磁碟建立後,會顯示在 [磁碟] 索引標籤上。選取 [下一步: 網路功能]。
在 [網路] 索引標籤上,您將設定 VM 的網路連線。
參數 描述 虛擬網路 從下拉式清單中,選取您在網路介面上啟用計算時建立於 Azure Stack Edge 裝置上的虛擬交換器。 子網路 此欄位會自動填入與已啟用計算的網路介面相關聯的子網路。 IP 位址 為您的 VM 提供靜態或動態 IP。 靜態 IP 應為指定子網路範圍內的可用 IP。 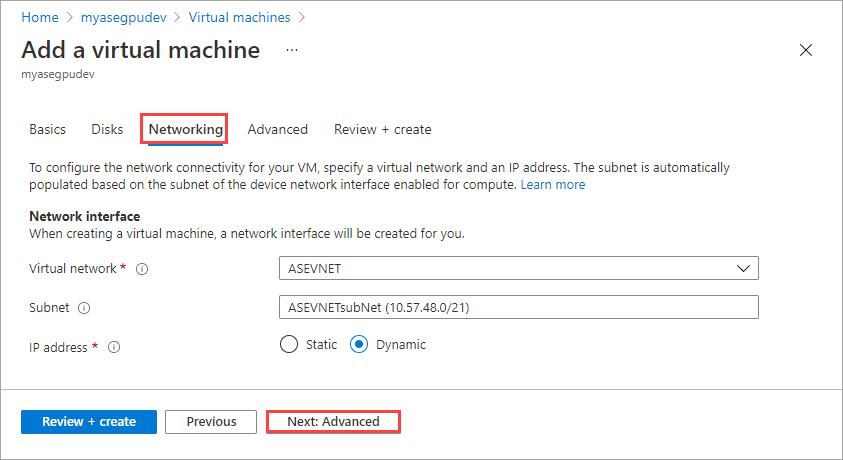
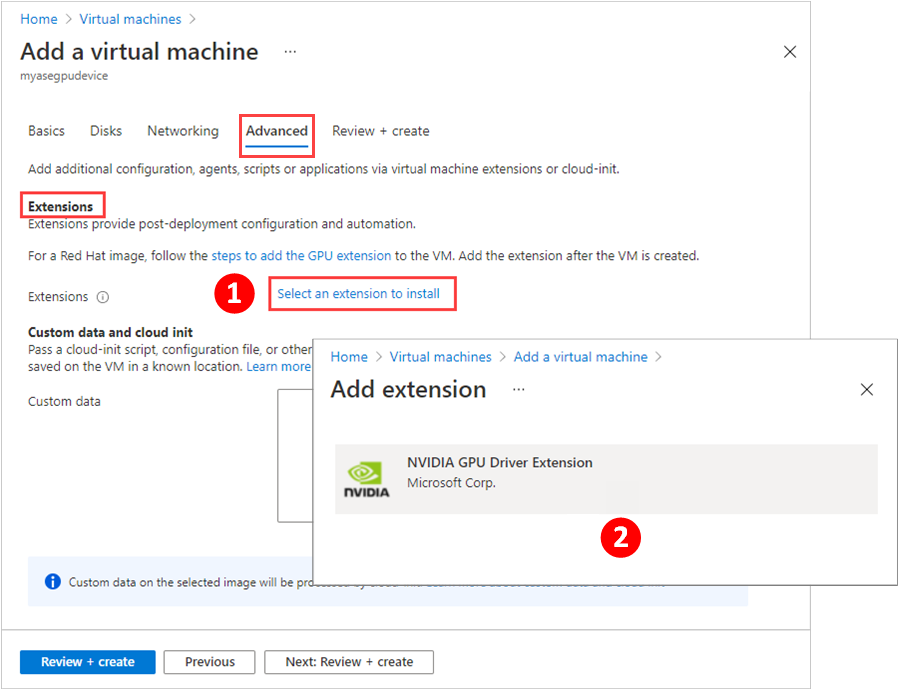
選取 [下一步: 進階]。 在 [進階] 索引標籤上,您可以選取要在 VM 部署期間安裝的延伸模組,也可指定用來自訂 VM 的
cloud-init指令碼。如果您想要在建立 VM 時在其上安裝延伸模組,請選擇 [選取要安裝的延伸模組]。 然後,在 [新增延伸模組] 畫面上選取延伸模組。
如需在 VM 部署期間安裝 GPU 延伸模組的詳細步驟,請參閱部署 GPU VM。
如果您想要使用
cloud-init公用程式在新的 VM 第一次開機時加以自訂,請在 [進階] 索引標籤上,將cloud-init指令碼貼到 [自訂資料和 cloud init] 底下的 [自訂資料] 方塊中。如需關於使用
cloud-init的詳細資訊,請參閱 Cloud-init 概觀。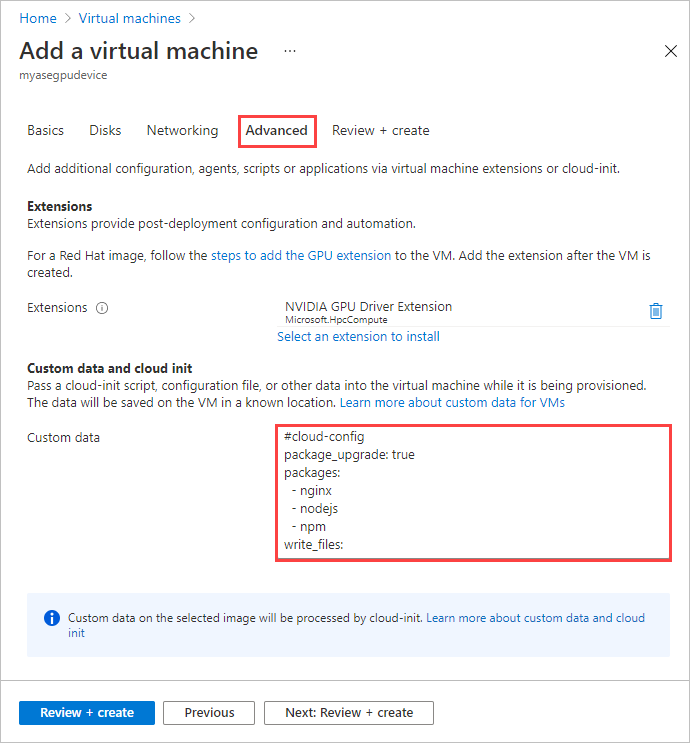
完成時,選取下一步:檢閱 + 建立。
在 [檢閱 + 建立] 索引標籤上,檢閱 VM 的規格。 然後選取建立。
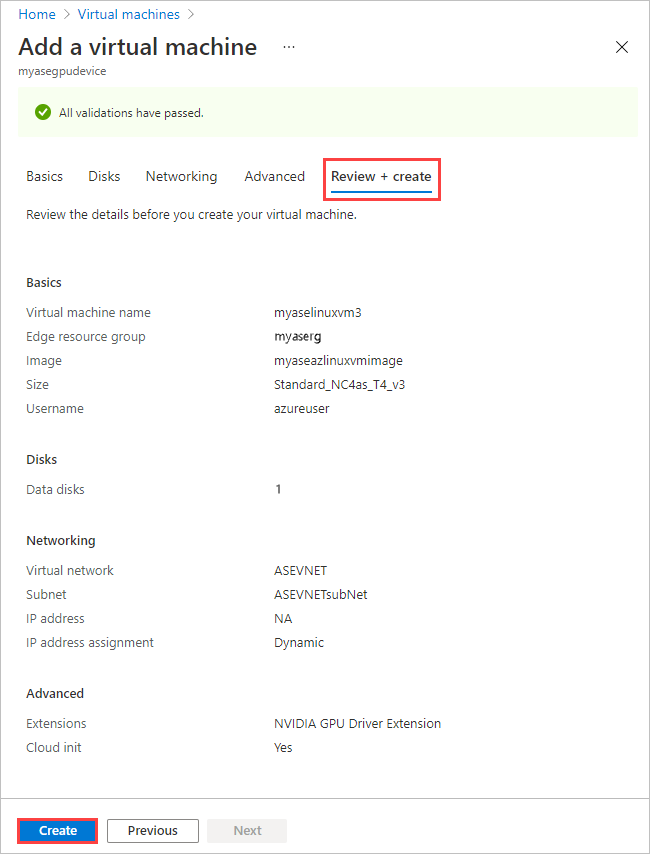
VM 會開始建立,最多可能需要 20 分鐘的時間。 您可以移至 [部署] 以監視 VM 的建立。
VM 成功建立後,您會在 [概觀] 窗格上看到新的 VM。
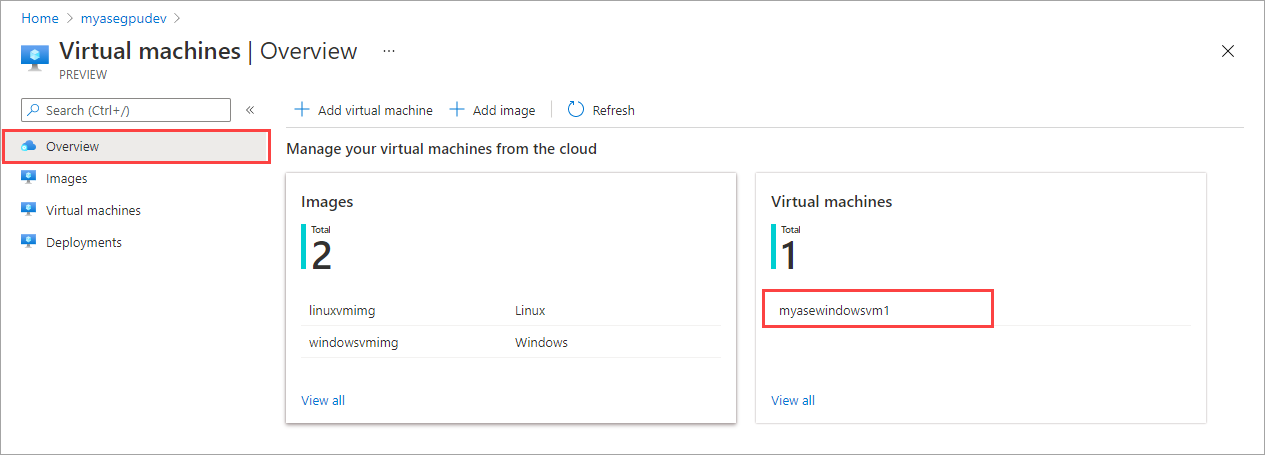
選取新建立的 VM,以移至 [虛擬機器]。
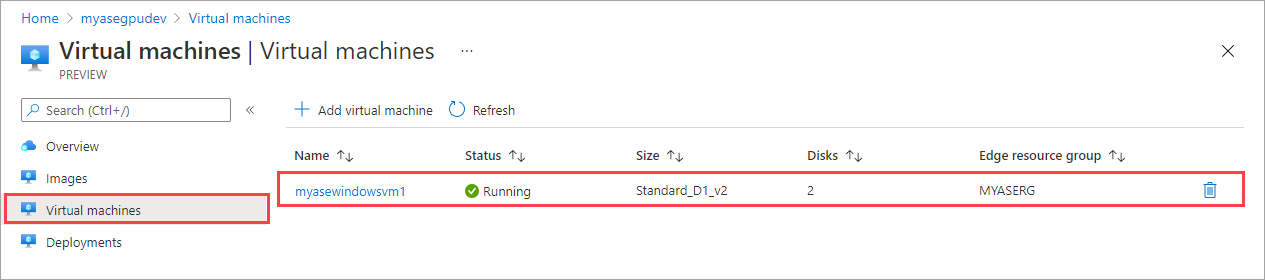
選取 VM 以查看詳細資料。
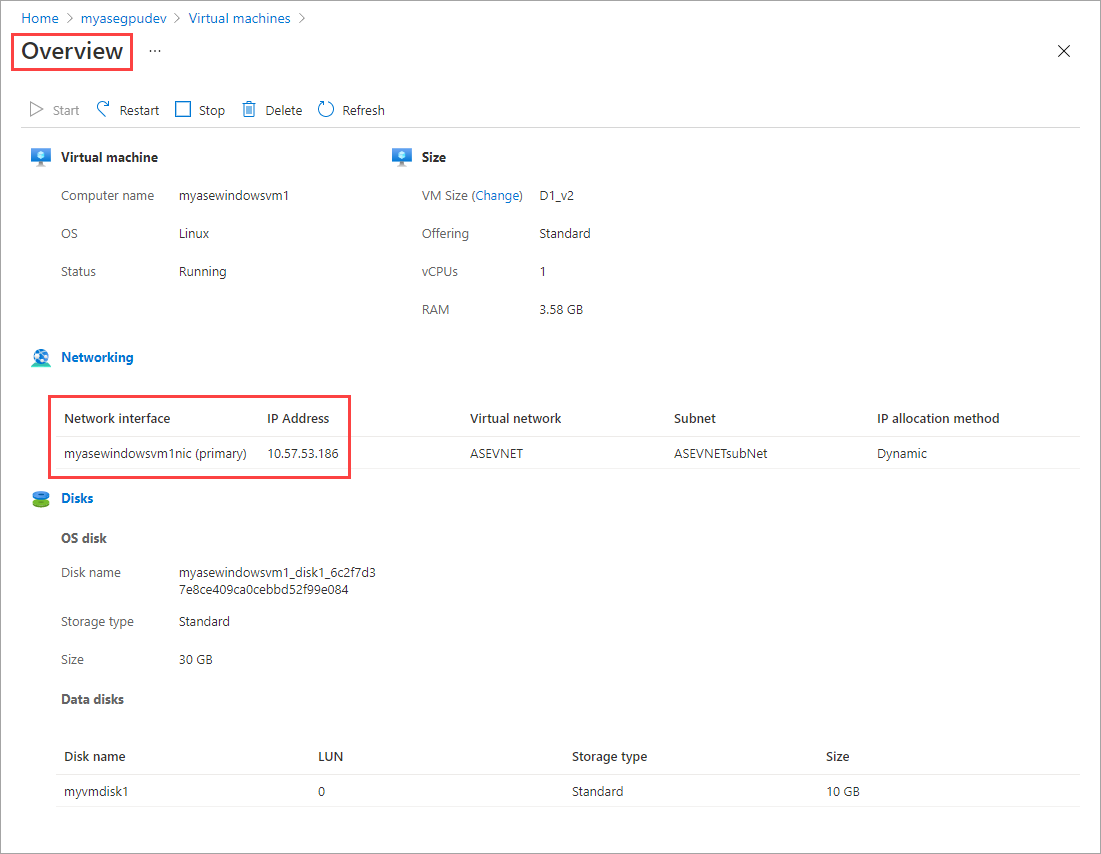
您將使用網路介面的 IP 位址來連線至 VM。
連線至 VM
根據您建立的是 Linux 還是 Windows VM,連線的步驟可能不同。 您無法連線至透過 Azure 入口網站在裝置上部署的 VM。 請依照步驟連線至您的 Linux 或 Windows VM。
連線至 Linux VM (英文)
請遵循下列步驟以連線至 Linux VM。
使用您在建立 VM 時所傳遞的私人 IP 來連線到 VM。
開啟 SSH 工作階段,以使用 IP 位址進行連線。
ssh -l <username> <ip address>在提示出現時,提供您在建立 VM 時所使用的密碼。
如果您需要提供 SSH 金鑰,則請使用此命令。
ssh -i c:/users/Administrator/.ssh/id_rsa Administrator@5.5.41.236以下是您連線至 VM 時的範例輸出:
PS C:\WINDOWS\system32> ssh -l myazuser "10.126.76.60"
The authenticity of host '10.126.76.60 (10.126.76.60)' can't be established.
ECDSA key fingerprint is SHA256:V649Zbo58zAYMKreeP7M6w7Na0Yf9QPg4SM7JZVV0E4.
Are you sure you want to continue connecting (yes/no/[fingerprint])? yes
Warning: Permanently added '10.126.76.60' (ECDSA) to the list of known hosts.
myazuser@10.126.76.60's password:
Welcome to Ubuntu 18.04.2 LTS (GNU/Linux 4.18.0-1013-azure x86_64)

 * Documentation:  https://help.ubuntu.com
 * Management:     https://landscape.canonical.com
 * Support:        https://ubuntu.com/advantage

 System information disabled due to load higher than 1.0

  Get cloud support with Ubuntu Advantage Cloud Guest:
    http://www.ubuntu.com/business/services/cloud

284 packages can be updated.
192 updates are security updates.

The programs included with the Ubuntu system are free software;
the exact distribution terms for each program are described in the
individual files in /usr/share/doc/*/copyright.

Ubuntu comes with ABSOLUTELY NO WARRANTY, to the extent permitted by
applicable law.

To run a command as administrator (user "root"), use "sudo <command>".
See "man sudo_root" for details.

myazuser@myazvmfriendlyname:~$ client_loop: send disconnect: Connection reset
PS C:\WINDOWS\system32>
連線至 Windows VM
請依照下列步驟連線至 Windows VM。
使用遠端桌面通訊協定 (RDP),透過您在 VM 建立期間所傳遞的 IP 連線至您的 Windows VM。
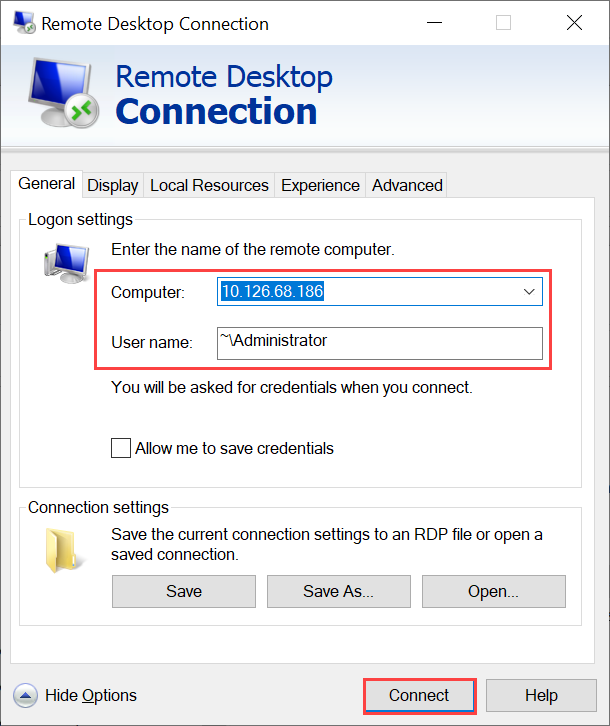
在您的用戶端上,開啟 RDP。
移至 [開始],然後輸入 mstsc。
在 [遠端桌面連線] 窗格上,輸入 VM 的 IP 位址,以及您在 VM 範本參數檔案中所使用的存取認證。 然後選取 [連線]。
注意
您可能需要核准連線至不受信任的機器。
您現在已登入在設備上執行的 VM。
下一步
意見反映
即將推出:我們會在 2024 年淘汰 GitHub 問題,並以全新的意見反應系統取代並作為內容意見反應的渠道。 如需更多資訊,請參閱:https://aka.ms/ContentUserFeedback。
提交及檢視以下的意見反映: