適用於: Azure CLI ml 延伸模組 v2 (目前)Python SDK azure-ai-ml v2 (目前)
了解如何在 Azure Machine Learning 中使用 NVIDIA Triton 推斷伺服器搭配線上端點。
Triton 是針對推斷最佳化的多架構開放原始碼軟體。 它支援熱門的機器學習架構,例如 TensorFlow、ONNX Runtime、PyTorch、NVIDIA TensorRT 等等。 它可用於您的 CPU 或 GPU 工作負載。
將 Triton 模型部署至線上端點時,主要可以採用兩種方法:無程式碼部署或完整程式碼 (攜帶您自己的容器) 部署。
- Triton 模型的無程式碼部署是簡單的部署方式,因為部署時只需要 Triton 模型。
- 針對 Triton 模型進行完整程式碼部署 (自備容器) 是更進階的部署方式,因為您可以完全控制自訂 Triton 推斷伺服器可用的組態。
在這兩個選項中,Triton 推斷伺服器會根據 NVIDIA 定義的Triton 模型 來執行推斷。 例如,集團模型 可用於更進階的案例。
受控線上端點和 Kubernetes 在線端點 都支援 Triton。
在本文中,您將瞭解如何使用適用於 Triton 的無程式碼部署將模型部署到 受控線上端點。 同時使用 CLI (命令列)、Python SDK v2 和 Azure Machine Learning 工作室提供資訊。 如果您想要使用 Triton 推斷伺服器的組態進一步自訂,請參閱 使用自訂容器來部署模型 和 Triton 的 BYOC 範例 (部署定義 和 端對端指令碼)。
先決條件
pip install numpy
pip install tritonclient[http]
pip install pillow
pip install gevent
NVIDIA Triton 推斷伺服器需要特定的模型存放庫結構,其中的每個模型都有一個目錄,以及子目錄為模型版本。 每個模型版本子目錄的內容取決於模型的類型和支援該模型的後端需求。 若要查看所有模型存放庫結構 https://github.com/triton-inference-server/server/blob/main/docs/user_guide/model_repository.md#model-files
此文件中的資訊是以使用 ONNX 格式儲存的模型為基礎,因此模型存放庫的目錄結構是 <model-repository>/<model-name>/1/model.onnx。 具體而言,此模型會執行影像識別。
本文中的資訊是以 azureml-examples 存放庫中包含的程式碼範例為基礎。 若要在本機執行命令,而不需要複製/貼上 YAML 和其他檔案,請複製存放庫,然後將目錄變更為存放庫中的 cli 目錄:
git clone https://github.com/Azure/azureml-examples --depth 1
cd azureml-examples
cd cli
如果您尚未設定 Azure CLI 的預設值,請儲存您的預設設定。 若要避免多次傳遞訂閱、工作區和資源群組的值,請使用下列命令。 將下列參數取代為特定設定值:
- 使用您的 Azure 訂用帳戶識別碼來取代
<subscription> 。
- 將您的 Azure Machine Learning 工作區名稱取代為
<workspace>。
- 將
<resource-group> 取代為包含您工作區的 Azure 資源群組。
- 將
<location> 取代為包含您工作區的 Azure 區域。
秘訣
您可以使用 az configure -l 命令來查看目前的預設值。
az account set --subscription <subscription>
az configure --defaults workspace=<workspace> group=<resource-group> location=<location>
適用於:Python SDK azure-ai-ml v2 (目前)
Azure Machine Learning 工作區。 如需建立工作區的步驟,請參閱 建立工作區。
適用於 Python v2 的 Azure Machine Learning SDK。 若要安裝 SDK,請使用下列命令:
pip install azure-ai-ml azure-identity
若要將現有的 SDK 安裝更新為最新版本,請使用下列命令:
pip install --upgrade azure-ai-ml azure-identity
如需詳細資訊,請參閱 適用於 Python 的 Azure Machine Learning 套件用戶端連結庫。
正常運作的 Python 3.8 (或以上版本) 環境。
您必須安裝額外的 Python 套件以進行評分,而且可以使用下列程式碼加以安裝。 其中包括:
pip install numpy
pip install tritonclient[http]
pip install pillow
pip install gevent
您 Azure 訂用帳戶的 NCv3 系列 VM 的存取權。
重要事項
您可能需要要求增加訂用帳戶的配額,才能使用這一系列的 VM。 如需詳細資訊,請參閱 NCv3 系列。
本文中的資訊是以 azureml-examples 存放庫中包含的 online-endpoints-triton.ipynb 筆記本為基礎。 若要在本機執行命令,而不需要複製/貼上檔案,請複製存放庫,然後將目錄變更為存放庫中的 sdk/endpoints/online/triton/single-model/ 目錄:
git clone https://github.com/Azure/azureml-examples --depth 1
cd azureml-examples/sdk/python/endpoints/online/triton/single-model/
定義部署設定
適用於:Azure CLI ml 延伸模組 v2 (目前)
本節說明如何使用 Azure CLI 搭配機器學習擴充功能 (v2) 部署至受控線上端點。
若要避免輸入多個命令的路徑,請使用下列命令來設定 BASE_PATH 環境變數。 此變數會指向模型和相關聯的 YAML 設定檔所在的目錄:
BASE_PATH=endpoints/online/triton/single-model
使用下列命令來設定即將建立的端點的名稱。 在此範例中,會為端點建立隨機名稱:
export ENDPOINT_NAME=triton-single-endpt-`echo $RANDOM`
為您的端點建立 YAML 設定檔。 下列範例會設定端點的名稱和驗證模式。 下列命令中使用的是位於您稍早複製的 azureml-examples 存放庫中的 /cli/endpoints/online/triton/single-model/create-managed-endpoint.yml:
create-managed-endpoint.yaml
$schema: https://azuremlschemas.azureedge.net/latest/managedOnlineEndpoint.schema.json
name: my-endpoint
auth_mode: aml_token
建立用於部署的 YAML 設定檔。 下列範例會將名為 blue 的部署設定為上一個步驟中定義的端點。 下列命令中使用的是位於您稍早複製的 azureml-examples 存放庫中的 /cli/endpoints/online/triton/single-model/create-managed-deployment.yml:
重要事項
若要讓 Triton 無程式碼部署 (NCD) 運作,需要將 type 設定為 triton_model,type: triton_model。 如需詳細資訊,請參閱 CLI (v2) 模型 YAML 結構描述。
此部署會使用 Standard_NC6s_v3 VM。 您可能需要要求增加訂用帳戶的配額,才能使用此 VM。 如需詳細資訊,請參閱 NCv3 系列。
$schema: https://azuremlschemas.azureedge.net/latest/managedOnlineDeployment.schema.json
name: blue
endpoint_name: my-endpoint
model:
  name: sample-densenet-onnx-model
  version: 1
  path: ./models
  type: triton_model
instance_count: 1
instance_type: STANDARD_NC4AS_T4_V3
適用於:Python SDK azure-ai-ml v2 (目前)
本節說明如何定義 Triton 部署,使用 Azure Machine Learning Python SDK (v2) 部署至受控線上端點。
若要連線到工作區,我們需要識別碼參數:訂用帳戶、資源群組和工作區名稱。
subscription_id = "<SUBSCRIPTION_ID>"
resource_group = "<RESOURCE_GROUP>"
workspace_name = "<AML_WORKSPACE_NAME>"
使用下列命令來設定即將建立的端點的名稱。 在此範例中,會為端點建立隨機名稱:
import random

endpoint_name = f"endpoint-{random.randint(0, 10000)}"
我們使用來自 MLClient 中 azure.ai.ml 的上述詳細資料,以掌握所需的 Azure Machine Learning 工作區。 如需如何設定認證並連線至工作區的詳細資料,請參閱設定筆記本 (英文)。
from azure.ai.ml import MLClient
from azure.identity import DefaultAzureCredential

ml_client = MLClient(
    DefaultAzureCredential(),
    subscription_id,
    resource_group,
    workspace_name,
)
建立 ManagedOnlineEndpoint 物件以設定端點。 下列範例會設定端點的名稱和驗證模式。
from azure.ai.ml.entities import ManagedOnlineEndpoint

endpoint = ManagedOnlineEndpoint(name=endpoint_name, auth_mode="key")
建立 ManagedOnlineDeployment 物件以設定部署。 下列範例會將名為 blue 的部署設定為上一個步驟中定義的端點,並定義本機模型內嵌項目。
from azure.ai.ml.entities import ManagedOnlineDeployment, Model

model_name = "densenet-onnx-model"
model_version = 1

deployment = ManagedOnlineDeployment(
    name="blue",
    endpoint_name=endpoint_name,
    model=Model(
        name=model_name,
        version=model_version,
        path="./models",
        type="triton_model"
    ),
    instance_type="Standard_NC6s_v3",
    instance_count=1,
)
本節說明如何使用 Azure Machine Learning 工作室在受控線上端點定義 Triton 部署。
使用下列 YAML 和 CLI 命令,以 Triton 格式註冊您的模型。 YAML 使用來自 https://github.com/Azure/azureml-examples/tree/main/cli/endpoints/online/triton/single-model 的 ensenet-onnx 模型
create-triton-model.yaml
name: densenet-onnx-model
version: 1
path: ./models
type: triton_model
description: Registering my Triton format model.
az ml model create -f create-triton-model.yaml
下列螢幕擷取畫面顯示您註冊的模型在 Azure Machine Learning 工作室的模型頁面上的外觀。
![顯示 [模型] 頁面上 Triton 模型格式的螢幕擷取畫面。](media/how-to-deploy-with-triton/triton-model-format.png?view=azureml-api-2)
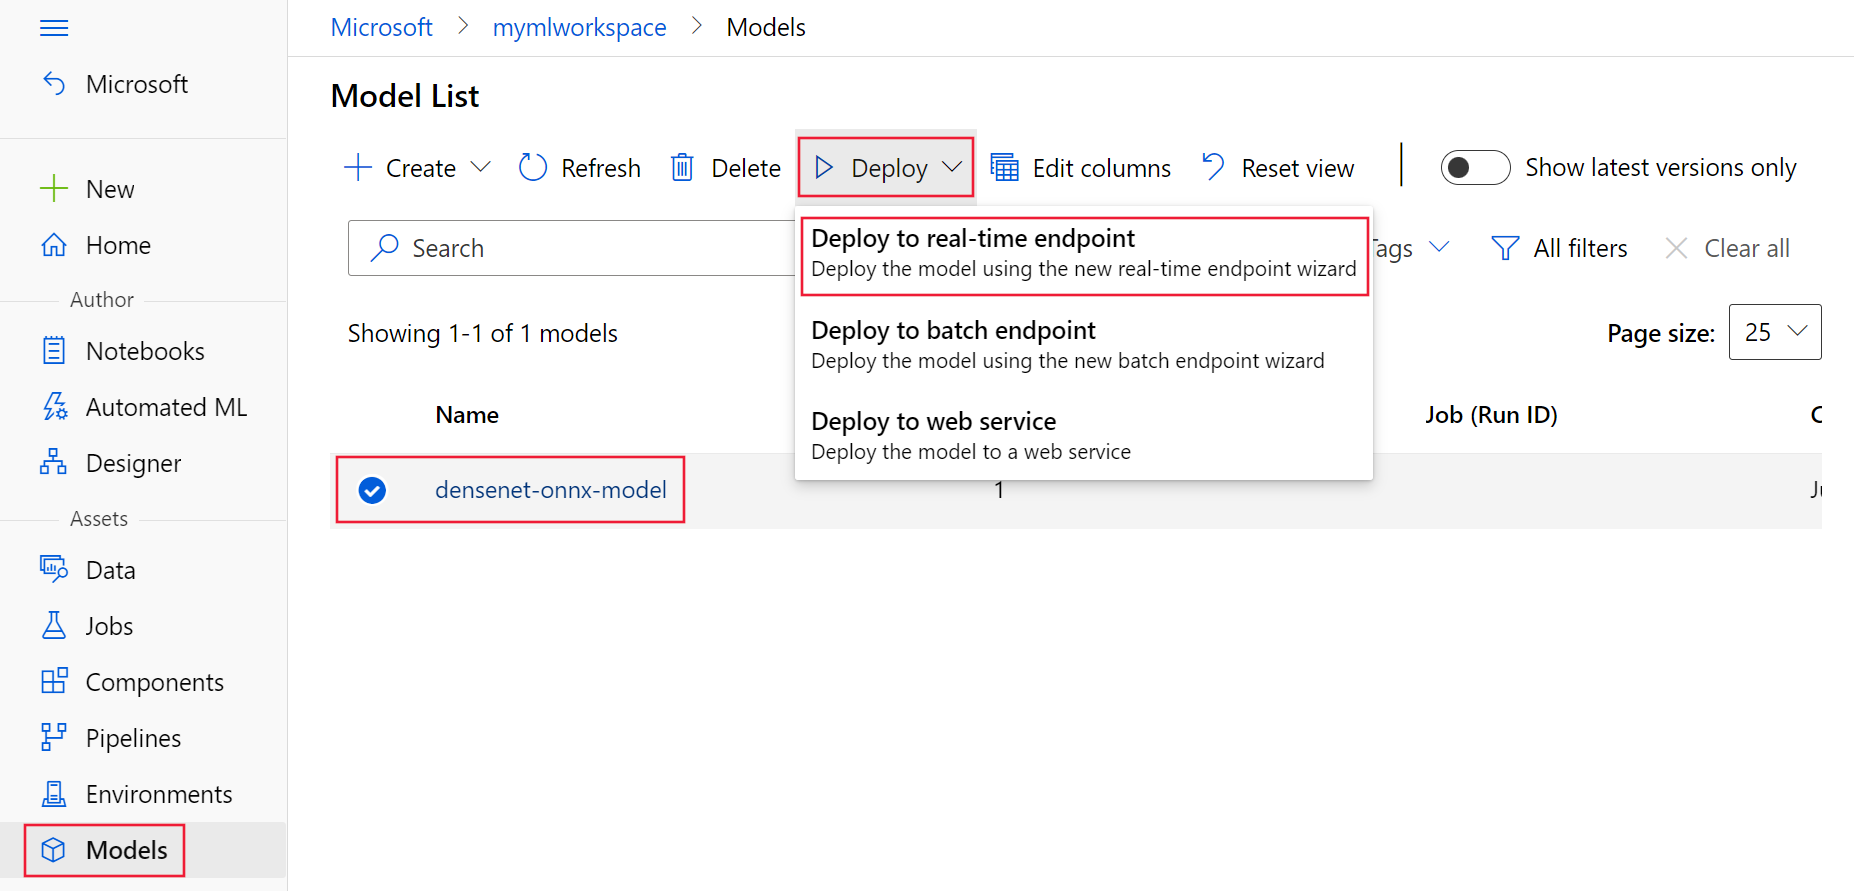
從工作室選取您的工作區,然後使用 [端點] 或 [模型] 頁面,以建立端點部署:
從 [端點] 頁面,選取 [建立]。
![顯示 [端點 UI] 頁面上建立選項的螢幕擷取畫面。](media/how-to-deploy-with-triton/create-option-from-endpoints-page.png?view=azureml-api-2)
提供端點的名稱和驗證類型,然後選取 [下一步]。
選取模型時,請選取先前註冊的 Triton 模型。 選取 [下一步] 以繼續操作。
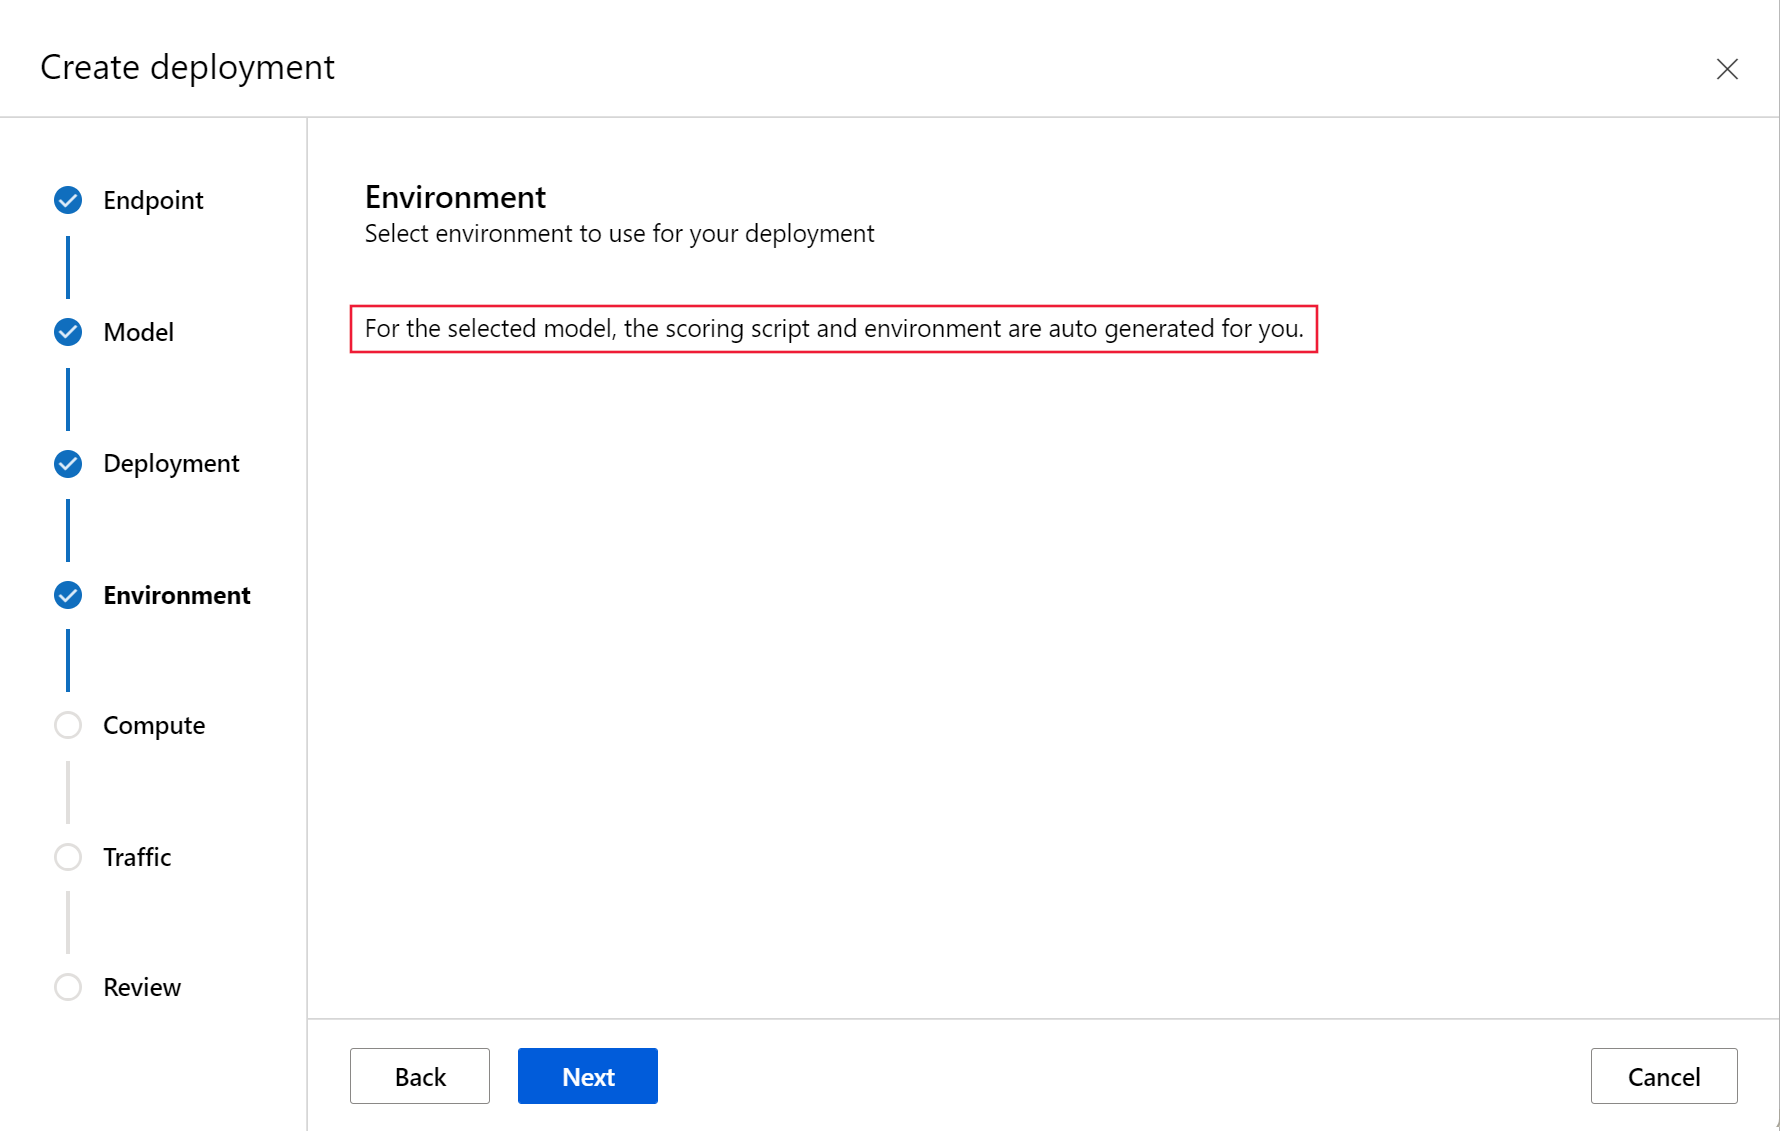
當您選取以 Triton 格式註冊的模型時,在精靈的 [環境] 步驟中,您不需要評分指令碼和環境。
選取 Triton 模型,然後選取 [部署]。 出現提示時,請選取 [部署到即時端點]。
部署至 Azure
適用於:Azure CLI ml 延伸模組 v2 (目前)
若要使用 YAML 設定來建立新端點,請使用下列命令:
az ml online-endpoint create -n $ENDPOINT_NAME -f $BASE_PATH/create-managed-endpoint.yaml
若要使用 YAML 設定來建立部署,請使用下列命令:
az ml online-deployment create --name blue --endpoint $ENDPOINT_NAME -f $BASE_PATH/create-managed-deployment.yaml --all-traffic
適用於:Python SDK azure-ai-ml v2 (目前)
若要使用 ManagedOnlineEndpoint 物件來建立新端點,請使用下列命令:
endpoint = ml_client.online_endpoints.begin_create_or_update(endpoint)
若要使用 ManagedOnlineDeployment 物件來建立部署,請使用下列命令:
ml_client.online_deployments.begin_create_or_update(deployment)
部署完成後,其流量值將會設定為 0%。 將流量更新為 100%。
endpoint.traffic = {"blue": 100}
ml_client.online_endpoints.begin_create_or_update(endpoint)
完成精靈以部署至端點。
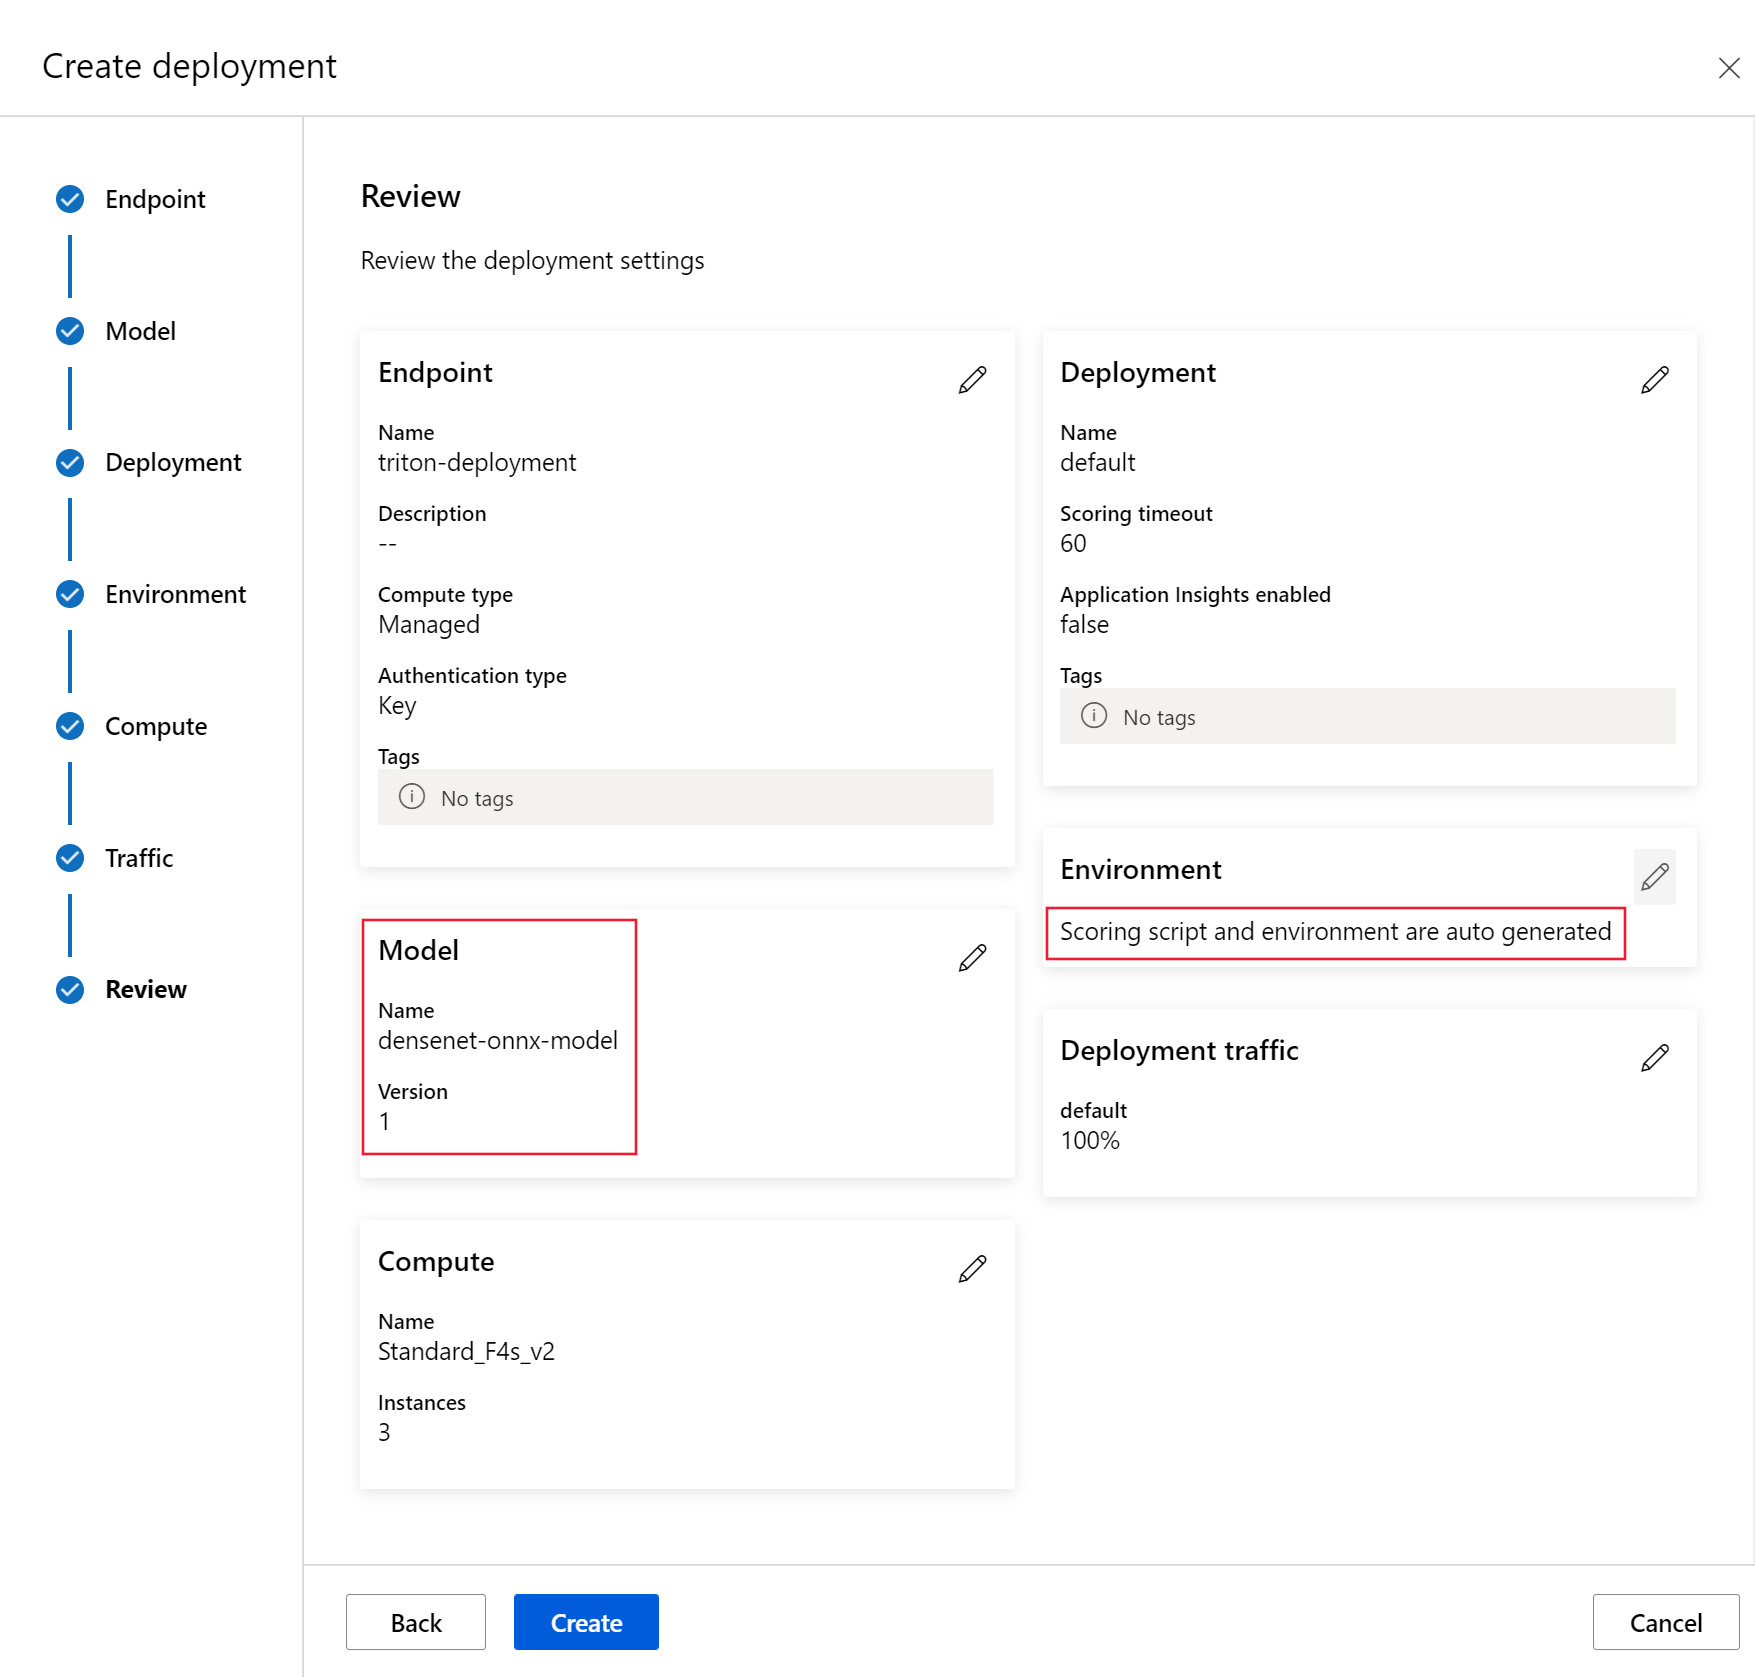
部署完成後,其流量值將會設定為 0%。 按一下第二個功能表列上的 Update Traffic,從 [端點] 頁面將流量更新為 100%。
測試端點
適用於:Azure CLI ml 延伸模組 v2 (目前)
部署完成後,請使用下列命令對已部署的端點提出評分要求。
秘訣
azureml-examples 存放庫中的檔案 /cli/endpoints/online/triton/single-model/triton_densenet_scoring.py 會用於評分。 傳遞至端點的影像需要預先處理,以符合大小、類型和格式需求,以及需要後置處理以顯示預測的標籤。
triton_densenet_scoring.py 會使用 tritonclient.http 程式庫來與 Triton 推斷伺服器進行通訊。 此檔案會在用戶端執行。
若要取得端點評分 uri,請使用下列命令:
scoring_uri=$(az ml online-endpoint show -n $ENDPOINT_NAME --query scoring_uri -o tsv)
scoring_uri=${scoring_uri%/*}
若要取得驗證金鑰,請使用下列命令:
auth_token=$(az ml online-endpoint get-credentials -n $ENDPOINT_NAME --query accessToken -o tsv)
若要使用端點對資料進行評分,請使用下列命令。 它會將孔雀 (https://aka.ms/peacock-pic) 的影像提交至端點:
python $BASE_PATH/triton_densenet_scoring.py --base_url=$scoring_uri --token=$auth_token --image_path $BASE_PATH/data/peacock.jpg
指令碼的回應類似於下列文字:
Is server ready - True
Is model ready - True
/azureml-examples/cli/endpoints/online/triton/single-model/densenet_labels.txt
84 : PEACOCK
適用於:Python SDK azure-ai-ml v2 (目前)
若要取得端點評分 uri,請使用下列命令:
endpoint = ml_client.online_endpoints.get(endpoint_name)
scoring_uri = endpoint.scoring_uri
若要取得驗證金鑰,請使用下列命令:keys = ml_client.online_endpoints.list_keys(endpoint_name) auth_key = keys.primary_key
下列評分程式碼會使用 Triton Inference Server Client 將孔雀的影像提交至端點。 此指令碼可在此範例的隨付筆記本中使用 - 使用 Triton 將模型部署置線上端點。
# Test the blue deployment with some sample data
import requests
import gevent.ssl
import numpy as np
import tritonclient.http as tritonhttpclient
from pathlib import Path
import prepost

img_uri = "http://aka.ms/peacock-pic"

# We remove the scheme from the url
url = scoring_uri[8:]

# Initialize client handler
triton_client = tritonhttpclient.InferenceServerClient(
    url=url,
    ssl=True,
    ssl_context_factory=gevent.ssl._create_default_https_context,
)

# Create headers
headers = {}
headers["Authorization"] = f"Bearer {auth_key}"

# Check status of triton server
health_ctx = triton_client.is_server_ready(headers=headers)
print("Is server ready - {}".format(health_ctx))

# Check status of model
model_name = "model_1"
status_ctx = triton_client.is_model_ready(model_name, "1", headers)
print("Is model ready - {}".format(status_ctx))

if Path(img_uri).exists():
    img_content = open(img_uri, "rb").read()
else:
    agent = f"Python Requests/{requests.__version__} (https://github.com/Azure/azureml-examples)"
    img_content = requests.get(img_uri, headers={"User-Agent": agent}).content

img_data = prepost.preprocess(img_content)

# Populate inputs and outputs
input = tritonhttpclient.InferInput("data_0", img_data.shape, "FP32")
input.set_data_from_numpy(img_data)
inputs = [input]
output = tritonhttpclient.InferRequestedOutput("fc6_1")
outputs = [output]

result = triton_client.infer(model_name, inputs, outputs=outputs, headers=headers)
max_label = np.argmax(result.as_numpy("fc6_1"))
label_name = prepost.postprocess(max_label)
print(label_name)
指令碼的回應類似於下列文字:
Is server ready - True
Is model ready - True
/azureml-examples/sdk/endpoints/online/triton/single-model/densenet_labels.txt
84 : PEACOCK
Triton 推斷伺服器需要使用 Triton 用戶端才能推斷,Triton 推斷伺服器支援 tensor 型輸入。 Azure Machine Learning 工作室目前不支援這項功能。 請改用 CLI 或 SDK,透過 Triton 叫用端點。
刪除端點和模型
適用於:Azure CLI ml 延伸模組 v2 (目前)
完成端點之後,請使用下列命令將它刪除:
az ml online-endpoint delete -n $ENDPOINT_NAME --yes
使用下列命令封存您的模型:
az ml model archive --name $MODEL_NAME --version $MODEL_VERSION
適用於:Python SDK azure-ai-ml v2 (目前)
刪除端點。 刪除端點也會刪除任何子部署,但不會封存相關聯的環境或模型。
ml_client.online_endpoints.begin_delete(name=endpoint_name)
使用下列程式碼封存模型。
ml_client.models.archive(name=model_name, version=model_version)
進入端點的頁面,按一下端點名稱下方第二個資料列的 Delete。
進入模型的頁面,按一下模型名稱下方第一個資料列的 Delete。
後續步驟
若要深入了解,請檢閱下列文章:
![顯示 [模型] 頁面上 Triton 模型格式的螢幕擷取畫面。](media/how-to-deploy-with-triton/triton-model-format.png?view=azureml-api-2#lightbox)
![顯示 [端點 UI] 頁面上建立選項的螢幕擷取畫面。](media/how-to-deploy-with-triton/create-option-from-endpoints-page.png?view=azureml-api-2#lightbox)


