Add a copilot to Microsoft Teams
Important
Power Virtual Agents capabilities and features are now part of Microsoft Copilot Studio following significant investments in generative AI and enhanced integrations across Microsoft Copilot.
Some articles and screenshots may refer to Power Virtual Agents while we update documentation and training content.
With your copilot published, you can make your copilot available to users in Teams. This way you, your teammates, and your broader organization can interact with it. You must publish the copilot at least once before users can interact with the copilot in Teams.
You can:
- Customize your copilot's appearance in Teams
- Install the copilot for yourself in Teams
- Share the copilot's installation link with other users
- Show the copilot in the Teams app store.
- Show the copilot to shared users by adding it to the Teams app store Copilot extensions section.
- Share the copilot with the organization by submitting the copilot for admin approval to be featured in the Built for your org section of the Teams app store.
- Add the copilot to a team channel.
- Download the app manifest for your copilot to distribute it within your Teams tenant.
When you add a copilot to Teams, some of your data, such as copilot content and end-user chat content, is shared with Teams. Your data might flow outside of your organization's compliance and geographic or regional boundaries. For more information, see Understand the permissions of and the information accessed by Teams apps.
Prerequisites
- Share your copilot with other users so they can install and chat with the copilot in Teams.
- Your organization must allow Microsoft Power Platform apps to be added to Teams before you or other users can directly install a copilot in Teams or find it in the Copilot extensions section in the Teams app store. Work with your admin to Manage Microsoft Power Platform apps in the Microsoft Teams admin center if it's disabled for your organization.
- Copilots that appear in the Built for your organization section (approved by an admin) are managed separately by admins in the Teams admin center's Manage apps page.
- Before installing a copilot for yourself or sharing it with others, you should publish the copilot at least once.
Connect a copilot to the Microsoft Teams channel
After publishing your copilot at least once, you can connect it to the Microsoft Teams channel to allow users to chat with it in Teams.
Note
We recommend you turn on security settings for copilots built for Teams or internal employee use, to prevent individuals outside of your organization from using these copilots.
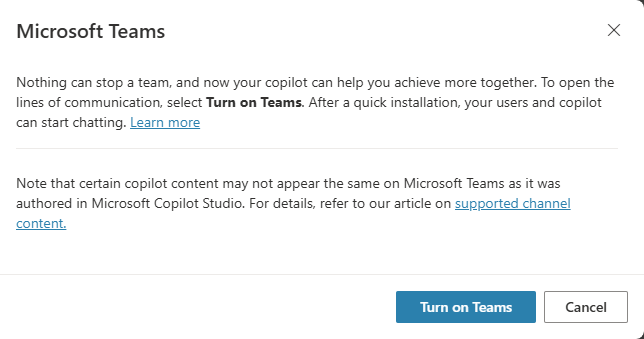
Open the configuration panel for the Microsoft Teams channel.
Select Turn on Teams.
Note
If you do not see this option, the Microsoft Teams channel is already enabled.
Customize the appearance of a copilot for Teams
Providing the right description and appearance for a copilot before making it available to other users is important as it informs them on the copilot's purpose and branding, when applicable.
Open the configuration panel for the Microsoft Teams channel.
Select Edit details to change the copilot's icon, color, and descriptions. These attributes are visible in the Teams app store and on the app's About tab after the user installs the copilot. Review the app icon format guidelines for Teams.
Important
Changes to a copilot's details aren't available to users who have already installed the copilot from a shared link or from the Copilot extensions section of the Teams app store. Users must reinstall the copilot to obtain the updates.
For copilots that have been approved by an admin, you must resubmit the copilot for approval.
Select More to add the following information:
- Developer name
- Website
- Privacy statement
- Terms of use
You should provide this information to inform the users about your copilot. For more information, see Privacy statement and terms of use.
Select Save. Your changes to the color, icon, and short description are now visible on the configuration panel.
Note
Icon customization in this section only applies to the copilot avatar for copilots that are approved by admin and does not apply for users who install the copilot with a direct installation link or from the Teams app store Copilot extensions section. You can customize the copilot avatar at Customize the look and feel of the copilot.
Install a copilot as an app in Teams
With your copilot published, you can add the copilot to your own Teams profile directly from Copilot Studio.
Important
New content in a freshly published copilot won't appear in conversations that are currently ongoing.
You can type "Start over" in an existing conversation to start a new conversation right away and see the latest updates to the copilot.
We recommend adding your copilot to your own profile in Teams first, before sharing it with others.
Open the configuration panel for the Microsoft Teams channel.
Select Open copilot to have the installation prompt launch in Teams. Select Add to add it as an app in Teams. This operation only installs the copilot for you.
Share a link so others can install a copilot
Open the configuration panel for the Microsoft Teams channel.
Select Availability options.
Select Copy link.
Share the link with users so they can install the copilot in Teams.
Important
Only users who can access the copilot can use the installation link to install the copilot. You can share the copilot to give users access to the copilot.
Show a copilot in the Teams app store
Once you publish your copilot, you can show it in the Teams app store so users can find and install it.
Show to shared users
You can share your copilot by adding it to the Copilot extensions section of the Teams app store. Only shared users can find the copilot there.
Important
Only shared users can find and install the copilot in the Copilot extensions section of the Teams app store. The copilot does not show for everyone in the organization even if it is configured to allow everyone to use the copilot. To show the copilot to the organization, submit the copilot for an admin's approval to show it in the Built for your org section of the Teams app store.
A copilot can only appear in the Copilot extensions section of the Teams app store if the total number of shared users doesn't exceed the limits imposed by the Teams app store discovery policy for your tenant. To make your copilot available to a larger number of users, partner with your admin to show the copilot to the organization.
Open the configuration panel for the Microsoft Teams channel.
Select Availability options.
Select Show to my teammates and review who has access to the copilot.
Confirm the Visible in Copilot extensions checkbox is selected and select Share.
Your copilot becomes available in the Copilot extensions section of the Teams app store, and a green Added to Teams label appears in the availability options page.
Note
If your app doesn't appear in the Copilot extensions section, your Teams app might be caching information.
Try signing out and back in (if you're using the Teams desktop app) or refreshing your browser (if you're using the Teams web app).
Remove a copilot from the Copilot extensions section
You can remove a copilot from the Copilot extensions section. Removing the copilot from there doesn't affect users with the copilot installed.
Open the configuration panel for the Microsoft Teams channel.
Select Availability options.
Select Show to my teammates and clear the Visible in Copilot extensions checkbox.
Select Share. The copilot no longer appears in the Copilot extensions section of the Teams app store.
Show to the organization
You can share a copilot with your organization by submitting it for admin approval to be featured in the Built for your org section of the Teams app store. Featuring your app in Built for your org is a great way to broadly distribute your copilot by partnering with your admin to roll it out to everyone in the organization or to a subset of users.
Admins can also use app setup policies to automatically install and pin a copilot for users in the organization so they can access it directly from their app bar in Teams.
Before submitting a copilot to your organization, make sure that:
- Your copilot is ready for release and in compliance with company standards, rules, and policies.
- You coordinate with other copilot managers. Once you submit a copilot, a different user can't resubmit it until an admin approves or rejects the previous submission.
- You remove the copilot, if applicable, from the Copilot extensions section of the Teams app store. Otherwise if you submit your copilot for admin approval it could end up showing up in two places.
Note
Once a copilot is approved by an admin, the copilot availability in the Built for your org section is managed by your admin. Only an admin can remove the copilot from the Built for your org section.
Submit a copilot for the Built for your org section
Open the configuration panel for the Microsoft Teams channel.
Select Availability options.
Confirm the copilot isn't shown to teammates or shared users. Remove it if it says Added to Teams.
Select Show to everyone in my org.
Review the requirements for submission, and select Submit for admin approval.
Note
Make sure you review the content and it's ready for an admin to review. You must submit a new approval request to update the icon and descriptions for copilots that were previously approved.
Once approved, all new and existing users of the copilot in Teams receive the update.
This only applies to the copilot details. You can still make content updates to your copilot and publish it as often as desired. You don't need to submit your copilot for approval again after publishing such content changes.
A final confirmation prompt appears.
Select Yes to continue. The copilot is sent to your admin for approval, and you can see a note indicating the status of your submission.
Note
After submitting the copilot for admin approval, you should not change the copilot's access setting to be less than everyone in your organization.
Setting to less than everyone results in users in the organization being unable to chat with the copilot after installing it from the Built for your org section of the Teams app store.
Work with your admin on the Microsoft Teams app policy to determine who can find and install the copilot.
Wait for your admin's approval. You can check the latest status by selecting Refresh, or opening the Make the copilot available to others window from the Publish page.
After your admin approves the copilot, the status is updated to Approved. You can directly open the copilot and share the approved version's link with other users.
Optionally, ask your admin to use app setup policies to automatically install and pin a copilot for users in the organization so they can access it directly from their app bar in Teams.
Note
If your app doesn't appear in the Built for your org section even though it's marked as Approved, your Teams app might be caching information.
Try signing out and back in again (if you're using the desktop app) or refreshing your browser (if you're using the Teams web app).
Allow users to add a copilot to a team in Teams
In Teams, users can add a copilot to a specific team. Once a copilot is available for a team, team members can "@mention" it in any team channels, and all teammates see the responses from the copilot. This feature is useful for situations such as the following examples:
- Your copilot supports collaboration, like sharing the latest sales report insight with the rest of the Sales team.
- You want to allow all team members to engage with the copilot in a team channel or via private chat without needing to manually install the copilot themselves.
Two options determine whether users can add a copilot to any team that they're part of, or to group and meeting chats when adding the copilot in Teams. With these options selected, the copilot has access to the conversation history from the team channel, group chat, or meeting chat, which helps the copilot provide answers better suited to the context of the conversation.
When users install a copilot from the Teams app store or by using the installation link they can see one of the following options, depending on the collaborative scope you set for the copilot:
- Add the copilot to a team channel
- Add the copilot to group and meeting chats in Teams
Team members can also remove a copilot from a team.
Important
The copilot is configured to allow everyone in the organization to chat with it. This ensures all team members have permission to chat with the copilot in team channels. It's highly recommended to not change the security setting of the copilot after enabling this capability. Otherwise users will see permission errors when interacting with the copilot in team channels.
To allow users to add a copilot to a team:
Open the configuration panel for the Microsoft Teams channel.
Select Edit details.
Select Allow your users to add this copilot to a team.
Select Save.
Teams caches information, so it can take a while before users see the option to add the copilot to a team or group chat. Users can refresh the browser (or sign out of the Teams desktop client and sign back in) to get the latest changes.
If you previously submitted the copilot for admin approval, you must submit it again after enabling this option. The admin must approve your changes before users can add the copilot to their teams from the Built for your org section of the Teams app store.
Prevent users from adding a copilot to a team, or group and meeting chats
Disabling this option prevents users from adding a copilot to a new team, group, or meeting chat. If you added a copilot to a conversation already, disabling this option doesn't remove it. You must manually remove the copilot.
To prevent users from adding a copilot to a team:
Open the configuration panel for the Microsoft Teams channel.
Select Edit details.
Clear the Allow your users to add this copilot to a team checkbox.
Select Save.
Configure private greeting behavior
Private greetings from a copilot are useful for when you want team members to have one-on-one conversations with the copilot without needing to manually install the copilot themselves.
Note
Private greeting configuration is available for classic chatbots only.
When enabled, your copilot automatically starts a conversation with team members. To customize the copilot's greeting message, modify the Greeting system topic.
Consider how relevant the copilot is to team members. Make sure the copilot's greeting helps them understand what to do with it, describes its limitations and, most importantly, gets them comfortable interacting with it.
To configure when a copilot sends a private greeting:
Open the configuration panel for the Microsoft Teams channel.
Select Settings.
Configure the private greeting options.
Select Save.
Download the Teams app manifest for a copilot (advanced)
You can download the copilot's Teams app manifest to make detailed changes to the manifest directly and share with your admin or users in the tenant. You can also directly upload an app manifest into Teams if your organization's policy allows you to upload custom applications.
Open the configuration panel for the Microsoft Teams channel.
Select Availability options.
Select Download .zip.
The manifest is generated as a .zip file, and is saved according to your browser's save settings.
Disconnect a copilot from Teams
You can take your copilot offline so users can no longer chat with the copilot in Teams. When your copilot is offline, it doesn't respond to anyone who tries to chat with it. You should thoroughly consider the need to disconnect your copilot before you do so.
Disconnected copilots don't appear in the Copilot extensions section of the Teams app store and can't be installed from a shared link. If a user already has such a copilot installed in Teams, it remains available until the user uninstalls it.
After you disconnect a copilot that was approved by an admin, it continues to appear in the Built for your org section of the Teams app store. You must ask your admin to remove it.
Open the configuration panel for the Microsoft Teams channel.
Select Disconnect from Teams.
Review the information about disconnecting your copilot, and select Disconnect to continue.
You can always reconnect your copilot by selecting Turn on Teams in the Make the copilot available to others window on the Publish page.
Open the configuration panel for the Microsoft Teams channel
Open your copilot in Copilot Studio.
On the top menu bar, select Channels.
Select the Microsoft Teams tile. The configuration panel appears.
Known limitations
- Private greeting configuration isn't supported for copilots using the upgraded unified authoring canvas.
- Currently, only the Personal and Team scopes are supported for Teams. Group chat isn't supported.
- Setting the copilot avatar icon on the details page doesn't show up for copilots approved by an admin. Copilots approved by an admin use the app icon as the copilot avatar.
- Teams has rate limiting on copilots. Depending on your business needs, you might want to keep your copilot content concise for copilots that are added to Teams.
- Currently, if your copilot supports end-user authentication, the user isn't able to explicitly sign out. This behavior fails the Microsoft Teams AppSource certification if you're publishing your copilot in the Seller Dashboard. This limitation doesn't apply to personal or tenant usage of the copilot. Learn more about how to Publish your app to the Teams Store and about the AppSource certification policy.
- After you disconnect your copilot from the Microsoft Teams channel, it might take a few minutes before the copilot becomes unreachable by users in Teams.
Feedback
Coming soon: Throughout 2024 we will be phasing out GitHub Issues as the feedback mechanism for content and replacing it with a new feedback system. For more information see: https://aka.ms/ContentUserFeedback.
Submit and view feedback for