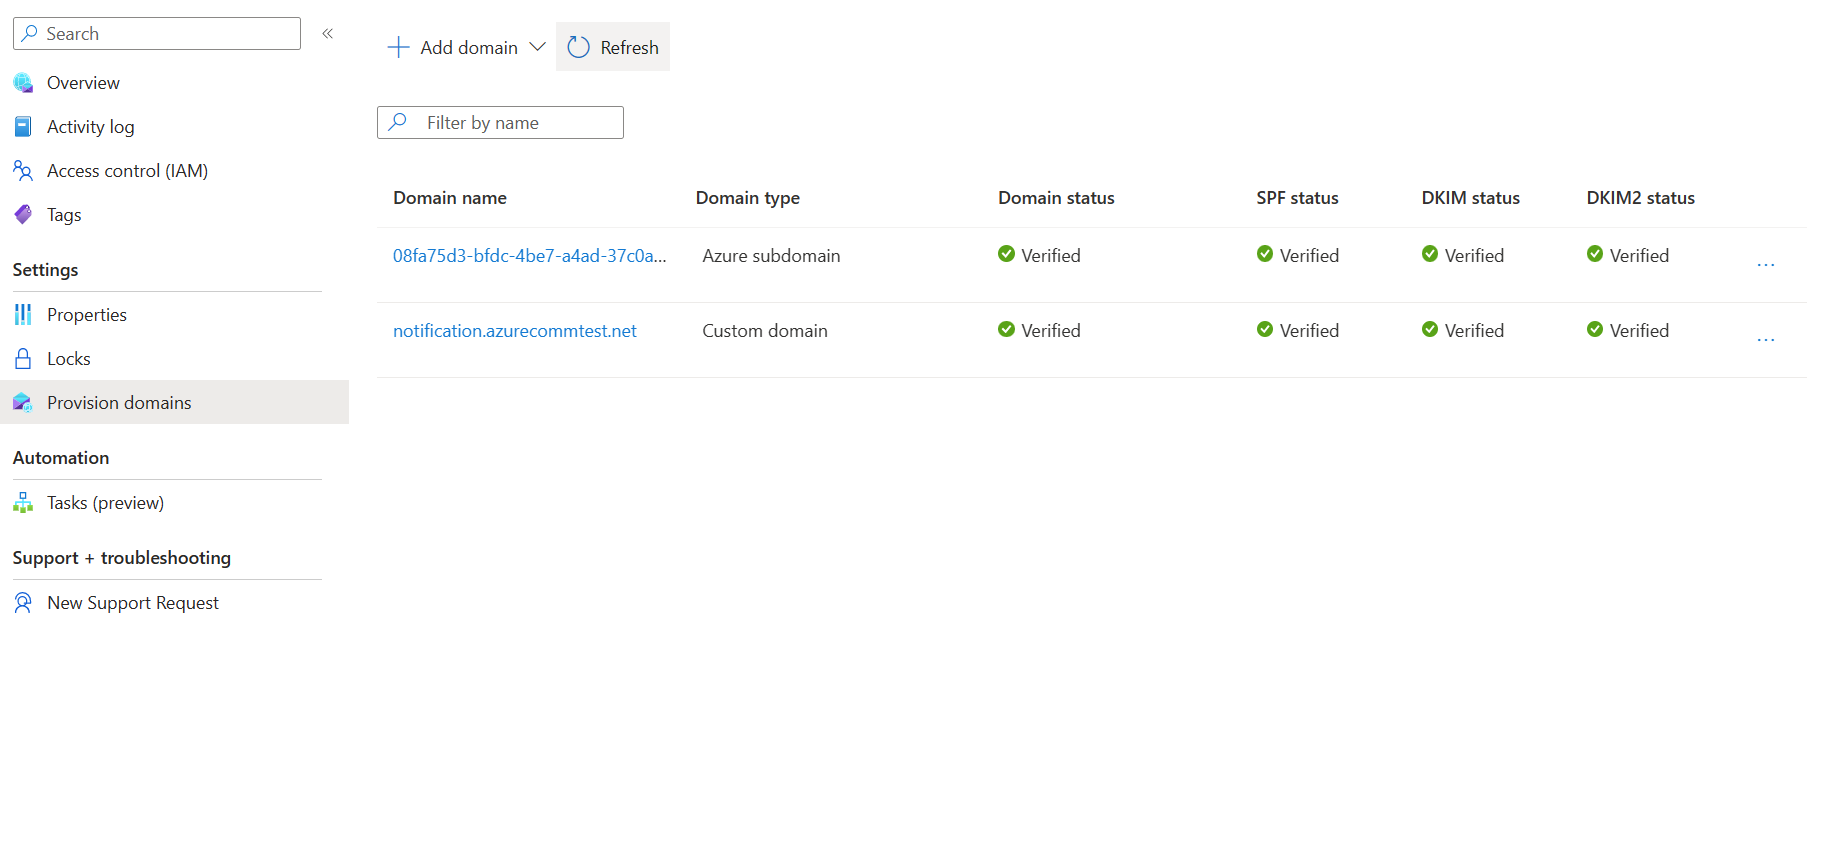
Quickstart: How to add custom verified email domains
In this quick start, you learn how to provision a custom verified email domain in Azure Communication Services.
Prerequisites
- An Azure account with an active subscription. See Create an account for free.
- An Azure Communication Services Email Resource created and ready to add the domains. See Get started with Creating Email Communication Resource.
Provision a custom domain
To provision a custom domain, you need to:
- Verify the custom domain ownership by adding a TXT record in your Domain Name System (DNS).
- Configure the sender authentication by adding Sender Policy Framework (SPF) and DomainKeys Identified Mail (DKIM) records.
Verify custom domain
In this section, you verify the custom domain ownership by adding a TXT record in your DNS.
Open the Overview page of the Email Communication Service resource that you created in Get started with Creating Email Communication Resource.
Create a custom domain using one of the following options.
(Option 1) Click the Setup button under Setup a custom domain. Continue to step 3.
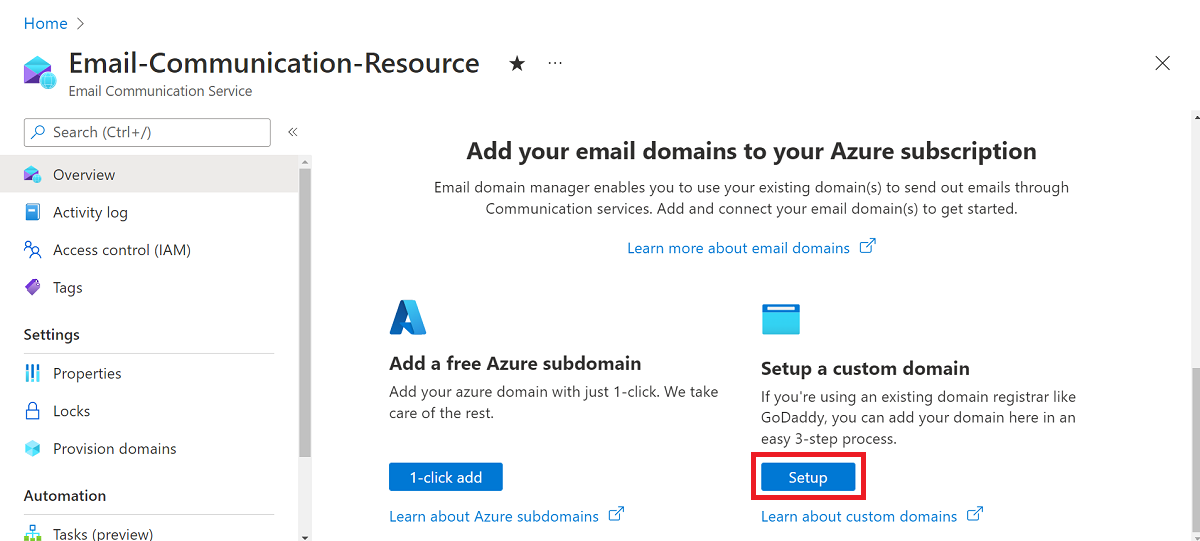
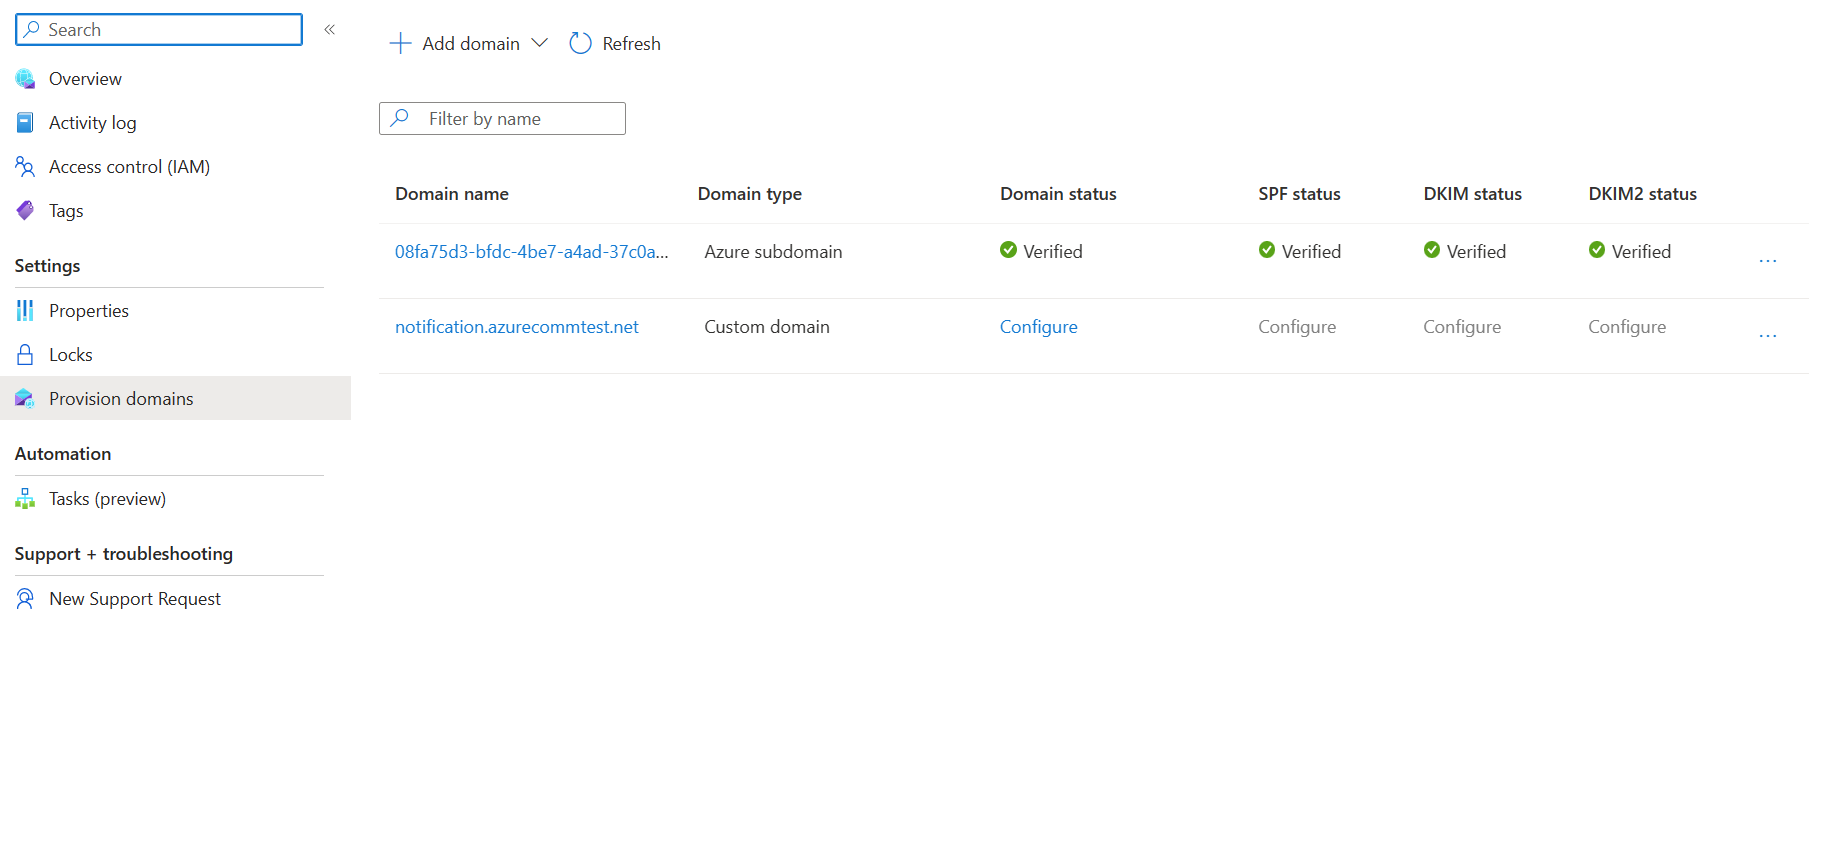
(Option 2) Click Provision Domains on the left navigation panel.
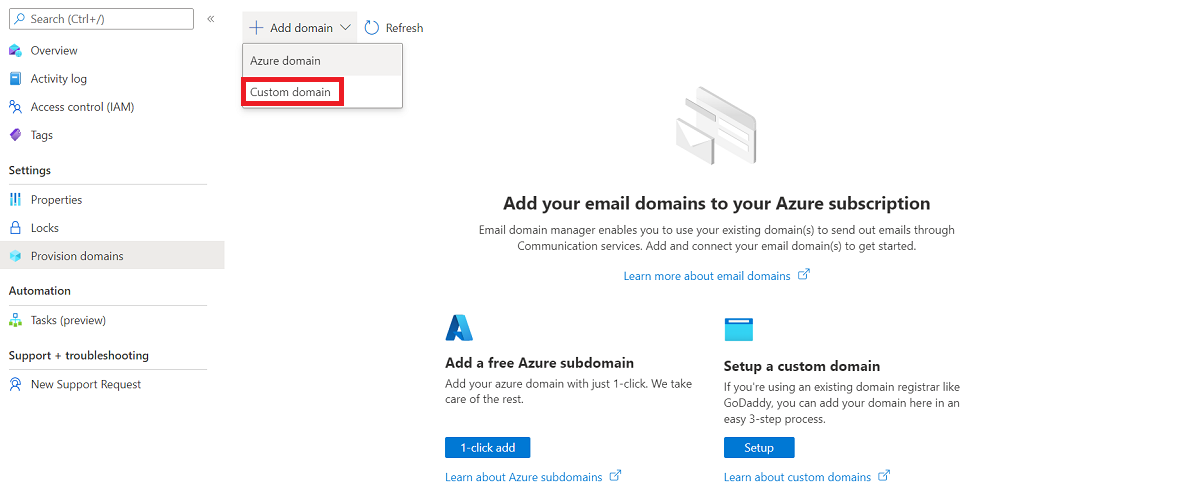
Click Add domain on the upper navigation bar.
Select Custom domain from the dropdown.
Click Add a custom Domain.
Enter your domain name in the text box.
Re-enter your domain name in the next text box.
Click Confirm.
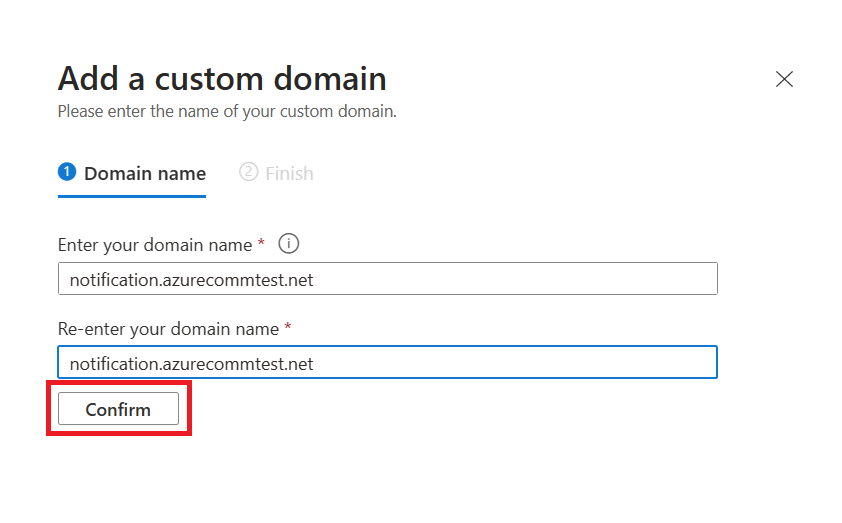
Make sure the domain name you entered is correct and both text boxes are the same. If needed, click Edit to correct the domain name before confirming.
Click Add.
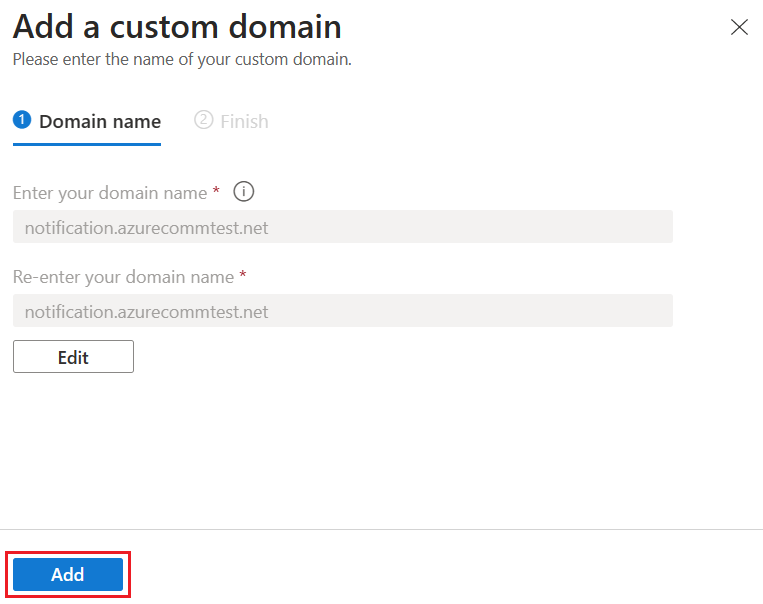
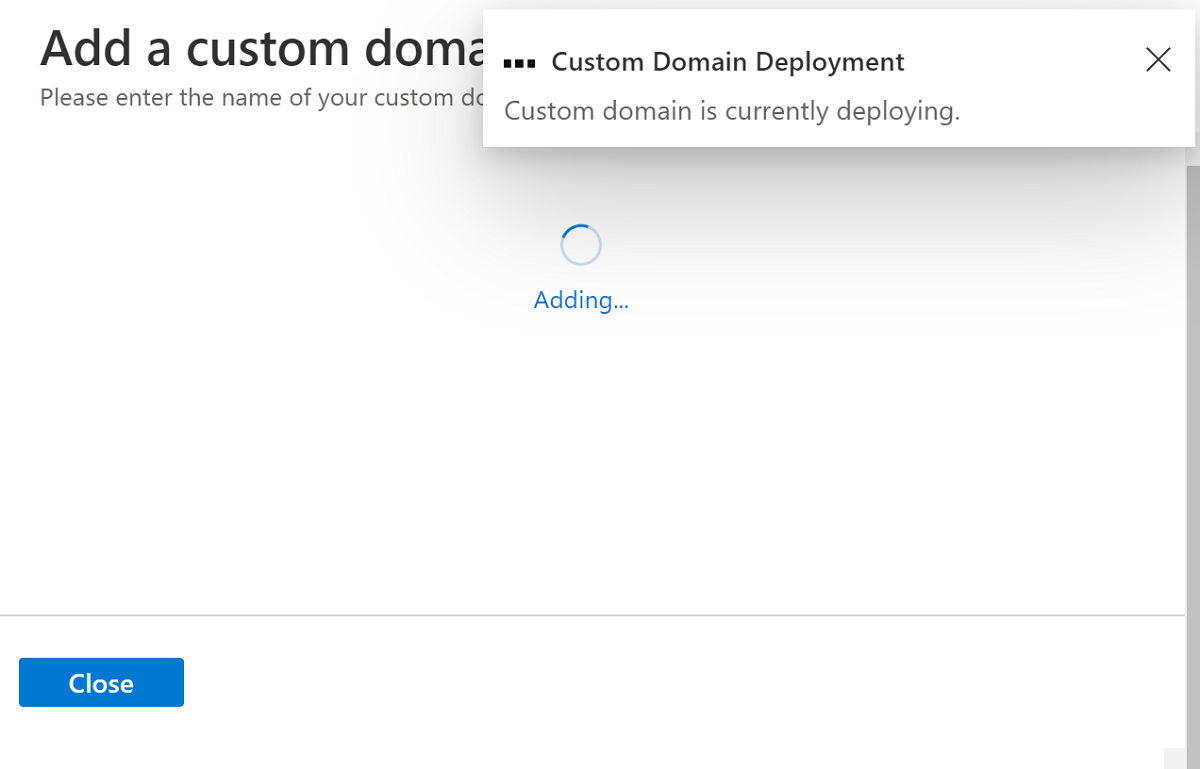
Azure Communication Services creates a custom domain configuration for your domain.
To verify domain ownership, click Verify Domain.
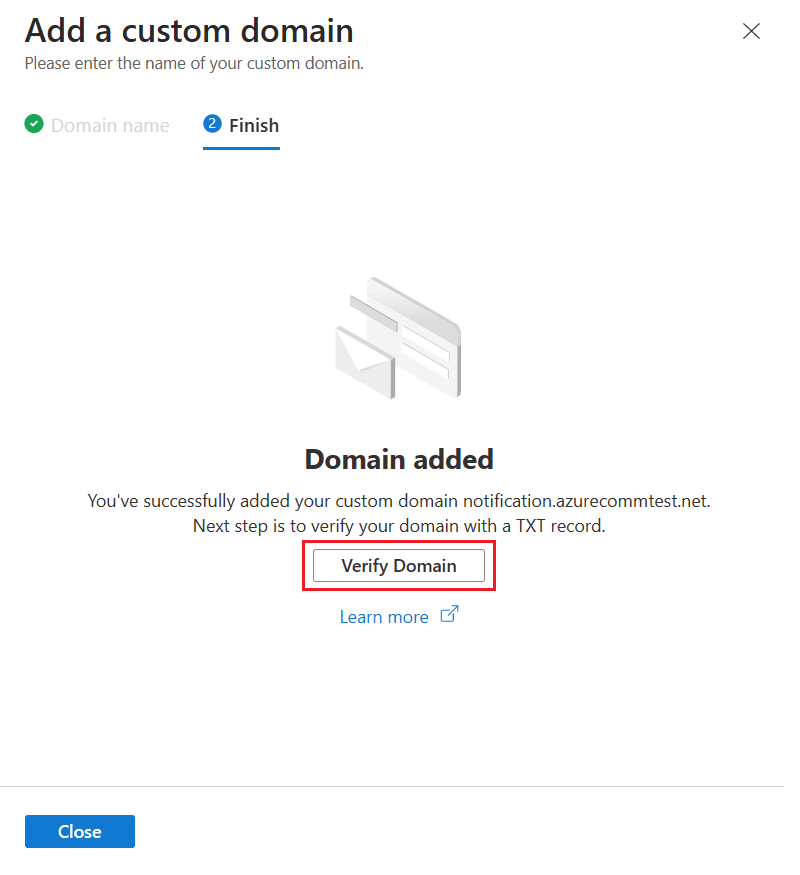 .
.To resume the verification later, click Close and resume. Then to continue verification from Provision Domains, click Configure.
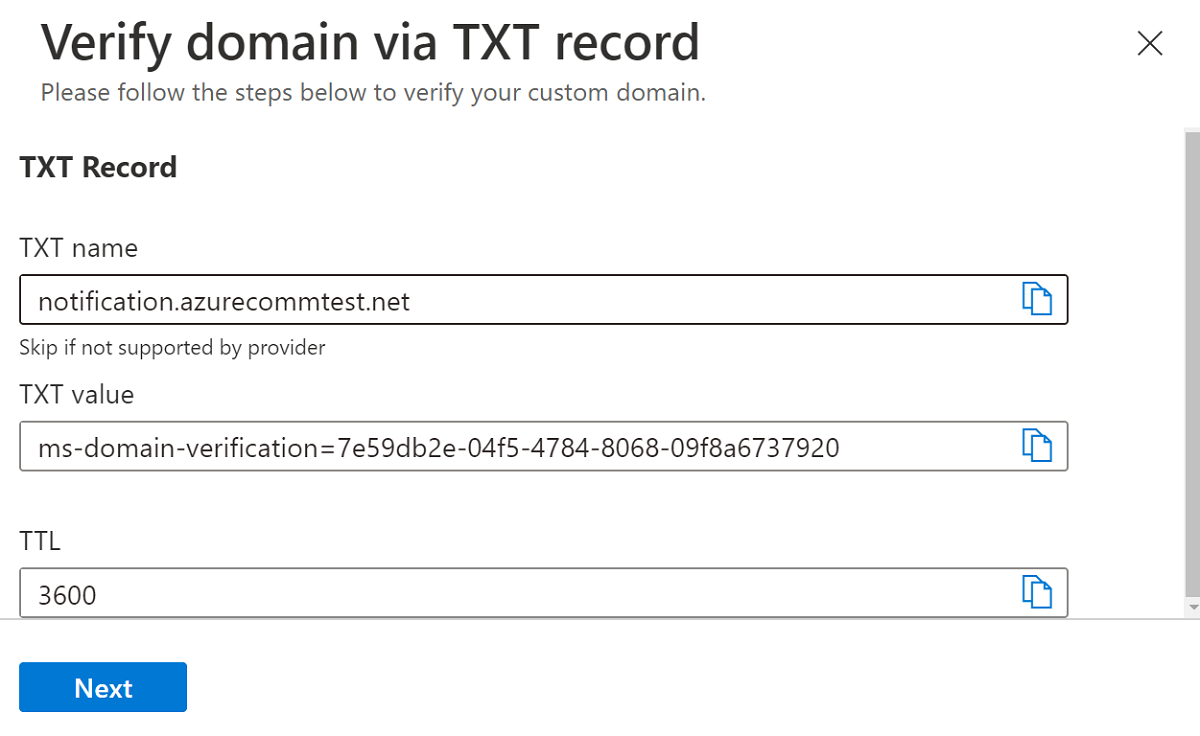
When you select either Verify Domain or Configure, it opens the Verify Domain via TXT record dialog box.
Add the preceding TXT record to your domain's registrar or DNS hosting provider. Refer to the TXT records section for information about adding a TXT record for your DNS provider.
Once you complete this step, click Next.
Verify that the TXT record was successfully created in your DNS, then click Done.
DNS changes require 15 to 30 minutes to take effect. Click Close.
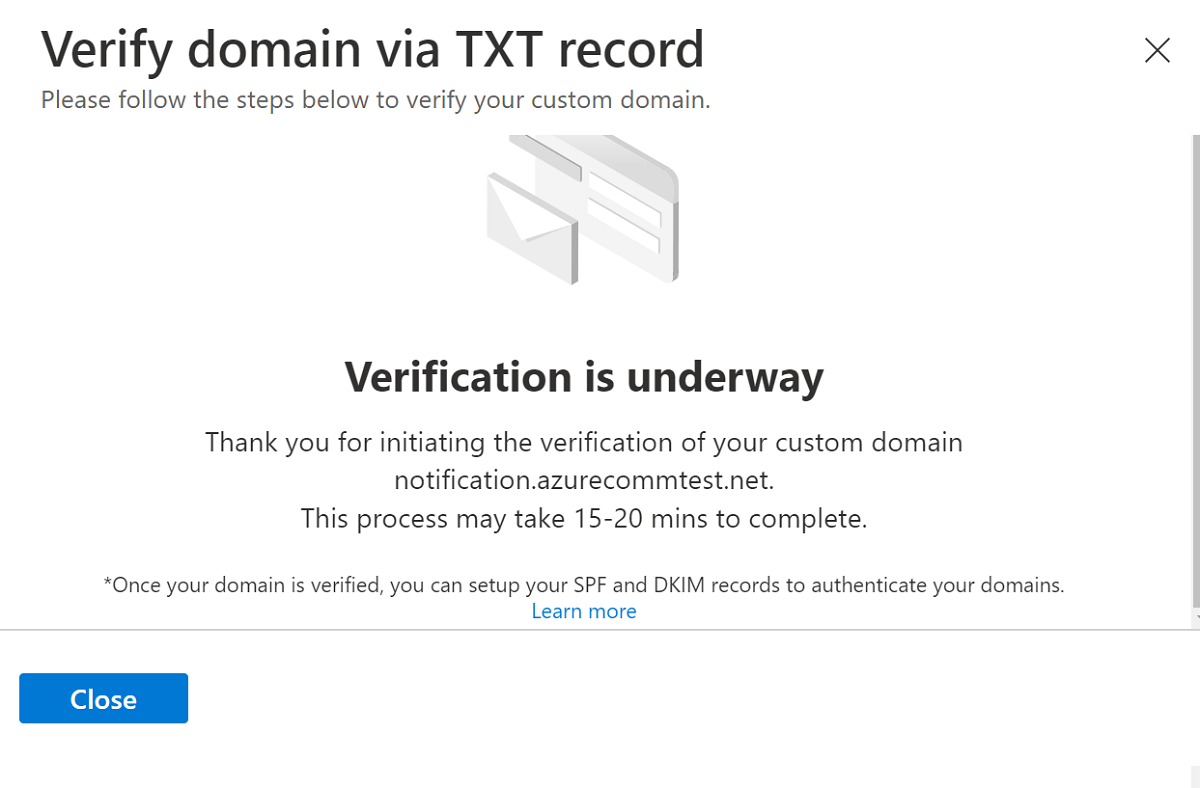
Once you verify your domain, you can add your SPF and DKIM records to authenticate your domains.
Configure sender authentication for custom domain
To configure sender authentication for your domains, you need to add more Domain Name Service (DNS) records. This section describes how Azure Communication Services offer records for you to add to your DNS. However, depending on whether the domain you're registering is a root domain or a subdomain, you need to add the records to the respective zone or make changes to the automatically generated records.
This section shows how to add SPF and DKIM records for the custom domain sales.us.notification.azurecommtest.net. The following examples describe four different methods for adding these records to the DNS, depending on the level of the zone where you're adding the records.
- Zone: sales.us.notification.azurecommtest.net
| Record | Type | Name | Value |
|---|---|---|---|
| SPF | TXT | sales.us.notification.azurecommtest.net | v=spf1 include:spf.protection.outlook.com -all |
| DKIM | CNAME | selector1-azurecomm-prod-net._domainkey | selector1-azurecomm-prod-net._domainkey.azurecomm.net |
| DKIM2 | CNAME | selector2-azurecomm-prod-net._domainkey | selector2-azurecomm-prod-net._domainkey.azurecomm.net |
The records generated by the portal assume that you are adding these records to the DNS in this zone sales.us.notification.azurecommtest.net.
- Zone: us.notification.azurecommtest.net
| Record | Type | Name | Value |
|---|---|---|---|
| SPF | TXT | sales | v=spf1 include:spf.protection.outlook.com -all |
| DKIM | CNAME | selector1-azurecomm-prod-net._domainkey.sales | selector1-azurecomm-prod-net._domainkey.azurecomm.net |
| DKIM2 | CNAME | selector2-azurecomm-prod-net._domainkey.sales | selector2-azurecomm-prod-net._domainkey.azurecomm.net |
- Zone: notification.azurecommtest.net
| Record | Type | Name | Value |
|---|---|---|---|
| SPF | TXT | sales.us | v=spf1 include:spf.protection.outlook.com -all |
| DKIM | CNAME | selector1-azurecomm-prod-net._domainkey.sales.us | selector1-azurecomm-prod-net._domainkey.azurecomm.net |
| DKIM2 | CNAME | selector2-azurecomm-prod-net._domainkey.sales.us | selector2-azurecomm-prod-net._domainkey.azurecomm.net |
- Zone: azurecommtest.net
| Record | Type | Name | Value |
|---|---|---|---|
| SPF | TXT | sales.us.notification | v=spf1 include:spf.protection.outlook.com -all |
| DKIM | CNAME | selector1-azurecomm-prod-net._domainkey.sales.us.notification | selector1-azurecomm-prod-net._domainkey.azurecomm.net |
| DKIM2 | CNAME | selector2-azurecomm-prod-net._domainkey.sales.us.notification | selector2-azurecomm-prod-net._domainkey.azurecomm.net |
Add SPF and DKIM Records
In this section, you configure the sender authentication by adding Sender Policy Framework (SPF) and DomainKeys Identified Mail (DKIM) records.
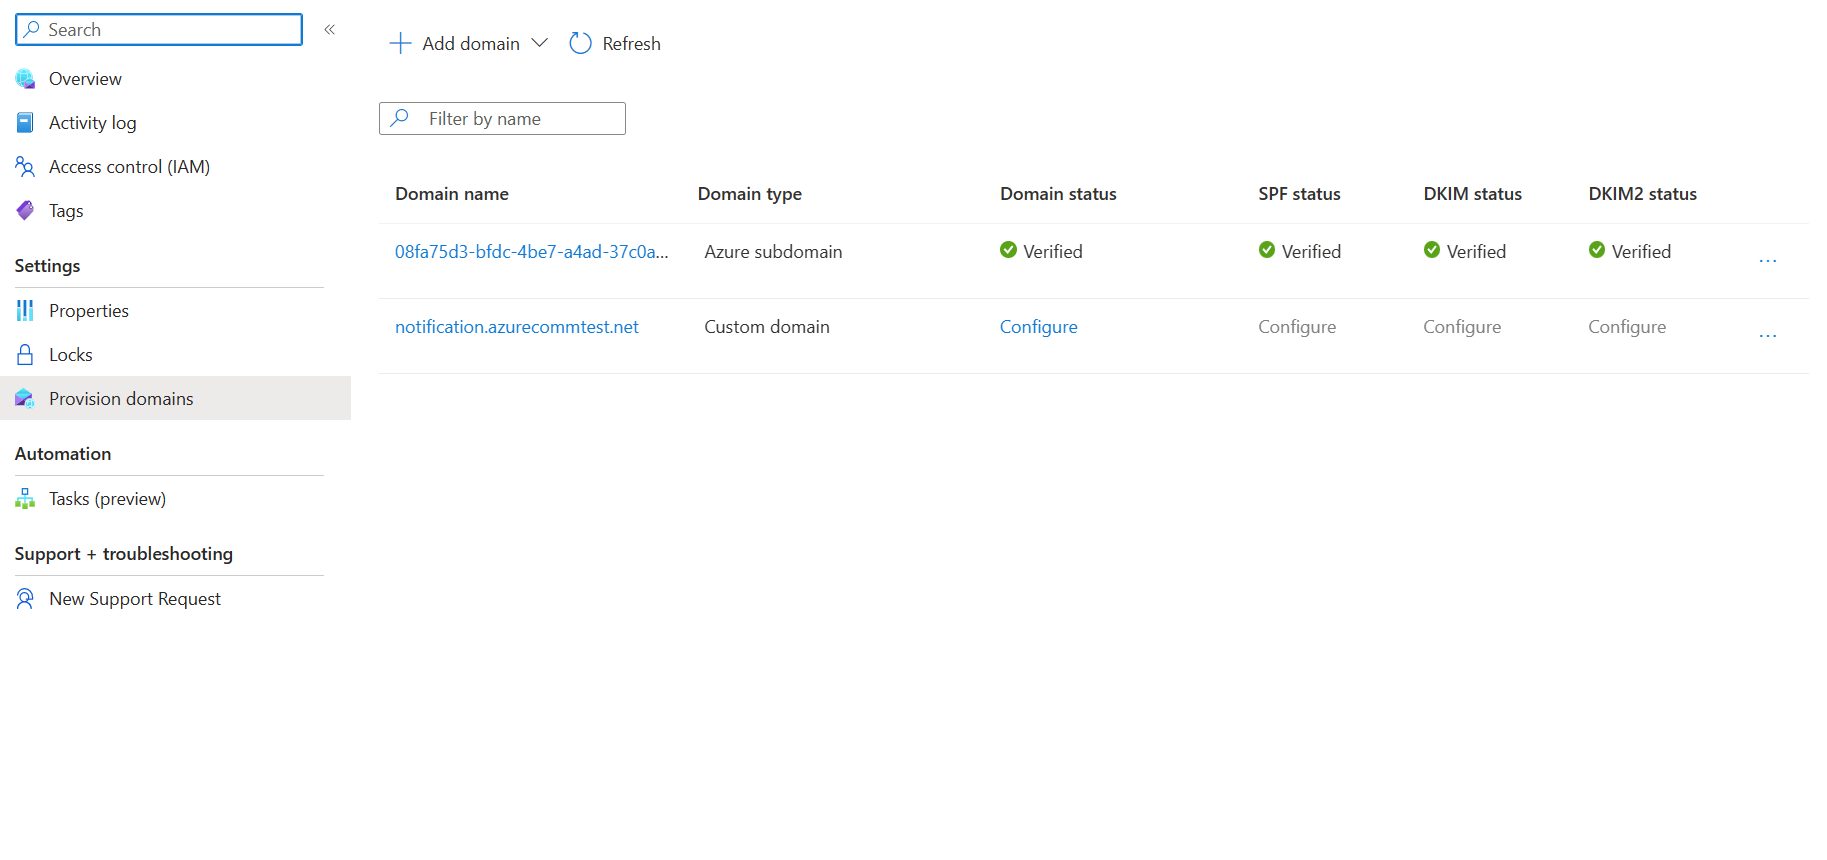
Open Provision Domains and confirm that Domain Status is in the
Verifiedstate.To add SPF and DKIM information, click Configure.
Add the following TXT record and CNAME records to your domain's registrar or DNS hosting provider. Refer to the adding DNS records in popular domain registrars table for information about adding a TXT and CNAME record for your DNS provider.

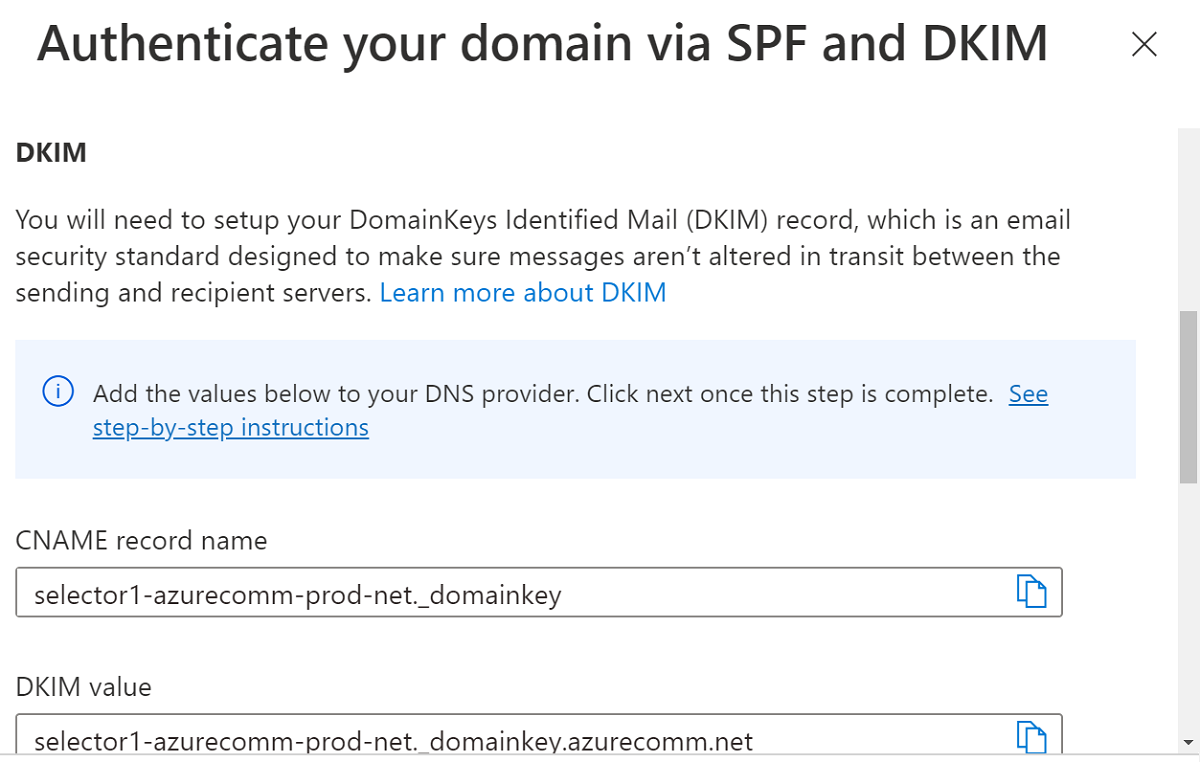
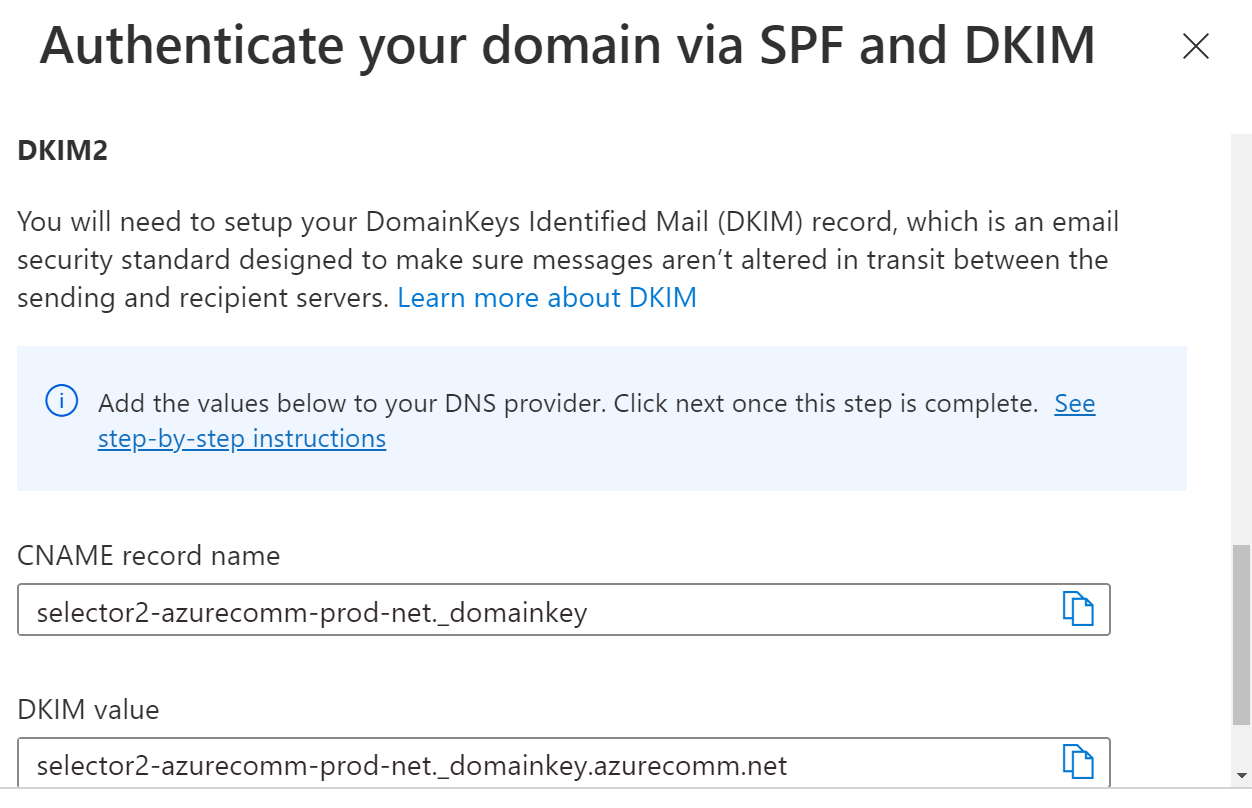
When you're done adding TXT and CNAME information, click Next to continue.
Verify that TXT and CNAME records were successfully created in your DNS. Then click Done.

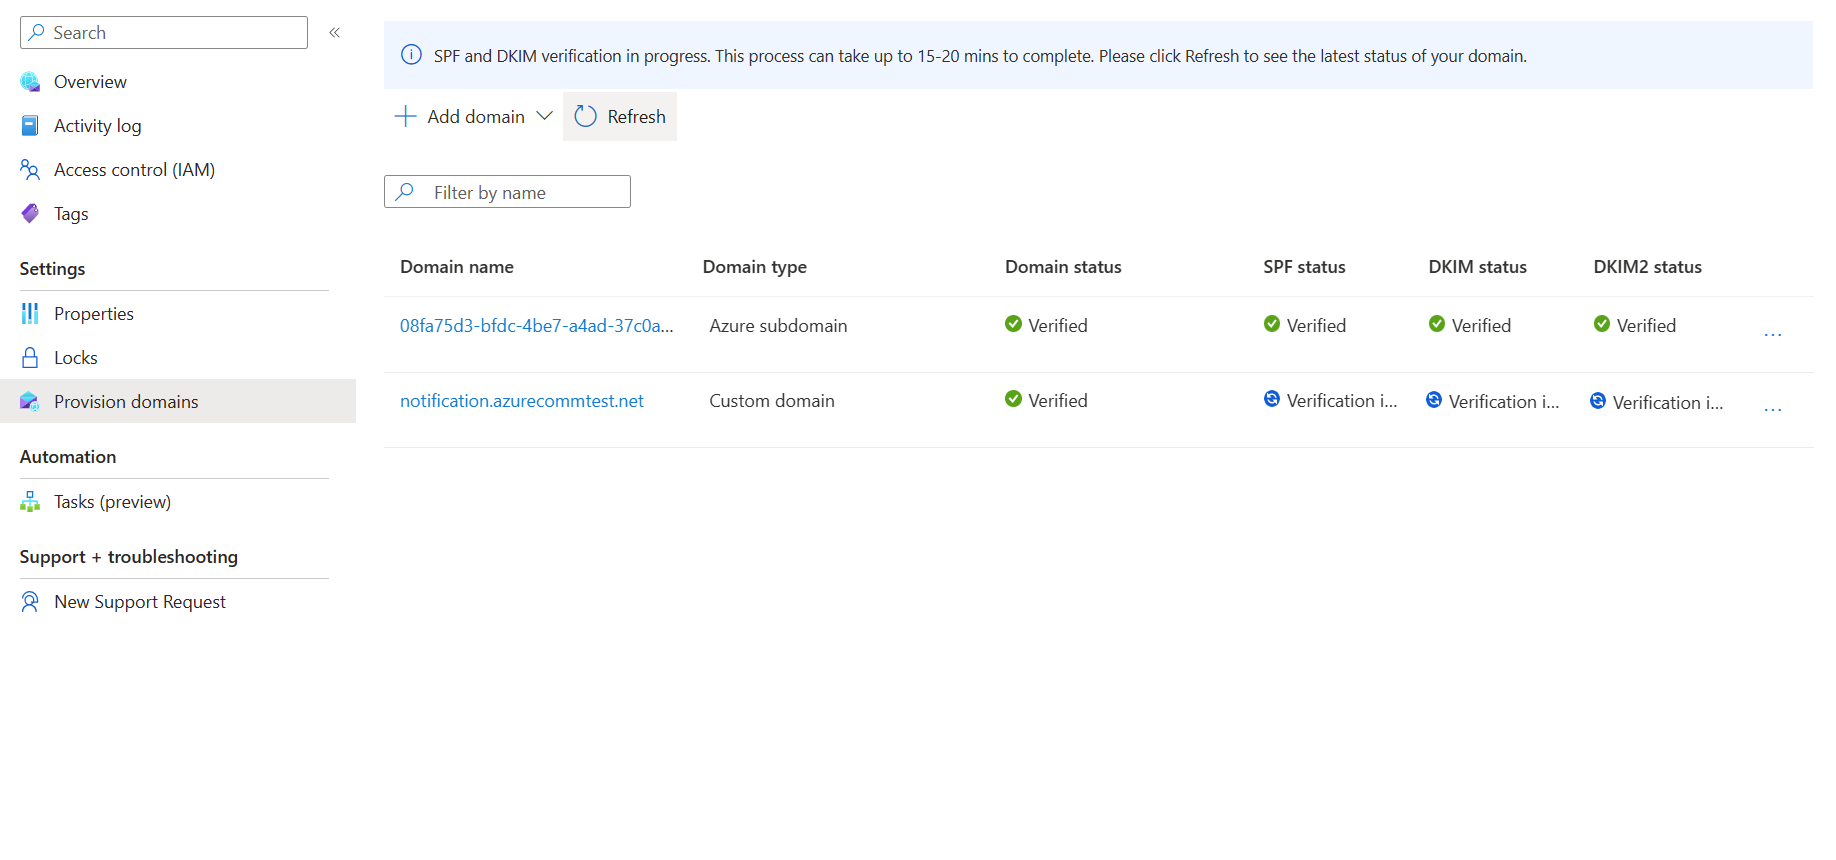
DNS changes take effect in 15 to 30 minutes. Click Close and wait for verification to complete.
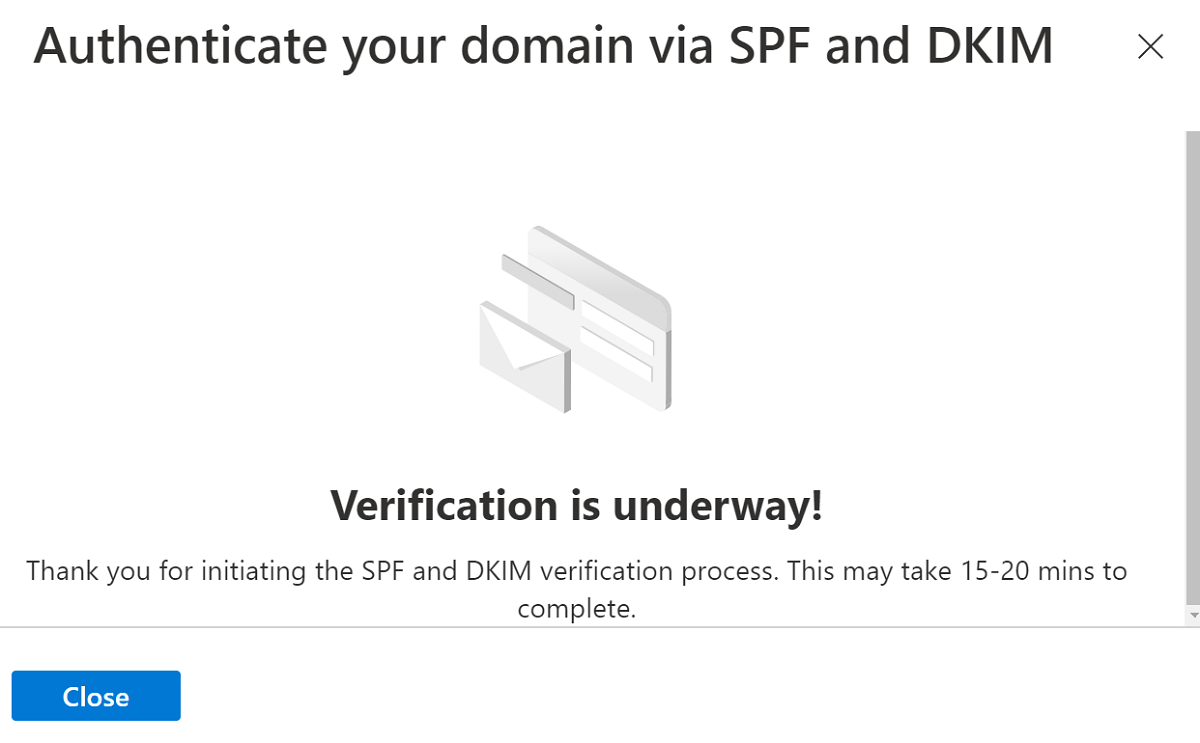
Check the verification status at the Provision Domains page.
Once you verify sender authentication configurations, your email domain is ready to send emails using the custom domain.
Prerequisites
- An Azure account with an active subscription. Create an account for free.
- Install Azure CLI
- Create an Email Communication Service.
Provision a custom domain
To provision a custom domain, you need to:
- Verify the custom domain ownership by adding a TXT record in your Domain Name System (DNS).
- Configure the sender authentication by adding Sender Policy Framework (SPF) and DomainKeys Identified Mail (DKIM) records.
Create Domain resource
To create a Domain resource, sign in to Azure CLI. You can sign in running the az login command from the terminal and providing your credentials. To create the resource, run the following command:
az communication email domain create --domain-name "contoso.com" --email-service-name "<EmailServiceName>" --location "Global" --resource-group "<resourceGroup>" --domain-management CustomerManaged
If you would like to select a specific subscription, you can also specify the --subscription flag and provide the subscription ID.
az communication email domain create --domain-name "contoso.com" --email-service-name "<EmailServiceName>" --location "Global" --resource-group "<resourceGroup>" --domain-management CustomerManaged --subscription "<subscriptionId>"
You can configure your Domain resource with the following options:
- The resource group
- The name of the Email Communication Services resource.
- The geography the resource will be associated with.
- The name of the Domain resource.
- The value of the Domain management property.
- For Custom domains, the value should be - CustomerManaged.
In the next step, you can assign tags or update user engagement tracking to the domain resource. Tags can be used to organize your Domain resources. For more information about tags, see the resource tagging documentation.
Manage your Domain resource
To add tags or update user engagement tracking to your Domain resource, run the following commands. You can target a specific subscription as well.
az communication email domain update --domain-name "contoso.com" --email-service-name "<EmailServiceName>" --resource-group "<resourceGroup>" --tags newTag="newVal1" --user-engmnt-tracking Enabled

az communication email domain update --domain-name "contoso.com" --email-service-name "<EmailServiceName>" --resource-group "<resourceGroup>" --tags newTag="newVal1" --user-engmnt-tracking Disabled --subscription "<subscriptionId>"
To list all of your Domain Resources in a given Email Communication Service, use the following command:
az communication email domain list --email-service-name "<EmailServiceName>" --resource-group "<resourceGroup>"
To show all the information on a given domain resource use the following command:
az communication email domain show --domain-name "contoso.com" --email-service-name "<EmailServiceName>" --resource-group "<resourceGroup>"
Verification operation for your Domain resource
To configure sender authentication for your domains, please refer Configure sender authentication for custom domain section from the Azure portal tab.
Initiate Verification
To Initiate domain verification, run the below command:
az communication email domain initiate-verification --domain-name "contoso.com" --email-service-name "<EmailServiceName>" --resource-group "<resourceGroup>" --verification-type Domain
Cancel Verification
To Cancel domain verification, run the below command:
az communication email domain cancel-verification --domain-name "contoso.com" --email-service-name "<EmailServiceName>" --resource-group "<resourceGroup>" --verification-type Domain
Clean up a Domain resource
If you want to clean up and remove a Domain resource, You can delete by running the following command.
az communication email domain delete --domain-name "contoso.com" --email-service-name "<EmailServiceName>" --resource-group "<resourceGroup>"
Note
Resource deletion is permanent and no data, including event grid filters, phone numbers, or other data tied to your resource, can be recovered if you delete the resource.
For information on other commands, see Domain CLI.
Prerequisites
- An Azure account with an active subscription. Create an account for free.
- The latest version .NET Core SDK for your operating system.
- Get the latest version of the .NET Identity SDK.
- Get the latest version of the .NET Management SDK.
Provision a custom domain
To provision a custom domain, you need to:
- Verify the custom domain ownership by adding a TXT record in your Domain Name System (DNS).
- Configure the sender authentication by adding Sender Policy Framework (SPF) and DomainKeys Identified Mail (DKIM) records.
Installing the SDK
First, include the Communication Services Management SDK in your C# project:
using Azure.ResourceManager.Communication;
Subscription ID
You'll need to know the ID of your Azure subscription. This can be acquired from the portal:
- Login into your Azure account
- Select Subscriptions in the left sidebar
- Select whichever subscription is needed
- Click on Overview
- Select your Subscription ID
In this quickstart, we'll assume that you've stored the subscription ID in an environment variable called AZURE_SUBSCRIPTION_ID.
Authentication
To communicate with Domain resource, you must first authenticate yourself to Azure.
Authenticate the Client
The default option to create an authenticated client is to use DefaultAzureCredential. Since all management APIs go through the same endpoint, in order to interact with resources, only one top-level ArmClient has to be created.
To authenticate to Azure and create an ArmClient, do the following code:
using System;
using System.Threading.Tasks;
using Azure;
using Azure.Core;
using Azure.Identity;
using Azure.ResourceManager;
using Azure.ResourceManager.Communication;
using Azure.ResourceManager.Resources;
...
// get your azure access token, for more details of how Azure SDK get your access token, please refer to https://learn.microsoft.com/dotnet/azure/sdk/authentication?tabs=command-line
TokenCredential cred = new DefaultAzureCredential();
// authenticate your client
ArmClient client = new ArmClient(cred);
Interacting with Azure resources
Now that you're authenticated.
For each of the following examples, we'll be assigning our Domain resources to an existing Email communication service.
If you need to create an Email Communication Service, you can do so by using the Azure portal.
Create a Domain resource
When creating a Domain resource, you'll specify the resource group name, Email Communication Service name, resource name and DomainManagement.
Note
The Location property is always global.
// this example assumes you already have this EmailServiceResource created on azure
// for more information of creating EmailServiceResource, please refer to the document of EmailServiceResource
string subscriptionId = "11112222-3333-4444-5555-666677778888";
string resourceGroupName = "MyResourceGroup";
string emailServiceName = "MyEmailServiceResource";
ResourceIdentifier emailServiceResourceId = EmailServiceResource.CreateResourceIdentifier(subscriptionId, resourceGroupName, emailServiceName);
EmailServiceResource emailServiceResource = client.GetEmailServiceResource(emailServiceResourceId);

// get the collection of this CommunicationDomainResource
CommunicationDomainResourceCollection collection = emailServiceResource.GetCommunicationDomainResources();

// invoke the operation
string domainName = "contoso.com";
CommunicationDomainResourceData data = new CommunicationDomainResourceData(new AzureLocation("Global"))
{
    DomainManagement = DomainManagement.CustomerManaged,
};
ArmOperation<CommunicationDomainResource> lro = await collection.CreateOrUpdateAsync(WaitUntil.Completed, domainName, data);
CommunicationDomainResource result = lro.Value;

// the variable result is a resource, you could call other operations on this instance as well
// but just for demo, we get its data from this resource instance
CommunicationDomainResourceData resourceData = result.Data;
// for demo we just print out the id
Console.WriteLine($"Succeeded on id: {resourceData.Id}");
Manage your Domain Resources
Update a Domain resource
...
// this example assumes you already have this CommunicationDomainResource created on azure
// for more information of creating CommunicationDomainResource, please refer to the document of CommunicationDomainResource
string subscriptionId = "11112222-3333-4444-5555-666677778888";
string resourceGroupName = "MyResourceGroup";
string emailServiceName = "MyEmailServiceResource";
string domainName = "contoso.com";
ResourceIdentifier communicationDomainResourceId = CommunicationDomainResource.CreateResourceIdentifier(subscriptionId, resourceGroupName, emailServiceName, domainName);
CommunicationDomainResource communicationDomainResource = client.GetCommunicationDomainResource(communicationDomainResourceId);

// invoke the operation
CommunicationDomainResourcePatch patch = new CommunicationDomainResourcePatch()
{
    UserEngagementTracking = UserEngagementTracking.Enabled,
};
ArmOperation<CommunicationDomainResource> lro = await communicationDomainResource.UpdateAsync(WaitUntil.Completed, patch);
CommunicationDomainResource result = lro.Value;

// the variable result is a resource, you could call other operations on this instance as well
// but just for demo, we get its data from this resource instance
CommunicationDomainResourceData resourceData = result.Data;
// for demo we just print out the id
Console.WriteLine($"Succeeded on id: {resourceData.Id}");
List by Email Service
// this example assumes you already have this EmailServiceResource created on azure
// for more information of creating EmailServiceResource, please refer to the document of EmailServiceResource
string subscriptionId = "11112222-3333-4444-5555-666677778888";
string resourceGroupName = "MyResourceGroup";
string emailServiceName = "MyEmailServiceResource";
ResourceIdentifier emailServiceResourceId = EmailServiceResource.CreateResourceIdentifier(subscriptionId, resourceGroupName, emailServiceName);
EmailServiceResource emailServiceResource = client.GetEmailServiceResource(emailServiceResourceId);

// get the collection of this CommunicationDomainResource
CommunicationDomainResourceCollection collection = emailServiceResource.GetCommunicationDomainResources();

// invoke the operation and iterate over the result
await foreach (CommunicationDomainResource item in collection.GetAllAsync())
{
    // the variable item is a resource, you could call other operations on this instance as well
    // but just for demo, we get its data from this resource instance
    CommunicationDomainResourceData resourceData = item.Data;
    // for demo we just print out the id
    Console.WriteLine($"Succeeded on id: {resourceData.Id}");
}

Console.WriteLine($"Succeeded");
Get Domain resource
// this example assumes you already have this EmailServiceResource created on azure
// for more information of creating EmailServiceResource, please refer to the document of EmailServiceResource
string subscriptionId = "11112222-3333-4444-5555-666677778888";
string resourceGroupName = "MyResourceGroup";
string emailServiceName = "MyEmailServiceResource";
ResourceIdentifier emailServiceResourceId = EmailServiceResource.CreateResourceIdentifier(subscriptionId, resourceGroupName, emailServiceName);
EmailServiceResource emailServiceResource = client.GetEmailServiceResource(emailServiceResourceId);

// get the collection of this CommunicationDomainResource
CommunicationDomainResourceCollection collection = emailServiceResource.GetCommunicationDomainResources();

// invoke the operation
string domainName = "contoso.com";
bool result = await collection.ExistsAsync(domainName);

Console.WriteLine($"Succeeded: {result}");
Verification operation for your Domain resource
To configure sender authentication for your domains, refer Configure sender authentication for custom domain section from the Azure portal tab.
Initiate Verification
// this example assumes you already have this CommunicationDomainResource created on azure
// for more information of creating CommunicationDomainResource, please refer to the document of CommunicationDomainResource
string subscriptionId = "11112222-3333-4444-5555-666677778888";
string resourceGroupName = "MyResourceGroup";
string emailServiceName = "MyEmailServiceResource";
string domainName = "contoso.com";
ResourceIdentifier communicationDomainResourceId = CommunicationDomainResource.CreateResourceIdentifier(subscriptionId, resourceGroupName, emailServiceName, domainName);
CommunicationDomainResource communicationDomainResource = client.GetCommunicationDomainResource(communicationDomainResourceId);

// invoke the operation
DomainsRecordVerificationContent content = new DomainsRecordVerificationContent(DomainRecordVerificationType.Spf);
await communicationDomainResource.InitiateVerificationAsync(WaitUntil.Completed, content);

Console.WriteLine($"Succeeded");
Cancel Verification
// this example assumes you already have this CommunicationDomainResource created on azure
// for more information of creating CommunicationDomainResource, please refer to the document of CommunicationDomainResource
string subscriptionId = "11112222-3333-4444-5555-666677778888";
string resourceGroupName = "MyResourceGroup";
string emailServiceName = "MyEmailServiceResource";
string domainName = "contoso.com";
ResourceIdentifier communicationDomainResourceId = CommunicationDomainResource.CreateResourceIdentifier(subscriptionId, resourceGroupName, emailServiceName, domainName);
CommunicationDomainResource communicationDomainResource = client.GetCommunicationDomainResource(communicationDomainResourceId);

// invoke the operation
DomainsRecordVerificationContent content = new DomainsRecordVerificationContent(DomainRecordVerificationType.Spf);
await communicationDomainResource.CancelVerificationAsync(WaitUntil.Completed, content);

Console.WriteLine($"Succeeded");
Clean up a Domain resource
// this example assumes you already have this CommunicationDomainResource created on azure
// for more information of creating CommunicationDomainResource, please refer to the document of CommunicationDomainResource
string subscriptionId = "11112222-3333-4444-5555-666677778888";
string resourceGroupName = "MyResourceGroup";
string emailServiceName = "MyEmailServiceResource";
string domainName = "contoso.com";
ResourceIdentifier communicationDomainResourceId = CommunicationDomainResource.CreateResourceIdentifier(subscriptionId, resourceGroupName, emailServiceName, domainName);
CommunicationDomainResource communicationDomainResource = client.GetCommunicationDomainResource(communicationDomainResourceId);

// invoke the operation
await communicationDomainResource.DeleteAsync(WaitUntil.Completed);

Console.WriteLine($"Succeeded");
Note
Resource deletion is permanent and no data, including event grid filters, phone numbers, or other data tied to your resource, can be recovered if you delete the resource.
Prerequisites
- An Azure account with an active subscription. Create an account for free.
- Install the Azure Az PowerShell Module
- Create an Email Communication Service.
Provision a custom domain
To provision a custom domain, you need to:
- Verify the custom domain ownership by adding a TXT record in your Domain Name System (DNS).
- Configure the sender authentication by adding Sender Policy Framework (SPF) and DomainKeys Identified Mail (DKIM) records.
Create a Domain resource
To create a Domain resource, Sign into your Azure account by using the Connect-AzAccount using the following command and provide your credentials.
PS C:\> Connect-AzAccount
First, make sure to install the Azure Communication Services module Az.Communication using the following command.
PS C:\> Install-Module Az.Communication
Run the following command to create the Custom managed domain resource:
PS C:\> New-AzEmailServiceDomain -ResourceGroupName ContosoResourceProvider1 -EmailServiceName ContosoEmailServiceResource1 -Name contoso.com -DomainManagement CustomerManaged
You can configure your Domain resource with the following options:
- The resource group
- The name of the Email Communication Services resource.
- The name of the Domain resource.
- The value of the Domain management property.
- For Custom domains, the value should be 'CustomerManaged'.
In the next step, you can assign tags or update user engagement tracking to the domain resource. Tags can be used to organize your Domain resources. See the resource tagging documentation for more information about tags.
Manage your Domain resource
To add tags or update user engagement tracking to your Domain resource, run the following commands. You can target a specific subscription as well.
PS C:\> Update-AzEmailServiceDomain -Name contoso.com -EmailServiceName ContosoEmailServiceResource1 -ResourceGroupName ContosoResourceProvider1 -Tag @{ExampleKey1="ExampleValue1"} -UserEngagementTracking 1

PS C:\> Update-AzEmailServiceDomain -Name contoso.com -EmailServiceName ContosoEmailServiceResource1 -ResourceGroupName ContosoResourceProvider1 -Tag @{ExampleKey1="ExampleValue1"} -UserEngagementTracking 0 -SubscriptionId SubscriptionID
To list all of your Domain Resources in a given Email Communication Service, use the following command:
PS C:\> Get-AzEmailServiceDomain -EmailServiceName ContosoEmailServiceResource1 -ResourceGroupName ContosoResourceProvider1
To list all the information on a given domain resource, use the following command:
PS C:\> Get-AzEmailServiceDomain -Name contoso.com -EmailServiceName ContosoEmailServiceResource1 -ResourceGroupName ContosoResourceProvider1
Verification operation for your Domain resource
To configure sender authentication for your domains, refer Configure sender authentication for custom domain section from the Azure portal tab.
Initiate Verification
To Invoke domain verification, run the below command:
PS C:\> Invoke-AzEmailServiceInitiateDomainVerification -DomainName contoso.com -EmailServiceName ContosoEmailServiceResource1 -ResourceGroupName ContosoResourceProvider1 -VerificationType Domain
Cancel Verification
To Stop domain verification, run the below command:
PS C:\> Stop-AzEmailServiceDomainVerification -DomainName contoso.com -EmailServiceName ContosoEmailServiceResource1 -ResourceGroupName ContosoResourceProvider1 -VerificationType Domain
Clean up a Domain resource
If you want to clean up and remove a Domain resource, You can delete your Domain resource by running the following command:
PS C:\> Remove-AzEmailServiceDomain -Name contoso.com -EmailServiceName ContosoEmailServiceResource1 -ResourceGroupName ContosoResourceProvider1
Note
Resource deletion is permanent and no data, including event grid filters, phone numbers, or other data tied to your resource, can be recovered if you delete the resource.
Azure Managed Domains compared to Custom Domains
Before provisioning a custom email domain, review the following table to decide which domain type best meets your needs.
| Azure Managed Domains | Custom Domains | |
|---|---|---|
| Pros: | - Setup is quick & easy - No domain verification required |
- Emails are sent from your own domain |
| Cons: | - Sender domain isn't personalized and can't be changed - Sender usernames can't be personalized - Limited sending volume - User Engagement Tracking can't be enabled |
- Requires verification of domain records - Longer setup for verification |
Change MailFrom and FROM display names for custom domains
You can optionally configure your MailFrom address to be something other than the default DoNotReply and add more than one sender username to your domain. For more information about how to configure your sender address, see Quickstart: How to add multiple sender addresses.
Your email domain is now ready to send emails.
Add DNS records in popular domain registrars
TXT records
The following links provide instructions about how to add a TXT record using popular domain registrars.
| Registrar Name | Documentation Link |
|---|---|
| IONOS by 1 & 1 | Steps 1-7 |
| 123-reg.co.uk | Steps 1-6 |
| Amazon Web Services (AWS) | Steps 1-8 |
| Cloudflare | Steps 1-6 |
| GoDaddy | Steps 1-6 |
| Namecheap | Steps 1-9 |
| Network Solutions | Steps 1-9 |
| OVH | Steps 1-9 |
| web.com | Steps 1-8 |
| Wix | Steps 1-5 |
| Other (General) | Steps 1-4 |
CNAME records
The following links provide more information about how to add a CNAME record using popular domain registrars. Make sure to use your values from the configuration window rather than the examples in the documentation link.
| Registrar Name | Documentation Link |
|---|---|
| IONOS by 1 & 1 | Steps 1-10 |
| 123-reg.co.uk | Steps 1-6 |
| Amazon Web Services (AWS) | Steps 1-8 |
| Cloudflare | Steps 1-6 |
| GoDaddy | Steps 1-6 |
| Namecheap | Steps 1-8 |
| Network Solutions | Steps 1-9 |
| OVH | Steps 1-8 |
| web.com | Steps 1-8 |
| Wix | Steps 1-5 |
| Other (General) | Guide |
Next steps
Related articles
- Familiarize yourself with the Email client library
